Wiki
Email Integration
Kpi.com supports email integration to keep your mails in one place, to automate ticketing system known as case management, to send emails directly from the system and many more.
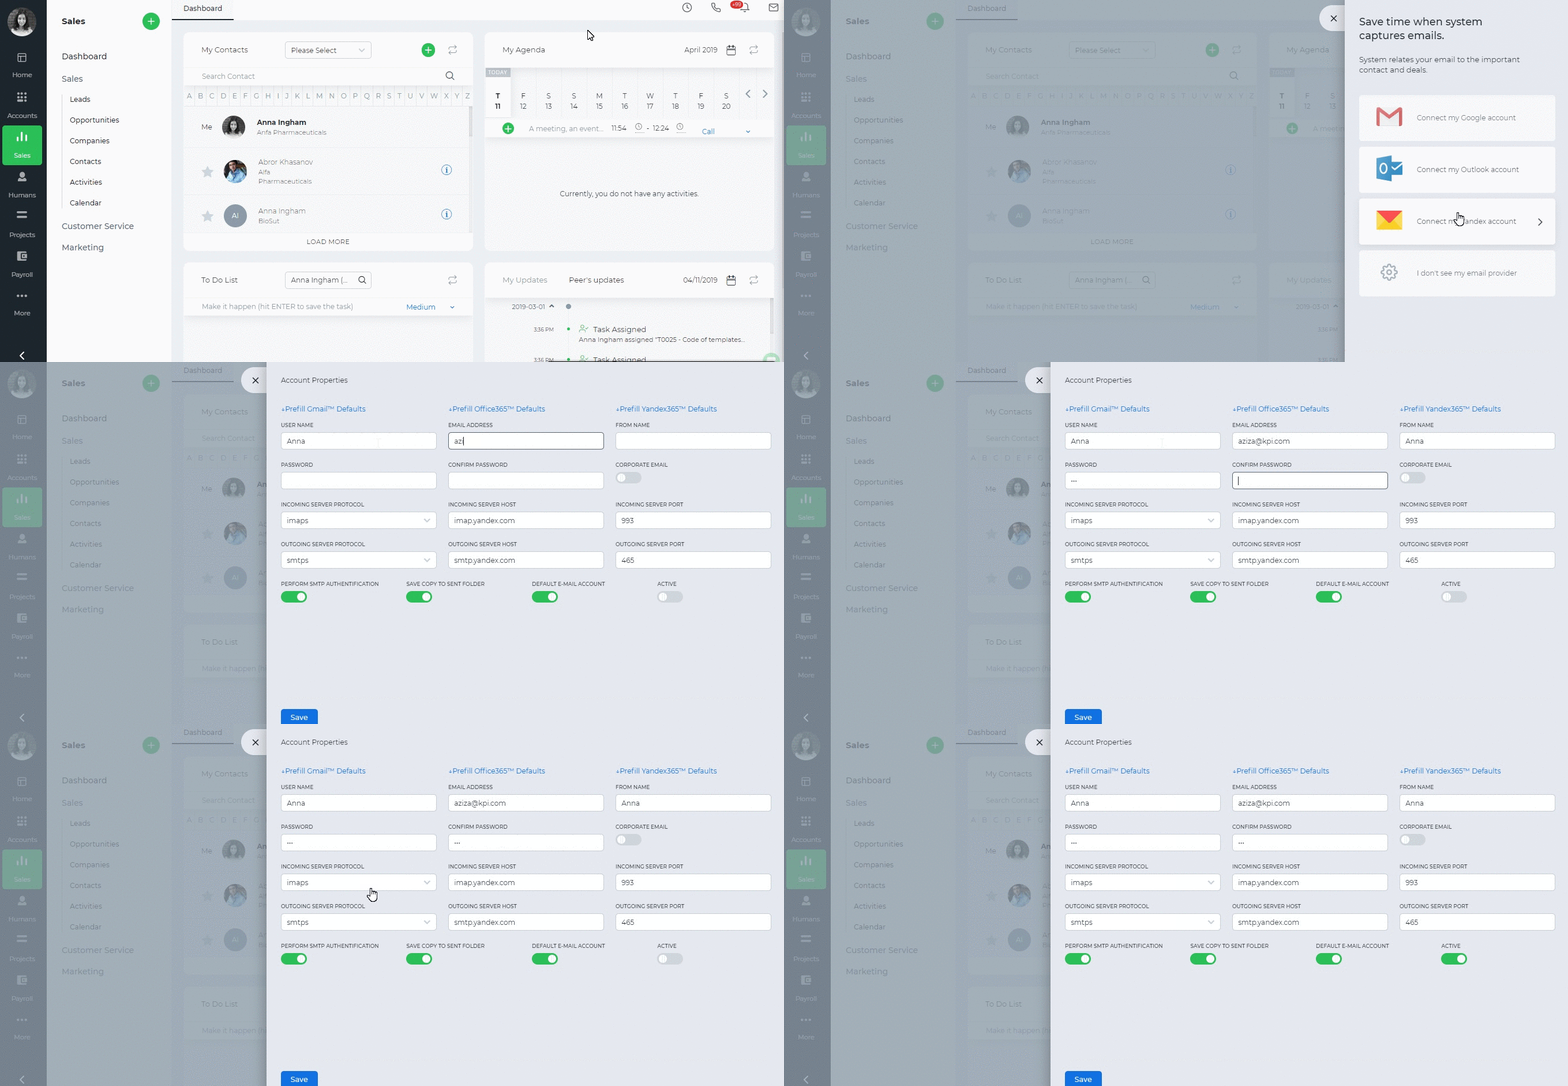
To integrate your email click the message icon on top right corner. Choose your email provider whether it is Gmail, Outlook or Yandex or choose “I don’t see my email provider”. Then fill in the email details.
- User Name – your name
- Email Address – enter the email address your want to integrate
- From Name – enter the name which is shown in emails
- Password – enter the email’s password
- Confirm Password – re-enter the password
- Corporate Email – the email will be used system-wise for all notifications and users
- Incoming Server Protocol – imaps or imap
- Incoming Server Host – enter the host name
- Incoming Server Port – enter the port number
- Outgoing Server Protocol – smtps or smtp
- Outgoing Server Host – enter the outgoing host name
- Outgoing Server Port – enter the outgoing server port
- Perform SMTP Authentication – check the box to have a more secure integration
- Save Copy to Sent Folder – sent mails will be copied in the Sent folder
- Default Email Account – if you have set up two or more email accounts, this checkbox will make the email account as the default one.
- Active – used to activate or deactivate.

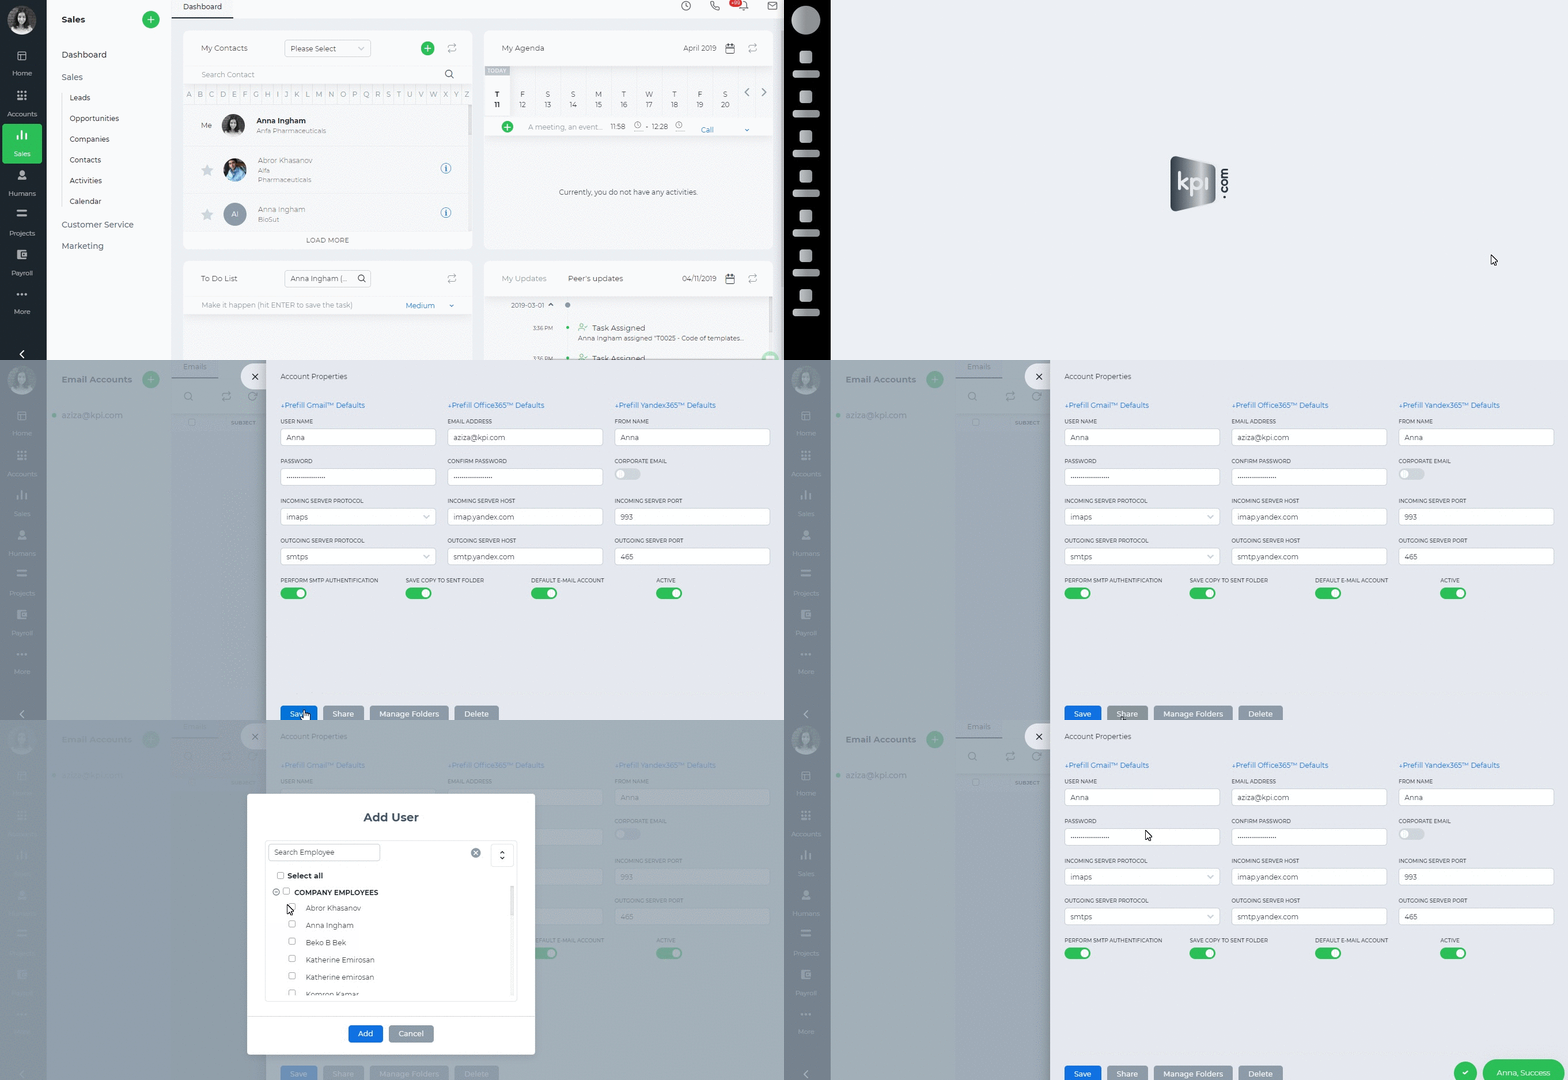
Click save and if the configuration is successful you will be able to go to your inbox, sent mails and draft and manage your folders using the same message button on top right side.
Go to your email account, show the left side menu and click customize to manage folders. Choose your folders and save.
You can share the email with other users in the system. Click share and add the users. The users will have the same access to the email as yourself.
The Delete option will delete your email account from the system.

Created by Aziza Israilova,
April 2019


