kpi.com offers accounting solution for small and medium businesses, allowing them to manage their daily sales, purchases, expenses, fixed assets and inventory transactions routine. But there is more than just bookkeeping. With kpi.com you can offer your services online by setting up a storefront.
Within kpi.com you can invite your customers into the system allowing them to track quotes, orders and invoices issued.
If you have sales personnel, you can also add them to your company, so they can take care of their sales, and employees can track their expenses within one system, and there is no hassle to maintain separate spreadsheets or extra platforms.
You can use the system for the purposes of bookkeeping, reporting with integrated functionalities of financial documents flow management where you will be able to add sales invoices, sales quotes, purchase orders, and purchase invoices. You can either follow the links below or find what you need in appropriate Accounting and Finance Sections on the left.
Accounting Settings
Accounting Settings
Accounting Settings can be accessed through the main Settings.
Accounting Settings lets you view and change the majority of the most important settings ranging from seeing your invoice templates and giving different discounts to your products and services to creating shipping methods and working with your charts of accounts.
Invoice Settings
Invoice settings includes set up details for due date terms, options for switching on/off some options in Accounting, Payment Gateways which are linked to sales invoices using which your customers can make online payment directly, default options for bank accounts, options for PDF naming, default introduction and payment terms and your logo.
Financial Settings
Financial Details are the following:
Conversion Date - the year when your financial transactions start.
Financial Year End - the date when you fiscal year ends.
Currency - your base currency.
Close Posting Periods Before - you can choose the date before which nobody can post transactions.
Exchange Rate Floating Points - the number of decimals available in exchange rates.
Calculation Scale - the decimal points for prices.
VAT Return Report - switch on/off the VAT report under Accounts module.
Sales Tax is for entering your company tax details like Tax ID number, Tax ID Name, Tax Period, Tax Basis etc and also the switch on options for showing tax in invoices and in reports.
Additional Settings includes switch on/off options for:
Enable Post Dated Transactions - transactions will not be posted until the date arrives.
Select Depreciation Date - you will be able to select a depreciation date for fixed assets.
Product Price in Multi Currency - you will be able to choose currencies in products and relates prices.
Restrict When Credit Limit Exceeds - the system will not allow you to create a sales invoice when the customer credit limit is over.
Department/Cost and Profit Centers - enabling budgets per department. For more information click here.
Update Cost Price as of Last Purchased Date - the cost price in the product summary changes to according to the last purchased price.
Double Confirmations - pop ups for confirmations.
Account Numbering
You can set up automatic numbering for Chart of Account categories.
Numbering Settings
You can set up numbering for Products, Fixed Assets, Expense Claims, Stock Adjustment, Stock Transfer, Manual Transactions, Bank Payments, Bank Receipts, Cash Payments, Cash Receipts, Customer Prepayments, Supplier Prepayments, Invoices, Quotes, Purchase Orders, Purchase Invoices, and Credit Notes. You can also restart the numbering each year.
Tax Rates
You can create different tax rate which later you will be able to use in accounting transactions like invoices, purchase orders, expense claims etc.
Currency Rates
You need to create and set up all the currencies you use in your financial transactions here.
Discounts
Discounts can be created here which can later be used in all accounting transactions.
Measurements
You can create unit of measurements for the items used in invoices and orders. The unit of measurements can be items, kilograms, liters, meters etc.
Product Category
Different categories for your products and services can be created here. You can categorize your items by their color, audience they are made for, such as age group, sex, region and so on.
Brands
Brands of your products can be added and viewed in this section of the Accounting Settings.
Shipping Method
Different type shipping methods can be created with the price, account and names.
Payment Methods
In this section, you can specify methods of payments such as Bank transfer, Cash, Cheque, Credit/Debit card, Wire Transfer.
Invoice Templates
Several type of custom invoice templates are presented and available for purchase.
Product Table Settings
More information is available about the product table settings here.
Chart of Accounts
You can find the chart of accounts which is a listing of all accounts used in the general ledger of an organization. The charts are usually sorted in order by account number, to ease the task of locating specific accounts. You can edit, add and remove chart of accounts here.
Created by Aziza Israilova
April, 2019
Activities
Activities
Activities are Interviews and Calls registered for particular candidates. To add a new interview or a call go to Humans>>Recruitment>>Activities and click plus button. Enter the call details. You can also link the activity to a project, contact, lead, task etc. Email reminders are also available to remind you about the due date of the activity.
Created by Aziza Israilova,
April 2019
Activities
Activities
Activities contain the list of your events and calls registered either from the Calendar or from the Activities. To add an activity go to Sales>>Activities and click on plus button. Choose Event or Log a Call. Activities you add here will be available in your Calendar as well.
Created by Aziza Israilova,
April 2019
Add a Task
Add a Task
Task is an activity based on a certain project that needs to be completed within a specified period of time.
To create tasks, go to the Projects section and click the Add New and fill out the form with the task details.
Tasks are related to certain projects. The system has 2 default projects: CRM Tasks and Non-project related hours.
CRM Tasks is the default project for CRM activities. All tasks created from the Sales section will be saved under this project.
Non-Project Related Hours is the default project to which you can add trivial tasks that are not related to any project. All employees are involved in this project, so you can assign any employee to the tasks.
Task number is automatically generated when you select the project. If the task is the first one in the selected project, then the task number will be T0001.
In the assignee's box, you need to assign employees who will be working on the task. Estimated time is the approximate hours to complete the task for each employee and it is required to calculate the budget and costs of the project.
If you do not show the estimated time, the task percentage completion and budget sheet planned costs cannot be calculated.
Add New Assembly Item
Add New Assembly Item
To add an Assembly item, go to Accounts>>Product/services listing page and click plus icon and choose Product.
The form will appear with the following fields:
Product Type– Select Assembly Item type and following fields will be available:
Product Name– Write name of the Assembly Item.
Product Number– Product number will be set automatically. You can set your own numbering in Settings, Numbering Settings and Product Numbering.
Category– Choose a category of the Assembly Item. You can add new Category here in dropdown clicking Add New or in Settings, Product Categories and Add Category.
Tax Rate– Tax rate to the per unit of Assembly Item.
Cost Price– Cost price of the Assembly Item to the company.
Selling Price– Selling price of the Assembly Item to customers.
COGS Account– Cost of Goods Sold account. By default Materials Purchased will be set, you can choose other COGS account in dropdown menu.
Income Account – Sales account will be set by default, you can choose another income account from dropdown menu.
Is purchased from supplier – tick the check box if the Assembly item is purchased from supplier and you can select assembly in order to include it on the Purchase Order/Purchase Invoice form.
Bill of Materials – in this box select inventory items to include it on the materials list, the fields such as: Description, type, cost will be automatically filled after selecting an item. Then specify, how many of the item is needed in the “Qty” box. Total box will calculate total cost of the item. If you wish to add more items to build assembly item, click the plus icon and select another item to add in the materials list.
Quantity on Hand – Number of the Assembly Item that company has currently in Stock.
Reorder Point– Enter the level of inventory when an order should be made with suppliers to bring the inventory up.
Asset Account – Choose an asset account from dropdown menu to register your Assembly Item to your Stock.
Total Value – Total cost of the product/services, it will be calculated automatically based on the cost price and Quantity on Hand of the Assembly Item.
As of – Select the date that Assembly item came to your Stock, if you have Assembly Item in your Stock.
If you are going to input more data about the Assembly Item you can click More options: SKU number, UPC number, Unit measurement, Vendor, Manufacturer, Part number.
Created by Aziza Israilova,
April 2019
Add New Employee
Add New Employee
The Employees section of the Humans/Projects or the Settings>>Users and Priviliges module stores the personal information of employees in the system. Only administrators, directors and HR managers are eligible to add a new employee to the system.
To add a new employee, go to Humans or Projects or Settings>>Users and Privileges and then Employees section and click add.
First Name – Employee’s first name
Last Name – Employee’s last name
E-mail – Employee’s email address (Since an activation link will be sent to an employee’s email address, it is recommended to provide a valid email address)
Role – Employee’s position at the company
To assign a role to the person, select the roles from the existing list. Following roles are available in the system by default:
Employee
Administrator
Director
Accountant
HR Manager
Sales Manager
Customer Service Representative
Sales Person
Then choose a department and a location if needed.
No Access – If this box is checked, the employee will not receive an activation email and they will not have access to the system. You will just keep employee information in the application, however, you will be able to generate payruns for them.
ESS User – Employee Self-Service User. If this box is checked, the user will have very limited access to the application and their user access level cannot be changed.
In the new user interface, you need to add your employee first and then go to edit employee form and add more details.
Add New Inventory Item
Add New Inventory Item
To add a new Inventory Item, go to Product/Services page and click Add. Here are the description of the fields:
Product Type – Select Inventory Item type following fields will be available:
Product Name – Write the name of Inventory Item.
Product Number – Product number will be set automatically. You can set your own numbering in Settings, Numbering Settings, Product Numbering.
Category – Choose a category of the product or service. You can add new Category here in dropdown clicking Add New or in Settings, Product Categories and Add Category.
Tax Rate – Tax rate to the per unit of Inventory Item.
Cost Price – Cost price of the Inventory Item to the company.
Selling Price – Selling price of the Inventory Item to customers.
COGS Account – Cost of Goods Sold account. By default Materials Purchased will be set, you can choose other COGS account in dropdown menu.
Income Account – Sales account will be set by default, you can choose another income account from dropdown menu.
Quantity on Hand – Number of the Inventory Item that company has currently in Stock.
Reorder Point – Enter the level of inventory when an order should be made with suppliers to bring the inventory up.
Asset Account – Choose an asset account from dropdown menu to register your Inventory Item to your Stock.
Total Value – Total cost of the product/services, it will calculated automatically based on the cost price and Quantity on Hand of the Inventory Item.
As of – Select the date that Inventory item came to your Stock.
If you are going to input more data about the Inventory Item you can push More options: SKU number, UPC number, Unit measurement, Vendor, Manufacturer, and Part number.
Add New Non-Inventory Item
Add New Non-Inventory Item
To add a new Non-Inventory Item, go to Product/Services page and click Add. Here are the description of the fields:
Product Type – Select Non-Inventory Item type and following fields will be available:
Product Name – Write the name of Non-Inventory Item.
Product Number – Product number will be set automatically. You can set your own numbering in Settings, Numbering Settings, Product Numbering.
Category – Choose a category of the Non-Inventory Item. You can add new Category here in dropdown clicking Add New or in Settings, Product Categories and Add Category.
Tax Rate – Tax rate to the per unit of Non-Inventory Item.
Rate – Selling price of the Non-Inventory Item to customers.
Account – Sales account will be set by default, you can choose another income account from dropdown menu.
If you want to show this Non-Inventory Item in purchase documents (Purchase Order, Purchase Invoice, or supplier Credit Note), you need to check "Is purchased from supplier" check-box. And following fields show up:
Purchase Price – Cost price of the Non-Inventory Item to the company.
Expenses Account – Select an expense account to track expenditure.
If you are going to input more data about the Non-Inventory Item you can push More options: SKU number, UPC number, Unit measurement, Vendor, Manufacturer, and Part number.
Add New Product/Service
Add New Product/Service
To create Product/Services, go to Accounts>>Products and Services and click on the plus icon and choose Product.
The form will appear with the following fields:
Product Type – Select a type of product you are going to save. It can be Inventory Item, Non-Inventory Item,Service, Assembly Item, Other Charge and Product Group.
If you select Inventory Item type following fields will be available:
Product Name – Write the name of Product or Service.
Product Number – Product number will be set automatically. You can set your own numbering in Settings, Numbering Settings, Product Numbering.
Category – Choose a category of the product or service. You can add new Category here in dropdown clicking Add New or in Settings, Product Categories and Add Category.
Tax Rate – Tax rate to the per unit of product or service.
Cost Price – Cost price of the product to the company.
Selling Price – Selling price of the product to customers.
COGS Account – Cost of Goods Sold account. By default Materials Purchased will be set, you can choose other COGS account in dropdown menu.
Income Account – Sales account will be set by default, you can choose another income account from dropdown menu.
Quantity on Hand – Number of the products that company has currently in Stock.
Reorder Point – Enter the level of inventory when an order should be made with suppliers to bring the inventory up.
Asset Account – Choose an asset account from dropdown menu to register your inventory item to your Stock.
Total Value – Total cost of the product/services, it will calculated automatically based on the cost price and Quantity on Hand of the Inventory Item.
As of – Select the date that Inventory item came to your Stock.
[video width="1342" height="602" mp4="https://www.kpi.com/wp-content/uploads/2016/12/add-product.mp4"][/video]
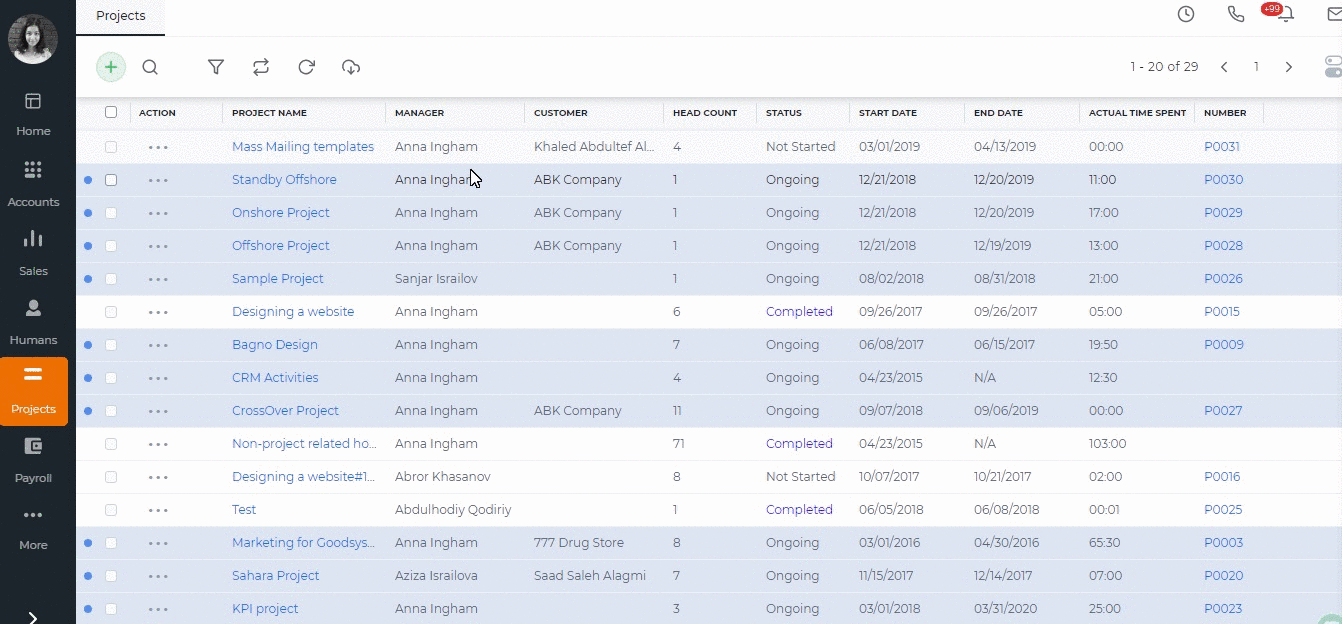
Add Project
Add Project
To add a new project go to Projects module and click Projects subsection. Click the plus button and choose Project or Quick add. The quick add is a short form with important project information only.
Enter the project name and choose the start and end dates.
Choose project status.
Choose the customer if needed.
Clone Project Widget gives you an option to copy project details from an existing project.
Choose involved employees and enter their hourly rates. This is import to calculate employee costs in the Budget Sheet.
Upload attachments and add notes if needed and save.
After you have saved the project you add tasks, workstreams and log tlimesheet entries to the project.
Created by Aziza Israilova,
April 2019
Add Reference
Add Reference
If the Reference Settings is enabled in your account, you will be able to add extra status, priority, types, and others related to all sections of the system such as leads, projects, accounts, tasks, etc.
For example: To add a new case status, perform the following steps:
Go to Settings>>Reference.
Search Case Status.
Click the actions to edit.
Click on Plus icon which will populate a new line to add a new status.
Type the name and the description of the status and save.
Once you save the changes, the new case status will be available in the Cases.
The Reference Settings is not available by default. To enable the feature, contact our technical support team.
Adding Pictures into the Signatures
Uploading a picture
In order to upload a picture you need to go to Documents>>Public>>Upload File (which size should be 5 mbs per upload)
Then, you need to get a URL of that uploaded file, go to Action menu and copy the URL of chosen file.
Afterwards, go to the Settings>>Email Templates>>Signature, where you can Add New Signature or Edit existing one. You can add a picture by pasting your copied URL link.
Created by Aziza Israilova,
April 2019
Annual Leave Report
Annual Leave Report
Annual Leave balances are added in Leave Allowances page.
Annual Leave Report shows each employee's current leave balances as of date chosen.
The formula for the Current Balance is as follows: Number of Worked Days( Leave allowance days/365 ) - Taken Days.
Number of worked days will be calculated depending on Effective start date and Effective end dates. Effective start date can be employee's hire date or opening balance date. If employee's Hire Date is earlier than Opening Balance date, then the Opening Balance Date is going to be the Effective start date. If employee was hired after Opening balance date, then his Hire date will be taken as Effective start date.
Effective end date is the date chosen from the date-picker on top of the report or Employee's resignation date.
For example, Aziz Djalilov's Hire Date is September 18, 2017 and till December 26, 2017 he has worked 99 days in total. He is Allowed to take 30.6 days as an annual leave in 2017. So his current balance is: 99(30.6/365) - 0 = 8.3
Opening Balance Date for Leaves
The Administrator can set an opening balance date for all employees leave balances, which means that the leave balances are effective starting from that date. The opening balance can be set from Settings>>Humans>>Leave Reasons>>Edit Leave.
This date is also shown in the Annual Leave Report.
If the Hire Date is before the Opening Balance date, then the balances effective date is going to be the Opening Balance Date. If the Hire Date is after the Opening Balance date, then the balances effective date is going to the Hire Date.
So the number of worked days depends on the Effective Start Date.
Opening Balance Days
If the employees already have the balances as of the opening balance date, then the opening balances are just added to the current balance, so the formula is as follows: Number of Worked Days( Leave allowance days/365 ) - Taken Days + Opening Balance Days.
The Opening Balance Days column can be enabled from the Customize icon on the right hand side corner of the report.
After the column is enabled, a double click helps you to enter opening balance days for each employee.
Created by Aziza Israilova,
April 2019
Appraisal Settings
Appraisal Settings
Use Competencies for Appraisal – If you enable the checkbox, you will be able to review employees by their competencies.
Use goals for appraisals - If you enable the checkbox, you will be able to review employees by their assigned goals.
Enable Employee Rate – You can choose if an employee can rate himself/herself in this checkbox.
Score Scale – Default score scales of appraisals from 1 to 7. You can define your own score scales.
If your company operates under the Forced Distribution Ranking Percentage Scheme, you should define scores from 1 to 100.
Appraisals Archive
Appraisals Archive
Appraisals archive list shows all appraisals completed and approved by manager. You can add new appraisals, edit and view the existing ones or generate their PDF version.
The Appraisals Archive is available in Humans>>Performance Appraisals>>Appraisals Archive.
Created by Aziza Israilova,
April 2019
Approval Process
Approval Process
Some organization procedures require top management's approval like expense claims, cash advances, leave requests etc. Kpi.com offers approval processes for Leave Requests, Cash Advances, Expense Claims, Additional Payments, Sales Quotes, RFP, Manual Entries, RFQ, Company Rules.
To set up the approval process go to Settings>>Automation>>Approval Process and select the form from the dropdown.
Choose the "Approver". The approver can be determined by the role or by the employee name. Then choose the conditions which further determines the actions if the item is approved or rejected.
You can add as many steps as needed in your organization. The approval can be two-level, three-level and so on.
Once you are done, "Save" the settings.
Assembly Products
Assembly Products
Assembly Item – is a type of line items, which is used in filling sales or purchase form. Assembly item consists of inventories and assemblies (subassemblies) which build a single Assembly item. Items in the assembly are called Bill of Materials, those are the components parts of Assembly item.
Assembly items can be used when you are dealing with the customer related process on (Sales Quotes, Sales Orders, Sales Invoices, or customer Credit Notes). If you selected "purchased from supplier" while building an assembly item, Assembly item would appear in the supplier process on Purchase Orders, Purchase Invoices, or supplier Credit Notes).
Use Assembly item in order to:
· Customize the price of assembled items
· Quick access to information about finished goods
What's the difference between Assembly Item and Product Groups?
Assembly item and Product group may seem the same as they include a group of items which are under one item in the list of Product/services in kpi.com. However, they are not the same and have distinctive differences between each other.
Product Group is used when you often enter the same items and their quantity while recording sale or purchase form. You can make a group of inventory, non-inventory and service items include in one product group. You can avoid entering the same line items each time individually and add only one product group of items.
Assembly items let you combine inventory items and all these inventories make a new price into new finished goods that you offer to your customers. Also in assembly item, you can add assembly cost or other services which should be included in the list of Bill of materials.
Attendance Report
Attendance Report
Attendance Report shows the number of hours worked by your employees in a month. The data is based on the in/out hours. It also shows leave requests taken, holidays, not approved leave requests and total hours for the month.
You can change the in/out hours by double-clicking on the cells and entering the time.
If you already have a file containing the employee hours then you can import the data into the report. click on the Import/Export button, choose the Import option and download the template and make changes. If you already have downloaded the template, you can skip this step and upload the file. The uploaded file will overwrite what was available in the report.
Note that the entered came and left hours should follow the timeslot hours. Otherwise, the import process will fail.
You can also filter the report by employee name, by department, timeslot or by employee status and view the report in Excel format by exporting into Excel.
Created by Aziza Israilova,
April 2019
Attendance Tracking
Attendance Tracking
Attendance Tracking page shows all company employees and their timeslots. A click on the employee name forwards you to the Employee's attendance profile page where you can see his/her leave requests, leave status and in/out hours.
This page helps you manage the in/out hours of your employees. For example, if an employee cannot come to office and is working outside office, you can change his/her status to "In" (by clicking on the status dropdown) to register time for the correct attendance report.
Created by Aziza Israilova,
April 2019
Automation Settings
Automation Settings
Workflow Management helps you to automate your sales, marketing, and support processes. In business, there are numerous everyday activities and processes that need to be done and when automated will save time and effort. For example, a sales manager may be required to assign the leads to various sales reps based on certain criteria.
The Automation Settings is located on the Settings page. If you cannot find these Settings among other settings available, please make sure you have Administrator rights and if it is still not available for you, contact support@kpi.com to enable the Settings for your account.
Here are some of the terminology and their description:
Workflow Rules - A set of rules that are executed when specified conditions are met.
Workflow Alerts - Automated email notifications sent on triggering a workflow rule.
Workflow Tasks - Tasks that are assigned to the users when workflow rules are triggered.
Workflow Field Updates - Automatically updating specified field values when workflow rules are triggered.
The first step in Automation Settings is to specify the rule. Click on the Add New button to create a new rule. Write the name of the rule, select a module, choose status, and then select the Execution Criteria and finally specify the rule. For Example, you want to set a case workflow that sends a notification to your customers when the case is resolved or closed. You choose “Update Specified Field” – “Status” as an execution criterion and set that the rule should work when the status is changed to “Resolved”. Below you can see the screenshot of the rule:
You can also set up more complex rule criteria by adding new lines using the “Plus” icon. For example, the rule should work when the case type is a problem. So whenever the case’s type is a problem and its status is changed to “Resolved” the workflow will work. Make sure that you set “And” between the rule criteria.
You can add more criteria the same way and change the criteria pattern “And”, “Or”.
Using the “Change Pattern” button you can apply a different rule to the set of criteria. In the screenshot below the pattern has been changed manually.
After you are done with setting up the rules, click on “Save and Close” button. Now you can add alerts, tasks, activities or updates to the workflow.
To add an email notification, click on “Add Alert” button or go to Alerts subsection and add new. Choose from whom the notification should be sent in the “From Name”. Type the address of the recipient (if there is only one recipient) or choose a personalization attribute and paste it in the field.
Enter the notification’s subject, enter the content and save.
Now the workflow has been created. The same way, you can add tasks, events, and updates to the rule.
Bank Accounts
Bank Accounts
The bank accounts are registered in your kpi.com account in order to have correct financial reports and in order to track payments and receipts and other transaction occurring in your accounts.
To add a bank account go to Accounts>>Accounting>>Bank accounts and click plus button.
Enter the bank name and the bank, bank code and bank number.
Enter code details like the IBAN Code, SWIFT Code, Agent ID etc.
Enter financial information like the balance amount as of date, currency etc.
Enter bank address.
Click save button.
The bank will be available in the bank accounts list. A click on the balance column will forward you to the bank statement.
Created by Aziza Israilova,
April 2019
Bank Payment
Bank Payments
The bank payments can be accessed from Accounts >> Transactions >> Bank Payments.
You can add a bank payment by clicking the plus icon.
Another way to add bank payments is to import them.
Actions column provides options to view, edit and delete the payment.
Created by Aziza Israilova,
December, 2018
Bank Receipts
Bank Receipts
To receive money from Bank accounts, go to Accounts>>Bank account page and click actions and choose Bank Receipt. Alternatively, go to Accounts>>Transactions>>Bank Receipts and click on plus button to add new.
Fill in the form. Choose the date and the account you have received the funds from.
If it is accounts receivable, type in the customer name in the name column and save.
Created by Aziza Israilova,
April 2019
Bank reconcilation
Bank reconcilation
Bank statement reconciliation is a process of verifying the amounts in bank statement with the company’ Cash account or vice versa. The benefit of this report is it will allow you to compare reports of bank with the reports of your company cash account in order to uncover any possible discrepancies. Sometimes there may be differences between your company cash account and Bank statement because you may write hundreds of checks each month and make several deposits. Some items appear in your Cash account in different months with the bank statement. In kpi.com you can import your bank statements into the system and reconcile them with the company Cash account and even if your company Cash account does not have some transactions you can record a new transaction and reconcile it. For reconciling bank statement with your company Bank account in kpi.com, follow these instructions.
Go to Accounts>>Bank Account>>Click the actions and choose Import Transactions. Before uploading the statement save the file in .CSV or .OFX format. Finally upload the file into the system.
Once you have uploaded the file, following pop-up window will appear with the transactions list where you can match transactions with the bank transactions, which already have been created in kpi.com account or Create New Transaction.
Further, when you click Find and Match you can select transactions to reconcile by ticking transaction line and clicking Reconcile. Moreover, in this pop-up window users will be able to filter transactions by Amount more/less and set period.
If some transactions are not recorded in the system, you can create a new transaction in order to reconcile with the bank statement. For creating new transactions click on Create New transaction, then fill the required fields and save it.
After you have reconciled all the transactions with the bank statement your company Bank account balance at kpi.com will be the same with the bank account balance in your Bank.
Created by Aziza Israilova,
April 2019
Bill of Materials
Bill of Materials
Bill of materials (BOM) is a complete form of specific items that are needed to complete a project. The bill of materials can be submitted for a project manager to draft a project for the estimates and budget in kpi.com.
First, start your project by going to the Projects module and fill in the project details.
Then go to the Bill of Materials page and list the bill of materials needed
Item - the name of the material needed
Planned Quantity - the quantity needed to complete the project
U/M - unit of measurement
Price - the unit price of each bill of material
Requested Before - the quantity requested before this in the project
Requested Quantity - the quantity you are requesting/you need now.
As soon as you submit the bill of materials to the manager, company directors will be informed about it via email. The director can then click the link sent in the email notification and approve or reject the requested bill of materials for purchase and convert the requested bill of materials to "Request for Purchase".
The Request for Purchase, after the approval, can be converted to a Purchase Order.
After the purchase order is sent to the supplier, the purchase order will be shown as project expenses under the project budget sheet.
Created by Aziza Israilova,
July 16
Billable tasks
Billable tasks
Task billable box is required to create a timesheet based invoice to customers. When creating a timesheet-based invoice, the approved hours of only billable tasks will show up in the invoice. So, if you issue an invoice to your customers based on task worked hours, tick the Billable box when creating your tasks.
The Billable Task check box is available in Add Task and Edit Task forms.
Created by Aziza Israilova,
April 2019
Booking items
Booking items
With kpi.com online booking system, you are able to add and reserve items (i.e. room, vehicle, and computer). All reserved items will be saved in the Booking Items list. Once the first reservation is made, other employees will not be able to reserve the same item for the same period.
Go to Projects>>Booking Items and click the plus button and add items first. Once you have added the items you will be able to reserve them.
The item summary shows all the reservations in the history part.
Updated by Aziza Israilova,
May 2019
Budget per Department
Budget Per Department. Cost and Profit Centers
If you have sister companies and franchises and want to manage the financial reports per each sub-company separately, then you are recommended to use the Budget Per Department feature.
This feature is enabled from Settings>>Accounting>>Financial Settings. Check the box Departments/Cost and Profit Centres and save the settings.
Before allocating any transactions to different sub-companies(departments), make sure you have all the departments set in the Humans module.
You can save your forecast budget per each department in the Budget Manager available from the Accounting reports.
You can allocate transactions to different departments per line in the sales invoice, purchase order, expenses, purchase invoice, spend/receive money, manual transaction forms.
Balance sheet report can also be generated per department.
Build Assembly
Build Assembly
In order to build Assembly Item, go to Accounts >> Product/Services, click plus icon and select Build Assembly.
The form will appear with the following fields:
Select Product – in this field you can choose only assembly type products in the system.
Quantity to build –enter the quantity of the built assembly item.
Warehouse – select warehouse where the assembly will be kept.
After you have built Assembly Item, Inventory items’ (bill of materials) quantity on hand will be decreased by the quantity used for building assembly item.
Created by Aziza Israilova,
March 2019
Calendar
Calendar
The kpi.com Calendar is a handy tool for organizing events and activities. You may add events, tasks and activities using your calendar. The kpi.com Calendar is configurable with your Google Calendar and Office 365 enabling you to synchronize both calendars with one another. You can find our more about synchronization here.
Add Event/Task in My Calendar
To add an event go to Sales>>Calendar and click +Event button and fill in the event details. You can share the event with your colleagues under share box. Enter your colleagues names and system will find them itself. There is an email reminder available to remind about the event due date. Add links helps to connect your event with other items in the system like contacts, projects, leads etc. After you are done, click save.
Quick add event option is available right in the calendar itself. Click on the date and write the event name and click Create Event.
Other options in Calendar
The calendar not only shows your events or tasks but also your active projects you are involved in, holidays, issues and leave requests. You can switch them on from the lower left side of the calendar.
Edit/Delete Event
You can edit or delete an event directly from the Calendar page. Click on the event which shows you the details of the event and below the details you can see the "Edit Event" and "Delete Event" options.
Alternatively, Sales>>Activities also shows the events in a list view. Click the actions and choose either edit or delete.
Created by Aziza Israilova,
April 2019
Calendar Synchronization
Calendar Synchronization
Google Calendar and Office 365 Synchronization is supported at kpi.com. To keep your events, tasks, and others in one place, configure your Calendar and manage everything in one app.
To configure your Calendar go to Sales>> Calendar and click Configure. Choose Office 365 or Google Calendar. The message will ask you to choose whether you want to sync with your default Google Calendar or create another folder for kpi.com events. Then click Save. You will be forwarded to the Google verification page. Grant Access to kpi.com.
After you have allowed access, sync your events and choose the date for the synchronization.
You can revoke Calendar synchronization if needed from Settings>> User Credentials>>Authorized access to your kpi.com account. Under the Calendar click Revoke Access.
Created by Aziza Israilova,
April 2019
Campaigns
Campaigns
Campaigns are all the marketing and advertising activities that promote your business and generate potential customers. This list contains the campaigns that you have launched.
To add a new campaign go to Sales>>Marketing>>Campaigns and click on plus button. Fill in the form and save.
You can use the campaigns in Mass Mails and Leads.
Created by Aziza Israilova,
April 2019
Candidates
Candidates
Candidates are the people you have applied to the open vacancies in your company. You can upload the list of candidate or add them one by one from Humans>>Recruitment>>Candidates.
To import candidates click the import/export button and choose Import. Choose the file or download the sample file to see how the candidates file should look like. After you have uploaded the file you will be asked to match file columns with the system columns and save.
To add candidates manually click the plus button, choose Candidate or Quick Add. Quick add is a short candidate form with only necessary information to fill in.
Created by Aziza Israilova,April 2019
Cases
Cases
Cases are tickets raised by your Customers.
Add Case
Cases are created in three ways:
Manually - to add a case manually, click on the Add New button.
Web Forms - you can create case forms, and whenever the form is filled in your website, the case will be created.
Emails - you can set up Message Center and create parent/assignee filters. All emails passing through those filters will arrive in cases section. For more information look through the email integration article here.
Send Email Notification
Send email notification option is an auto-reply notification sent to the reporter of the case. If you want the auto-reply to be sent to the reporter every time a case is added manually, please contact support to make the option ticked by default.
Case Assignees
When a case is created automatically from an email, it is assigned to one of the company employees. If it fits the assignee filter, then it is assigned to the right person, otherwise, it will be assigned to the default assignee set in the Filters.
The assignees are notified about the case creation/update through emails. You can modify case notifications from Settings>>Email Templates section.
You can change assignees using the actions drop-down.
Case Status
When a case arrives, its status is New by default. Whenever you respond to a case, the status changes to Replied. When the customer replies the second time, the status again changes from Replied to Waiting for Reply.
As soon as you change case status to Closed, the reporter (customer) will receive an email notification about the case closure.
In case, the customer responds to the closed case, the status changes to Reopened.
You can also create custom case status, you can find more about custom case status here.
Cash Advance
Cash Advance/Loans
Cash advances can be requested by employees themselves from their Profile under Humans or they can be created by other power users on behalf of other employees from the Payroll section.
Adding Cash AdvanceRequester is the person who is asking for the cash advance.
Category is the deduction category whether it is cash advance or loan.
Requested amount is the full amount the employee is requesting.
Payment amount is the deduction amount which is deducted from each recurring payrun.
Date is the requested date.
Approver is the manager who should approve/reject the cash advance.
After the cash advance is approved, it will be deducted from the next payrun.
The remaining payments of the cash advance can be viewed from the cash advance listing under the Remaining Amount column.
If you want to make the payment for the cash advance without deducting it from each payrun, you can open the cash advance and choose the Paid From account and Cash Advance account and Post.
The status of the cash advance changes to Posted. Then you can receive the payment by clicking the Payment button and entering the amount, account and date. The status of the cash advance then changes to Paid.
Cash Payments
Cash Payments
Cash payments are the cash funds which your company spends on different purposes. To record a cash payment go to Accounts>>Transactions>>Cash Payments and click the plus button. Fill in the form.
Cash Account - usually it is a petty cash account, however you can choose any other current assets account.
Account - the account to which you have made the payment.
Name - if you choose accounts payable in the account column, here you need to show the supplier name.
Bill to - the payment can be billed to one of your customers.
After you have completed the form, click save. You can view the transaction from your Accounting Statements.
Created by Aziza Israilova,
April 2019
Cash Receipts
Cash Receipts
Cash Receipts are the funds you receive in cash. To record the cash receipts go to Accounts>>Transactions>>Cash Receipts. Click the plus button to add new. Fill in the form.
Cash Account - choose the current asset account to which you have received the funds, usually it is a petty cash account.
Account - choose the account from which you received. If it is your customer, choose accounts receivable.
Name - if you have chosen accounts receivable under the account column, choose the customer name here.
After you have completed the form, click save. You can view the saved transaction in your accounting statements.
Created by Aziza Israilova,
May 2019
Change Password
Change Password
To change your current password, perform the following steps:
Go to Settings and then to User Credentials
Type your current password in the Current Password field
Type your new password in New Password and Confirm Password fields.
Click on Update
Next time, you will be able to login to the system with the new password.
Change System Language
Change System Language
The application is available in several languages. To change the language from English to other languages, go to Settings>>Company Settings and edit.
Go to Company Settings tab and choose the language: Arabic, Netherlands, Russian, Spanish, Turkish, Portuguese or Italian.
Change Username
Change Username
The username is the email address chosen during the signup process and is used when logging in to the site.
Currently, it is not possible to change the username. However, you can change your email address. To change the username, contact kpi.com Support Team.
Changing your email address will not change your username.
Chart of Accounts
Chart of Accounts
Managing ledger accounts at kpi.com is quite easy and lets you create your own accounts.
Go to Settings>>Accounts>>Chart of Accounts>>Add New. Then choose the right account type – be it Asset, Liability, Income, Expense or Equity. But if you already have your accounts list, you can import them via CSV upload.
[video width="1348" height="600" mp4="https://www.kpi.com/wp-content/uploads/2016/12/chart-of-accounts.mp4"][/video]
Checks
Checks
Using the checks you can make a payment to one of your accounts from your bank..
To add checks go to Accounts>>Transactions>>Checks and click plus button. The form will appear with the following fields:
Bank – select a bank account from the look up field.
Balance – balance of the selected bank
No - check’s registration number
Pay to – write receiver of the funds
Date–indicate the date check is created
Amount – money amount which is going to be spent
Address – address of the receiver
Memo – write notes if you need
Check to be printed – click if you are going to print the check
Account – select an account from your chart of account list. In order to pay for Supplier select Accounts Payable account and then Name field will be active, you can select Supplier here.
Amount – enter the payment amount
Description – write description if there any need
Name – this field will be active once you select Accounts Receivable and Accounts Payable accounts only, and will be used to link the amount to Supplier and Customers.
Click "Save" after completing the check.
Created by Aziza Israilova,
April 2019
Client Access
Client Access
To enable access to customer contacts at kpi.com, perform the following actions:
Go to the Sales>>Companies module on the main menu.
Go to the Customer View page. The account type should be set as Customer.
Click Contacts from the top bar and click on the contact name.
In the Contact View page click on the Actions and choose Enable Access.
The customer contact will receive an email notification to activate his/her customer account at kpi.com.
The customer contact will have access to the following:
View access to Sales Quotes, Sales Orders and Sales Invoices.
View access to the Customer Balance.
Export options
Approve options in Sales Quotes and Orders.
View access to Cases.
View access to Projects and Tasks
You can modify the customers' access level from Settings>>Users and Privileges>>Permissions.
The below is the Customer Portal.
Created by Aziza Israilova, April 2019
Closing the Fiscal Year
Closing the Fiscal Year
In the system, there is no need to add financial year closing entry. System will calculate profit and loss on the run-time base and in Trial Balance report you will see 0 beginning balance for Revenue and Expense accounts. Their balances will be shown in Retained Earnings accounts in Beginning Balance column. If you go to transaction details of Retained Earnings account in Account Transactions report, you will see per financial year net profit (loss).
Companies
Companies
Companies are company details of your customers, suppliers, re-sellers and etc. Companies can relate to several contacts (representatives of accounts whom you can contact to deal with the company).
To add a new company go to Sales>>Companies and click plus button and choose one of the options: Customer, Supplier, Account. Fill in the account details and save. If you save the customer or supplier account, they will be available in Accounts>>Customer Center or Accounts Supplier center as well.
If the company is your re-seller, partner or any other then choose Company option and fill in the details and save.
You can also import accounts which saves your time rather adding them one by one manually. The import option is explained here.
Created by Aziza Israilova, April 2019
Company Expense Claims
Company Expense Claims
There are two types of expense claims in kpi.com: Company Expense and Employee Expense. Limited users can add only employee expenses and submit it to manager. Accountant, Directors and Admins can add Company Expenses which has more information and functions.
To add a company expense go to Accounts>>Accounting>>Expense Claims and click the plus button and choose Company Expense.
Enter the expense report title.
Choose the date.
Choose the supplier name if it is related to one of your vendors.
Choose the approver. If you want to approve the expense yourself, choose your name.
Choose expense categories.
Enter units and costs.
Click Save & Approve or Save as Draft.
You can also attach receipts to each line item, choose department if needed and upload files.
The company expense can be billed directly to the customer if the "Bill to" column is enabled from Product Table Settings. When the expense is billed to the customer, the expense will show up in the customer invoices which you can apply to the total amount of the invoice.
Created by Aziza Israilova, April 2019
Company IP address
Set up Company IP address
In order to limit the access of company users to the system from outside of the company, you can set up your own company IP Address (or IP Address Range) through Settings>>Company Settings>>System Access Details.
While you set up IP Address (or IP Address Range), company users can access the system only from the indicated IP Address (or IP Address Range).
Moreover, you can set up Password expiration period in order to make your company account more secure.
Created by Aziza Israilova,
December, 2018
Competencies
Competencies
Competencies list shows all competencies available in the system by default. You can add your own competencies and build templates based on them.
To add a new competency go to Humans>>Performance Appraisals>>Competencies and click the plus button. Choose the competency group, enter the competency name, its description and enter the weight.
You can add more competencies in the list by clicking the green plus icon. After you have finished you can save or save and add new.
You will be able to use the competencies in your performance appraisals.
Created by Aziza Israilova, April 2019
Connect your own data
Connect your own data
In kpi.com Reports you can upload your own sheets and customize them using the features available in the system. To upload your sheet, go to Reports and click the plus button. Click on the "Connect your own data" and choose the file type you are trying to upload: XLS, XLSX, CSV or Google Sheet. Upload your file. The guidelines for the csv file are available on the link on the right side. The help video is also available.
Once the upload is complete, the file's data will show up on the screen. You can deselect some of the column which you do not need and decide what type of data they contain whether it is numeric, money, or date. Click "Import".
Once you have successfully imported, you will be able to filter the report, customize the column, create chart, create summaries and so on.
Contact Synchronization
Contact Synchronization
In kpi.com you can synchronize your contacts in the system with the contacts in Google or Office 365. The procedure of setting synchronization is simple and requires just a few steps to complete.
To configure synchronization go to Sales>>Contacts and click Import/Export button location on top of the contacts list. Choose Configure option. Choose the way synchronization is conducted. There are three ways explained in the pop up. Click save after deciding on the option. You will be forwarded to the Grant Access page.
Click Allow and click the Export/Import button again. Choose Settings Folders. Match the Contacts Categories with kpi.com Contact Categories and save.
Stop Synchronization
If you need to stop the synchronization go to Settings>>User Credentials>>Authorized access to your kpi.com account. Under the Contacts click Revoke Access.
Created by Aziza Israilova, April 2019
Contacts
Contacts
Contacts can be added in three different ways: adding manually, importing from a file and synchronizing with Google Contacts or Office 365 Contacts.
To add contacts manually go to Sales>>Contacts section and click the plus button:
Contact - full contact form with all contact fields.
Quick Add - short contact form with only important fields.
Multiple Contact - a form that enables to add multiple contacts at a time.
Fill in the form and save the contact. The contacts you add will be available in the list.
Created by Aziza Israilova,
May 2019
Creating Intercompany Sales Invoice
Creating Intercompany Sales Invoice
Select the customer related to a subsidiary company and choose the right currency, which is limited to the base currencies of the parent and subsidiary company.
Once a sales invoice issued by a parent company will be listed in Purchase Invoice listings page of the child company with "Pending" status. Accountant of the subsidiary company would then need to login to their account and click the button under "Action" in Purchase Invoice listings as is shown in the screenshot to the right.
Child company accountant or admin would need to set Purchase Invoice number and double check the exchange rate in the right bar and click "Draft" button, which would set the status of the purchase invoice into Draft. Accountant would need to revisit the purchase Invoice and click "Approve Invoice" button to finalize intercompany sales.
Customer Center
Customer Center
Customer Center involves all companies added/imported either from CRM or Accounting with the "Customer" type.
You can add customers manually using the "Add" button or import the list of customers using the "Import" button.
While adding the customer, fill in all the necessary information related to the customer such as the account information, address information, and financial information:
Bank Accounts - if you use only one bank for this customer transactions, choose the default bank account.
Currency - choose the customer currency (if multiple-currency option is enabled).
VAT Number - if customer uses VAT, enter the VAT number.
Payment Method - choose the method the customer makes the payments such as cash, wire transfer, credit card, debit card etc.
Terms - choose the invoice period terms. Once chosen this will be default for all invoices of this customer.
Tax - choose the default tax for this customer (not required field).
Discount - choose the default discount you usually offer to this customer.
Accounts Receivable - by default the customer transactions are posted under the default chart of account called "Accounts Receivable". However, if your books record customer transactions to other current asset account then choose that account from this look up field.
Create GL Account - This check box will be used to create an account in chart of accounts listing for the Customer. If it is checked, general ledger account will be created as sub account of Accounts Receivable. Account Name will be same as Customer name.
As of Date - choose the date the customer balance is effective from.
Opening Balance - enter the amount/balance of the customer as of the date chosen on the above field.
Credit Limit - if the customer has the credit limit, enter that amount. Invoicing and transactions will not allow you to post balances more than that account.
Price Level - choose the price level if applicable.
After that click "Save & Close". The customer will show up on top of the list.
Customer Balance
You can generate the customer statement by clicking on the customer balance shown in the screen shot below:
Based on the period you choose from the date picker on top of the report, you will see all related customer transactions.
You can send the report directly to the customer using the "Send Report" button. The customer will receive the balance in the email as an attachment.
You can also export the report to Excel and PDF.
Customer Prepayments
Customer Prepayments
Customer Prepayments are the advance payments that your customer have made. To record customer prepayments go to Accounts>>Transactions>>Customer Prepayments. Click the plus button to add new.
Customer - choose the customer name. The customer balance will show up immediately after you choose the customer.
Date - prepayment date.
Post Dated - if the prepayment is recorded for the future date.
Paid To - choose the account to which the prepayment was made.
Amount - enter the prepayment amount.
Accounts Receivable - choose the accounts receivable account.
Reference - add short reference to the prepayment.
Click save after you have completed the form. The prepayment will be posted with "Open" status. You will be able to apply this prepayment to customer invoices as the payment. After you apply the prepayment to an invoice, the status will change to "Applied".
Created by Aziza Israilova,
May 2019
Customers
Customers
The Customer Center in Project Management section keeps a record of all customers registered in the system. In order for an account to be a customer, the account type should be "Customer" wherever you add (from CRM section, Accounting, and Finance or Project Management).
To add a new customer in PM, go to the Customer Center and click on New Customer button and fill in the form.
Once you have successfully added the customer, you can relate the customer to Sales Quotes, Sales Invoices, Sales Orders, Projects, Opportunities, and others.
All the related items will be visible in the Customer Summary subsections
In new User Interface, you have the opportunity to link projects, cases, and activities by clicking the additional "..." button
In addition, by pressing the Actions buttons, you can add contact, opportunity, event, task and look up on Google, also send sales quote and invoice.
Customize Listing pages
Customize Listing pages
Using the Customize button, you can change the list of items shown based on your needs.
This button can be found anywhere where you see the items listed in the system such as projects, tasks, leads, accounts, opportunities, contacts, etc.
You can increase the number of items shown per page up to 50.
You can add or remove columns from your list by ticking/unticking the boxes.
You can drag and drop the column to change their sequence.
In order to sort a column in ascending or decending order, use the dropdown called Sort by.
You can save the column size changes and apply the changes made to all users' accounts.
Color Settings
If Colorize option is enabled to your account, you will be able to apply colors to columns and words in your list.
If this option is not enabled, please contact your account manager or support team.
Click on the Colored Icon, and specify the rule whether you can to apply the color to a Raw, Cell or Text and then select the Color.
Created by Aziza Israilova, November 2018
Dashboards
Dashboards
Each module has built in dashboards which includes different widgets with charts and graphical data for customers. The dashboard is fully customize-able with drag and drop, enlarge, narrow, remove and add options.
To add a new widget first you need to save your desired report through the Reporting module.
Go to Reporting, add your report, select columns, summaries, group and create the chart, add it to the module widget and then save the report.
Then go to Settings>>Dashboards>>Dashboard list and customize the dashboard in the correct module. Click "Add Widget", place it to the right location and save.
Created by Aziza Israilova
April, 2019
Deactivate Employee
Deactivate Employee
There are several options to control employees access and update it if necessary.
You can either deactivate, resign or remove employees. Deactivate option disables the access of an employee to the application. However, this is temporary deactivation since the admin and HR manager can activate the employee's access any time. Deactivation doesn't give another chance to add a new employee.
To deactivate an employee go to either Humans, Projects or Users and Privileges>>Employees, click actions and choose "Deactivate". The deactivation function prevents the employee’s access to the account, but all information related to the employee will be kept in the system.
Created by Aziza Israilova,
April 2019
Default Timesheet Reminder
Default Timesheet Reminder
Default Timesheet Reminder is available only for Administrators who enable timesheet reminders for all the users in the system.
You can find it from Settings>>Recurrence Settings>>Default Timesheet Reminder.
Once it is set, every user/employee using the system will receive a notification about their Timesheet entries.
Departments
Departments
Departments section keeps track of departments and their members in your company.
To see departments go to Projects >> Departments New Department
To create a new Department, go to either Project Management or HRMS module and then go to Department section. Click on Add New button and fill in the form. You need to assign members and a department leader to a new department.
A department leader will be able to approve leave requests, expense claims of department members.
Department Summary
This page shows the details of the department such as when it was created, by whom it was created, members of the department and the leader of the department. You can also convert the department summary to a PDF version by click on the PDF icon.
Edit Department
To edit a department, please click on the Actions dropdown in the Department's list and make changes to the department such as changing the department leader, changing the name, description or the start date.
Also, you can remove some of the employees from the department either by unchecking the checkbox or by clicking the remove action. By default, when you remove employees from a department, they are moved to Company Employees department. Note that one employee cannot be a member of two or more departments.
When an employee is moved to another department, the further timesheet entries will be reflected in a new department’s timesheet report. Older timesheet entries will be reflected in old department’s timesheet report.
Department Notes
You can leave some notes to the department you belong to. To do that, please go to Departments section, click on actions dropdown and choose Department Notes. You can make the notes public or private and save.
Delete Department
To delete a department, please go to Departments section and click on the actions dropdown and “Remove”. Once you approve removing an existing department, you will be asked to move department members to another department.
Department Issues
In this section, you can add and keep track of issues related to the department. To create a new issue in the system, click on New Issue button and fill in the form. All members of the department are able to create issues and view existing ones by default.
Dividends Payable
Dividends Payable
A current liability account that reports the amounts of cash dividends that have been declared by the board of directors but not yet distributed to the stockholders.
Documents Overview
Documents Overview
In kpi.com all the files uploaded into the system are stored in the Documents section. This section is divided into separate categories such as My folder, System folder, Public, Shared by me and Shared with me.
My folder section contains all the documents uploaded by the user. These files can also be stored or linked to My Google Documents, so the user will be able to retrieve or upload files to his Google account straight away.
Besides, these files can be shared with any other user in the system or specific group. In order to create this group, go to Actions>>Groups>>Add Group.
Once the group is created, any document can be shared with this group.
System Folder includes all the modules of the system, e.g. Project Management, CRM, Accounting and Finance, etc. For instance, receipts uploaded in Expense claim will be reflected in Accounting>>Expense Uploaded documents.
Backup folder can be enabled by request, where all the files (csv, pdf) can be retrieved. This folder is visible only for the Administrator of the system.
Public folder
Files in Public folder are visible for all the users, including the customers and suppliers.
Shared With me
All the files that have been shared with a user will be reflected in this section.
Shared by me
All the files that have been shared by the user will be reflected in this section.
File Attachments
In order to compose an email, it is 5MBs per attachment file and overall storage of user is 10GBs.
E-mail Integration
Email Integration
Kpi.com supports email integration to keep your mails in one place, to automate ticketing system known as case management, to send emails directly from the system and many more.
To integrate your email click the message icon on top right corner. Choose your email provider whether it is Gmail, Outlook or Yandex or choose "I don't see my email provider". Then fill in the email details.
User Name - your name
Email Address - enter the email address your want to integrate
From Name - enter the name which is shown in emails
Password - enter the email's password
Confirm Password - re-enter the password
Corporate Email - the email will be used system-wise for all notifications and users
Incoming Server Protocol - imaps or imap
Incoming Server Host - enter the host name
Incoming Server Port - enter the port number
Outgoing Server Protocol - smtps or smtp
Outgoing Server Host - enter the outgoing host name
Outgoing Server Port - enter the outgoing server port
Perform SMTP Authentication - check the box to have a more secure integration
Save Copy to Sent Folder - sent mails will be copied in the Sent folder
Default Email Account - if you have set up two or more email accounts, this checkbox will make the email account as the default one.
Active - used to activate or deactivate.
Click save and if the configuration is successful you will be able to go to your inbox, sent mails and draft and manage your folders using the same message button on top right side.
Go to your email account, show the left side menu and click customize to manage folders. Choose your folders and save.
You can share the email with other users in the system. Click share and add the users. The users will have the same access to the email as yourself.
The Delete option will delete your email account from the system.
Created by Aziza Israilova,
April 2019
E-mail Marketing
E-mail Marketing
The Sales>>Marketing section provides mass mailing tools, allowing sending bulk e-mails to your Leads and Contacts.
Mailing List
The Mailing list is used to send e-mail messages to your Leads and Contacts in bulk. To add a mailing list, go to Contacts/Leads section, filter the list such as Leads under the certain campaign, Contacts from certain location etc and click on Add New and choose Mailing List.
Once you create a mailing list, it will take a while for the system to load the list of recipients depending on the number of contacts you had in the list.
You can check the added mailing lists from the Email Marketing>> Mailing list section.
Add Message
To add a message for mass mailing, click on Add New button in Waiting Messages section and choose Mail Message.
Type in the Subject, select a mailing list, choose date and time, from email and write the content of the message.
While writing the content, you can make effective use of personalization attributes which will make the message personalized. If you have templates for the mass mailing, choose from the Choose Template drop-down. You can find more about templates here.
Once the message is ready, you can schedule a time for the message to be sent.
Note that the scheduled time should be at least 5 minutes after the time shown on your computer.
Before scheduling the message, you can send a text message to your own email address to see how the final message looks...
Note that your mass email will contain a link for the recipients to unsubscribe.
Sent Messages
In this page, you can view the statistics about your sent messages such as who viewed, who unsubscribed, how many sent, how many bounced, etc.
If you click on the numbers, you will see the name of the contact who viewed or unsubscribed.
Created by Aziza Israilova,
April 2019
Edit Customer
Edit Customer
To edit the Customer details, please go to Customer Center and click on the Actions dropdown and choose "Edit Client/Customer".
You can also edit the Customer details from the Customer Summary page. Just click on the edit icon shown below:
Once you update the Customer profile, the changes will be saved in all sections for the Customer.
Edit Project
Edit Project
The edit project option is available only to Project Managers, Backup Managers and Administrators.To edit a project go to Projects list, click the actions and choose Edit.
Once you are on the edit page, you can:
Edit project details like the dates, name and description of the project, project status etc.
Remove or add new employees to the project.
Change the employee rates.
Add or Remove backup managers
Created by Aziza Israilova,
April 2019
Edit Task
Edit Task
There are two ways of editing tasks. First is through the actions dropdown in Task listing.
Second is from Task Summary page using "Edit" subsection.
In "Task Edit" form, you can change the task details like Number, Name, Description, Start/End dates, Status and others. After you have completed making the changes, click "Update".
Email Notifications
Email Notifications
You can enable notifications that are sent by the system to your email address (in My E-mail Notifications).
Tick the boxes of the notifications that you want to be sent such as whenever a task is added, a project updated and so on. After selecting the boxes, just click on the Save button.
This feature helps you to be updated about the activities in the system and track the actions of your employees. In order to stop notifications, remove the ticks from the boxes and save.
If you are an Administrator, you have the privilege of enabling Notifications for all users in the system. You can do this by clicking on the Apply to existing users button at the bottom of the page "Company E-mail Notifications".
Email Templates
Email Templates
This section stores all email templates including default and custom templates.
If you want to change the default template's content that is used in the email notifications, search the name of it in the search box and create a copy.
Then you can make changes to the template and update. All further emails will use the new template depending for whom you created it (current user or specific user).
You can create a new template using the Add Email Template button on top. While adding, you need to specify the category whether it is a case template, message center template, invoice template and others.
In order to check how the final content looks, you can send a test email using the new template.
Employee Activation Process
Employee Activation Process
Once a new employee is added to the employees' list, an activation link will be sent to the employee’s email address. To activate the account, the employee should follow the link and activate his/her account.
Click the link to activate the account. It will redirect to the kpi.com welcome page. To access to an employee’s account, set the password.
Double-check the correctness of an email address before sending the activation link. If no activation link is received, it is recommended to check the Spam folder of the mailbox.
Employee Expense Claims
Employee Expense Claims
Employee expenses can be added either from the Accounts module or from the Humans module. Limited users can add employee expense from the Humans module only. To add a new expense claim go to Humans>>Employee Profile>>Expenses and click the plus button.
Enter the employee name. By default your name is chosen.
Enter the report title.
Enter the expense date.
Choose the manager who will approve or reject the expense.
Choose the expense category.
Enter units, costs, taxes. etc.
Click Submit for Approval.
You can also attach receipts to each line item, choose department if needed and upload files. The submitted expense will be sent to the manager as an email notification. As soon as the expense is approved, you will also be notified about it.
Created by Aziza Israilova, April 2019
Employee Profile
Employee Profile
The employee profile on KPI's HR module shows all the information related to the employee like the employment information, personal identity information, payments, bank account information, documents, account information and any additional information available in custom fields.
You can export the employee profile into PDF and edit the details by clicking the edit icon. The edit option is available for HR Managers, Directors and Admins.
The employee form can be customized easily. You can disable some fields, change the place of the fields and add/remove columns.
Employee Self Review
Employee Self Review
Once managers review the appraisal and send to employees for self-review, employees will receive an email notification with a link to view their appraisal. Employees can also log in to their account and view the appraisal in Waiting for Your Review tab of Performance Appraisals section.
Employees should click the appraisal and leave their own review or rate.
Employee-Manager comments are shown as comments history, if the number of comments is more than 3. Employees should complete the review and click the Review and Submit to Reviewer button.
Managers then, can close the appraisal, or review and send to employee until the agreement is reached.
Created by Aziza Israilova, April 2019
Employee Status
Employee Status
Pending Employees
If employees have not yet activated their account after you added them to the system, their status is Pending.
Active Employees
Once the employee activates his/her account by setting the password, the status becomes Active.
You can make the active user's account as "no access" user. To do that, click on the actions dropdown and choose "Revoke Access".
No Access
If you add no access users, their status is No Access. In order to learn how to add "no access" users, please refer to this article: https://wiki.kpi.com/document/employees/employees
You can always activate the account of no access users who will then have access to the system from actions dropdown>> Activate button.
The user will receive an email notification to activate his/her account.
Inactive Employees
If you deactivate the employee, he/she will not have access to the system and the status becomes Inactive.
You can also activate the profile of Inactive users by choosing the "Activate" option from the actions dropdown. In order for the user to be able to set password, you need to send activation link from by clicking on the "Resend Activation link" option.
Resigned Employees
If you terminate the employment of a user, the status becomes Resigned. The employee will not have access to the system anymore and this gives you an opportunity to add more employees (increases license).
Employee's Documents
Employee's Documents
The Documents section of the Employee Profile enables employees to upload work-related documents and files to the system.
To upload a file to the system, click the Plus icon on top of the page, click Upload then select from the following options:
Upload File to kpi.com storage
Link to my kpi.com documents
Upload to my Google Documents
Link to my existing Google Documents
Upload File to kpi.com Storage
Select Upload File to kpi.com storage
Click Drop files here or click to attach
Locate the file you want to upload
Enter a brief description of the file
Click Save & Close.
Link to My kpi.com Documents
Select Link to my kpi.com documents
Click Drop files here or click to attach
Locate the file you want to link
Enter a brief description of the file
Click Save & Close
Upload to My Google Documents
Kpi.com’s Documents section is integrated with the Google Documents, so that users may retrieve existing documents directly from the Google Drive. They can make changes and save the changed document as new to the Google Documents without leaving the application.
Before uploading any files to the Google Documents, you need to authorize the Google Documents.
To authorize the Google Documents, click OK. Then Google My Account notification page appears. Click Access Granted to complete the authorization process.
If Google My Account notification page is not displayed automatically, check your browser settings. Disable Block Pop-Up windows and repeat the steps again.
Employees
Employees
Employees section stores the list of your employees' personal and work related information.
Add Employee
In order to a add more users into the system, click on the New Employee button.
Fill in the employee information such as first name, last name and email address.
Note that employee email address should be valid one, since the activation link will be sent to that email ID.
Inactive Employees (No access users)
You can also add inactive employees who will not have access to the system. Their employment information will just be recorded in the system.
Adding inactive employee is done the same way as active employees.
Click on the New Employee button and fill in the form, please check the "No Access" box.
If this option is not enabled in your account, please contact your account manager.
Activating Account
Once you have added an employee, he/she will receive an email notification on activating their account. When they press the link provided in the email, they will be asked to set their password in the system.
Their username will be their email address.
End of Service Gratuity
End of Service Gratuity
End of Service Gratuity is a benefit payment for employees when they resign from their work or when their job contract ends. This payment is practiced in some countries like United Arab Emirates, Saudi Arabia, Qatar and so on.
In this article, End of Service Gratuity calculation will be discussed according to the United Arab Emirates Labor Law.
If your company is located in United Arab Emirates, the End of Service settings are already set up according to the UAE Labor Law.
There are two types of Contracts: Limited and Unlimited Contract.
If the employee has the Contract Start and End dates set in their profile, then the employee is said to get an end of service payment based on the limited contract calculations. If the employee doesn't have the Contract Start and End dates set in their profile, then the system will recognize them as Unlimited Contract employees.
The system calculates end of service gratuity either by Resignation or by Termination. Let's calculate the end of service gratuity of an employee who has a limited contract.
If the employee has completed more than 5 years of continuous service with your company and has resigned, then for the first 5 years he/she is eligible for 21 day’s basic salary and for service above 5 years, he/she is eligible for 30 day’s basic salary for every year of service.
Calculation:
Hire Date: Jan 01, 2012
As of Date: Dec 15, 2017
Basic Salary: 5000 per month
Basic Salary per Day: 5000*12/365 = 164.3836
Total Number of Days Worked: Hire Date - As of Date = 2176
Total Number of Years Worked: 2176/365 = 5.96164
21 Days Basic Salary: 164.3836*21 = 3452.055
30 Days Basic Salary: 30*164.3836*(5.96164-5) = 4742.353 (for above 5 years).
Total Gratuity: 5*3452.055 + 4742.353 = 22002.63
The end of service calculates the gratuity total according to the reason you choose and date you choose. Other calculations are made according to the End of Service Settings in your account using the same formula.
Resigned Employees
If the employee is already resigned, the gratuity can be added from the End of Service Gratuity page. In order to add it, the employee should have the Resignation Date set in his/her profile.
Once the End of Service Gratuity is added for the resigned employee, a single payrun will be automatically added in the Single Payrun list with a draft status.
Created by Aziza Israilova, April 2019
ESS Users
ESS Users
ESS - Employee Self Service. ESS users have limited user role and their subscription license costs much less than full users because the user permissions of ESS users cannot be edited. Their access level is set and cannot be changed.
ESS users have access to their employee profile, their own tasks and projects, cash advances and payslips.
They can add leave requests, expenses, cash advances and enter timesheets.
Exporting to Excel and PDF
Exporting to Excel and PDF
The export option is available in almost all lists. The option is available at the end of the list (bottom right-hand side).
The list shows up to 200 items per page. You can view the number of pages and the total number of items in the bottom of the page.
If you export the list from the first page, the system export all items. If the export is clicked from 2,3, and further pages, the system export all next items starting from the page you are on.
For example, I have 377 companies and when I export the list from the first page, the Excel and PDF shows all 377.
However, when I go to the second page and export the list, the system export all next items (remaining 177).
Thus, if you would like to export all items, then you need to go to the first page and then click Export.
Export Limit
If you list includes more than 1000 items, you cannot export all items into one Excel of PDF because each exported file can have up to 1000 items.
For example, I have 2000 companies and I want to export all. So from the first page, I can export 1000 and then I go to the page number 6 and export the rest 1000 items.
You can request the support team to increase the export limit to ease your processes. Please contact support@kpi.com.
FIFO method of inventory valuation
FIFO method of inventory valuation
Kpi.com Accounts uses the first-in, first-out (FIFO) method of costing inventory. This method assumes that oldest items are sold first. The cost of the oldest item is assigned to the first item sold, and the cost of the newest item is assigned to inventory. The value of the inventory is close to its actual replacement cost.
You might purchase items at a certain price, and then purchase more of the same items at a different price. The FIFO method treats items that are purchased at the same price as a layer of inventory. Although the sales price is the same for all the layers, the cost of goods sold is determined from the purchase price of the first layer until all its items are gone, and then from each succeeding layer until all its items are gone.
When prices are going up, your cost of goods sold is lowest with FIFO, because you take the oldest, and therefore least expensive, items out of inventory first. Your income is higher, although your taxes are higher as well.
Cost of inventory can also be accounted for in the following ways:
Last-in, first-out (LIFO) This method assumes that newest items are sold first. The cost of the newest item is assigned to the first item sold, and the cost of the oldest item is assigned to inventory.
Weighted average This method uses an average cost. Item cost is assigned by dividing the total cost by the number of items.
Filter
Filter
Filter is an important tool to organize and sort items in your lists. You can find Filter button on any page at the top side.
You can filter by main columns like period, assignees, client, status, priority and etc.Once you select the needed columns, you can save this filter and apply it immediately. If you check the box "Default", your filtered list will show up everytime you open the page. You can always switch to the normal list or other filters from the dropdown on top of the page.
In order to remove a filter, go the main Filter pop-up, choose the filter from the saved filters dropdown and click on Delete. If you want to modify your saved filter, choose the filter and click on Reset. Make the necessary changes and Save.
Fixed Assets
Fixed Assets
At kpi.com, you have the ability to keep track of your company's long-term assets, like buildings or machinery, and the system will automatically figure out how much they decrease in value over time using a simple and standard method. Plus, if you sell any of these assets, you can record that in the system, whether you sold them on credit or for immediate cash, and it will be accurately reflected in your financial reports.
What are Fixed Assets?
Fixed assets are items that a company acquires with the intention of using them for a sustained period in its operations, rather than reselling them in the short term. These assets are essential for the company to carry out its business activities efficiently. As they are used over time, fixed assets generally lose value, a process known as depreciation. Examples of fixed assets include real estate properties like office buildings, manufacturing equipment, delivery vehicles, and computer hardware. These assets form the backbone of a company's operations, enabling it to produce goods or provide services.
How to add Fixed Assets in the Accounting software by KPI?
To add a fixed asset, go to Accounts>>Fixed Assets and click the "plus" button. From Category select the Fixed Asset Category, such as Furniture & Fixtures, Equipment, etc. If you cannot locate the right fixed asset category, then go to the Chart of Accounts, and add the right category Fixed Asset account.
Fixed Asset Code is automatically generated and comprises of suffix + four digit number. You can input any combination of suffix and digits in the pattern provided.
Fixed Asset Cost is a historical price of a fixed asset in company's base currency. Thus, if you set up your company with kpi.com, and your company base currency is USD, any number in Fixed Asset Cost is also denominated in USD.
Fixed Asset Purchase Date is the date when a Fixed Asset is purchased. If a purchase date of a fixed asset is after your company conversion period, and if Calculate Depreciation is enabled, the system calculates depreciation expense and accumulated depreciation expenses.
Useful life - is entered in years, which is the depreciation calculation used as the denominator. Useful life usually refers to the duration for which the item will be useful (to the business), and not how long the property will actually last. Many factors affect a property's useful life, including the frequency of use, the age when acquired and the repair policy and environmental conditions of the business. The useful life for identical types of property will differ from user to user depending on the above factors, as well as additional factors such as foreseeable technological improvements, economic changes and changes in laws.
Residual Value - is subtracted from the cost of the fixed asset in calculating depreciation expense throughout the useful life of the asset.
How much a fixed asset is worth at the end of its useful life.
If you are a business owner, let's say your desk has a useful life of ten years. How much the desk is worth at the end of ten years (its fair market value as determined by agreement or appraisal) is its residual value (also known as salvage value).
Purchase Invoice - through this link you can add this fixed asset to purchase invoice form.
Purchase Order - through this link you can add this fixed asset to purchase order form.
Account - field completes the required input fields and it is related to an account from the chart of accounts. This field is the account that the fixed asset financed by. You need to select one account if you do not link this fixed asset to Purchase Order or Purchase Invoice.
After entering all fields and clicking save, the fixed asset is created and it is saved in the system.
Edit Fixed Asset
The edit option for Fixed Assets is available in the actions dropdown from the list.
If the fixed asset has transactions related or depreciation is enabled to the fixed asset, some of the fields become disabled to edit since the modification affects the reports and transactions.
Example for Purchase Date After Conversion Date
For instance: a company purchases machinery for $130,000 in February 2024, intending to use it for 10 years, and expects it to have a residual value of $10,000 at the end of its usage. If the company's financial records begin in January 2024, then the following entries would be made in the accounting books:
Date
Account
Debit ($)
Credit ($)
February 2024
Fixed Asset
130,000
GL Account (or Accounts Payable)
130,000
Monthly
Depreciation Expense
2,000
Accumulated Depreciation
2,000
In a case where the purchase date was before the conversion date (for example, December 2023), the entries would look like this:
Date
Account
Debit ($)
Credit ($)
December 2023
Fixed Asset
130,000
GL Account (or Accounts Payable)
129,000
Accumulated Depreciation
1,000
Glossary of Terms:
Term
Definition
Fixed Asset
A long-term tangible piece of property or equipment that a firm owns and uses in its operations to generate income.
Depreciation
The accounting method of allocating the cost of a tangible asset over its useful life.
Accumulated Depreciation
The total depreciation of an asset that has been charged to expense since the asset was acquired.
GL Account
General Ledger Account, used to record all transactions of a certain type.
Accounts Payable (AP)
Money owed by a business to its suppliers shown as a liability on a company's balance sheet.
Debit
An accounting entry that results in either an increase in assets or a decrease in liabilities on a company's balance sheet.
Credit
An accounting entry that results in either a decrease in assets or an increase in liabilities on a company's balance sheet.
Residual Value
The estimated value of an asset at the end of its useful life.
Useful Life
The estimated period over which an asset is expected to be usable by a business.
Have You Experienced the Full Potential of kpi.com? Stay on top of your finances with real-time access to your general ledger, balance sheet, profit and loss, and cash flow statements. kpi.com offers monthly, quarterly, or annual management financial reports produced to local and international financial reporting standards.
A Fixed Asset is something that a business owns and uses for a long time, like buildings, machines, or computers. It is not meant to be sold quickly.
Why are Fixed Assets Important?
Fixed Assets are important because they are needed for a business to operate and make products or offer services. They are like the tools and space a business needs to work.
What is Depreciation?
Depreciation is when the value of a Fixed Asset goes down over time. For example, a new car loses value as it gets older and is used more. In business, this loss in value is tracked for accounting purposes.
How is Depreciation Calculated?
There are different ways to calculate depreciation, but a common way is the Straight-Line Method. This divides the cost of the asset by the number of years it is expected to be used.
What is Residual Value?
Residual Value is how much a Fixed Asset is worth at the end of its useful life. For example, after using a machine for 10 years, it might be able to be sold for a certain amount. That amount is the Residual Value.
How Do I Record Fixed Assets in Accounting?
To record a Fixed Asset in accounting, you need to make entries for the cost of the asset, its depreciation, and any money received if it is sold. This keeps the financial records accurate.
Foreign Currency Bank
Foreign Currency Bank
If you have a foreign currency account and if you want to manage your transactions in that currency, then you are welcome to use the Bank Foreign Currency feature in the application.
To enable the feature, go to Settings>>Accounting>>Financial Settings and check "Multiple Currency for Bank Accounts" and save the changes.
Then you can add your foreign currency bank from Accounts>>Accounting>>Bank Accounts.
While adding the bank details, you will have an option to choose another currency from the Currency field. So choose the currency (EUR for example), enter the as of date amount in that currency and save.
So for any transactions made in that bank currency(EUR), the bank will show up as an option for payments.
Your bank statement shows the balance in both your base currency and foreign currency (EUR). You just need to check the box "Show in base".
Created by Aziza Israilova, November 2018
Foreign Currency Payrun
Foreign Currency Payrun
Many international companies need to issue payruns in foreign currencies. By default in kpi.com, you can generate payruns in your country's base currency. To issue the payruns in other currencies, go to Settings>>Payroll>>Employer Settings and check the box "Enable Multi-Currency for Payroll".
Currencies
The foreign currencies should be set up under Settings>>Accounts>>Currency Rates.
Employee Payroll Settings
Employees who receive their payruns in a foreign currency should have the right currency set in their payroll profile.
Single Payrun
After you have set up all the currencies, you will be able to generate payruns in other currencies.
For group payruns, add the employee payroll groups who need payruns in a foreign currency from Settings>>Payroll>>Payroll Groups.
Full Users
Full Users
Full user access requires a subscription license. Full users are defined by their user roles assigned under Humans>>Employee profile. There are several user roles available by default in the system such as Administrator, Director, Accountant, HR Manager, Sales Manager, Sales Person, Customer Service Representative, Member etc. If a user is assigned any of these user roles, then he/she is considered as a full user.
Each role's permissions are listed under Settings>>Users and Privileges>>Permissions. As an Administrator you can create more user roles as custom user roles. Custom User roles are also attached to full users. Any user role listed under Permissions can be changed by ticking and unticking the related permissions.
Administrator is a power user in the system. The user with this role has access to all features and is allowed to delete, edit and view.
Director is a next power user after the Administrator. His/Her user role is restricted to view and edit in many cases. However, this can be changed from Settings>>Users and Privileges>>Permissions.
Accountant is a full user under Accounts module.
Sales Manager is a full user under Sales module.
Global Payroll Settings
Global Payroll Settings
The Global Payroll Settings helps you to set up payments and deductions for employees who have the same payment settings.
Go to Settings>>Payroll>>Global Payroll Settings and click the plus icon to add new.
Choose the Type (Department or Position), payroll group, employees, and go to Payment Settings.
Choose the Fixed or Fixed with Overtime, then set the Basic Salary amount and select the payment currency.
If the employee is paid for overtime work, specify the overtime payment settings.
Payment/Deduction category is for other allowances and deductions that are included in employee payrun.
After you have filled up all the information, click save. The information you have saved here will also be shown under each employee's profile.
Created by Aziza Israilova
March, 2019
Goods Delivered Notes
Goods Delivered Notes
Goods Delivered Notes are created from Sales Orders which are not invoiced yet. When you create a sales order, no financial transactions will be created in your books. However, when you ship the products ordered by your client, the stock transactions will be created in your books.
Go to a Sales Order view page the status of which is either Sales Order or Partial Shipped. Go to the Pick List of using the Options button.
Fill in the form with the shipping information. Click Save. You will see the Goods Delivered Notes created from the Sales Order which you can then convert to a Sales Invoice. The GDN transaction can be found from Statements>>Journal Report.
Group Payrun
Group Payrun
The group payrun is designed to create payruns for group employees. Go to Payroll>>Group Payrun to pay salaries to your employees.
Type - Group Payrun or Project Payrun. If you choose the project payrun then you will need specify the name of the project in the next field and all the assigned under that project will be shown.
Payroll Group - choose the group which you have created in Settings>>Payroll>>Payroll Groups.
Period - choose the month the payrun relates to.
Process Date - the date which the payrun will be processed.
Frequency - daily, weekly or monthly gayrun.
Payment Method - choose the options available under the payment method.
Approver - type the name of the manager who can be either Admin, Director or HR manager.
Send Email - if you check this box all employees will receive an email notification with their payruns attached.
The table will populate the name of the employee under the group chosen and their payments/deductions. A click on the Allowance will show the details of the payments. The same applies to Deductions and Expenses.
You can save the payrun as draft, submit or save and approve.
Created by Aziza Israilova
March, 2019
How to add organization chart
How to add organization chart
The organization chart is available under Humans. In order to set up an organization chart you should have Departments. To add departments go to Settings>>Humans>>Departments and click plus button.
While adding the department assign employees who work under that department and set parent department if needed and save.
You can also set a parent department right in the organization chart. Click the more option in the department name and click "Set as Parent".
Created by Aziza IsrailovaApril 2019
How to Change Account Details at kpi.com
How to Change Employee Account Details at kpi.com
To change account details, go to the Humans >> Employee Profile. By pressing Edit button, you can change your personal, contact, address and bank account information. You can also upload your profile photo and upload your documents.
The information available under your profile is available for HR users, Administrators and Directors.
The employee profile is integrated with Payroll too. So all the payment related information will also be available under Payroll.
Created by Aziza Israilova, November 2018
How to convert Sales Quote to Order, Invoice & Project
How to convert Sales Quote to Order, Invoice & Project
Once the Sales Quote is in open status, and the client has approved Quote, you can record that by clicking Client Approve.
When the Quote is approved by the client, you can convert your Quote to Sales Order, Sales Invoice and Project using approprate buttons.
If client has rejected the Quote, you can change the Quote terms and send the Quote back to client later.
When you choose a Manager to approve a Sales Quote and even after the Manager has approved the Sales Quote, you cannot convert it to Order.
How to make Journal Entries for Retained Earnings
Retained Earnings Journal Entry
The Retained Earnings figure lies in the Share Capital section of the balance sheet. It is an important financial term that reflects the portion of net income that a company retains after distributing dividends to shareholders. The journal entries associated with Retained Earnings ensure that corporate accounting records are updated appropriately at the end of each accounting period.
Understanding Retained Earnings
In essence, Retained Earnings represents the accumulated profits that a company has kept over time. This account is part of the Share Capital section of a company’s balance sheet and can be used for reinvestment in the business or to pay down debt.
Journal Entries for Retained Earnings
At the end of each accounting period, businesses close out their revenue and expense accounts, summarizing them into a temporary account known as the Income Summary Account. The net balance (revenue - expenses) of this account is then transferred to Retained Earnings through closing entries.
If the company made a profit, Retained Earnings account will be credited (increased).
If the company incurred a loss, Retained Earnings account will be debited (decreased).
How Retained Earnings are calculated
Suppose Company XYZ has the following revenue and expenses for the year:
Account
Amount (USD)
Sales Revenue
10,000
Cost of Goods Sold
4,000
Operating Expenses
2,000
Net Income = Sales Revenue - Cost of Goods Sold - Operating Expenses = $10,000 - $4,000 - $2,000 = $4,000
The journal entry to transfer the net income to Retained Earnings would be:
Account
Debit (USD)
Credit (USD)
Income Summary
4,000
Retained Earnings
4,000
The Retained Earnings account is credited to reflect the addition of the net income for the year.
Have You Experienced the Full Potential of kpi.com?
Stay on top of your finances with real-time access to your general ledger, balance sheet, profit and loss, and cash flow statements. kpi.com offers monthly, quarterly, or annual management financial reports produced to local and international financial reporting standards.
A: Retained Earnings are the accumulated net income of a company that is retained within the business rather than distributed to shareholders as dividends.
Q: How are Retained Earnings calculated?
A: Retained Earnings are calculated as the beginning Retained Earnings plus Net Income minus Dividends paid during the period.
Q: What is a journal entry for Retained Earnings?
A: The journal entry for transferring net income or loss to Retained Earnings involves debiting the Income Summary account and crediting (for net income) or debiting (for net loss) the Retained Earnings account.
Q: Is Retained Earnings an asset?
A: No, Retained Earnings is not an asset; it is part of the equity section of the balance sheet, representing the amount of net income retained in the business.
Q: Why are Retained Earnings important?
A: Retained Earnings are important as they provide insight into how much profit a company has been able to retain for reinvestment or to strengthen its financial position. This can be crucial for growth, reducing debt, or weathering future financial challenges.
Q: Is Retained Earnings a debit or credit?
A: Retained Earnings is a credit balance account. It increases with a credit entry when the company earns profits and decreases with a debit entry when the company distributes dividends or incurs losses.
Scenario
Effect on Retained Earnings
Debit or Credit
Company earns profits
Increases
Credit
Company distributes dividends
Decreases
Debit
Company incurs losses
Decreases
Debit
Import Manual Transactions
Import Manual Transactions
To import your Manual entry transactions, open Accounting >>Transactions>>Manual transactions tab
In the following form click on CSV file and download a Sample XLS file.
In excel file you should fill out the mandatory fields such as Narration, Date, Reference, Account code, Debit and Credit. Based on your preference you can fill out others.
To import manual transactions successfully you should follow these rules:
1. There must be only one value for each transaction Date, Reference and Narration.
2. Sum of Debit and Credit amounts in each transaction must be equal.
3. Chart of account code must be in the system.
4. Date format in Excel must be similar with date format in your kpi.com account.
After finishing filling Excel sheet, you must save it in CSV format to import in kpi.com.
The system will provide you with imported and not imported manual transactions’ statistics through email.
Import tasks from MS-project
Import tasks from MS-project
You can import your project from three subsections of the Project Management module: from Tasks list, from Projects list or from the Gantt chart, but Gantt chart is not yet available in the new user interface.
Click on the Import button and then MS project file.
Then, you need to choose a file to import and select to which project you want to import your tasks by Select Filedropdown. Note that only .mpp and .xml files exported from MS Project are allowed to be imported. Also, there is a box called Import tasks as billable,which you need to tick, if you need to invoice your customers based on task worked hours
After selecting a project, click on Import and wait until it imports those tasks from MS Project file. The tasks will appear in the Task list.
Importing Customer Accounts
Importing Customer Accounts
In order to import CRM Accounts (or Companies), Contacts, Leads or Opportunities, click on the Import button on top of the list.. Note that the file should be in a CSV form. You can also download the sample file to view how the import file should look like.
After you have uploaded, you will be asked to match the columns of kpi.com with your file's columns such as: account name, account type, email address etc.
Duplicate Action
If your file has duplicate accounts with the same account name or email, you need to choose Skip option to avoid duplicates.
If you want those duplicates to be aggregated to one account, then you need to choose Overwrite option.
If you want those duplicates to stay as they are, you need to choose Clone option.
Once you have done matching and chosen the duplicate action, you can start importing the accounts. It may take a while for the system to finish the importing process depending on the size of your file.
In order to see the imported items in the system, please refresh the page.
You will be notified about the number of accounts imported in an email sent by the system. You can also view the status of the import from Settings>>System Logs>>Import logs.
Created by Aziza Israilova, April 2019
Importing data into kpi.com
Importing data to kpi.com
Import option is available in most sections of kpi.com and the file format for importing data is .csv in many cases. For tasks import MS Project file is required and for Bank Statements .ofx is also supported. The new user interface supports the vCard files, too.
You can import Employees, Leads, Contacts, Companies, Products and Services, Bank Transactions, Tasks and more.
In the new user interface the import button is available on top of each section:
The sample .csv file is available for downloading which helps you to view how the format should be in order to successfully upload your data.
If your data is in an excel file, you need to save it as a .csv file first.
Then you can upload the file. After you have uploaded the file, the system will ask you to map the columns of your file with the system's columns.
Once you have matched all the necessary columns, save it. The file items will appear in the list after some seconds. The upload time depends on the size of your file. The bigger the file, the longer it will take.
Upon the completion of the import, you will receive an email notification about it.
You can also track the upload process from Settings>>System Logs>>Import Logs:
Using the Log File you can find out why some of the items were not imported. Using the instructions in the log file, you can correct the file and upload again.
If you still need more assistance on uploading files, please contact Support Team through support@kpi.com.
Created by Aziza Israilova, April 2019
Importing Employees
Importing Employees
You can import employees either from Humans, Projects, Payroll or from Users and Privileges Settings. The way of importing is the same in all modules. So let's go to Humans>>Employees and click on Upload icon. Choose the file which contains the list of your employees. The file format should be .csv. You can also download the sample file to see how the import file should look like.
After you have uploaded, the system will ask you to map the file columns with the system columns.
You can check the status of the import process from Settings>>System Logs>>Import Logs.
The logs shows the date the file was uploaded, the number of requested items to be uploaded, imported and rejected items, skipped and overwritten items as well as the rejected file to see the reason why the items were rejected.
Created by Aziza Israilova, April 2019
Incidents
Incidents
There can be unplanned events that happen to employees during the work time or when the employee is employed in your company. Such events may result in but not limited to exposure, damage or illnesses. In order to record such incidents that happen to employees, go to Humans>>Employee Profile>>Incidents section and click the plus button to add new and fill in the form.
When you choose the related employee name and save the incident, it will be available in that employee's profile. The status field helps you to track whether the incident is new, under progress or resolved.
Created by Aziza Israilova, July 2019
Intercompany Purchases
Intercompany Purchases
Add parent/subsidiary company as a Supplier
Logic of adding a supplier as a subsidiary is the same as adding customer as the subsidiary.
In adding supplier, you would need to choose subsidiary from the subsidiary field, fill required fields and save it. Once you have subsidiaries as a supplier you can start purchasing services and inventory items.
Creating intercompany Purchase invoice
Select the Supplier related to a subsidiary company and choose the right currency, which is limited to the base currencies of the parent and subsidiary company.
Once a purchase invoice issued by a parent company, it will be listed in Sales Invoice listings page of the child company with "Pending" status.
Intercompany Sales
Intercompany Sales
Learn what Intercompany Sales are and how you can easily reflect them with the Accounting solution by KPI.
What are Intercompany Sales?
Intercompany sales are transactions that occur between two or more entities of the same corporate group. This means that a parent company and its subsidiaries, or different subsidiaries owned by the same parent company, are involved in a business transaction with each other.
These transactions can include the sale of goods, services, or assets from one entity to another within the same corporate group.
What are reasons for Intercompany Sales?
Intercompany sales are common in large corporations that have multiple subsidiaries, often operating in different geographic locations or in different industries. The objective of such sales may vary and can include optimizing supply chains, taking advantage of tax structures, or reallocating resources and goods within the corporate group.
How to reflect Intercompany Sales on KPI?
To conduct intercompany sales, which could be between subsidiaries from bottom to up sales, from the parent company to subsidiaries or vice versa, you would need to add a customer and relate it one of the companies in the network.
Add subsidiary/parent companies as a Customer Learn more about how to add Subsidiary companies here.
In "Adding a Customer", you would have an additional field “Subsidiary”, which is visible only if the Multi-Company feature is enabled.
In order to relate a customer to a subsidiary, you would need to select it from the list of active subsidiaries in your company. After you have the subsidiary as a customer you can start selling services and inventory items. (Note: Product Group and Assembly items cannot participate in intercompany sales).
If the items you are selling to your subsidiary are not listed in that company's Products/Services listings page, those items will be automatically created in the child company's account.
Issue Management
Issue Management
Issue Managementis a section that keeps track of list of problems related to the projects or issues occurred during the project implementation. On this page, resolvers and managers can add new issues to the list or remove the existing ones while through the Actions dropdown, the issue details can be viewed and edited. The list can be exported to PDF and Excel using the feature buttons below the screen.
Add Issue
To add a new issue to the list go to the Issues subsection and click the New Issue function located on the top menu. You need to fill in the appeared form and click Save & Close.
View Issue Details
Issue details can be viewed through the Action dropdown of issue list. You can see the summary of the issue, edit the details and leave issue notes on this page.
Remove Issue
To remove an issue from the list, click the Remove option in the Actions dropdown of issue list.
Items Table
Items Table
Most of the accounting transactions show the items table where users can insert inventory items, assembly items or services they are going to sell or purchase.
While adding the line items, all the saved products/services will be populated when you type in either the number of the item or the name of the item. Then you can choose the item from the populated results. Other details will be automatically filled up by the system like description, price, unit of measurement (U/M), sales accounts and so on.
All fields are editable there. You can change the description, price, quantity and sales account. You can add discount and tax if applicable.
By default there are 5 line items shown, if there are more than 5 line items which you would like to add, the system will add more lines once you fill the last line.
There are also delete and add icons to the last column.
The drag and drop option is available to change the order of the items.
The PDF version of the form also shows the same order you see in the web form.
Created by Aziza Israilova,
December, 2018
Landing Cost
Landing Cost
The landing cost is the total price of the shipped product. It includes the product's price and other fees like transportation, duties, customs etc. The landed cost is linked to purchase orders while receiving products.
Add the purchase order from Accounts>>Purchase Order section and approve it.
Then create an expense which you will use as the landed cost in the purchase order. While adding the expense, choose the purchase order number you want to link it to under Show Additional Fields.
After the expense is approved, go to purchase order summary and click receive. Choose the allocation type under Related Expenses. You will see the allocated costs. Click save. The average cost of each item will change accordingly.
You can view the allocated expense from Accounts>>Statements>>Journal Report.
Created by Aziza Israilova,
April 2019
Leads
Leads
Leads are your prospects or potential customer accounts at kpi.com. You can add your leads or import them from a .csv file.
To add a lead go to Sales>>Leads section and click on plus button and choose either Lead, Quick Add or Multiple Leads. The Lead form opens on the lead information to fill in. Quick Add opens only necessary fields while the Multiple Lead allows you to add two or more leads at a time.
Leads can be imported from .csv file to save your time. More information about the import option is discussed here.
Created by Aziza Israilova,
April 2019
Leads, Opportunities and Cases
Leads, Opportunities and Cases
Leads are contacts of your potential customers. This is normally the first step when a contact is registered in the CRM Tool.
Leads that show interest in your offer are usually converted to Opportunities. When a Lead is converted to an Opportunity, Account and Contact records are created in the CRM.
Opportunities are deals with your customers.Opportunities have different stages of deal process such as: Needs Analysis, Closed Won, Closed lost to competition, Value proposition and so on. An can be converted to a project and or to a sales quote.
Cases are the questions and issues raised by your clients. Therefore, cases are assigned to responsible employees to deal with the client requests.
CRM cases is usually called a ticketing system. Once a case is resolved or closed, the client will get an email notification that their case has been resolved/closed.
When you set up an email in the system, Message Center will receive emails from different senders. If the sender's email and contact name is not recorded in the system, the senders contact details will be automatically recorded as a lead in the CRM Leads Section.
Leave Allowance
Leave Allowance
Each leave reason involves a specific number of days allowed. You can set the allowance days from Settings>>Humans>>Leave Allowances page and click the employee name. The page shows all the leave reasons and related allowances. Set the allowances and click save. You can also view how many days were left from the last year. You can add them to the current year by ticking the option called "Add Last Year Remaining".
Created by Aziza Israilova, April 2019
Leave Encashment
Leave Encashment
Leave Encashment is a payment allowance for the leaves taken by money type. Leave Encashment calculation can be set up in Settings>>Payroll Employer Settings.
After the changes are saved in the settings, the leave encashment will be added as a payment category in the employee payrun for the period the leave was taken. For example, an employee is allowed to take 30 days as an annual leave, however, 20 days are taken as the money type which means employee is still working for those allowed days.
Once the Money type leave request is approved, the employee will be entitled for the leave enchashment in his/her payrun for that month.
Go to Payroll>>Single Payruns and add a new payrun for the employee for the same month when the money type leave was taken.You will see "Leave Salary" payment category in the list of payments.
Created by Aziza Israilova, April 2019
Leave Reasons
Leave Reasons
Leave Reasons are available at Settings>>Humans>>Leave Reasons page. On the same page, you can add more leave reasons too.
The balances for each leave reasons can be set up by editing the Leave Reason from the actions dropdown.
After the days have been set to the leave reasons, the balances show up in the add Leave Request form too, so that the employee knows how many days are allowed per year and how many days are left/taken.
Adding and Editing Leave Reasons
Name - leave request name
Short Name - the name which appears in the chart
Description - leave request description
Color - the color of the bar in the leave requests chart
Leave Unit - daily or hourly type leave
Active - active or inactive leave. If you make it inactive, the employees will not be able to take such leaves
Day offs between leave period - if the leaves taken inlude weekends, you still count them as leave or not
While applying for leave, exceed leave balance:
Do not allow - the system will not allow to take leave requests more than what is allowed.
Allow as paid - if you allow exceeding the leave allowance, you decide that the taken leave will be paid.
Allow as non-paid - if you allow exceeding the leave allowance, you decide that the taken leave will be non-paid.
This Leave Applicable For - the leave can be applicable for specific employees, for example, specific department employees, specific positions, user roles or gender. You can also choose employee names who the leave is applicable for.
Leave Entitlement - this is the yearly allowance, meaning how many days are allowed to be taken as leave.
Created by Aziza Israilova, October 2019
Leave Requests
Leave Requests
This page shows all pending leave requests either waiting for your approval or for department leader's approval.
You can quickly view the leave requests and approve them all with one click.
So click on the "Approve All" and choose period, a department and an employee. The "View Result" button shows you leave requests for the selected filter. You can change leave type, leave allowance and approve.
Created by Aziza Israilova, April 2019
Locations
Locations
The Locations section contains all information connected to the addresses and locations of your company. Moreover, the locations list can be customized according to your desire to make it more convenient for your usage by clicking Customize on the top-right.
Add a New Location
To add a new location, go to Locations section and click New Location that is located on the top menu. In the form, choose country and state from the dropdown, write your e-mail address, phone number and fax details.
Edit a Location
You will find Edit Location function from the Action dropdown in Locations list. You need to implement changes and click Update.
Manual Transaction Overview
Manual Transaction Overview
If you need to make an adjustment to your accounts, change customer, supplier balances, allocate costs across projects, then Manual Transaction at kpi.com is the right feature you need.
All you need to enter the double entries in the manual entry form.
Go to Accounts>>Transactions>>Manual Entries and click on plus icon to add new. The fill in the form:
Narration – short name of the transaction.
Date – post date of the transaction.
Reference – enter reference if needed.
Memorized Transaction – check the box if you need to have this transaction as a template next time you create a new transaction.
Currency – choose the transactions currency.
Recurring - the manual transaction will be created on a recurring basis.
Then go to table and enter accounts that should be debited and credited. Enter the amounts, description per each line, project and departments if needed and click Post or Save as Draft.
If you want to receive a payment from the customer account, choose Accounts Receivable under the account column and type the customer name under the Customer column. The same applies to Supplier transactions, in that case, you will just choose the Accounts Payable
Created by Aziza Israilova, April 2019
Mark PO as Open
Mark PO as Open
Once the Purchase Order has been approved you can send it to Supplier from the Purchase Order view form or change its status to "Open" manually. In order to change the status to "Open", go to Purchase Order listing page, click on the Action menu and click on Mark as Open.
You can change the status of the Purchase Order from summary view as well. Go to summary view of Purchase Order and click on "Approve & Email" or choose "Mark as Open".
Created by Aziza IsrailovaApril 2019
Meeting Minutes
Meeting Minutes
The Meeting Minutes is available in the Workspace section. It is enabled to customers based on their request.
Using the Meeting Minutes, you can record the details of the meetings held by your company.
Meetings Minutes can be added using following steps Humans >> Meeting MinutesAdd Meeting Minutes
To add a meeting, click on the "Add Meeting" button on top of the page and fill in the form.
You can specify employees who attended the meeting and those who were absent.
You can also create several agendas by clicking "Add New Agenda" link.
Copy Meeting details
You can create a meeting by copying some details from another meeting. To do that, click on the actions dropdown and choose "Copy to New".
Upload Files
Uploading files is available in the left side of the Meeting Minutes form or the Meeting summary page.
Edit Meeting
To edit a meeting, click on the actions dropdown and choose "Edit Meeting". The Edit option is available to the Administrator and the person who created it.
Delete Meeting
To delete a meeting, click on the actions dropdown and choose "Remove".
Move Inventory to Another Warehouse
Move Inventory to Another Warehouse
When the Multiple-Warehouse option is enabled in your account, you will be able to move your inventory from one warehouse to another. To do that, go to Accounts>>Warehouse>>Stock Transfer and click plus button to add.
Fill in stock transfer details and then the warehouse/product details and click save.
Created by Aziza Israilova, April 2019
Multi-Company Settings
Multi-Company Settings
With the kpi.com you can manage multi-company accounting and interact with the subsidiary companies.
Multi-company accounting feature is enabled upon the request, you can send request to support@kpi.com.
After passing Accounting & Finance "Getting Started", locate your name from the top right corner and click"Settings" link, which will lead to the following screen:
Once “multi-company” feature is enabled in your company, you will find additional settings “Setup Company Subsidiaries".
Proceed with the link to arrive at Subsidiaries listings page. Click Add New button to invite your subsidiary company or companies.
In adding a subsidiary company you would need provide basic information under Company information, Address information and Financial information.
Note: Under Financial Information you will need to provide subsidiary’s Base Currency and select other currencies if child company deals with it currencies in their daily activity under Operating Currencies.
You need to make sure that Parent Company's base currency coincides with child companies Base Currency or is listed under Operating Currencies.
Multiple Currency
Multiple Currency
Multiple Currency option enables you to create and post your financial transaction in different foreign currencies. You need to add all the currencies used in your business from Settings>>Accounts>>Currency Rates. Then you will be able to choose those currencies while making invoices, expenses, manual entries, purchase orders and etc.
You can view your financial reports in those currencies as well.
Created by Aziza Israilova, April 2019
My Attendance
My Attendance
My Attendance page involves reports about your in/out hours, timeslot, leave status and leave requests for the current year.
Under the Calendar widget the days highlighted in green shows the approved leave days.
Created by Aziza Israilova, April 2019
New User Interface
New User Interface
We are delighted to introduce the new user interface of our application kpi.com to customers.
It is easy, contemporary and straightforward.
The main changes have been made to the colors and to the location of modules.
The modules are available on the left side, a click on them shows the subsections available for quicker access.
Settings is on the top right side, the subsections of which are also shown on the left side.
A click on the profile picture shows the options to Employee Profile, My Account page, Referrals, Support, and Log out. If you have several accounts you can switch the accounts from the same window.
The bell icon on top right side is for notifications while the icon before is for the Workspace. Need help opens live chat and send feedback options.
Message Center, Timer and Calls are also located at the bottom of the app.
No Access Employees
No Access Employees
No access employees are registered in the system however, they will not have access to the system. Administrators, Directors and HR Managers can take actions on behalf of them like add payslips and cash advances for them, leave requests, expenses and more. You can buy a no access license for a very affordable price and manage employees and their activities easily.
Numbering Settings
Numbering Settings
You can set up the numbering settings for the following features and transactions from Settings>>Accounts>>Numbering Settings:
Products/Services;
Fixed Asset;
Expense Claims;
Manual Entries;
Bank Payments;
Bank Receipts;
Cash Payments;
Cash Receipts;
Customer Prepayments;
Supplier Prepayments;
Stock Adjustments;
Sales Quote;
Sales Invoice;
Credit Note;
Purchase Order;
Purchase Invoice;
Purchase Credit Note;
You can restart the numbering each year by checking the box called "Restart Numbering" and setting the restart date.
Created by Aziza Israilova, April 2019
Numbering Settings/Projects
Numbering Settings/Projects
The Numbering Settings enables you to create your own numbering set to Tasks, Projects, Workstreams and Employees.
If your projects are related to customers, you can add the customer code in the Project numbering.
You can drag the boxes and add a delimiter between numbers such as comma, semi colon, colon etc. The Preview box shows how the sample number to get the real picture.
The numbers can be restarted every year. So you can choose which date they should be restarted (January 1, for example).
The same you can apply to Task, Workstream and Employee numbers.
Once you have made necessary changes to the Numbering Settings, click on "Save" button at the bottom of the page.
Onboarding
Onboarding
Onboarding is the process of integrating a new employee to the company by familiarizing the company rules, traditions, and work procedures.
There are several stages of onboarding that differ from one company to another. To create your company onboarding processes go to Humans>>Onboarding>>Onboarding Steps or Period. If there are stages of the onboarding, created them first using the Onboarding Periods.
Click the plus button and fill in the form.
After you have created all onboarding phases, go to Humans>>Onboarding Steps and create the procedures. Click the plus button and fill in the form.
If you check the box "Create Onboarding Entry Form", the step will be added as a separate section under the Onboarding module which you can later link to your candidates or your employees with different statuses.
Created by Aziza Israilova,
May 2019
Opportunity
Opportunity
Opportunities in kpi.com are the chances that your client might buy your product/service or get interested in your service. Leads are marked as opportunities to reflect the process of sending quotes, invoices or entering negotiations for a sale with the contact.
To add a new opportunity go to Sales>>Opportunities and click on plus button. You can use the Quick Add option to fill in only necessary details to save time.
You can convert a lead with an opportunity as well. Go to Leads section, click actions and choose Convert. Check the box called "Add new opportunity for this account".
Created by Aziza Israilova, April 2019
Overtime Payments
Overtime Payments
Along with monthly salaries, employees can also be rewarded for their overtime working hours. Administrators and HR managers can set up how much each employee should get for their overtime hours in the Payroll module.
In Payroll Employees page, each employee has the payroll settings. Overtime settings can also be found there.
Under the payment settings, "Fixed & Overtime from HRMS" should be chosen, if the company employees should be paid for their overtime hours. There are three types of Overtime rates:
Regular Overtime Rate - it is paid when the employee works overtime during the working days.
Weekend Overtime Rate - it is paid when the employee works on day offs.
Holiday Overtime Rate - it is paid when the employee works on holidays.
There are two types of payment rates: Percentage-Based or Fixed.
When the fixed rate is chosen, the employee overtime hours will be multiplied by the amount set up under the Amount/Percentage column. When the percentage is chosen, the employee overtime hours will be calculated based on the basic salary multiplied by the percentage.
The rates are per hour
The employee worked hours can be checked from Humans>>Attendance Tracking>>Attendance report. The application records hours either from Biometric Device (if integrated) or from the login/logout total hours.
The overtime is calculated using the employee in hours minus timeslot hours.
The percentage based (% of basic salary) overtime hours calculation is as follows:
salary / working days*8 = hourly rate
overtime based % hour * ((hourly rate /100) * overtime based)
Created by Aziza Israilova, November 2018
Overview of Role Level Access
Overview of Role Level Access
Your level of access to kpi.com depends on your user role. If your user role allows it, you may be able to set up other users or change your own role settings.
You can see what roles you have in Employee Profile Summary in the Account Information tab under Humans section.
User Roles and Permissions
kpi.com has following User roles by default:
Administrator - Has highest level of permissions, can see all projects, tasks, employees, and can see any other listings in the company without any restrictions. Only administrator can remove data which is created by others.
Director - Has high level of permissions, can see all projects, tasks, employees, and can see any other listings in the company with some restrictions.
HR Manager - Has full access to Humans module, can view all leave requests, can approve those leave requests, and has full control over employees, positions, salary grades and departments. HR manager additionally should have member access role for other sections.
Accountant - Has full level access to Accounts module. Accountant can create sales quotes, sales invoices, etc... can make manual transaction entries and view reports. Accountant will view other sections with member access role.
Admin Location - Administrator of office locations, can view all project, task, employee, and all other data in the location, but can't see data of other locations.
Sales Manager - Can assign leads, tasks, and events in Sales module to sales people in his/her team.
Project Manager - Has full control over project management section. Project manager can add projects, tasks, assign employees to the project, approve timesheet, and view reports.
Department Leader - Can see all projects, tasks, employees and positions in his/her department. Can add new employees to the department, and also can initiate performance appraisals to employees in their own department.
Customer Service Representative - Can add, remove, and change the status of all cases, add solutions, close cases.
Sales Person - Can see assigned leads, accounts and contacts, work with leads and tasks. Sales person has access to CRM sections, but to see other sections, he or she will be a member by default.
Member - Default role in the system. Members will view their own data only, and can remove their own data only. Members can add tasks to themselves, once assigned to project, they can edit their own information in employee profile, and submit expense claims for approval.
Calendar Editor - Can see other people's calendar, can add events to other people, and also remove events from events lists of others.
You can change the user permissions as an Administrator from Setting>>Users and Privileges>>Permissions. Checking the permissions to the related roles, allows the user to perform that action. Removing the option is the opposite.
New user roles can also be created from Users and Privileges>>Roles section.
Created by Aziza Israilova, April 2019
Pay Invoices
Pay Invoices
Pay Invoices is a section to add bulk payments to several supplier invoices at a time. To pay the invoices go to Accounts>>Transactions>>Pay Invoices section. Click the plus button to add new.
Supplier - choose the supplier name whose invoices you want to pay.
Payment Date - choose the date you want the record the payments on.
Type - you can pay supplier invoices, manual transactions, both or the expenses.
Account - choose the account from which you are paying.
Then check the invoices you want to pay. Enter the Payment amount and click save. If you are making an over-payment, enter the bigger amount than the invoice due amount and the system will ask you how to record the over-payment either with a Prepayment or the Overpayment.
After you save the transaction, the related supplier invoices' status will change to Paid.
Created by Aziza Israilova,
May 2019
Pay Salaries
Pay Salaries
Before paying salaries to your employees in the system, you need to make sure that you have set up everything correct in your Payroll Settings. Go to Settings>>Payroll>>Payment or Deduction page and set up the credit and debit account for each payment you make for your employees.
After that create a single payrun or a group payrun. Once you approve the payrun, the debit and credit balances will be updated accordingly. Then you can go to Accounts>>Transactons>>Manual Entries page and create a transaction for the paid salaries.
Created by Aziza IsrailovaMay 2019
Payment/Deduction
Payment/Deduction
Payments and Deductions for payruns can be added from Settings>>Payroll>>Payment or Deduction. Some default payments and deductions are already available. You can edit them or add new ones.
Click the plus icon on top of the list and add the details of the payment like the code, the name of the payment, debit and credit accounts then click save.
After you have successfully added the payments, they will show up under look up fields for payments in employee profile or in single/group payruns.
The deductions are added the same way.
Payroll Employer Settings
Payroll Employer Settings
The Payroll settings includes Employer Settings, Payroll Groups, Pension Providers, Pension Scheme, Payment Categories, Deduction Categories, End of Service Settings and Numbering Settings.
Before starting to use the Payroll module, it is advised to set up payroll settings first.
Go to Employer Settings and fill in the company payroll information. Important information to note:
By Default Email Notification - the send notification in payruns will be checked by default which means employees will receive an email about their payslips.
Enable Multi Currency for Payroll - an option that gives an ability to issue payruns in different foreign currencies.
Enable Double Confirmation - double approval process.
Do not record payroll transactions - the recurring payslips will not be recorded in accounting transactions.
Paid Leave Days Impact - the basic salary decreases if the employee has paid leave days.
Non-Paid Leave Days Impact - the basic salary decreases if the employee has non-paid leave days.
Enable Leave Payments - Leave Encashment which mean the amount of funds given to the employee for not taking the allowed leave days.
Enable Leave Deductions - Deduct non-paid leave days.
Under the Daily Leave Type Encashment settings, specify the Payment Type and Deduction type by choosing the category whether it is Basic Salary or Basic Salary plus allowances.
Payroll Groups
Payroll Groups
Group Payrun is dedicated to create several number of single payruns for group of employees in one window to save employer's time.
The default payrun group is All Employees, however, sometimes HR managers and employers need to create payruns for each department separately in case the payment currency, payment type and payment frequency are different. Therefore creating group payruns for such instances is a good help.
Go to Settings>>Payroll>>Payroll Groups and click on plus icon to add new group.
Enter the name of the group, short description if needed, choose customer, project and managers if necessary, choose the type whether it is per department or per position of employees, choose the currency and assign employees. After you have entered all the info, click the "save" button.
Pension Scheme
Pension Scheme
Pension scheme is a long term savings plan. According the countries pension scheme, employees save little money from their salary during their working life so that they have enough funds when they retire.
You can set up the pension scheme from Payroll>>Pension Scheme page. Before the Pension Scheme is set up, you need to provide information about the Pension Provider.
While setting up the Pension Scheme, choose the Provider's name and enter the Scheme name. Then enter the Contribution details per employee and per employer.
Local Employees are identified by their Country, Passport Number and Passport Issue By fields available at HRMS>>Edit Employee Profile page. If their country is the same as employer's country, then they will use the pension scheme for local employees. The pension scheme can be based on percentage or a fixed amount. If it is a percentage, you need to set up from which allowance/salary it should be deducted from: Basic Salary or Basic Salary + Allowances.
After the scheme is correctly set up, it will be deducted from employee's payruns.
[video width="1336" height="610" mp4="https://www.kpi.com/wp-content/uploads/2017/12/pension-scheme.mp4"][/video]
Performance Appraisals
Performance Appraisals
Performance Appraisal is a document reviewing an employee's performance with different competencies and goals and giving scores to them.
Performance Appraisals feature is enabled per request by the support team.
Once enabled go to Humans>>Performance Appraisals>>Simple Appraisals and click the plus button to add new.
Choose the employee whom you are going to initiate the appraisal, choose the manager who will review the appraisal, choose the period and choose the competencies template. If choose the weighable option, you will be able to give scores to each competency and see the weighable result out of the total weight. You can also add goals to the appraisal and Send it to the Employee or Review it.
When you Initiate and Send it to the Employee, the appraisal will be pending to employee's review. You can complete the appraisal after the employee sends it back to the manager.
When you Initiate and Review you will be able to assess the employee with each competency, give scores and leave your comments and approve.
You can view the saved appraisals in the Simple Appraisals page and generate the PDF version of the appraisal.
Created by Aziza Israilova, April 2019
Performance Notes
Performance Notes
Performance Notes are issues related to employees in the system (breach of performance rules or the opposite). Once you add performance note to your employee, you will be able to see the performance note, while reviewing the appraisal in the same period.
To add a new performance note go to Humans>>Performance Appraisals>>Performance Notes and click plus button. Enter the details and save.
Created by Aziza Israilova, April 2019
Performance Templates
Performance Templates
Templates consist of competencies used in performance appraisals. You can add templates from Humans>>Performance Appraisals>>Templates by clicking on the plus button.
After entering the template name you need to add competencies from the list of competencies available.
Created by Aziza Israilova, April 2019
Personal Goals
Personal Goals
Goals are part of the performance appraisals, they can be linked to the assessment process in the performance appraisals. Personal goals section is also available under Employee Profile, visible for each employee.
To add a personal goal go to either Goals>>Personal Goals or Employee Profile>>Goals tab and click the plus button to add new. Fill in the form and save. Later you will be able to link it to performance appraisals.
Created by Aziza Israilova,
May 2019
Placements
Placements
Placements are dedicated to hire candidates as employees to the matched vacancies.
To add a placement go to Humans>>Recruitment>>Placements and click plus button. Fill in the details like the candidate name, patched vacancy, date offered, placement details and attachments and notes if needed and save. The status of the placement becomes "Approved".
Later you can hire the candidate as an employee with approved placements. The hired employees will be listed in your employees list under Humans section.
Created by Aziza Israilova, April 2019
Positions
Positions
Kpi.com’s Humans module includes the option of managing available Positions in an organization (e.g. Salesperson, Lawyer, Marketing Manager, etc.).
To add positions go to Settings>>Humans>>Positions. In this section, users (managers) can add new, edit, or view the summary of a position in the list, as well as adding a Job Description to each Position.
Post Dated Check
Post Dated Check
Users can enable Post Dated Check (PDC) from Settings>>Accounts >> Financial Settings by ticking Post Dated Checkbox.
Once you activated PDC option, you can add postdated checks using Checks or Supplier Prepayments tabs under Accounts>>Transactions module if you want to pay suppliers’ invoices.
Open Accounting >> Transactions >> Check tab and click on New button. Fill out following fields:
Bank – choose bank account from which you are going to pay
Date – select PDC date
Post Dated – tick checkbox if you are going to use PDC option
Description – leave a description if you need for further transactions
Name – select supplier from dropdown option by typing letters.
Once you post check, system will remember transaction date and its amount. When a transaction date comes, system will post it in accounting reports and you can apply it to supplier’s invoices.
Alternatively, you can use Supplier Credit option under Transactions module. Fill following fields:
Supplier – select supplier whom you are going to add PDC
Paid From – choose bank account from which you paid for supplier
Note – leave a note if needed.
Date – PDC date
Reference – reference for the added PDC
Amount – indicate amount of PDC
Currency – if supplier’s currency different from base currency specify exchange rate
Post Dated – give a tick if a supplier’s credit is PDC
Once you PDC transactions, you can apply them to purchase invoices using Apply Credit option. Note: Transaction of PDC will not be shown in Apply Credit option, until PDC date comes.
PDC for customers
To add PDC for customers, open Accounting section >>Transactions tab >> Prepayment
In the following form you should fill out following fields:
Customer – select customer who did PDC
Paid –indicate bank account which should receive payment
Note – leave a note if needed
Date – choose PDC date
Reference – write a reference
Amount – indicate amount of PDC
Currency – if customer paid in another currency indicate exchange rate
POST dated – tick PDC checkbox
Once you add PDC check, you can apply it for customer invoices and it work the same like for suppliers.
Created by Aziza Israilova, April 2019
Predecessor and Successors
Predecessor and Successors
Tasks maybe related to each other, which is called task dependency. If one task ends, the other task may start immediately. If there is a task that should start before the current task, then you can add Predecessor task. If there is some other task that should start after your current task, then add Successor Task.
Product Table Settings
Product Table Settings
Accounting product tables are fully customize-able which provides customers with better user experience while creating transactions in the system. Using the product table settings you can add, change the order and remove columns.
Go to Settings>>Accounting>>Product Table settings. Find the form you would like to change whether it is Sales Invoice, Sales Quote, Purchase Invoice, Purchase Order, Expense Report or Opportunity Sub Items.
Click "Customize" icon located on top right corner of each form. The green icon means that the column is available in the from. You can enable/disable the columns using this button. By dragging you can change the order of the column easily. After you have finished click "Apply Changes". If you need to add an extra field which is not available by default in the system, click "Add Custom Field".
You can check the result of your changes by going back to the Accounts module and adding new.
Created by Aziza Israilova
April, 2019
Products & Services Overview
Products & Services Overview
Products & Services at kpi.com accommodate various industries from services to manufacturing companies.
You can add Inventory items, Non-Inventory items, Service items, Assembly products, Group Products and more. You can allocate your stock to different warehouses. Besides, stock adjustment, stock transfer options make it easy to manage your inventory.
To add new products or services go to Accounts>> Products and Services and click on the plus button. You can choose the quick add option to register the product quickly only with the important product info.
For more information, go to this wiki.
Created by Aziza Israilova,
April 2019
Products/Services Import
Products/Services Import
To upload Product/Services, go to Accounts>>Product/Services listing page and click Import on top of the page.
For the import of goods, the file should be in a .csv format. You can also download the sample file using the "Download a sample CSV file". Try to adjust your own list of products to the sample file provided.
Then choose your file from your desktop. Click Upload and then match the file columns with the system columns and save.
The items will be available in the list after a few seconds. You can check the Log details about the import process from Settings>>System Logs.
[video width="1308" height="562" mp4="https://www.kpi.com/wp-content/uploads/2016/12/product-import.mp4"][/video]
Progress Invoicing
Progress Invoicing
Progress invoicing enables you to bill customers partially based on the quotes they have approved. You can bill them either by percentage of the total amount or by the number of items.
Start your progress invoicing from Accounts>>Accounting>>Sales Quote. Add new quote and check the box called "Progress Invoicing". Then fill in the quote details like the customer name, dates, the name of the products/services, their quantity and prices and save and approve. After you have approved the quote as a manager, click the "Client Approve" button. The status of the quote changes to "Approved By Client" which allows you to take further actions with the quote.
Click on the quote, click more options at the bottom of the quote and choose Convert to Invoice. A pop up will ask you to choose whether you want to convert the quote by percentage, by quantity or by amount. Choose the option you need and click "OK". You will be forwarded to Add Sales Invoice form with all the details of the quote. Review the invoice, add more details if needed and click Save and Approve. Once you save the invoice, the status of your quote will change to "Partially Invoiced".
Quotes with progress invoices enabled show all the related invoices for your reference inside the quote summary.
You will be able to convert the quote to invoices until you have fully converted the quote. When you fully convert the remaining balance becomes zero and status of the quote changes to "Invoiced".
Created by Aziza IsrailovaApril, 2019
Project Subsections
Project Subsections
Documents
The Documents section stores all documents uploaded to the project showing the date of the upload, the owner, and the type. You can upload additional documents either to the kpi.com storage or to Google Docs by clicking the Upload File. Besides, documents can be linked to the existing Google documents or kpi.com documents.
Project Employees
You can add more employees or remove them from the project. You can also change their wage rates here.
Gantt Chart
Show the Schedule of the Project and the Project Work Breakdown structure in a bar chart basis. You can change the dates of the tasks by clicking the taskbar twice and moving them.
The Gantt Chart is currently not available in the new user interface.
Work Breakdown Structure
This section shows the hierarchy of workstreams and tasks. You can create workstreams by clicking the Add Workstream. You can add tasks and multitasks as well.
From the Actions dropdown on Workstreams, you can edit the existing workstreams, set parent/child workstreams, add tasks and remove the workstream.
Work Breakdown struction is not available in the new user interface.
Budget Sheet
The Budget Sheet shows the Planned and the Actual Project Cost; as well as the Revenue with the difference between the planned amounts and actual amounts.
The Revenue part is derived from the Sales Quotes and Sales Invoices created for the client of the current project. The Sales Quotes is displayed as the Planned Revenue, whereas the Sales Invoices as the Actual Revenue.
Expenses Part of the budget sheet uses Employee Costs and Expense Claims and Purchases to show the amounts.
Planned Employee Cost is taken from the Wage Rate of Employees multiplied by the Estimated Timegiven for each tasks.
Actual Employee Cost is taken from the Wage Rate of Employees multiplied by the Approved Timesheet hours.
Expense Claims show the amount when the expense claim is related to the project.
Purchase Order and Purchase Invoice amounts are also considered as expense in the Project Budget Sheet.
Project Budget Beta
The Project Budget displays the profit and loss report for the consequent project period by month. You can view the Planned Income vs. Actual Income and compare them using the Difference in figures and percentages.
The budget column shows the planned amounts for Revenue and Expenses. Actual columns show the real incurred Revenue and Expenses.
Budget:
Revenue fields are filled out manually. Click the cells and enter your forecasted revenue.
Expenses include employee costs and other expenses that you can enter manually. Budget employee costs are taken from the estimated hours per month and the wage rate. The budget employee costs cannot be edited.
Purchases are also filled out manually. Click the cells and enter the planned purchase figures.
Actual:
Revenue displays the transaction amounts taken from the sales invoices. Note that the sales invoice start time should match with the Project Period. If you cannot still see the Actual Revenue, you need to specify the account type the Sales Invoice was issued, such as Sales, Sales of Assets, Miscellaneous Income and etc.
Expenses shows the employee costs and expense claim amounts. Employee costs are taken from the approved timesheet hours per month and the employee wage rates.
Purchases show the transactions made by Purchase Orders and Purchase Invoices. Note that the purchase status of the order should be Received.
You can see the totals at the end of the report by scrolling to the right side of the page and save the PDF version of the Project Budget Report.
This report is not yet available in the new user interface.
Employee Rate History
You can change the Involved Employee’s Wage and Client Charge Rates. The system will keep the last updated rates and show the date when it was updated. To change the employee wage rate, remove the current one and enter a new rate and save. All previous employee costs will be calculated using the old wage rate. After you have entered the new rate, the system will start to calculate using the new rate for further timesheet entries.
Tasks
This section lists all the tasks related to the project you selected. For more details on this section, go to the Project Management - Tasks.
Resource Workload
Resource Workload page displays the Resource Utilization Dashboard and Tasks Status Report per employee.
The green bar - the available hours of an employee (taken from the timeslot assigned to employees).
The orange bar - the planned work assigned (taken from the estimated time of assigned tasks within the project).
The blue bars - the actual work done based on the approved timesheet hours.
This section is not yet available in the new user interface.
Project Notes
You can save notes and make them public so that all involved employees will be able to view the project note. Or you can just keep the note private for your own reference.
Even though the notes are public, they will not be visible to the clients who have access to the system.
You can also send the notification to employees. To do that, tick the checkbox next to the employee name and save the note.
This section is not available in the new user interface.
Sales Quotes
The Sales Quotes page stores all sales quotes related to the project. The page is view only. Once you click the Sales Quote link, you will be redirected to the Accounting & Finance page to see the Quote Summary.
Project Invoices
This Project Invoices page stores all issued sales invoices related to the project. The page is view only. Once you click the Sales Invoice link, you will be redirected to the Accounting & Finance page to see the Invoice Summary.
Purchase Orders
The Purchase Orders page stores all purchase orders related to the project. The page is view only. Once you click the Client link, you will be redirected to the Accounting & Finance page to see the Purchase Order Full Summary.
Purchase Invoices
This page stores all issued purchase invoices related to the project. The page is view only. Once you click the Purchase Invoice link, you will be redirected to the Accounting & Finance page to see the Invoice Summary.
Expense Claims
This page stores all expense claims related to this project. The page is view only. Once you click the Expense Claim link, you will be redirected to the Accounting & Finance page to see the full summary.
Issues
In this page you can add issues that you may face or have faced during the project implementation. To create a new issue, click the New Issue, fill in the form and save.
You can also enable timesheet for the issue. Once it is enabled, the issue will appear in your Timesheet.
Cases
This section shows the cases that you have created or linked the existing cases to the Project.
Emails
The Emails section displays the emails that you have sent from the Project Summary or the email you have linked to the project from the Message Center.
Project Summary
Project Summary
The Project Summary page displays the main details of the project:
Project Details
All related Tasks
Work Breakdown Structure
Budget Sheet
Gantt Chart
Documents
Related Sales Quotes, Invoices, Sales Orders, Purchase Orders, Purchase Invoices, Expense Claims, Resource Utilization, Rate History, Issues and related Emails.
Involved Employees
Involved Employees tab shows all the assigned employees and their Time details.
Estimated Time - the approximate time entered by the project manager while adding the task
Time Spent - the sum of all the entered timesheet hours in this project
Actual Time - the sum of all the approved timesheet hours in this project
% Completed - the percentage of task completion compared to the estimated time
More Details
Actual Start Date - the first timesheet entered date
Actual End Date - the last entered timesheet date
Actual Cost - the multiplication of all approved hours to the related employee rates
Estimate Cost - the multiplication of estimated time to the wage rates
Waiting for Approval - all the timesheet hours that are pending for manager's approval
Rejected Hours - all the timesheet hours which were rejected
Estimated Time - the sum of all employees estimate time (in all project tasks)
Time Spent - all the approved timesheet hours
Created by Aziza Israilova,
April 2019
Projects
Projects
Projects section can be found the main modules menu. It consists of Tasks, Projects, Timesheet, Timesheet Approval, Customer Center, Employees and Resource Utilization sections.
Administrators have full access to the Projects section while limited users have access to their own tasks, projects and timesheet page.
Project Managers have full access to the projects they are running like to the budget of the projects, to the resource utilization, workstreams, tasks and more.
Public Holidays
Public Holidays
To add holidays, go to Settings>>Humans>>Public Holidays page and click on Add New button. You can choose to add holidays to different years.
If it is a recurring holiday, check "Recurring" box and choose "Monthly" or "Yearly".
Once the Recurring box is checked, the holiday will be added automatically to each coming year/month.
If it is a day off, the leave requests added to that date will not be counted and the left leave days per year will not decrease.
However, you can choose that it is taken from the annual leave allowance which will decrease the number of allowed leave days.
Purchase Invoice
Purchase Invoice
Go to Accounts>>Purchase Invoice list and click on the plus button to add a new Purchase Invoice.
Supplier- Choose a company or an organization or a person you are sending an order from the list of Suppliers. You can also lookup the suppliers from the search box. If there are no suppliers registered in your company you can add new Supplier from Add new link just in the Supplier dropdown.
Date- Indicate the date Purchase Invoice is created (Transaction will be registered on this date in your General Ledger).
Due Date- Indicate the Due Date which you need to pay for bill.
Invoice #- Enter the number of the Purchase Invoice. You can put here the number of the invoice that your supplier send you. Alternatively, you can set up automatic numbering in Accounts Settings.
PO Number – if you have converted the Purchase Invoice from Purchase Order the number of the purchase order will be set here or you can add manually while creating the new Purchase Invoice.
Amounts – Select the type of applying taxes (Tax Exclusive or Tax Inclusive).
Item – Title of the product or service, required field. You can select from existing products/services or type here not listed items.
Description – Description of the product which can be editable.
Qty – Enter the quantity of the product or services.
U/M – You can specify the unit of measurement.
Price – Cost price of the product or services
Discount – Enter the discount percentage.
Asset Acc. – Enter an expense or asset type General Ledger (GL) account for bookkeeping purposes.
Net Amount – Net amount displays the amount after applying the discount.
Tax Rate – Choose the tax rate from the tax rate dropdown menu. Tax rates are applied in percentage.
Total Amount – The total amount of each line is displayed here.
Payment Instructions/Notes – Write Payment Instructions or Notes. This will be printed in PDF version of the Purchase Invoice.
Show Additional Fields - It will open more fields to specify in your invoice like Billing Address, Custom Fields, Accounts Payable, and other fields.
Once you have filled all required fields, you can print the PDF version, Save and Approve or save it as Draft.
Created by Aziza Israilova,
April 2019
Purchase Order
Purchase Order
The Purchase Order section is available under the Accounts>>Accounting>>Purchase Order. To add a new purchase order click the green plus icon and fill in the form.
Supplier- Choose a company or an organization or a person you are sending the order from the list of suppliers. You can also lookup the suppliers from the search box. If there are no suppliers registered in your company you can add new Supplier from Add new link just in the Supplier dropdown.
Project- Select the project which you want to relate this Purchase Order to.
Date- Indicate the date order is created.
Due Date- Indicate the expected Ship Date which this order will be shipped.
PO Number- Edit or use default order number generated.
Reference - Enter the reference to the transaction.
Currency - The dropdown shows all the currencies you use in your company transactions.
Manager - Select the manager who will approve your purchase order. You can select yourself as a manager if you have an administrator, direct or accountant user roles.
Show Additional Fields - A click on this shows you extra fields like custom fields, billing and shipping address, payment type, payment terms and more.
Item – Title of the product or services, required field. You can select from existing products/services or type here not-listed items.
Description – Description of the product or services which can be editable.
Qty – Enter the quantity of the product or services.
U/M – You can specify the unit of measurement.
Price – Cost price of the product or services.
Discount – Enter the discount percentage.
Account – Enter an expense or asset type General Ledger (GL) account for bookkeeping purposes.
Net Amount – Net amount displays the amount after applying the discount.
Tax Rate – Choose the tax rate from the tax rate drop-down menu. Tax rates are applied in percentage.
Total Amount – The total amount of each line is displayed.
Terms and Conditions – Write terms and conditions in the box below. This will be printed in the PDF version of the Purchase Order.
History and Notes - You can leave your comments in the box.
Attachments - you can upload fields related to the PO.
After you have finished, you can save the PO as draft, print the PDF or Save and Approve (Submit if you have the manager).
[video width="1336" height="646" mp4="https://www.kpi.com/wp-content/uploads/2016/12/add-po.mp4"][/video]
Purchase Order Actions
Purchase Order Actions
The purchase order actions is located in the first column of the purchase order list. The actions allows you to take further activities with the PO after it is saved. The options available under actions can vary depending on the PO status. A click on the actions allows you the following:
Summary - view the PO details.
Edit - modify the PO details.
Delete - remove the PO.
Copy to PO - copy the details to a new PO.
Copy to Quote - copy the details to a new Sales Quote.
Copy to PI - copy the details to a new Purchase Invoice.
Goods Received Notes - view the Goods Received Notes.
PDF - print the PDF version of the PO
Created by Aziza Israilova,
April 2019
Purchase Order for Fixed Assets
Purchase Order for Fixed Assets
If you need to create a purchase order for a fixed asset, you will need to create the Purchase Order first. Receive it and then create the fixed asset.
While adding the fixed asset, under the Financing Account, choose the account you have chosen while creating the Purchase Order.
Purchases / Bills Overview
Purchases / Bills Overview
At kpi.com, you can register bills, create purchase orders and purchases invoices.
If you are placing an order with your supplier, go to Purchase Order listings page, click Add. In Purchase Order add form, you can find multiple options – Approve & Email to Supplier or just Approve. Yet if you need to email additional data on top a purchase order, you can enclose multiple documents by uploading in the add form. If you need to place an order in a foreign currency, you can do so, by setting the right currency from the top right corner.
Once your Purchase Order is approved, you can receive Purchase Order items and convert it into a Purchase Invoice, either by navigating into a Purchase Order and clicking “Convert to invoice”, or from Purchase, add Invoice form, where you will be notified of available purchase orders with a selected supplier.
From Supplier Center, just like in the Customer Center, you can monitor Supplier info and their balances. You can also drill down into supplier balances and print Supplier Reports in Excel and PDF.
Created by Aziza Israilova, March 2019
Receive Payments
Receive Payments
This section is dedicated to receive customer invoices payments, and manual entry payments in bulk. To receive payments go to Accounts>>Transactions>>Receive Payments and click on plus button.
Choose the payment type whether it is a manual transaction or an invoice. Enter the customer name. As soon as you enter the customer name the table will populate all the customer's unpaid invoices. Then choose the account (it can be bank account or a cash account), enter the payment amount and save.
Created by Aziza Israilova,
April 2019
Receive Purchase Order
Receive Purchase Order
Receiving a purchase order creates Goods Received Notes for each transaction and increases the number of stock on hand. To Receive your open purchase orders go to the purchase order list and find your approved purchase orders. Click the actions and choose "Mark as Open" or go to the summary view of the purchase order and click Mark as Open, this option is available in the more options of Approve and Email button. The Purchase Order status changes to "Open". Now you can receive items. Click the Receive button and enter the number of items you are receiving and Save.
Goods Receive Notes (GRN) will be created which you can view in the purchase order summary or from the actions from the purchase order listing.
The status of the PO changes to either Partial Received or Received depending on the number of items you have received. Fully received purchase orders can be converted to purchase invoice. Alternatively you can convert the GRN itself to a purchase invoice. Go to the GRN list, go to the summary of the GRN and click "Convert to Invoice".
Created by Aziza Israilova,
April 2019
Recurring Bills
Recurring Bills
Recurring Bills are purchase invoices created automatically in the system on a periodic basis. To add a recurring bill go to Accounts>>Accounts>>Recurring bills and click the plus button.
Enter the supplier name
Choose the dates and set up the recurrence type. It can be daily, weekly, monthly or yearly based recurring invoice.
Choose the end date which is the date when the recurring invoices will not be created for this supplier.
Choose the start date of the recurring invoice.
Choose products or services you purchase on a periodical basis. Enter quantity, discounts and taxes (if applicable).
If you save and approve the invoice, the subsequent purchase invoice status will be approved when created. If you save as draft the subsequent invoices will be saves just as draft.
Created by Aziza Israilova,
April 2019
Recurring Invoice
Recurring Invoice
If you have partners or clients whom you bill invoices on a certain amount of goods and services on a recurring basis, it may be time-consuming as you have to fill the same Sales invoice for the specific client repeatedly. However, you can automatize this process with kpi.com to save your time and energy. In kpi.com you can create recurring invoices which will be automatically sent on particular date and time.
To create a recurring invoice, go to Accounts>>Recurring Invoice and click plus button to add.
Enter the customer name, invoice dates, products, and services and then set up the recurrence.
If you save and approve the recurring invoice, the invoice will be created in the Sales Invoice list on due date/time. If you approve and email, the invoice will be created and sent to the customer. You can also save it as a draft.
Created by Aziza Israilova,
April 2019
Recurring task
Recurring task
A recurring task is a project-related task that can repeat at regular intervals (such as daily, weekly, monthly etc) and always have the same duration and attributes. For example, you might define the daily project progress meeting as a recurring task.
To create a recurring task in kpi system click on the Advanced Options on Add task formand tick the Recurring checkbox. It will show different recurrence options:
Once you have checked recurrency option and fill the blanks, you can see your all repeated tasks in Task list in Projects.
However, the recurring task option is not yet available in the new user interface.
Remove Employee
Remove Employee
To remove an employee from the Employee List:
Go to Employees section under the Humans or Projects module or Settings>>Users and Privileges.
Find the employee from the list
Click the Actions
Choose Delete
You will be asked to be sure whether to delete the selected employee or not. Click OK and the employee will be removed from the system. If the employee is a project manager in certain projects, you will be asked to change the manager.
"Remove" function completely deletes all employee-related data from the system, whereas "Terminate Employment" keeps them in the system.
Created by Aziza Israilova,
April 2019
Remove Reference
Remove Reference
To remove a reference, go to Settings>>Reference Settings. Search the reference, click the actions, choose edit and click the delete icon on the reference item.
Note that system reference items cannot be deleted.
Reporting
Reports
The Reports is very handy for creating reports based on the data you have in the system, saving them and sharing with your colleagues. The Reports already has some necessary reports built in for each section such as Sales Reports, Lead Reports, Overdue Projects reports and so on.
Add Folder
Click on the Plus icon and choose Add Folder. Type the details of the report and click Save. Later you will be able to save your custom reports under this folder.Add Report
Click on the Plus icon and choose New Report. Choose the report type whether it is a timesheet reports, sales invoice, employee report etc. Then you can customize the columns and the report itself by clicking the customize icon and going to the tabs on top of the report. You can choose the report type, group the column, select summaries, create charts and apply filters.
[video width="1342" height="610" mp4="https://www.kpi.com/wp-content/uploads/2016/12/Report-creation.mp4"][/video]
Save Report
In order to save the report you need to click Save Report button and fill in the fields given.
Share Report
With this function you are able to share the ready reports with your collaborators and even schedule recurring emails with attached report. Click the Share button once you have saved the report and set up the notification recurrence.
You can export the report to Excel, PDF or CSV files using the export button on top of the report.
Created by Aziza IsrailovaFebruary, 2019
Request for purchase
Request for purchase
Request for Purchase is a document requesting from your purchasing department to provide a particular quantity of a material or a service for a particular date.
You can add Request for Purchase (RFP) in kpi.com using Accounts >> Request for Purchase.
Customer - the customer who you need to provide the products with.
Due Date – required field to fill, date until that particular request is active
Approver– the manager who will review and approve the request.
Project – to which project this request is related
Then choose products or services, their quantity you are requesting. When you fill all the fields, click Submit to Manager. It will automatically send the request to responsible Manager. If you are the manager, system shows Save and Approve button. automatically.
When the request is already approved by the manager, you can convert your request to PDF version or convert to Purchase Order, Request for Quote (RFQ), or Stock Adjustment.
Created by Aziza Israilova,
April 2019
Request for quote
Request for quote
Request for quote (RFQ) - a request of an organization interested in purchasing goods or services, to suppliers in order to determine possible purchase prices.
In kpi.com you can find Request for Quote from Accounts >>Accounting>> Request for Quote (RFQ).
Fill in the form with the necessary details like the date, items you are requesting from suppliers, quantity of items and choose the supplier name.
If you want to inform suppliers about the request, click Show Additional Fields and check Send notification to suppliers.
When you have approved Request for Quote, there is an option to Send Quote to suppliers or convert it to Purchase Order.
Once you convert the RFQ to a purchase order, the status of the RFQ changes to "Converted".
Created by Aziza Israilova,
November, 2018
Resign Employee
Resign Employee
The termination of employment does not delete any personal or job-related data of the employee, i.e. project leave request, invoices, expense reports, time sheets, etc. Termination disables the access of the employee and gives you a chance to add a new user (frees up the user limit).
To terminate employment, perform the following steps:
Go to either Humans, Projects or Settings>>Users and Privileges and then Employees.
Find the employee in the list
Click the Action drop-down
Choose Terminate Employment.
A pop-up window will appear to confirm the resignation of employment. As soon as you confirm, the employee will be resigned.
Created by Aziza Israilova, April 2019
Resource Utilization
Resource Utilization
Using the Resource Utilization you can manage the resource allocation within projects and tasks.
As indicated in the bottom of the Resource Utilization page:
Optimally Allocated - shows the same amount of time allocated as in the timeslot hours set for the employee
Over Allocated - shows more time allocated for tasks than in the timeslot
Under Allocated - shows less time allocated for tasks than in the timeslot
Task Duration - shows when the task starts and ends
Holiday - shows holidays where you cannot enter time
To compare the timeslot hours, timesheet hours, in hours or leave hours to the estimated time allocated, click Show button top right side of the page and check the needed option.
You can also filter by department or employee from the dropdowns located on top of the page.
Edit Estimated Time
Click on the dropdown next to an employee name which will populate all projects ongoing in the current month. Next, click on the project dropdown which will populate tasks. The task row shows the estimated time allocated for each day. You can change the estimated time by double-clicking on the cell.
Updated by Aziza Israilova,
May 2019
Run Time Calculation of Exchange gain/loss
Run Time Calculation of Exchange gain/loss
The calculation is explained with an example below.
Company base currency is AED.
Trail Balance
Ending balance
Accounts Receivable in foreign currency
Trial balance report is generated for Jan 1, 2016 to Dec 31, 2016.
Let’s say Accounts Receivable – USD account has balance at the end of reporting period (Dec 31, 2016) -102,000.00
This amount will be converted to base currency (operating currency) with the rate of reporting end date. Exchange Rate as of Dec 31, 2016 – 1 AED = 0.2725 USD
So, Accounts Receivable – USD account’s balance in base currency (AED) will be – 102,000.00/0.2725 = 374,311.93
Next, this amount will be compared to the base equivalent of the Accounts Receivable – USD account’s USD amount. This amount will be calculated from all historical transactions. Base amount is 374,586.85Then, system will calculate gain or loss subtracting Base Amount from Converted amount: 374,311.93 – 374,586.85 = 274.92.This amount (274.92) will be shown as loss in Exchange Rate Gain/Loss account.
And, if Accounts Receivable – USD account has balance for the previous period (Dec 31, 2015). This amount will be converted to base currency with rate at the end date of previous reporting period. It will be Dec 31, 2015 in our case. And if converted amount is different from the amount in base currency, gain or loss will be recorded to Retained Earning account.
Foreign Bank Account Revaluation
Trial balance report is generated for Jan 1, 2016 to Dec 31, 2016.
Let’s say NBD EUR bank account has balance at the end of reporting period (Dec 31, 2016) -105,000.00
This amount will be converted to base currency (operating currency) with the rate of reporting end date. Exchange Rate as of Dec 31, 2016 – 1 AED = 0.2588 USD
So, NBD EUR bank account’s balance in base currency (AED) will be – 105,000.00/0.2588 = 405,718.70
Next, this amount will be compared to the base equivalent of the NBD EUR bank account’s EUR amount. This amount will be calculated from all historical transactions. Base amount is 438,935.49Then, system will calculate gain or loss subtracting Base Amount from Converted amount: 405,718.70 – 438,935.49 = - 33,216.79.This amount (- 33,216.79) will be shown as loss in Exchange Rate Gain/Loss account.
And, if NBD EUR bank account has balance for the previous period (Dec 31, 2015). This amount will be converted to base currency with rate at the end date of previous reporting period. It will be Dec 31, 2015 in our case.
EUR amount at the end of 2015 is 10,000.00 EUR. This amount will be converted to base currency with the rate of at the end date of previous reporting period: 10,000.00/0.2508 = 39,872.41
And, if the converted amount is different from the amount in base currency, gain or loss will be recorded to Retained Earning account.
39,872.41 – 55,834.73 = 15,962.3215,962.32 - this is loss amount reflected in Retained Earnings.
Sales Custom Fields
Sales Custom Fields
To add extra fields to the Sales module, go to the Settings>>Custom Fields>>Sales Custom Fields.
You need to specify which item it relates to: Lead, Opportunity, Account, Contact or Case. Then you need to set the Field Name, Alias Name, Data type, and Field Type.
Show in listing
If you check this box, the field will show up as a column in the Contacts List for the quick view. So you do not have to go to the Contact Summary page to see the custom field data.
Show in filter
If you want to make the new field filterable, you need to check this box. After that, you will be able to filter your Contacts based on this field as well.
Alias Name
This is the additional name of the new field that helps you to move data to other sections. For example, you have the custom field in Opportunity and in the Projects section. If the Alias name is the same for the custom fields in these sections, the custom fields data will also be moved to the Projects section when you Convert an Opportunity to a Project. So the Alias Name is needed when you convert items.
Data Type
Here you specify what kind of information the new custom field carries: Date, Text, or Number.
Field Type
The field types can be Text, Date Picker (if you have chosen Date as Data Type), Radio Button, CheckBox, Entity Dropdown, or Text Area where you can add longer text.
Required
If you check this box, the field will be a mandatory one to fill in, so you will not be able to save the item without entering data into the custom field.
[video width="1342" height="544" mp4="https://www.kpi.com/wp-content/uploads/2016/12/custom-fields.mp4"][/video]
Sales Invoice
Sales Invoice
Sales Invoice section is available under Accounts>>Sales Invoice. Sales Invoices can be created from conversion of sales quotes/orders or using the "Add" button from the Sales Invoice listing.
There are two types of invoices: Sales Invoice and Timesheet Based Invoice. The Timesheet Invoice is covered in another wiki article here.
Sales Invoices can be added by Sales Persons, Managers, Accountants, Directors and Admins. While adding an invoice, you need to fill in some mandatory fields like Customer Name, Dates, Item Name, Quantity and Price. The Invoice number is provided automatically. However, you can still change it manually.
If you use multiple warehouse feature, then you will also need to choose the warehouse from which you are selling the item.
The invoice can be saved as Draft, Approved or Open. When you click "Save & Approve", the status of the invoice changes to Approved. When you save and email the invoice to your client, the status changes to "Open". Whenever the invoice due date is exceeded, the invoice status changes to "Overdue".
Invoice Payments
For any Overdue, Approved or Open invoices, you can receive payments.
Enter the amount paid, date paid and the account the payment is made to. Then click the Receive button. The invoice status changes to Paid.
The PDF version of the invoice can be generated either from the Actions in the listing page or from the Invoice summary. If you click the arrow in the PDF button, you will be able to generate the Packing Slip or Shipping Label PDF.
Invoice Actions
A click on the actions in the invoice list gives you several options as shown in the screen shot below.
All Approved, Overdue, Draft and Open invoices can be edited or voided.
Void creates a reverse transaction, which means the historical data will remain.
Delete removes the invoice and clears all transactions related to it from the application.
Copy to either copies all invoice details to a new invoice or a new purchase order.
Add Credit Note is used in cases when customer returns the products sold fully or partially (for any default or other reasons). The Credit Note deducts the amount returned.
Paid Invoices
Paid invoice summary includes the "Generate Receipt" button which exports the PDF version of the payment receipt.
As mentioned above, paid invoices cannot be edited. However, if you still need to make changes to the paid invoice, then you should first delete the payment and then edit the invoice.
Go to the invoice summary, click the Less Payment option from the totals and choose either delete or void. After that you will be able to edit the invoice details.
Created by Aziza Israilova,
April 2019
Sales Order
Sales Order
Sales Order is a second deed, once the Sales Quote is accepted and is an affirmation document mailed to the purchaser before delivering the goods or services.
Sales orders help you manage the sales of the products and services your customers order. Using sales orders is optional that you can convert Sales Quote to Sales Invoice directly.
Once Sales Order created the stock amount of the inventory will not be deducted, however you can see how many items were ordered (On Sales Order) in Products/Services listing page.
To add a new sales order go to Accounts>>Accounting>>Sales Order list and click on the plus icon. Fill in the form and save.
You can also covert a sales quote to a sales order. Once the sales order is approved, you will be able to convert it to a sales invoice, to a project, view the Pick List or edit it..
Created by Aziza Israilova, April 2019
Sales Overview
Sales Overview
Sales Quote/Sales Order/Sales Invoice
In kpi.com you can create a sales quote, order and invoices in multi-currencies.
To create a sales quote go to Sales Quote listings page and click Add. After you fill in relevant fields, you can either send the quote to your customer or register without emailing.
Apart from it, like from anywhere else in the system, you can upload attachments and carry internal notes in all add-forms.
If you are looking for progress invoicing or, so-called, partial billing, go to Sales Quote and enable Progress Invoicing checkbox. By approving the quote you are now ready to slice the estimated amount into as many invoices as you want. Yet no worries, you will never lose track of how much issued and how much left, as you can find the answers going back to the quote.
Issuing a Sales Invoice is quite similar to creating Sales Quote, yet comes with more bells and whistles. By enabling “Serial Number Tracking” add-on, you can sell not only quantities of items but assign serial numbers, so you can be on top of what serial number items are sold and which ones are remaining. In addition, you can register a customer Credit Notes to invoices issued.
Recurring Invoices is another feature that comes with very flexible scheduling options, through which you can control any time interval for sending invoices.
In addition, if you maintain projects and need to charge your customer for hours registered in Timesheet Entries in Project Management module at kpi.com, you can do so by clicking Timesheet Invoice from Sales Invoice listings. By clicking Timesheet Invoice you aggregate employee hours spent on a certain project within an interval you set. Then select the right invoice details to email your client.
From Customer Center, you can create customers; add their beginning balances and credit limits, so you can manage not only accounts receivables but also risks associated with it. Invoice payments and customer deposits can as well as be registered from Customer Center under More option.
Sales Quote
Sales Quote
Sales Quote provides the prospective customer with a quote of how much a product or service would cost. With this function, a manager can handle Sales Order and Sales Invoice. Sales Quote can also be used in kpi.com as part of Sales and Projects Modules. It can be sent to contacts, leads, accounts and customers. Project Managers can use Sales Quotes in order to create proposals and send them to clients before the start of the project
To create a Sales Quote, go to Accounts>>Accounting>>Sales Quote and click on plus icon. Fill in the form.
After you have filled in the quote form, you can:
Save as a Draft - you will be able to edit the quote later again. The status of the quote changes to "Draft".
Save & Approve – if you have enough rights, you can choose yourself in the Manager field and approve the quote yourself. The status of the quote changes to "Approved by Manager".
Approve & Email – when you click Approve & Email Sales Quote will be approved and you will be able to send the quote as an email with the PDF version attached. The status of the quote changes to "Open" after you have emailed the client.
Submit for Approval – you can submit Sales Quote for manager's approval by choosing manager in Manager field. Managers who can approve Sales Quote are Administrators, Directors and Accountants. The status of the quote changes to "Waiting for Manager's approval".
Print PDF Version – You can view how the final quote look by printing the PDF.
Client Approve – Once you receive quote approval from your customer, you will be able to change the status to "Approved by Client" by clicking the Client Approve button.
Client Reject – If the client has rejected the quote, you can change the quote terms and send the quote back to the client later. The status of the quote changes to "Rejected".
Convert to Order – Once the quote is approved by the customer, you can convert your quote to sales order using Convert to Order button.
Convert to Invoice - Once the quote is approved by the customer, you can convert your quote to sales invoice using Convert to Invoice button. The status of the quote changes to "Invoiced" after you have converted.
Progress invoicing - (also called progress billing, percentage of completion billing, or partial billing) Progress Invoicing enables you to create an invoice from a sales quote by billing your customer for a percentage of the original quote.
In order to generate Progress Invoicing go to the Sales Quote Add Form and tick Progress Invoicing on right-top. For more detailed information click here.
Created by Aziza IsrailovaApril, 2019
Send Purchase Order
Send Purchase Order
After saving Purchase order, go to a summary view of the Purchase order and click on the Approve & Email in order to send it.
Once click on the Approve & Email, following pop-up window will appear.
Pop up window shows the default email which will be sent with along purchase order. If you wish you can modify default email message and choose your own template to purchase order. Also, you can attach files from your desktop or from the kpi.com documents regarding purchase order.
You can send clicking on the Send button:
If you do not want to receive a copy of the email, you may uncheck Send a copy to me. By default, it will be selected.
Serial Numbers
Serial Numbers
Serial Numbers are not available by default. You can request the support team to activate the add-on to your account (support@kpi.com).
1. To set Serial Numbers in products, go to Purchase Orders from list of menu, and choose Purchase Order that you need. The bottom of the page you may see Approve & Email button, click the dropdown list and choose Mark As Open ( if it is not Marked As Open)
2. Then click Receive button
3. There are Assign Serials button on the rigt side of the page. click it:
4. When you click it, there are Assign Serial Numbers window. enter all serial numbers and data to each fields
5. Finally, save all entries.
6. In addition, While Sales Invoicing, if you choose the items which you entered with Serial Numbers you may identify them. Click the Assign Serials button on the right side:
7. When open Assign Serial Numbers window, you should select items serial number from dropdown list and press Ok
8. After selecting Serial Numbers you may Save & Approve your Sales Invoice
Setting Barcode for a Product
Setting Barcode for a Product
Go to Accounts>>Products and Services. Add or edit an inventory item and go to More Options. Enter the bar-code and click Generate. You can view the generated bar-code in a new window.
Created by Aziza Israilova, April 2019
Shortlists
Shortlists
Shortlist is the list of candidates who are most probably will be hired. Candidates are included into shortlists after interviews or calls usually.
To add an employee to the short list go to Humans>>Recruitment>>Shortlist and click on plus button. Alternatively you can go to the Candidate list, click on the actions and choose "Add to Shortlist".
Created by Aziza Israilova, April 2019
Signatures
Signatures
Go to Settings>>Email Settings>>Signature and add signatures which will show up in emails you send. If you are an administrator, you can add signatures to all of your employees.
"Insert this signature before quoted text in replies and remove the "--" line that precedes it" box is ticked if you want the signature to appear before the quoted text and after your new reply (otherwise, the signature will show up at the end of the conversation thread).
Single Payrun
Single Payrun
You can create payruns per employee or per group of employees. Using the Single Payrun, you can create one payrun for a specified period for one of your employees.
Go to Payroll>>Single Payrun and click the plus icon to add a new payrun. The below are the fields to be filled in:
Employee - choose the person for whom you are creating the payrun. It is a lookup field, you need to type in the employee name, then the system will populate the related employee names.
Approver - choose the manager who will be approving the payrun. This field populates HR Managers, Admins, and Directors.
Frequency - choose the payrun frequency Daily, Weekly, 2 Weekly, and Monthly.
Process Date - choose the date when the payrun should be processed.
Period - choose the period for which you are making the payrun.
Dates - when you choose the period, the dates are automatically chosen, however, you can amend the dates manually.
Pay Method - choose the payment method whether it is a cash payment, bank transfer, check etc.
Below the form, you will see the Payments, Deductions and Expenses table. The table will populate the amounts according to the employee's payrun settings.
All the payments and deductions available in the employee profile will show up in the payrun. If the employee has taken a loan or a cash advance on that period, they will be also deducted. If the employee has incurred any expenses on that period, the expenses will be paid off. Gov. Pension is also deducted which is set up in the Pension Scheme.
If you are the approver, you will have the "Save and Approve" option. Otherwise, you will need to submit the payrun for manager's approval or save it as Draft.
SMS Integration
SMS Integration
Sms integration allows you send short messages to your customers and prospects directly from the system. Besides, you can send blast sms as well.
To activate the feature go to Settings>>Sales>>SMS Accounts and click on plus button to add the account.
The providers kpi.com integrates with are ClickATell, MVaaYoo, SunCellular, EzyTextPro, or Our Sms. If you have credits in any of these providers, choose and enter your credentials. Click check balance to see how much balance you have. After that save the details.
You will be able to use this feature under Sales Module. Go to Contacts and click the phone number to send sms or go to Marketing module and click plus button to add sms in bulk.
Created by Aziza Israilova, April 2019
Spending and Receiving Transactions
Spending and Receiving Transactions
If you need to make an adjustment to your accounts, change customer, supplier balances, allocate costs across projects, then Manual Transaction at kpi.com is the right feature you need.
Go to Accounts>>Transactions>>Manual Entries and click on plus icon to add new. The fill in the form:
Narration - short name of the transaction.
Date - post date of the transaction.
Reference - enter reference if needed.
Memorized Transaction - check the box if you need to have this transaction as a template next time you create a new transaction.
Currency - choose the transactions currency.
Then go to table and enter accounts that should be debited and credited. Enter the amounts, description per each line, project and departments if needed and click Post or Save as Draft.
If you want to receive a payment from the customer account, choose Accounts Receivable under the account column and type the customer name under the Customer column. The same applies to Supplier transactions, in that case you will just choose the Accounts Payable.
Created by Aziza Israilova, April 2019
Stock Adjustments
Stock Adjustments
Stock adjustment is used to adjust stock quantity and stock value for different reasons like write-offs, stock-takes, donations and so on.
To adjust your stock go to Accounts>>Accounting Stock Adjustments. If the Warehouse feature is on in your account, then go to Accounts>>Warehouse>>Stock Adjustments. Click plus button to add new.
Choose the stock adjustment date, stock adjustment account and leave your notes in the Memo box if needed. Select the product for which you want to make adjustments. If you want to deduct from the current quantity, enter the deduction amount in the "Used Qty" field. The total will change accordingly. If you want to add more quantity, enter the new figure in the "New Qty" field. When you add new quantity, the product is added with the average cost however you can change it manually by clicking the "Change Manually" button and enter the new cost.
You can add any related files or documents to the stock adjustment using the attachments. After you have finished, click Save.
Created by Aziza Israilova, April 2019
Stock Transfer
Stock Transfer
When the Multiple-Warehouse option is enabled in your account, you will be able to move your inventory from one warehouse to another. To do that, go to Accounts>>Warehouse>>Stock Transfer and click plus button to add.
Fill in stock transfer details and then the warehouse/product details and click save.
Created by Aziza Israilova, April 2019
Stock Valuation
Stock Valuation
1. The Stock Valuation shows the product transaction dates, its balance and quantities. To see Stock Valuation details, go to Accounts>>Statements>>Stock Valuation.
2. Firstly, select the date From to To date the product actions. Select the Product from the dropdown list and choose Warehouse. Then click Update button for the refreshing page.
Subscription
Subscription
In order to purchase or upgrade your subscription at kpi.com, go to Profile>>My Account page.
Select the number of active users, ess users, and no access users. Select modules. You will see the total cost for the chosen subscription plan. Click "Continue" and choose the payment method.
If you have any questions or requests, please contact support@kpi.com.
Created by Aziza Israilova, April 2019
Subsidiary Company Management
Adding Subsidiary Companies
Sign-up with kpi.com as a usual user and request kpi.com Support Team to enable Multi-Company feature. You will do it only once.
After filling in the Getting Started page in the Accounting & Finance, click the icon next to the username at the right-upper corner of the screen.
Once the Multi-Company feature is enabled in your company, you will find additional settings for "Setup Company Subsidiaries".
Proceed with the link to arrive at Subsidiaries listings page. Click Add New button to invite your subsidiary company or companies.
When adding a subsidiary company you would need to provide basic information under COMPANY INFORMATION, ADDRESS INFORMATION and FINANCIAL INFORMATION.
Under COMPANY INFORMATION you would input subsidiary administrator's data such as First Name, Last Name, Phone Number, Email, Child Company country. The administrator's email will be used to send the invitation into the system.
You may optionally fill in subsidiary company billing and shipping addresses under the ADDRESS INFORMATION section.
Otherwise, you can leave it at the discretion of the Child Company's admin.
Under FINANCIAL INFORMATION you will need to provide a subsidiary's Base Currency and select what other functional currencies that child company will be dealing with in their daily activity under Operating Currencies. For example, Child Company prepares its reports for their own purposes in USD, but that company also uses EUR, GBP. In this example, child company base currency would be USD and EUR and GBP would be regarded as Operating Currencies in kpi.com.
You need to make sure that Parent Company's base currency coincides with child companies base currency or is listed under Operating Currencies.
Next option would be to Save & Close or Save & New after which the subsidiary company admin will receive email from kpi.com to activate their company. Following the link, the admin would need to set their passwords.
Intercompany Sales
To conduct intercompany sales, which could be between subsidiaries from bottom to up sales, from the parent company to subsidiaries or vice versa, you would need to add a customer and relate one of the companies in the network.
Adding Intercompany as a Customer
When adding a customer, you would have an additional field Subsidiary visible only if Multi-Company feature is enabled.
To relate a customer a subsidiary company, you would need to select from the list of active subsidiaries. Once you have the subsidiary as a customer you can start selling services and inventory items the companies. (Product Group and Assembly items cannot participate in intercompany sales).
If the items you are selling to your subsidiary is not listed in that company's Products/Services listings page, those items will be automatically created in the child company's account.
Creating Intercompany Sales Invoice
Select the customer related to a subsidiary company and choose the right currency, which is limited to the base currencies of the parent and subsidiary company.
Once a sales invoice issued by a parent company will be listed in Purchase Invoice listings page of the child company with Pending status. Accountants of the subsidiary company would then need to login to their account and click the button under Action in Purchase Invoice listings as is shown in the screenshot to the right.
Child company accountant or admin would need to set Purchase Invoice number and double check the exchange rate in the right bar and click the Draft button, which would set the status of the purchase invoice into Draft. An accountant would need to revisit the Purchase Invoice and click the Approve Invoice to finalize intercompany sales.
Consolidation
To consolidate Profit & Loss and Balance Sheet reports, the parent company admin or accountant need to set proper exchange rates under Exchange Rates tab, which is available only in the parent company account and lock the ex-rates by clicking Save. After saving, ex-rates cannot be altered.
If no exchange rates are set in the Exchange Rate tab, in consolidation, transactions will be divided by 1 for the missing dates.
Once the exchange rates are set and locked, the parent company can see consolidated Profit & Loss and Balance Sheet statements, all they need to do for this purpose is reports is to check Consolidation and click Update to see the up-to-date report.
Supervisor Structure
Supervisor Structure
Supervisor structure can be accessed from Humans module and it is available for Administrators, Directors and HR Managers.
You need to set up each employee's supervisors from Humans>>Employees>>Edit Employee page. After you set up all the supervisors, the structure will be available as a scheme.
Created by Aziza Israilova, June, 2019
Supplier Access
Supplier Access
To enable access to supplier contacts at kpi.com, perform the following actions:
Go to the Sales>>Companies module on the main menu.
Go to the Supplier View page. The account type should be set as Supplier.
Click Contacts from the top bar and click on the contact name.
In the Contact View page click on the Actions and choose Enable Access.
The supplier contact will receive an email notification to activate his/her customer account at kpi.com.
The supplier contact will have access to the following:
View access to Purchase Orders and Purchase Invoices.
Export options
Approve options in Purchase Orders.
View access to Cases.
You can modify the suppliers’ access level from Settings>>Users and Privileges>>Permissions.
Supplier Center
Supplier Center
Supplier Center lists all information about your vendors. To add a new supplier go to Accounts>>Supplier Center and click on green add icon. You can add multiple suppliers using the Import option.
Enter all the necessary information about the supplier in the add new form like supplier name, address, currency, supplier balance as of date etc.
Once you have saved the supplier details, you will be able to create purchase order, purchase invoice, payment and other transactions with the supplier.
You can view the supplier balance from the Balance column in the Supplier Center. You can also send the supplier statement to the supplier or generate the Excel or PDF versions.
Created by Aziza Israilova, March 2019
Supplier Prepayments
Supplier Prepayments
Supplier Prepayments are the advance payments your company has made to your suppliers. To record a supplier prepayments go to Accounts>>Transactions>>Supplier Prepayments. Click the plus button to add new.
Supplier - choose the supplier name. You will see the supplier balance immediately after you select the supplier.
Date - choose the prepayment date.
Post Date - check the box if the prepayment will be made in a future date.
Paid From - choose the account from which you have made the payment.
Amount - enter the prepayment amount.
Accounts Payable - choose the accounts payable.
Reference - enter short reference to this transaction.
Click save after you have completed the form. The prepayment will be posted with "Open" status. You will be able to apply this prepayment to purchase invoices as a payment. After the prepayment is used in purchase invoices, the status changes to "Applied".
Created by Aziza Israilova,
May 2019
Task Attachments
Task Attachments
You can upload documents related to the taskby clicking the Upload button in the task form under the Attachments. Files can be uploaded to either to the System storage or to your Google Documents, also you may link your existing System and Google documents to the tasks. Once you upload your documents, all task related users will be able to see the task attachments.
Task custom fields
Task custom fields
Custom fields extend the attributes of tasks, so if you have additional information to enter into the task, custom fields can help you with that. You can create your own custom fields from Settingssection>>Custom field . Once you create the custom field, it will be displayed in Task forms.
The Additional Information area displays the custom fields you have created for the Task forms.
Task due reminder
Task due reminder
You can set an email reminder for the due date of tasks, so that you become aware when you should end the task.The reminder can be set under the Dependencies subsection.
Once you set a notification reminder, all task assignees will receive an email notification about the expiration of the task. You can set several reminders for the task by using "Add reminder" link under the Due date reminder option.
Task links
Task links
Links are very useful option in kpi system to set a relation between two related items and easily navigate through them. You can add links to other system items those are related to the task.
Task links can be added from Add/Edit task forms or Task summary pages by clicking on the Add Links option. Links may be added to Contacts, Cases, Events, Issues, Opportunities etc. Once you add a link and click the link, you will be redirected to that related Item's Summary page.
Task Status
Task Status
Task Status
The Status field shows the task’s status for the employees involved. In the kpi.com, the status of a task can be defined as a global task status or a status for a particular employee. For example, the overall status of a task can be In Progress, however, for a particular employee the task can be Completed. If every employee completes the task, then the overall task status will become Completed as well. So here, you can set the task status for yourself only.
Task Summary
Task Summary
This page shows the overall summary of Task Details like Task Name, Description, Start/Dude dates, Priority and Status. You can also generate the PDF version of the task details in this subsection.
Assignees
The assignees subsection shows the list of employees involved in the tasks and their progress in the task.
Dependencies
The dependencies subsection shows all the predecessor and successor tasks links and the workstreams.
More Details
Under the More Details you can see information about task costs and time spent.
Time Entries
If you want to see how much time is spent by each employee in the task, then Time Entries tab will be handy. You can see the timesheet comments, date, and status of each time entry in the report.
Tax Rates
Tax Rates
Taxes are common in most financial transactions imposed by governmental law. To add a tax rate go to Settings>>Accounting>>Tax Rates and click on plus button.
Fill the required fields and click on Save & Close.
The taxes you have added will be available under Tax column in any transactions you make in the system.
You can also request the support team to enable the Double Tax option if this practiced in your country.
Created by Aziza Israilova, April 2019
Timer
Timer
Timer is like a stopwatch which calculates the time spent on a particular task. You can run a timer and stop it when you finish the task. This way you will exactly know how much time you spent on the task. Then you can register the time spent to the Timesheet using "Log to Timesheet" button.
You can access Timer from the Task Summary page or from the Actions dropdown of Task list.
Timesheet
Timesheet
Timesheet reflects the time entries of projects and tasks. Timesheet calendar navigation lets you easily jump to the exact day/time period. The actual and planned time spent feature allows comparing the time limits assigned for the exact project and task.
The Actual Time shows the time entries for the particular week and month, whereas the Planned Time shows the employee timeslot hours per week and month.
Time Entries
Time hours can be entered by clicking the boxes under the weekdays and pressing enter. While entering time you can also leave your comments.
Submit the Timesheet for Approval
The pre-filled timesheet form can be submitted for project manager`s or backup manager’s approval using the Submit button.
\While submitting the timesheet for approval, you need to choose the project and the period of the timesheet.
Your timesheet request will be reflected in Project Manager’s, Backup Manager’s and Administrators' approval list.
Status of Time Hours
Once you register the time in your timesheet, it will be reflected in black meaning it has been successfully registered.
Submitted time entries for approval are shown in orange, while approved hours are in green and rejected hours in red.
If the time has not been successfully saved, the system will show it in cursive.
Change the Status of Project/Task
In timesheet pane, you can change the status of a task. To do so, click the field under Status column of project list.
Export the Timesheet
You can export the timesheet asPDFandExcelversions by clicking functions in the Actions dropdown on the top menu of the Timesheet page.
Timesheet Filter
You can filter your timesheet by Client Name, Project Name and Workstream by choosing the options from the dropdowns on top of the timesheet page.
Updated by Aziza Israilova,
April 2019
Timesheet Approval
Timesheet Approval
This section is available by default for Project Managers, Backup Managers, and Administrators who can review employees’ timesheets and approve/reject them.
Review Timesheets
To review timesheets, go to Projects>>Timesheet Approval, click the actions and choose review for the timesheets with "Waiting for Approval" status.
Timesheets can be approved in batch too. Click the plus button to review in batch.
Choose the project
Select the period
View Result
While rejecting the timesheet, you can leave comments on the reason why you rejected it. The comment will show up in Task summary page.
Approval Permissions
You can also give the timesheet approval permission to other users from the Permission Management Settings. Please go to Settings>>Users and Privileges>>Permissions>>Projects tab and tick the option “Timesheet Approval” and “Approve/Reject all Timesheet” for other user roles.
Approved Hours
Approved time entries will be reflected as actual time spent in Task Summary page. The task’s percentage of completion is also calculated using the actual time spent if “Automatic” calculation is turned on.
Approved hours can be reviewed again and be rejected from Timesheet Approval Page. To reject the hours that have been previously approved, click on Actions and Review.
Timesheet-Based Invoice also uses approved hours to bill clients.
Timesheet based Invoice
Timesheet based Invoice
When you are project managing/contracting, you would need to aggregate timesheet entries on this project and raise invoices to your customer based hours spent, which can be accomplished via Timesheet Invoice.
Create Timesheet Invoice
To raise an invoice based on timesheet entries, you need to have a project related to a customer and have approved and non-billed hours.
Once you have unbilled hours, go to Accounting & Finance section of kpi.com. Click +Add New, then Timesheet Based Invoice. Select a customer and billable project(s).
Set Invoice Period and Invoice Type
You can present timesheet invoice to your customers in various formats, based on your selection of Invoice Type.
Invoice Type
Detailed Invoice includes line for each timesheet entry, including task name, assignee's name and timesheet entry date.
Group by Assignees - one invoice line per assignee, including project name, assignees name and task names
Group by Tasks - invoice lines grouped by task and assignee, including project's name, task name, assignee's name, and task description.
Group by Project - invoice line for project's total, including project name and description.
Timesheet Editor Role
Timesheet Editor Role
For project managers it is important to take control of project employees' activities. Besides approving timesheets, reviewing tasks and managing the project involvement, project managers sometimes need to fill timesheet on behalf of employees. Timesheet editor role helps them to do that.
Timesheet editor role gives full access to employee timesheets: add time, change task status, submit for approval, remove time etc.
To assign a timesheet editor role go to Humans>>Employees>>Edit Employee profile and choose Timesheet Editor role under Account Information part.
The timesheet editor can then go to Projects>>Timesheet and enter the employee name in the Employee field which then shows employee's timesheet.
Created by Aziza Israilova,
July 2019
Timesheet Invoice
Timesheet Invoice
Timesheet Invoice is used to bill customers based on employees worked hours on customers' projects.
Timesheet invoice can be added to Accounts>>Sales Invoices>>Add>>Timesheet Invoice.
While adding the timesheet invoice, choose the customer, projects of the customer, invoice period, invoice type and check the fields to be available in the invoice line item field and description field then click Continue.
The Timesheet Invoice populates all the employees approved hours in the Quantity field. The Price field shows the customer charge rate of the project per each employee.
The invoice can be saved as Draft, Approved or Open. When you click “Save & Approve”, the status of the invoice changes to Approved. When you save and email the invoice to your client, the status changes to “Open”. Whenever the invoice due date is exceeded, the invoice status changes to “Overdue”.
When you approve an email, the client receives the invoice as an attachment in the PDF form.
For any Overdue, Approved or Open invoices, you can receive payments.
Enter the amount paid, date paid and the account the payment is made to. Then click the Receive button. The invoice status changes to Paid.
The PDF version of the invoice can be generated either from the Actions dropdown in the listing page or from the Invoice summary.
Timesheet Reminder
Timesheet Reminder
The Timesheet Reminder is an email notification about the Timesheet that is sent to the user who enables it. Its primary purpose is to remind that the user has forgotten to fill in timesheet.
You can set this up from Settings>>Recurrence Settings. You need to set the Recurrence time and type for the reminder, and after that, you will receive an email about how much time you have registered for the day/week/month.
The Timesheet Reminder Settings is available for every user.
If you are a simple user (Member role), you will receive notification about your own Timesheet entries.
If you are the Department Leader, you will receive notification about your Department Members' entries.
If you are the Project Manager, you will receive notification about the Project Members' entries.
Administrator and Directors receive Timesheet notification about all user's time entries.
Timesheet Settings
Timesheet Settings
Showing Links to the Task
Tasks can have links to other section items such as contacts, accounts, projects, cases and many others. Timesheet can also show this relation just below the task name. You can set this up from Settings - Projects Settings - Timesheet Settings and tick the option called Show Timesheet Relation.
Auto Approved Time Entries
If you want time entries to get automatically approved without manager’s review, you can set it up from Settings - Project Management Settings - Timesheet Settings and check the Automatically checkbox for the Approve Timesheet option.
All further time entries registered will become green which means approved in the Timesheet.
Timesheet Validation
You can set limits to the Timesheet by validating against:
Maximum Hours - employees will not be able to enter more time than that is shown in their timeslot or planned estimated time. If you check the “Set Hours” you can set maximum hours that employee can set per day regardless of their timeslot hours
Task Start Date - employees will not be able to enter time before the task start date.
Task End Date – employee will not be able to enter time after the task end date.
Holidays – employees will not be able to enter time in Holidays.
Leave Request – employees will not be able to enter time for approved leave periods.
Set Timesheet Start Day
You can set the day when the working day starts in your country. By default, the timesheet shows Monday as a start of the week.
Show Completed Tasks until the Task Completion Week
By default, completed tasks are not reflected in the Timesheet. However, you can set the task to show up in the Timesheet just for one week which is the last week of the task.
Show Tasks from To-Do List
To do list is a quick panel to enter tasks and assign them to employees. This panel is located in the Workspace page (if enabled to your account).
If you tick the Show Tasks Added from To Do List option, the timesheet will reflect those tasks and you will be able to enter time for those tasks directly from the timesheet.
Show Hour Type dropdown
Some employees want to show where they worked when they enter hours into timesheet such as in the office, or while traveling or on-site. This option enables users to show the type of hour in the timesheet. The values in the dropdown can be changed to your own customized Hour Types from the Settings.
Multiple Timer Instances
Some users want to run timer for several tasks at a time. This option enables them to do so.
Save Timer Value to Timesheet Automatically
This option enables users to register timer value to timesheet when a timer is stopped. Otherwise, they may choose to log it to timesheet or cancel it.
Send Timesheet Notification
From the Timesheet Required for, you can choose those employees whom the timesheet notification will be sent.
Timesheet Reminder
The Timesheet Reminder Settings can be found from Settings - Recurrence Settings. Once you set the timesheet Reminder, you will start getting an email notification for the specified period of your timesheet hours registered.
Administrators can set Timesheet Reminder for all users in the system, as they have access to the Default Timesheet Reminder which can also be found from Settings - Recurrence Settings. Once the Timesheet Reminder specifications are set, all users will start receiving email notification on their Timesheet.
You can switch off Timesheet Reminder for some of your users from the Timesheet Required part of the Timesheet Settings.
[video width="1356" height="604" mp4="https://www.kpi.com/wp-content/uploads/2016/12/timesheet-settings.mp4"][/video]
Timeslots
Timeslots
To add work schedules, go to Settings>>Humans>>Timeslots page and click on Add New.
Enter Name, Description of the timeslot and then specify working hours. You can also use the Copy To All option if the working hours for the rest weekdays are the same.
You can add Exceptional Cases when a working day starts/ends at a different time.
Once you have finished adding timeslot hours, you can assign employees who will be working according to that timeslot.
The set timeslots will be reflected in Timesheet and in Attendance Tracking.
UAE VAT
UAE VAT
The UAE VAT was introduced and came into effect on January 1st, 2018. The tax rate imposed by the Federal Tax Authority is 5%.
The electronic registration is available on the Federal Tax Authority website. Companies need to create an account there first and then after creating an account, they need to complete the VAT Registration form with necessary details and documents. It is suggested to upload supporting documents to confirm the information provided like the following: passport copy, Emirates ID, trade license, other documents authorizing your business in UAE.
Once you submit the form, the FTA will its response via email confirming the Tax Registration Number (TRN).
Criteria for Registration
The VAT registration is compulsory for the companies revenues and imports of which make more than AED 375,000 annually
Some companies can voluntarily apply for VAT registration if their taxable revenues and imports exceed AED 187,500 per annum.
New and small size businesses have the option of becoming VAT Registered if their expenses exceed the voluntary registration threshold.
Foreign businesses may also recover the VAT they incur when visiting the UAE.
Keeping Records
As a VAT compliant accounting software, kpi.com offers clear and easy VAT transactions, reverse charges, VAT reports, and other financial transactions. The proper sign up helps you to get everything ready for Tax transactions.
Go to the kpi.com and click sign up. Enter your name and your email address. Choose the United Arab Emirates in the country field. You will receive an activation email upon sign up. Click the “Activate Account” button and start your account using the screen gif below:
It is important to tick the option “Yes” for the “Is your business registered for VAT” and enter your TRN number.
Check “ ” box if you are doing business with other GCC/Non-GCC countries and also for reverse charge handling.
You will have tax and financial settings correctly set up in your account. On the Settings>>Accounts>>Tax Rates section, you will have 4 types of taxes already created for you that are available in UAE: Zero Rate, Standard Rate, Out of Scope and Exempt.
Zero Rate tax is applied for:
Certain education and healthcare supplies.
Goods and services exported outside the GCC.
International transportation.
Certain investment-grade precious metals (e.g. gold and silver of 99% purity).
Newly constructed residential properties sold within 3 years of construction.
Standard Rate is applied for the goods and services that do not come under other category tax rates.
Out of Scope is applied for goods and services that do not fall in UAE and sent directly to other foreign countries. For example, in the case of merchant trading when an overseas supplier sells products to an overseas buyer, without the products being brought into the UAE and if a VAT registered entity supplies products to another VAT registered entity in another GCC country.
Vat Exempt applies for:
Residential properties.
Public transport.
Undeveloped land.
Life insurance.
Certain financial services.
Every organization, once VAT registered, should keep records of Tax transactions like Invoices, Credit Notes, and Debit Notes. Before creating your invoices, you will need to add your customer and supplier accounts. Depending on the type of financial information you enter in the customer/supplier accounts, their further invoice tax settings will be set accordingly.
Tax Treatment
There are several options under the Tax Treatment column defining the customer’s tax status like
VAT Registered - Company established in UAE and VAT Registered.
Non VAT Registered - Company established in UAE but not registered for VAT.
GCC VAT Registered - Company established in one of GCC countries and VAT registered (if you are buying products outside UAE with GCC countries, Reverse Charge).
GCC Non VAT Registered - established in one of the GCC countries but non VAT registered.
Non GCC - Company is established in none of GCC Countries (customer outside UAE and GCC).
VAT Registered– Designated Zone - Company is established in designated zones of UAE and VAT Registered
Non VAT Registered – Designed Zone - Company is established in designated zone but non VAT Registered
Invoicing
Tax Invoice is a document confirming the information about the taxable transaction made. Businesses should issue tax invoices for both taxable sales and taxable purchases. The tax invoice is required to include the following details:
A unique sequential number.
The date of issue.
The supplier’s name, address and Tax Registration Number (TRN).
The customer’s name, address and Tax Registration Number (TRN).
Description of goods or services supplied.
Total amount excluding VAT.
Total VAT chargeable.
Price and quantity of each item.
Rate of discount per item.
Rate of VAT charged per item – if an item is exempt or zero-rated, then mention there is no VAT on these items.
Total amount including VAT.
To create a tax invoice, go to Sales Invoices section of the Accounts module and click the plus button. Once you choose the customer, all the customer details will be brought to the invoice like the customer address details, TRN number, currency etc.
Fill in the invoice details and save. Click PDF to generate the PDF version of the tax invoice.
VAT Return
To generate a VAT Return Report go to Statements>>VAT Report and click Generate VAT Return button. Choose the period and click Save.
Created by Aziza Israilova,
July 2019
Users and Privileges
Users and Privileges
Users and Privileges give administrators a great control over what their employees can see, add and edit in the application.
To manage your users access level, go to Settings>>Users and Privileges.
There are three subsections under it: Employees, Roles, Permission Management.
In the Employees section, you will see all the employees added either from Humans or Projects and their statuses. The Employees section works the same as the Employees section available in Humans and Projects.
Roles section enables the admin to activate and deactivate all the user roles both custom and default ones.
Admin can also create a new custom user role using the New Role button.
In the Permission Management, you can manage the access level of your users. There are modules on top of the table and user roles under them. On the horizontal list, you will see the options like list view, add, edit etc. A tick on those options will enable the user to have access to that option. There is no "Save" button on this page, a change is automatically saved.
This setting is available only for Administrators. Administrators are not listed in the Permissions table since they are power users and their access cannot be changed.
Vacancies
Vacancies
Vacancies are open jobs available for new candidates/employees. To add new candidates go to Humans>>Recruitment>>Vacancies and click the plus button and choose Vacancy or Quick Add. Then fill in the details and save.
Created by Aziza Israilova,
April 2019
Validity Periods
Validity Periods
Validity Periods are used to configure performance appraisals, goal management and bonus distribution cycles. You can use validity periods while adding goals and performance appraisals.
In order to add validity period, go to Settings>>Humans>>Validity Periods.
Indicate the following details and save the validity period:
Validity Period Name – a Short name like “Setting SMART Goals"
Description –Short description
Date – Date when validity period starts
To Date – Date when validity period ends
Related to – Select related to options: appraisal, goal, and bonus.
If there are already validity periods in the system which overlap from and to dates, the system will give an error message.
You can remove the validity period, only if the period has not been used in appraisals, goals or in bonus distributions. To remove the validity period, select the Period from Validity Period's listing and click Remove from the Action dropdown.
Value Added Tax
Value Added Tax
Tax is a fee charged by the government on consumer goods, services, business revenues and other financial transactions to provide funding for public services and other government expenses incurred. There are two types of government taxes: direct and indirect tax.
Direct tax - it is paid by the taxpayer directly to the government without any intermediary.
Indirect tax - paid by the taxpayer to an intermediary who acts on behalf of the government for tax collection.
The VAT is a Value-added Tax also in some countries referred to as Goods and Services Tax (GST.) It is an indirect type of tax which is imposed on each step of supply of goods and services. VAT-Registered businesses get a refund on the tax paid from the previous step at the current step of the sales process. Ultimately, the end customers are the ones who will pay the VAT, the rate of which is added to the price of products and services they purchase.
VAT Registration Process
VAT Registration is a process that includes collecting and filing the documents to the responsible tax authorities so that your company listed as VAT-Registered. The registration rules and processes can be different from government to government.
The UAE VAT registration process is discussed here.
For KSA, US and UK registration processes click the links below:
Value Added Tax (or VAT) is an indirect tax. Occasionally you might also see it referred to as a type of general consumption tax. In a country which has a VAT, it is imposed on most supplies of goods and services that are bought and sold.
A VAT return is a form you file to show how much VAT you are due to pay to government. If you're not registered for VAT, you won't file VAT returns.
To enable the VAT Return in the application, go to Settings»Accounting»Financial Reports and tick the VAT Return Report and save the changes.
After that you will be able to create VAT from the Tax rates and use it in your invoices.
Make sure that Flat Rate Return is not selected in your Tax Settings under Financial Settings, otherwise the VAT Return will not show balances.
After the VAT tax is created, it can be used in transactions like Sales Invoice and Purchase Invoice.
When Tax Inclusive is chosen, the system takes your total price of 22,000 and then calculates what the rate would need to be to reach the total of 22,000 when a 5% tax is applied. Here is the formula:
By setting up No Tax, the system considers there is no tax at all in the transaction and the Tax column becomes disabled.
The VAT can be tracked using the VAT Return available from the Accounts Reports.
Once you save the VAT Return it will be copied to the VAT Report.
VAT Reverse Charge Mechanism
What is Reverse Charge Mechanism?
In the Forward Charge, the supplier of goods or services is responsible to pay tax to the government. However, under reverse charge mechanism the buyer or the recipient is liable to pay the tax to government. The main difference between Forward Charge and Reverse Charge is that the buyer of goods or services is responsible to pay tax to government instead of the supplier. Also, the tax under reverse charge mechanism is considered as non-refundable tax.
How is Reverse Charge Mechanism used in Kpi.com?
In Kpi.com, the only thing that you should do is to tick “Reverse Charge Applicable” in Financial Information of the supplier in Supplier Center. All Purchase transactions related to this supplier will be recorded under reverse charge mechanism.
Warehouse
Warehouse
A warehouse is an additional feature, activated per request to store products in different locations. Once activated, it can be accessed from Accounts>>Warehouse tab. Click the plus icon to add the warehouses.
To add new products to your warehouses go to Inventory Items and click on the plus button. Under the inventory stock information part, choose the warehouse.
To move the existing products to another warehouse, go to Warehouse>>Stock Transfer and add new Stock Transfer. More details can be found here.
To view the statistics about how many products are available in each warehouse, go to the Warehouses section and click the Actions and choose "Products". You will see how many quantities are available for each product.
Alternatively, you can go to Statements>>Stock Valuation report and run by filtering by product and by the warehouse to view the value and quantity of the products.
Created by Aziza Israilova, November, 2018
Web Forms
Web Forms
There are three types of web forms available in kpi.com: Lead, Case and Candidate forms which you can add to your website and integrate the forms with system.
To add a new web form go to Sales>>Marketing>>Web Forms and click on plus button. Choose the type of the form and fill in the details:
Title - web form title that will be shown in the website.
Description - description of the form.
Confirmation Message - enter the confirmation message when a visitor completes the form.
Button Text - enter the button text, for example, Save, Finish etc.
Path To A Redirect Page - redirection to the next page (optional).
Then configure the web fields. Tick the options next to the fields which should be available in the form. Then save.
You can preview the form using the IFRAME URL.
All the information filled up in the web form will be available in the system automatically.
Created by Aziza Israilova,
April 2019
.
What is Inventory Item?
What is Inventory Item?
Inventory items are crucial for businesses that deal with physical products. Understanding what an inventory item is and how it's tracked can help in efficient stock management and improve financial accounting.
Definition of Inventory Item
An Inventory Item is a product that a company purchases for resale purposes. It is essentially a tangible good that can be quantified in stock. In contrast to a non-inventory item, inventory items are tracked for both their quantities and value (in the Stock and in the Balance Sheet), allowing businesses to maintain adequate stock levels and manage the sales and procurement processes efficiently.
Tracking Inventory
Inventory items are tracked through various stages in the business processes. They are included in the customer process - appearing in the KPI Accounts Software under Sales Quotes, Sales Orders, Sales Invoices, and Customer Credit Notes, as well as in the supplier process, showing up in Purchase orders, Purchase invoices, and Supplier Credit Notes.
Kpi.com Accounts, as well as other inventory management systems, allow businesses to track the following metrics for inventory items:
Quantity on Hand: This represents the total number of items available on Hand, in the warehouse or across all warehouses.
Available Stock: This is the Quantity on Hand minus the items that are on sales orders. For instance, if a warehouse has 5 items and 4 are on sales orders, the available stock is 1 item.
On Sales Order: This indicates the total number of items that are currently on sales orders.
Adding and Working with Inventory Items
Once the initial setup of the company is completed in an inventory management system, such as KPI.com Accounts, businesses can start adding new inventory items. This option will appear after the "Accounting Getting Started" page. Detailed information about each item, including the accounts to charge when you buy and sell the item, quantity on hand, and reorder point, can be entered.
Accounting for Inventory Items
When inventory items are purchased and received, the accounting software credits the Pending Goods Received Notes account and debits the Stock asset account. Converting the Purchase Order to a Purchase Invoice credits the Accounts Payable account for the supplier and debits the Pending Goods Received Notes account. Upon selling the items, the software credits the Stock asset account and debits the Materials Purchased (cost of goods sold) account. This accounting process helps in keeping the financial records accurate.
Accounting Stage
Action
Account Credited
Account Debited
Purchase & Receipt of Items
Buying inventory items and receiving them
Pending Goods Received Notes
Stock (Asset)
Conversion to Purchase Invoice
Changing the Purchase Order to Purchase Invoice
Accounts Payable (Supplier)
Pending Goods Received Notes
Sale of Items
Selling inventory items to customers
Stock (Asset)
Materials Purchased (Cost of Goods Sold)
FAQ Inventory Item
What is an Inventory Item?
An Inventory Item is a tangible product that is purchased by a business for the purpose of reselling. These items are quantified and tracked in stock to manage sales and procurement processes efficiently.
How is the quantity of Inventory Items tracked?
Inventory items are tracked through three metrics: Quantity on Hand, which shows the total items available; Available Stock, which is Quantity on Hand minus items on sales orders; and On Sales Order, indicating the total items currently on sales orders.
What is the importance of Inventory Items in accounting?
Inventory items are essential in accounting as they represent a significant investment of business resources. Accurate tracking and valuation of inventory are crucial for financial statements, especially for calculating the Cost of Goods Sold and assessing profitability.
How is accounting for Inventory Items handled?
When inventory items are purchased, the Stock asset account is debited and the Pending Goods Received Notes account is credited. Upon converting the Purchase Order to a Purchase Invoice, the Accounts Payable account is credited and the Pending Goods Received Notes account is debited. When the items are sold, the Stock asset account is credited, and the Materials Purchased (Cost of Goods Sold) account is debited.
Can Inventory Items be both products and services?
Inventory Items typically refer to tangible products. Services are not considered inventory items as they are not tangible goods that can be stored or quantified in the same way physical products are. They fall under non-inventory items.
What is Non-Inventory Item?
What is Non-Inventory Item?
A Non-Inventory Item refers to a type of product that is bought or sold within a business, but unlike inventory items, the quantity is not tracked. Typically, non-inventory items are either purchased for internal company use or as custom products for specific projects.
Use in Business Processes (KPI)
Non-inventory items play a significant role in sales and supplier processes:
Sales Process: These items appear in various sales documents, such as Sales Quotes, Sales Orders, Sales Invoices, and Supplier Credit Notes.
Supplier Process: If a non-inventory item is marked as “Is purchased from supplier” in the KPI Accounting Software, it will also be included in supplier-related documents like Purchase Orders, Purchase Invoices, and Supplier Credit Notes.
This concept is essential in accounting and inventory management, especially for businesses that deal with a diverse range of products or services.
Non-Inventory Items appear in sales process (on Sales Quotes, Sales Orders, Sales Invoices, or customer Credit Notes). If you select "Is purchased from supplier" check box on the, non-inventory items appear in the supplier process (on Purchase Orders, Purchase Invoices, or supplier Credit Notes).
Businesses utilize non-inventory items to track products that:
Are sold but not purchased.
Are purchased but not resold.
Are purchased and resold but are not tracked as inventory.
Examples of Inventory and Non-Inventory Items
Examples of Inventory Items
Mobile Phones: A retail store that sells mobile phones keeps a stock of various models.
Books: A bookstore maintains an inventory of different books.
Groceries: A supermarket stocks various groceries including fruits, vegetables, and packaged food.
Clothing: A clothing store maintains an inventory of dresses, shirts, trousers, etc.
Auto Parts: A car parts store keeps various spare parts in stock.
Electronics: An electronics store holds an inventory of laptops, TVs, cameras, etc.
Furniture: A furniture shop stocks tables, chairs, sofas, etc.
Medicines: A pharmacy keeps an inventory of different medications.
Cosmetics: A beauty store maintains stock of makeup products.
Construction Materials: A hardware store keeps an inventory of nails, screws, lumber, etc.
Examples of Non-Inventory Items
Consultation Services: A consultancy firm offers services that don’t involve physical goods.
Software Licenses: A company selling software licenses which are sent via email.
Training Sessions: A company offering professional training or workshops.
E-books: An online store selling digital books.
Custom-made products: A company that orders products specifically for a customer's request.
Subscription Services: Such as online streaming, magazine subscriptions, etc.
Event Tickets: Tickets for concerts, sports events, etc., sold by a ticket retailer.
Food in Restaurants: Prepared and served immediately without keeping track of each ingredient's stock.
Repair Services: Such as car repair, computer repair, etc.
Freelance Work: Services offered by freelancers such as writing, design, development, etc.
Inventory Items are items that you buy and then stock for a while before selling. Kpi.com Accounts tracks the quantity on hand, the current stock value (transaction value), and the FIFO method to calculate stock valuation. It also tracks some accounting information like "cost of goods sold" for inventory items that you have sold.
Non-inventory items are items that you purchase (usually on behalf of a specific customer) and then immediately sell or install, or items that you sell without ever buying. For non-inventory items, Kpi.com Accounts will only track how much you have spent or taken in. Some businesses use non-inventory items even for items that they stock because they prefer a simpler approach—even though it gives them less information.
What are non-inventory items - Examples for inventory and non-inventory items
A Table with differences between Inventory and Non-Inventory Items
Characteristic
Inventory Items
Non-Inventory Items
Nature
Physical goods
Services, digital products, or specific custom-made products
Quantity Tracking
Quantity is tracked
Quantity is not tracked
Purchase Process
Usually purchased in bulk for stocking
Usually purchased on-demand or created as needed
Sales Process
May be sold immediately or kept in stock before selling
Usually sold or consumed immediately
Accounting Information
Detailed, including cost of goods sold
Typically only revenue or expenses
Stock Value Calculation
Involves methods like FIFO for stock valuation
Not applicable
Use in Business
Best for products that need detailed tracking
Best for flexible handling of products/services
Examples
Mobile phones, groceries, books, auto parts, medicines
A Non-Inventory Item is a product that is bought or sold in a business, but unlike inventory items, its quantity is not tracked. Non-inventory items are typically purchased for internal company use or as custom products for specific projects.
How are Non-Inventory Items used in business processes?
Non-Inventory Items play a significant role in sales and supplier processes. In sales processes, they appear in sales documents like Sales Quotes, Sales Orders, Sales Invoices, and Supplier Credit Notes. If marked as "Is purchased from supplier" in accounting software like KPI, they are also included in supplier-related documents like Purchase Orders, Purchase Invoices, and Supplier Credit Notes.
What are examples of Inventory and Non-Inventory Items?
Examples of Inventory Items include mobile phones, books, groceries, clothing, auto parts, electronics, furniture, medicines, cosmetics, and construction materials. Examples of Non-Inventory Items include consultation services, software licenses, training sessions, e-books, custom-made products, subscription services, event tickets, food in restaurants, repair services, and freelance work.
What is the difference between Inventory and Non-Inventory Items?
Inventory Items are physical goods, usually purchased in bulk for stocking, and have detailed accounting information. Non-Inventory Items are services, digital products, or specific custom-made products, usually purchased on-demand or created as needed, and typically only have revenue or expenses tracked. Inventory Items are best for products that need detailed tracking while Non-Inventory Items are best for flexible handling of products/services.
How does Kpi.com Accounts track Inventory and Non-Inventory Items?
Kpi.com Accounts tracks Inventory Items by monitoring the quantity on hand, the current stock value, and uses the FIFO method to calculate stock valuation. It also tracks accounting information like "cost of goods sold". For Non-Inventory Items, Kpi.com Accounts only tracks how much you have spent or taken in.
Workflow of Expense Claims
Workflow of Expense Claims
Expense claims can be seen by each employee once their accounting and finance module is fully setup by administrators. Employees can leave various forms of expense claims and send them for managers’ approval.
Workflow of Expense Claims:
Employees are able to submit expense claim for approval;
Department Leaders and project managers review expense claim and choose to approve or reject it;
Rejected expense claims can be changed and re-submitted again;
Once Expense Claim is approved, accountants can make payment to expense claim.
October 2017 Update
After the October 2017 system upgrade, the expenses are separated into Company and Employee expenses. Company expenses can be created by higher level users like Admin, Director and Accountant while Employee expenses can be created by everybody.
Employee expense form has been changed and simplified. There is no Category and Bill to columns. These fields will be chosen by the manager while approving the employee expenses.
Workstreams
Workstreams
Workstream is a project's milestone. You can use workstreams to group your tasks and divide your projects into phases. For example, tasks related to design, can be included in a workstream called "Design Tasks" or tasks related to coding can be included in a workstream called "Development Stream" etc. You may even assign parent and child workstreams for particular workstream within the project.
To add a workstream to a project go to Projects, go to the project summary and click Work Breakdown Structure and click the plus button.
Enter the workstream name.
Choose start and due dates.
Choose the parent workstream if needed.
Set up due date reminder (optional)
Click Save.
When add a new task to the project you will be able to choose the task workstream under Dependencies tab.
 Financial Settings
Financial Details are the following:
Financial Settings
Financial Details are the following:
 Account Numbering
You can set up automatic numbering for Chart of Account categories.
Account Numbering
You can set up automatic numbering for Chart of Account categories.
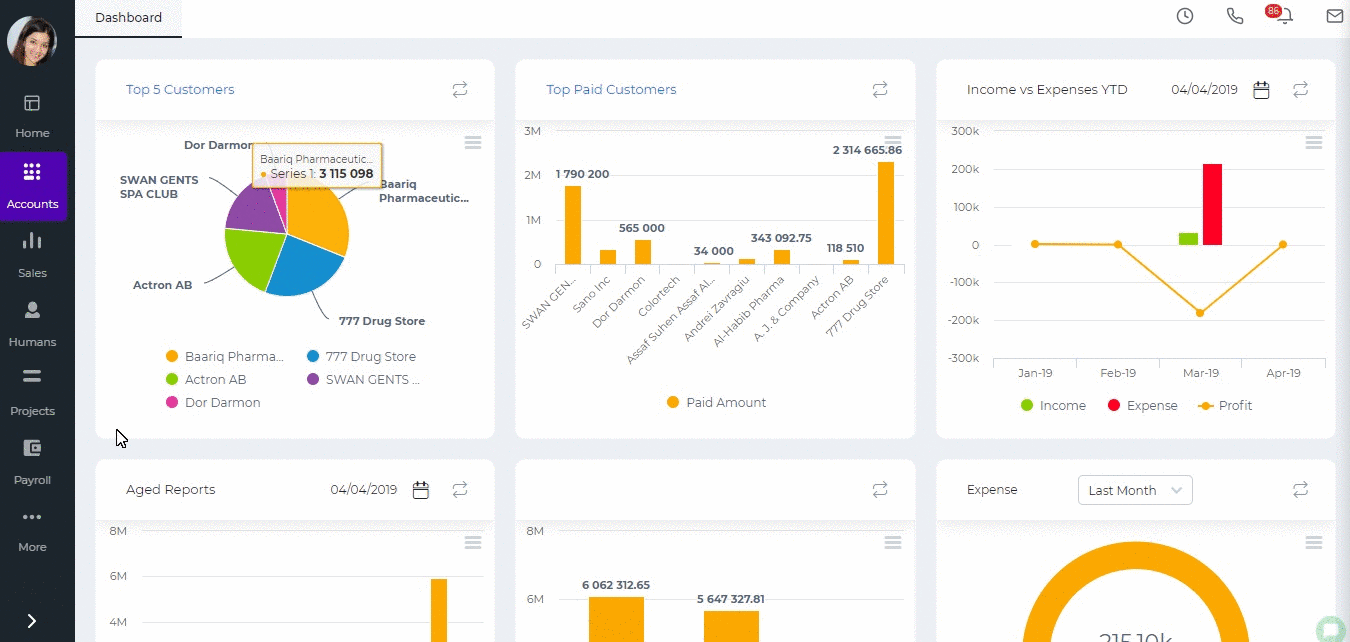 Numbering Settings
You can set up numbering for Products, Fixed Assets, Expense Claims, Stock Adjustment, Stock Transfer, Manual Transactions, Bank Payments, Bank Receipts, Cash Payments, Cash Receipts, Customer Prepayments, Supplier Prepayments, Invoices, Quotes, Purchase Orders, Purchase Invoices, and Credit Notes. You can also restart the numbering each year.
Numbering Settings
You can set up numbering for Products, Fixed Assets, Expense Claims, Stock Adjustment, Stock Transfer, Manual Transactions, Bank Payments, Bank Receipts, Cash Payments, Cash Receipts, Customer Prepayments, Supplier Prepayments, Invoices, Quotes, Purchase Orders, Purchase Invoices, and Credit Notes. You can also restart the numbering each year.
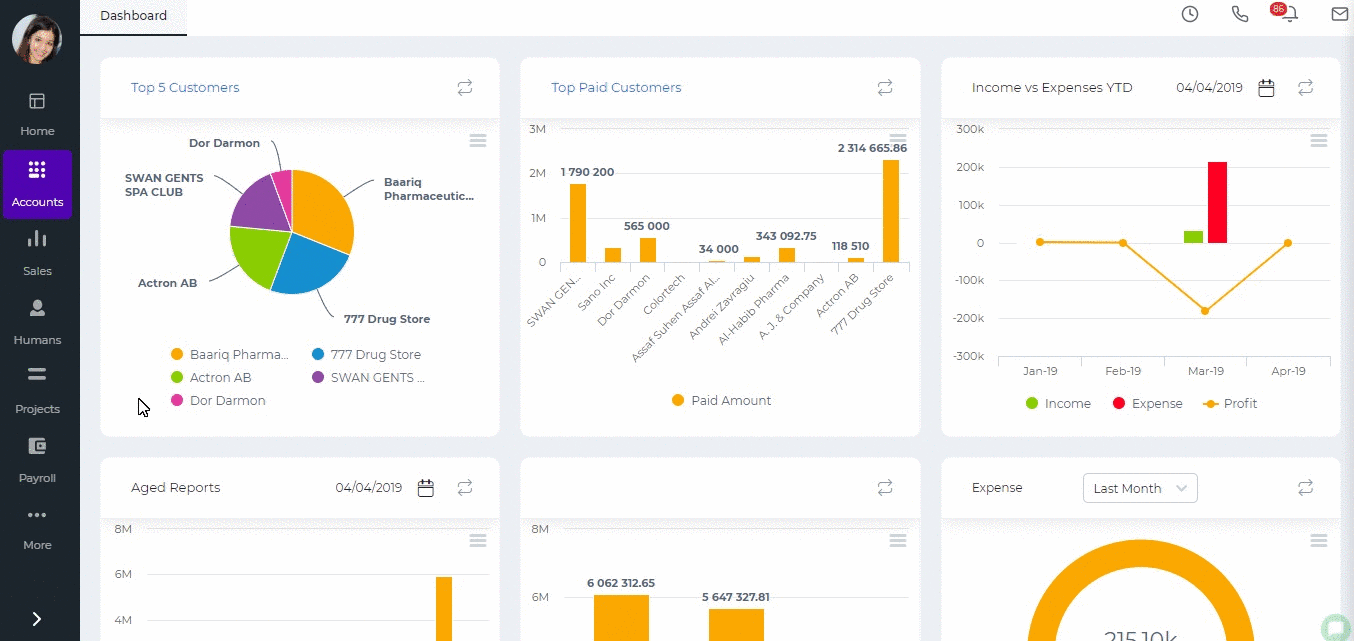 Tax Rates
You can create different tax rate which later you will be able to use in accounting transactions like invoices, purchase orders, expense claims etc.
Currency Rates
You need to create and set up all the currencies you use in your financial transactions here.
Discounts
Discounts can be created here which can later be used in all accounting transactions.
Measurements
You can create unit of measurements for the items used in invoices and orders. The unit of measurements can be items, kilograms, liters, meters etc.
Product Category
Different categories for your products and services can be created here. You can categorize your items by their color, audience they are made for, such as age group, sex, region and so on.
Brands
Brands of your products can be added and viewed in this section of the Accounting Settings.
Shipping Method
Different type shipping methods can be created with the price, account and names.
Payment Methods
In this section, you can specify methods of payments such as Bank transfer, Cash, Cheque, Credit/Debit card, Wire Transfer.
Invoice Templates
Several type of custom invoice templates are presented and available for purchase.
Product Table Settings
More information is available about the product table settings here.
Chart of Accounts
You can find the chart of accounts which is a listing of all accounts used in the general ledger of an organization. The charts are usually sorted in order by account number, to ease the task of locating specific accounts. You can edit, add and remove chart of accounts here.
Tax Rates
You can create different tax rate which later you will be able to use in accounting transactions like invoices, purchase orders, expense claims etc.
Currency Rates
You need to create and set up all the currencies you use in your financial transactions here.
Discounts
Discounts can be created here which can later be used in all accounting transactions.
Measurements
You can create unit of measurements for the items used in invoices and orders. The unit of measurements can be items, kilograms, liters, meters etc.
Product Category
Different categories for your products and services can be created here. You can categorize your items by their color, audience they are made for, such as age group, sex, region and so on.
Brands
Brands of your products can be added and viewed in this section of the Accounting Settings.
Shipping Method
Different type shipping methods can be created with the price, account and names.
Payment Methods
In this section, you can specify methods of payments such as Bank transfer, Cash, Cheque, Credit/Debit card, Wire Transfer.
Invoice Templates
Several type of custom invoice templates are presented and available for purchase.
Product Table Settings
More information is available about the product table settings here.
Chart of Accounts
You can find the chart of accounts which is a listing of all accounts used in the general ledger of an organization. The charts are usually sorted in order by account number, to ease the task of locating specific accounts. You can edit, add and remove chart of accounts here.

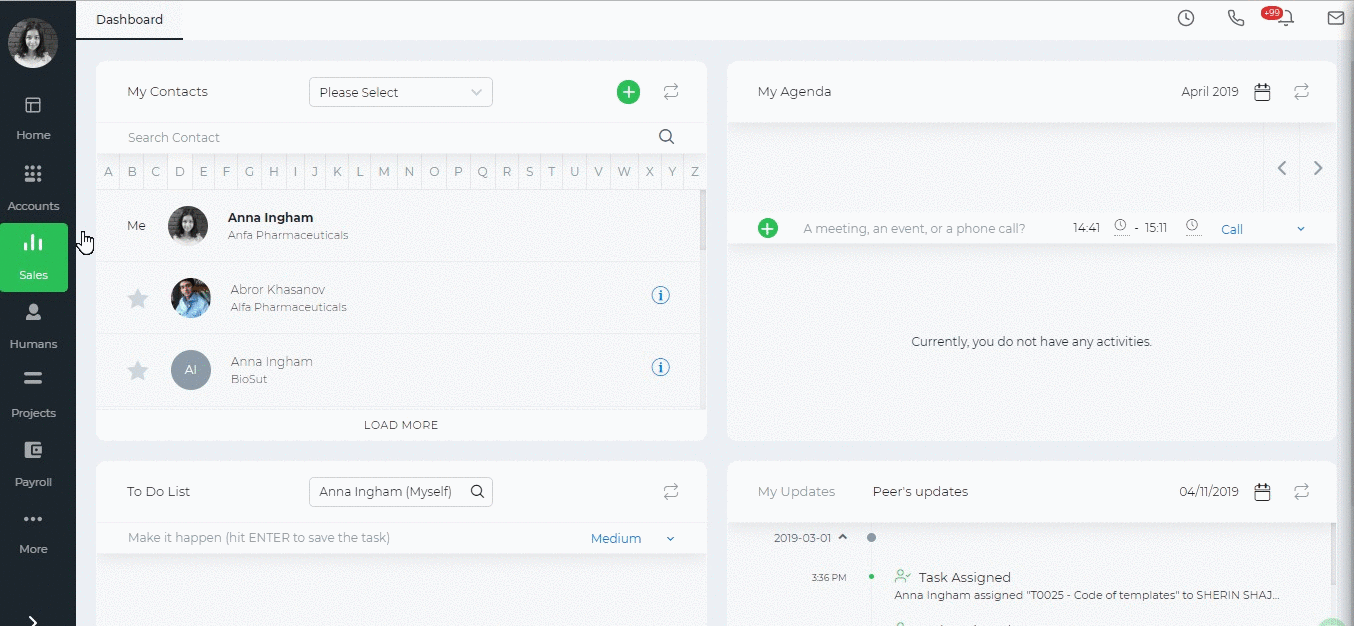
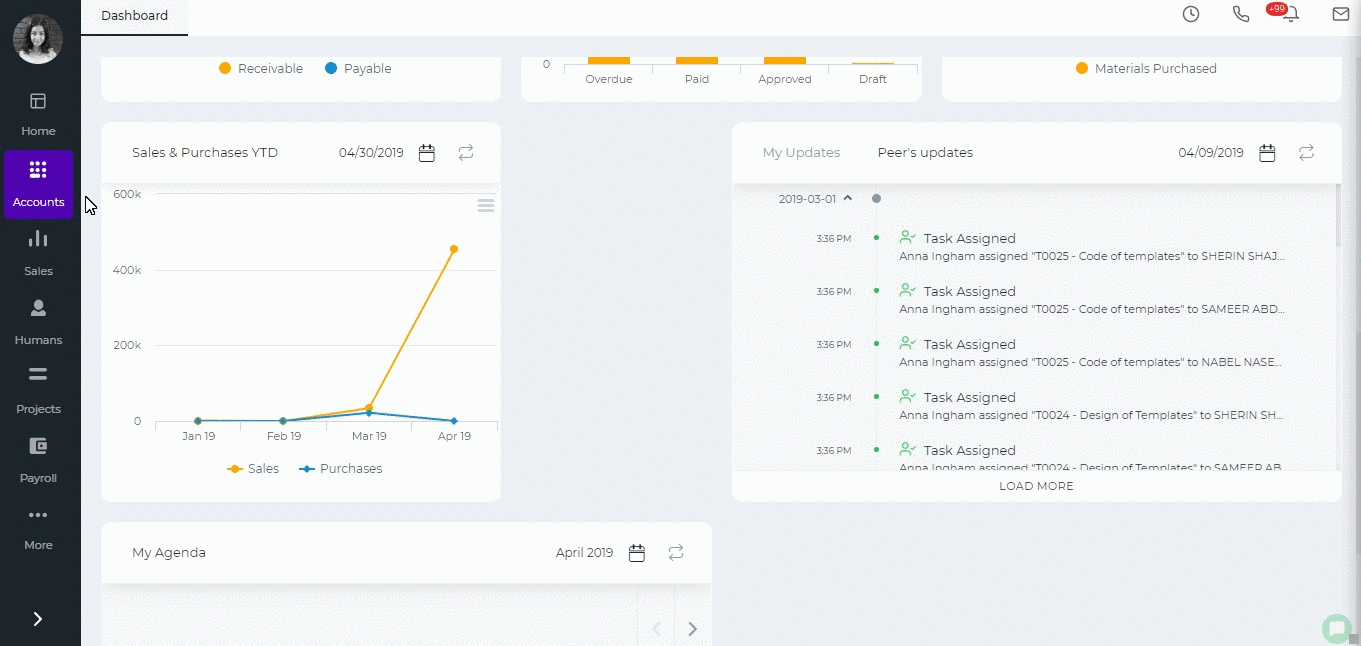

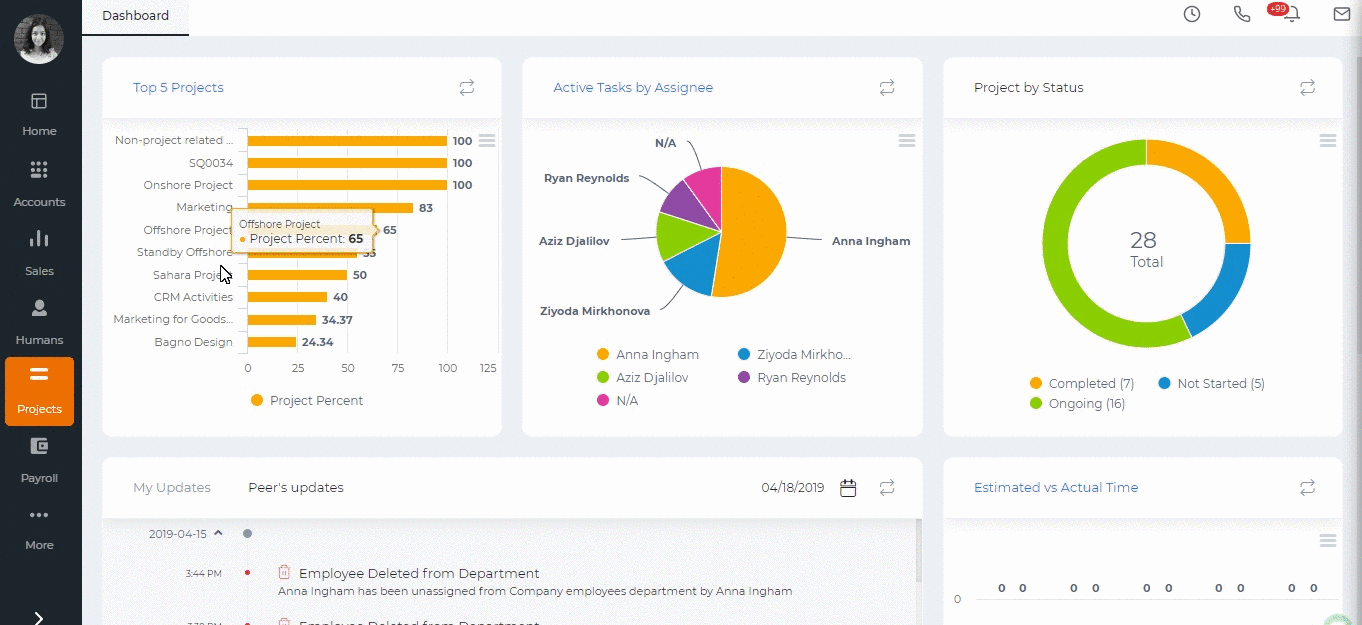
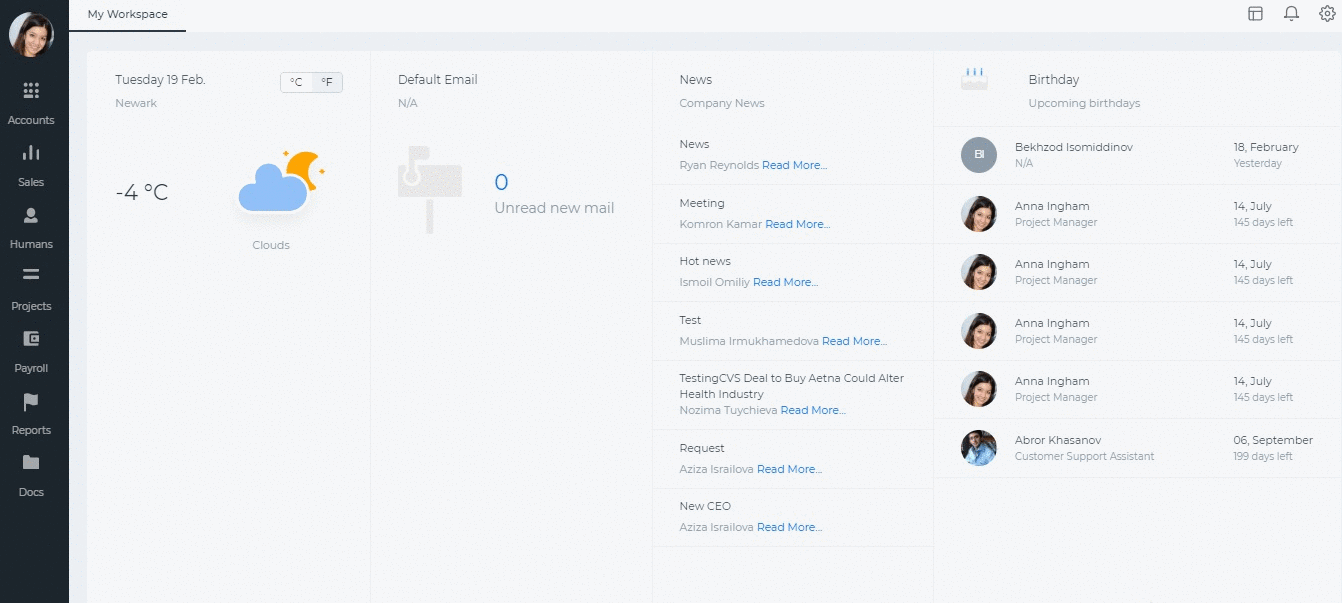
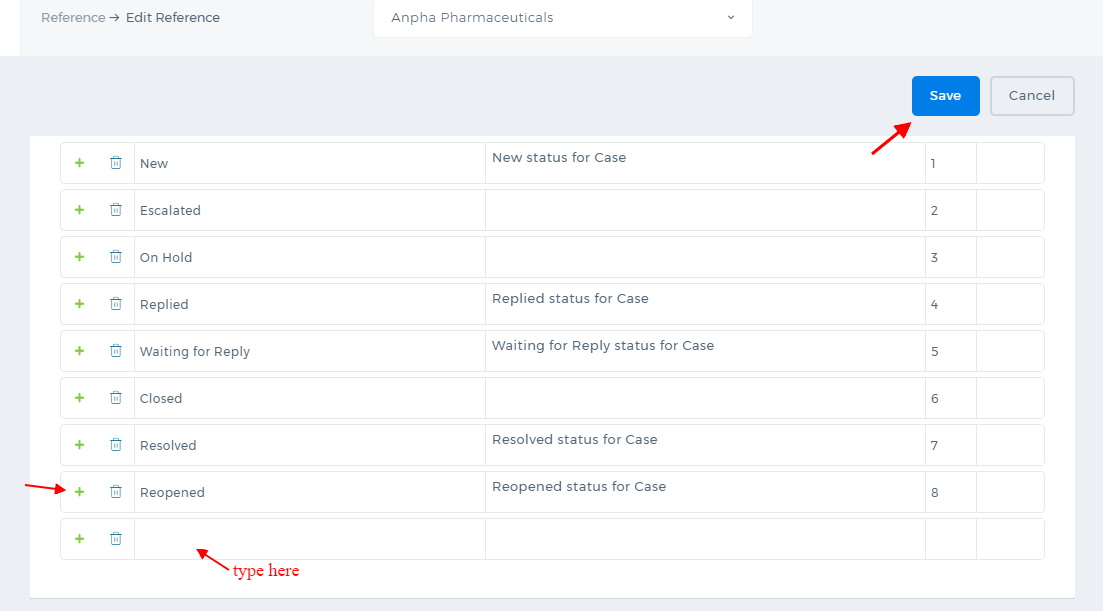 Once you save the changes, the new case status will be available in the Cases.
The Reference Settings is not available by default. To enable the feature, contact our technical support team.
Once you save the changes, the new case status will be available in the Cases.
The Reference Settings is not available by default. To enable the feature, contact our technical support team.
 Afterwards, go to the Settings>>Email Templates>>Signature, where you can Add New Signature or Edit existing one. You can add a picture by pasting your copied URL link.
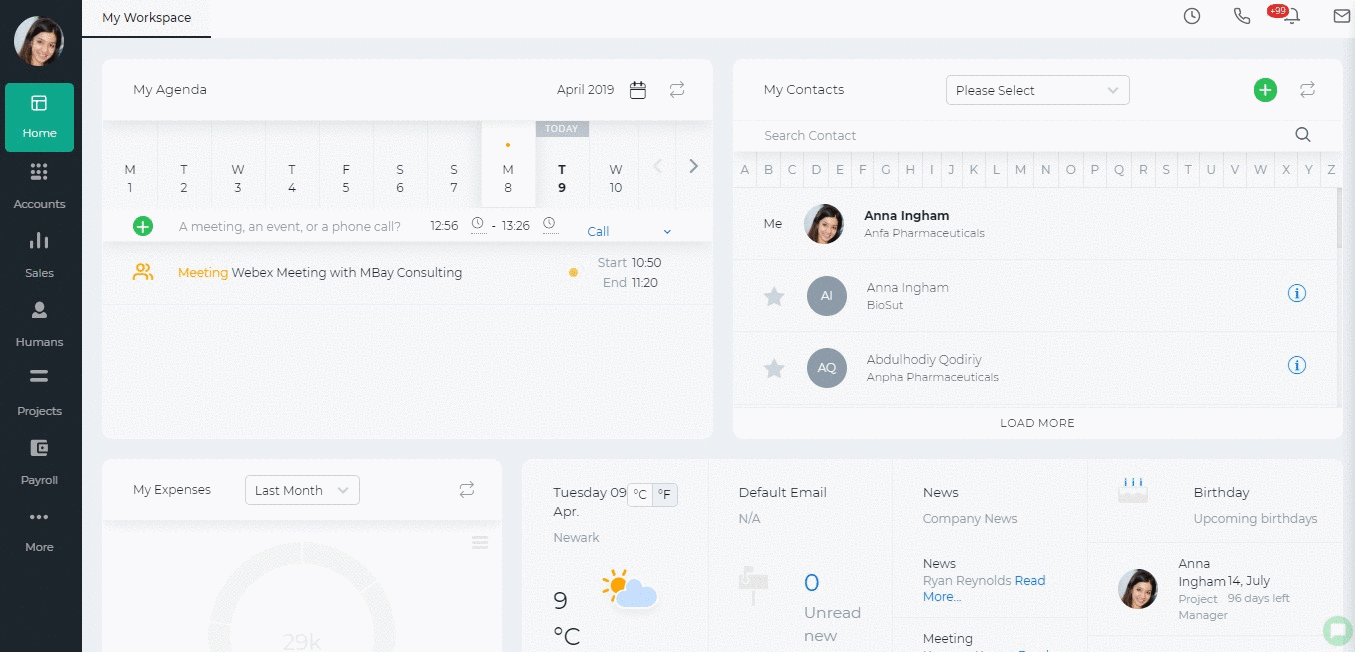 Opening Balance Date for Leaves
The Administrator can set an opening balance date for all employees leave balances, which means that the leave balances are effective starting from that date. The opening balance can be set from Settings>>Humans>>Leave Reasons>>Edit Leave.
This date is also shown in the Annual Leave Report.
If the Hire Date is before the Opening Balance date, then the balances effective date is going to be the Opening Balance Date. If the Hire Date is after the Opening Balance date, then the balances effective date is going to the Hire Date.
So the number of worked days depends on the Effective Start Date.
Opening Balance Date for Leaves
The Administrator can set an opening balance date for all employees leave balances, which means that the leave balances are effective starting from that date. The opening balance can be set from Settings>>Humans>>Leave Reasons>>Edit Leave.
This date is also shown in the Annual Leave Report.
If the Hire Date is before the Opening Balance date, then the balances effective date is going to be the Opening Balance Date. If the Hire Date is after the Opening Balance date, then the balances effective date is going to the Hire Date.
So the number of worked days depends on the Effective Start Date.
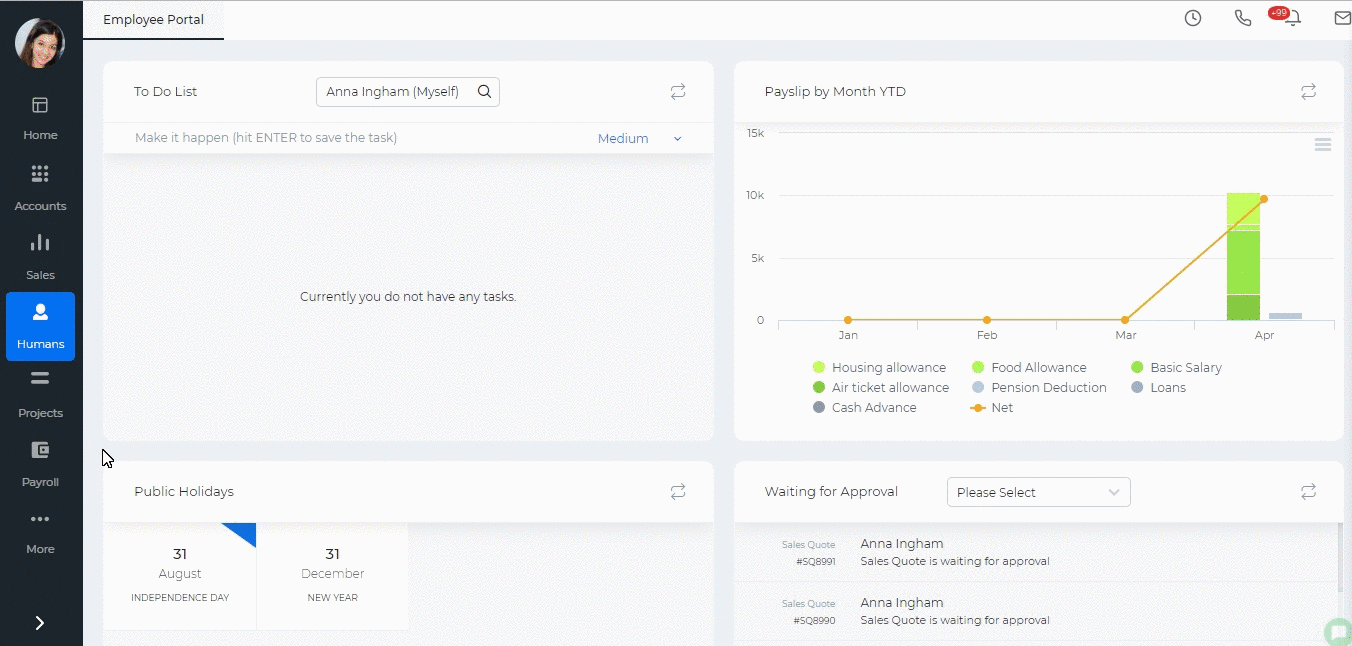 Opening Balance Days
If the employees already have the balances as of the opening balance date, then the opening balances are just added to the current balance, so the formula is as follows: Number of Worked Days( Leave allowance days/365 ) - Taken Days + Opening Balance Days.
The Opening Balance Days column can be enabled from the Customize icon on the right hand side corner of the report.
After the column is enabled, a double click helps you to enter opening balance days for each employee.
Opening Balance Days
If the employees already have the balances as of the opening balance date, then the opening balances are just added to the current balance, so the formula is as follows: Number of Worked Days( Leave allowance days/365 ) - Taken Days + Opening Balance Days.
The Opening Balance Days column can be enabled from the Customize icon on the right hand side corner of the report.
After the column is enabled, a double click helps you to enter opening balance days for each employee.
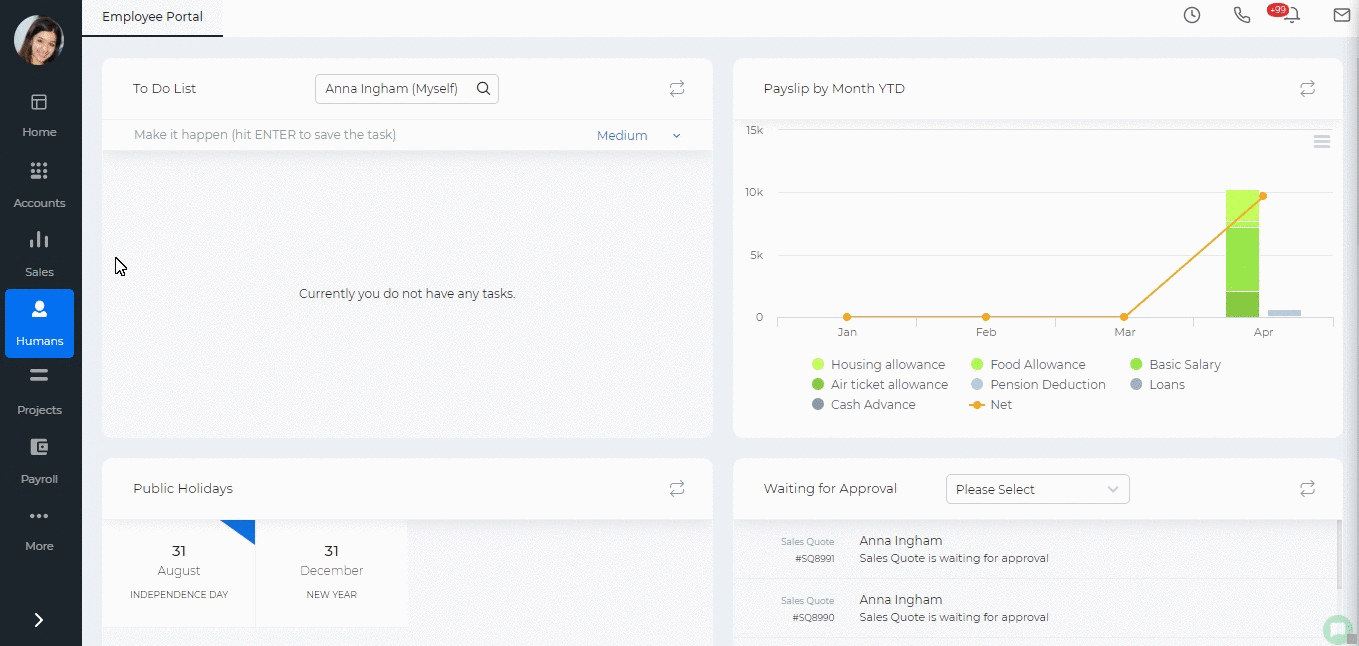

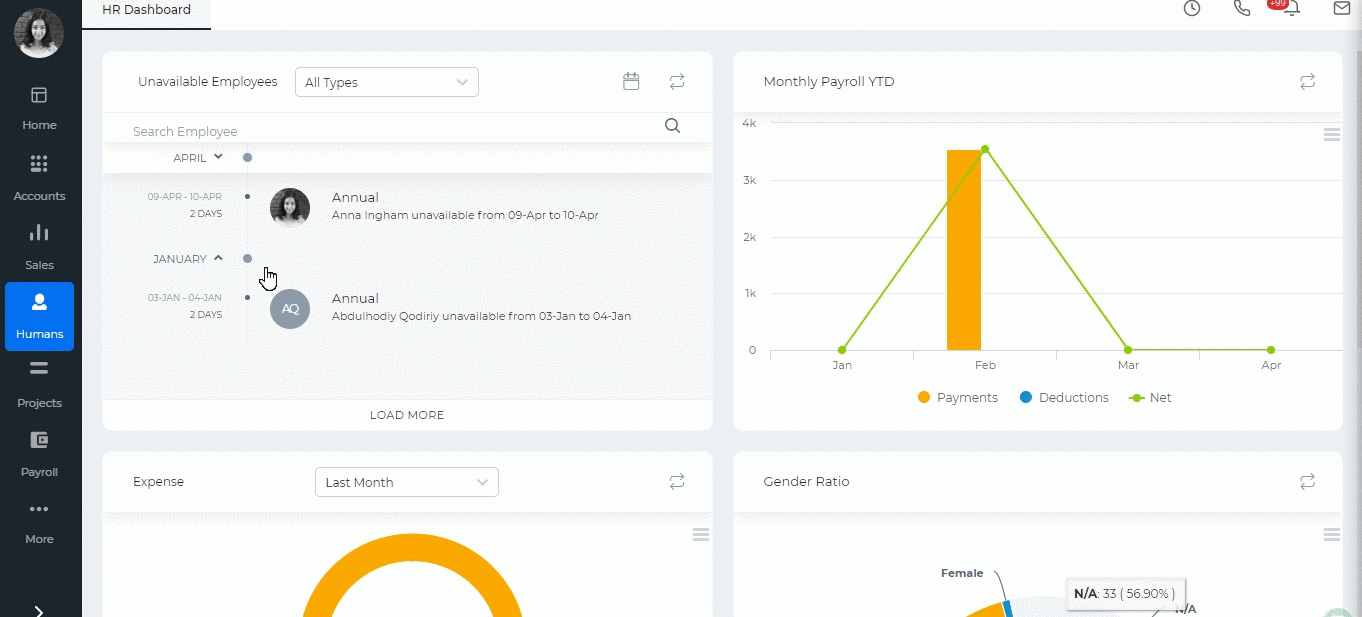
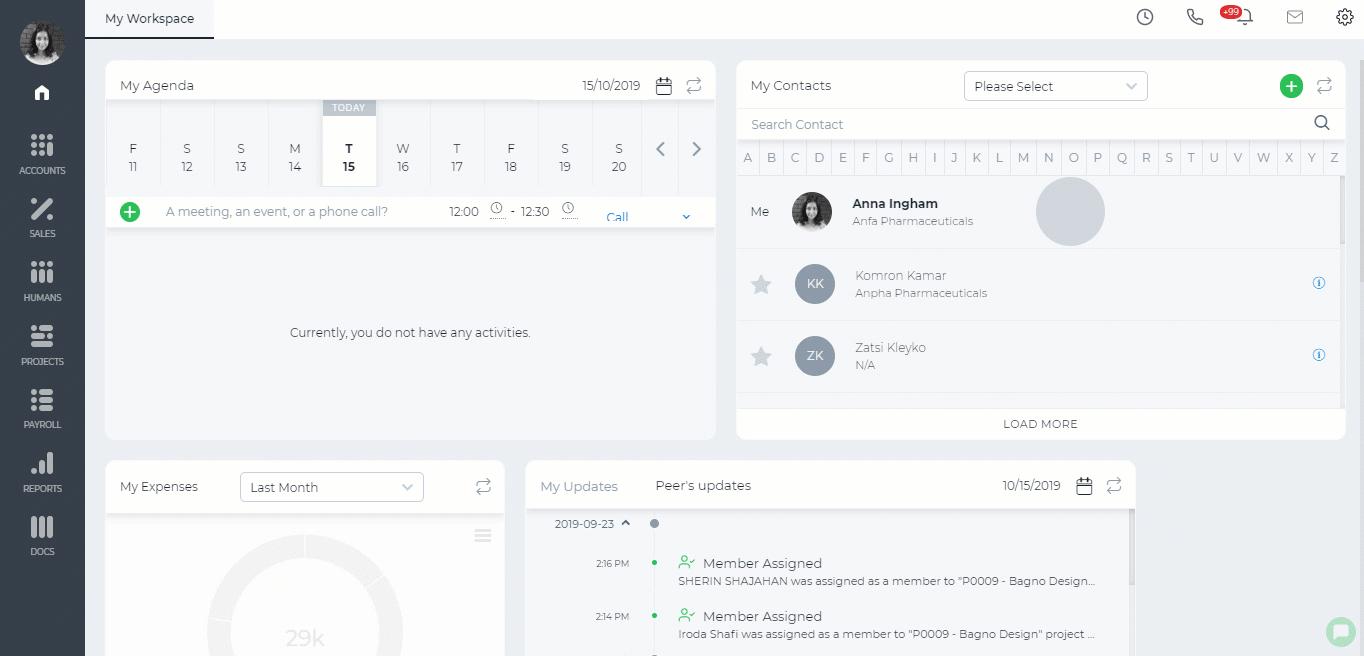
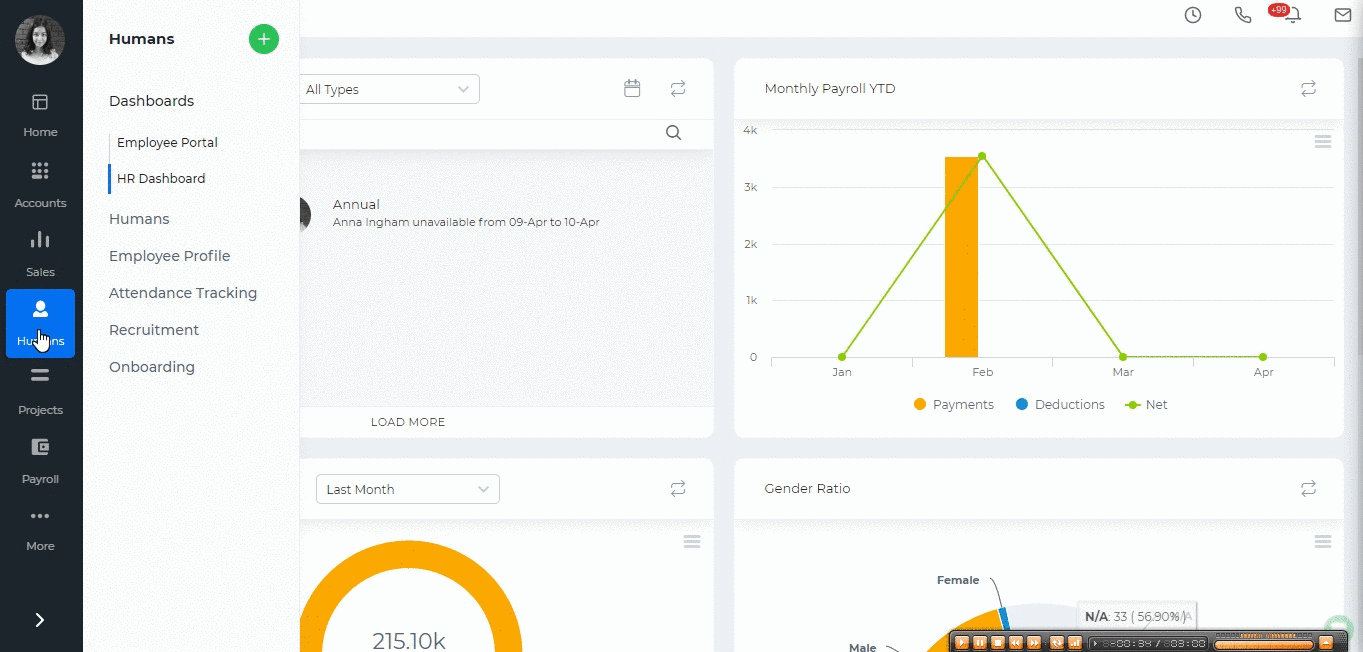 If you already have a file containing the employee hours then you can import the data into the report. click on the Import/Export button, choose the Import option and download the template and make changes. If you already have downloaded the template, you can skip this step and upload the file. The uploaded file will overwrite what was available in the report.
Note that the entered came and left hours should follow the timeslot hours. Otherwise, the import process will fail.
You can also filter the report by employee name, by department, timeslot or by employee status and view the report in Excel format by exporting into Excel.
If you already have a file containing the employee hours then you can import the data into the report. click on the Import/Export button, choose the Import option and download the template and make changes. If you already have downloaded the template, you can skip this step and upload the file. The uploaded file will overwrite what was available in the report.
Note that the entered came and left hours should follow the timeslot hours. Otherwise, the import process will fail.
You can also filter the report by employee name, by department, timeslot or by employee status and view the report in Excel format by exporting into Excel.
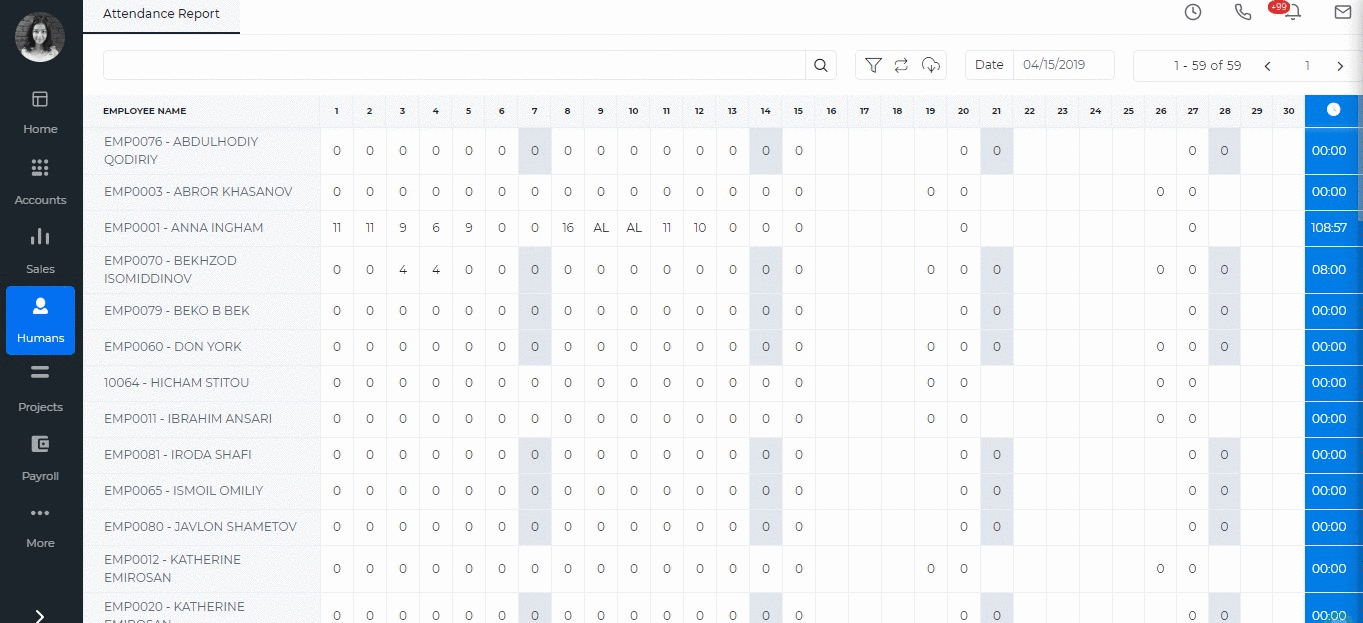
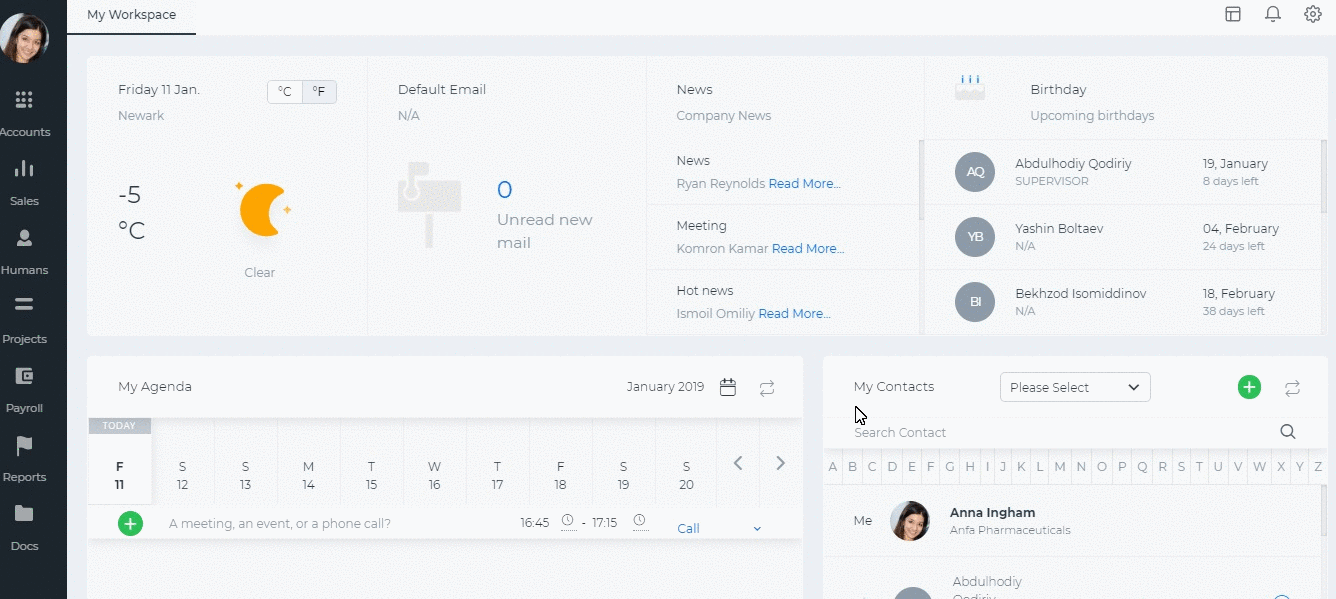
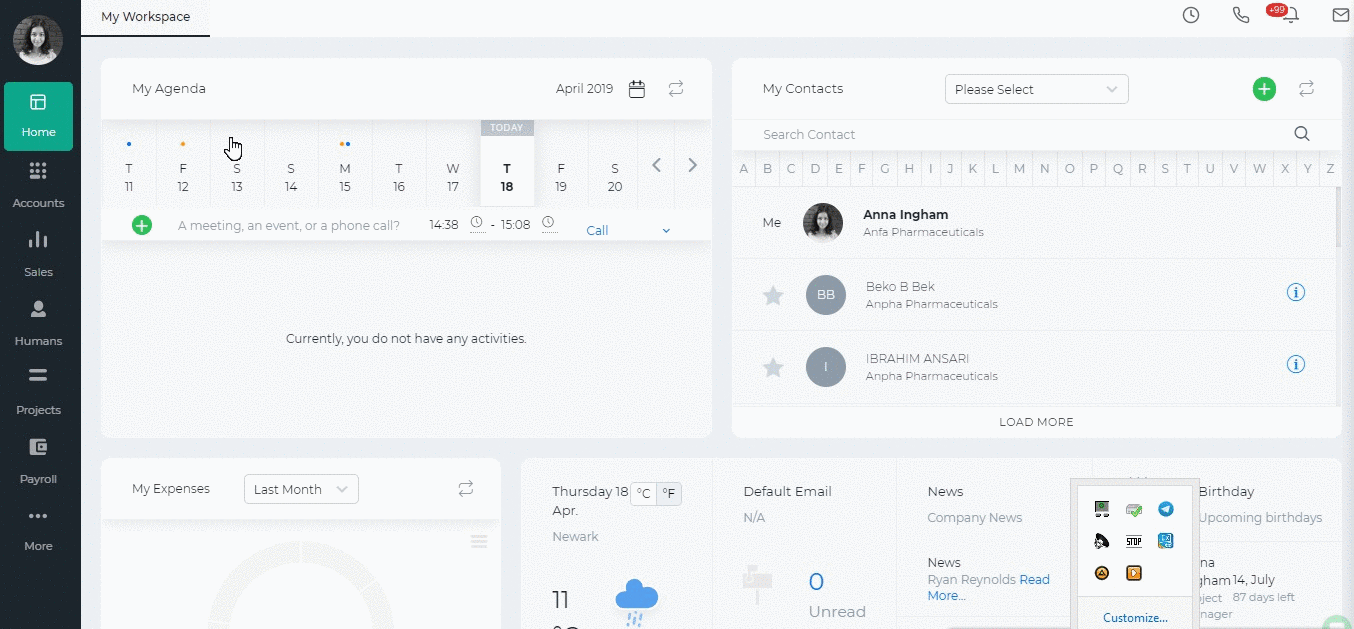
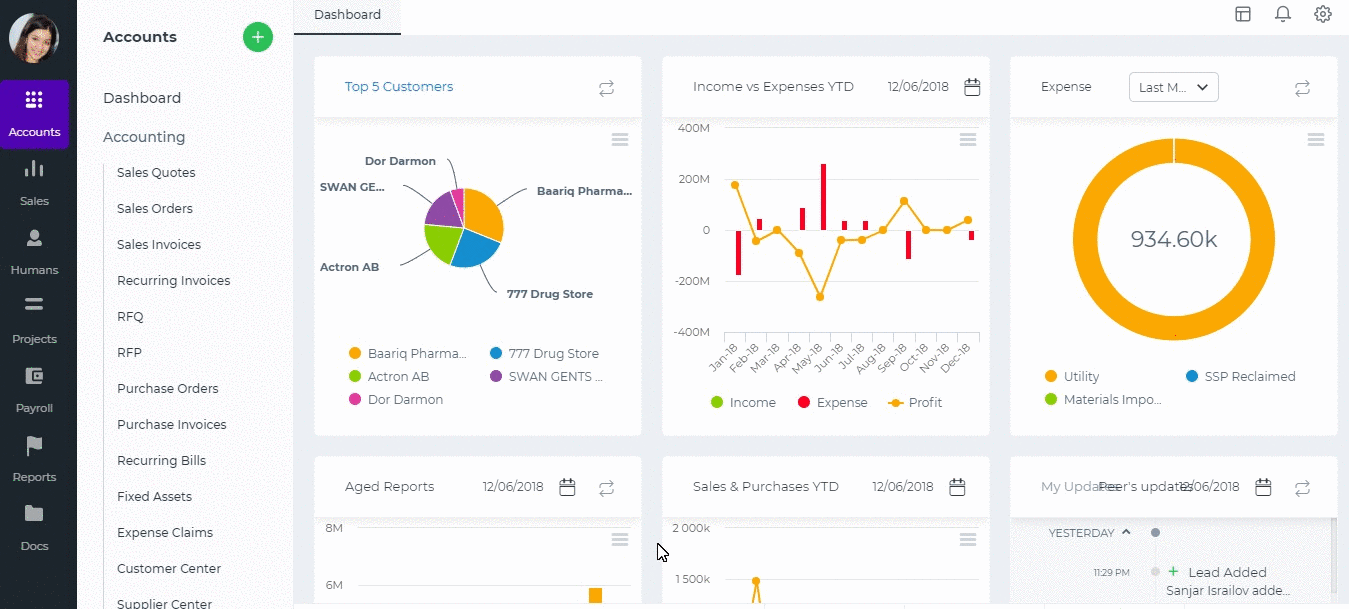

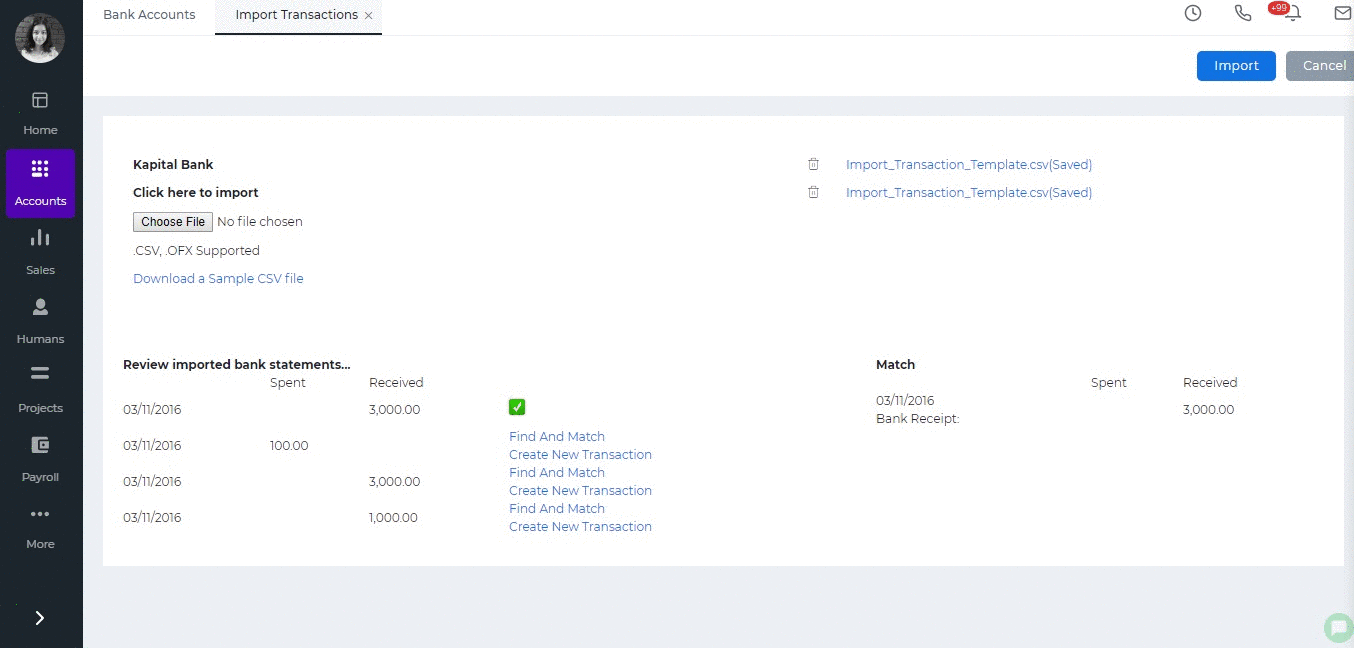
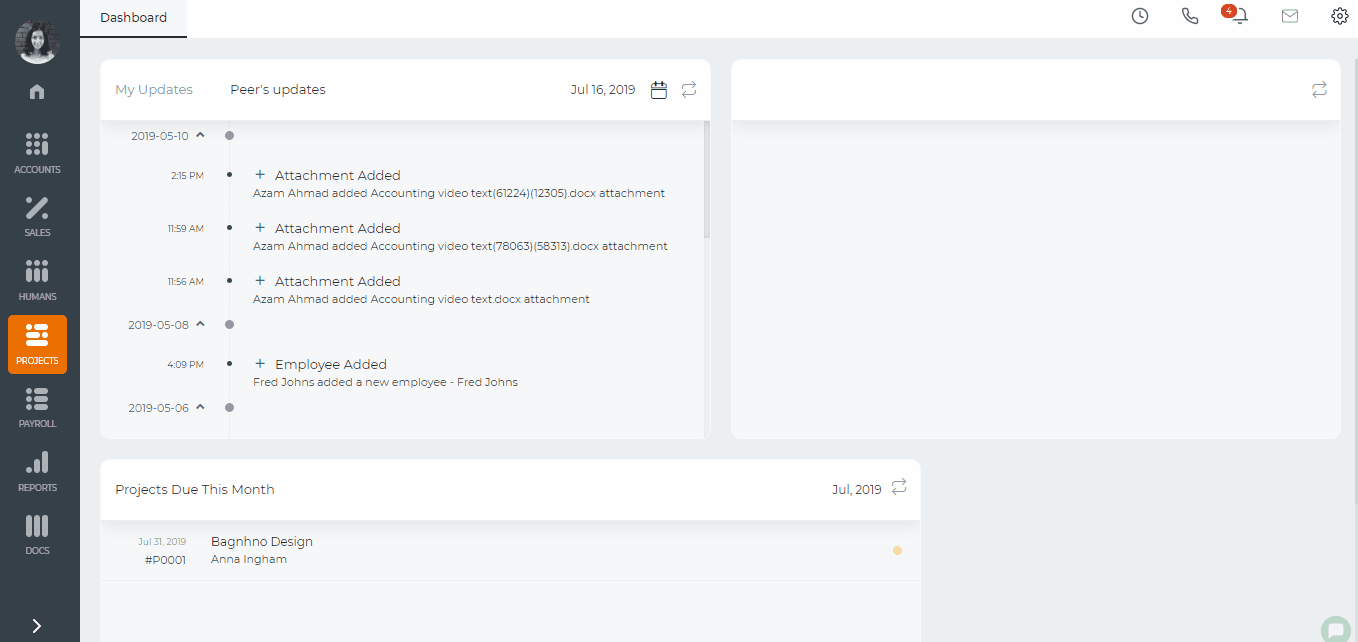 Then go to the Bill of Materials page and list the bill of materials needed
Item - the name of the material needed
Planned Quantity - the quantity needed to complete the project
U/M - unit of measurement
Price - the unit price of each bill of material
Requested Before - the quantity requested before this in the project
Requested Quantity - the quantity you are requesting/you need now.
Then go to the Bill of Materials page and list the bill of materials needed
Item - the name of the material needed
Planned Quantity - the quantity needed to complete the project
U/M - unit of measurement
Price - the unit price of each bill of material
Requested Before - the quantity requested before this in the project
Requested Quantity - the quantity you are requesting/you need now.
 As soon as you submit the bill of materials to the manager, company directors will be informed about it via email. The director can then click the link sent in the email notification and approve or reject the requested bill of materials for purchase and convert the requested bill of materials to "Request for Purchase".
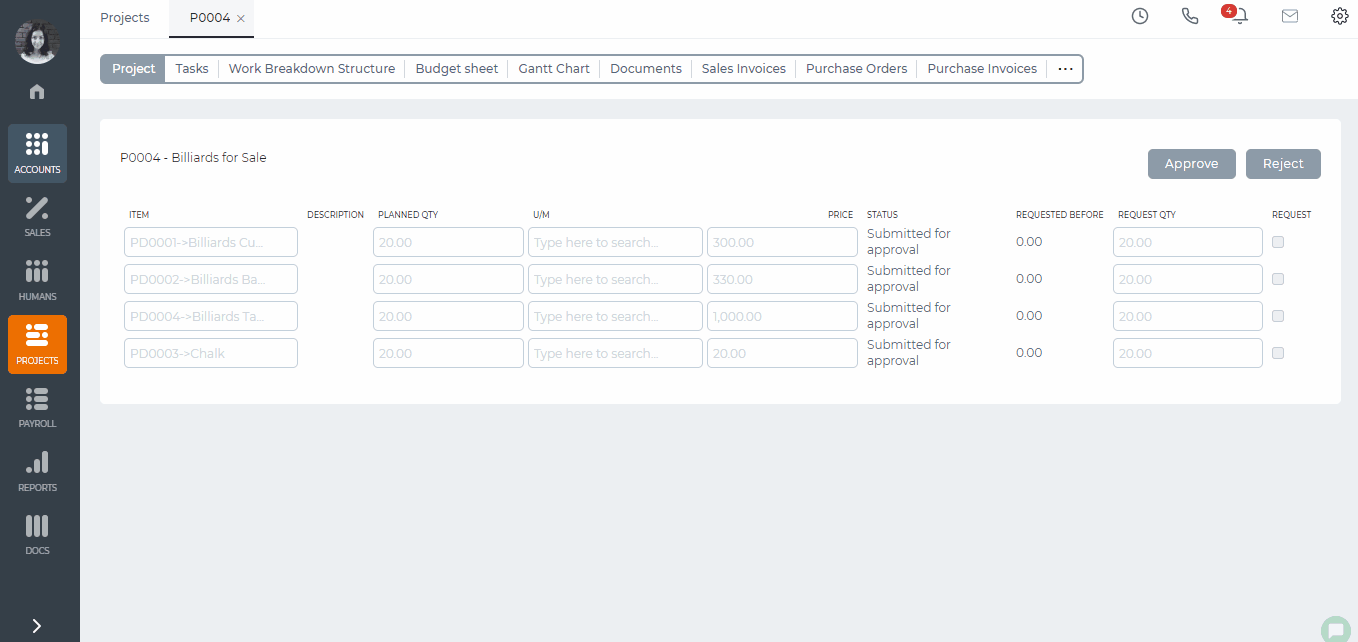 The Request for Purchase, after the approval, can be converted to a Purchase Order.
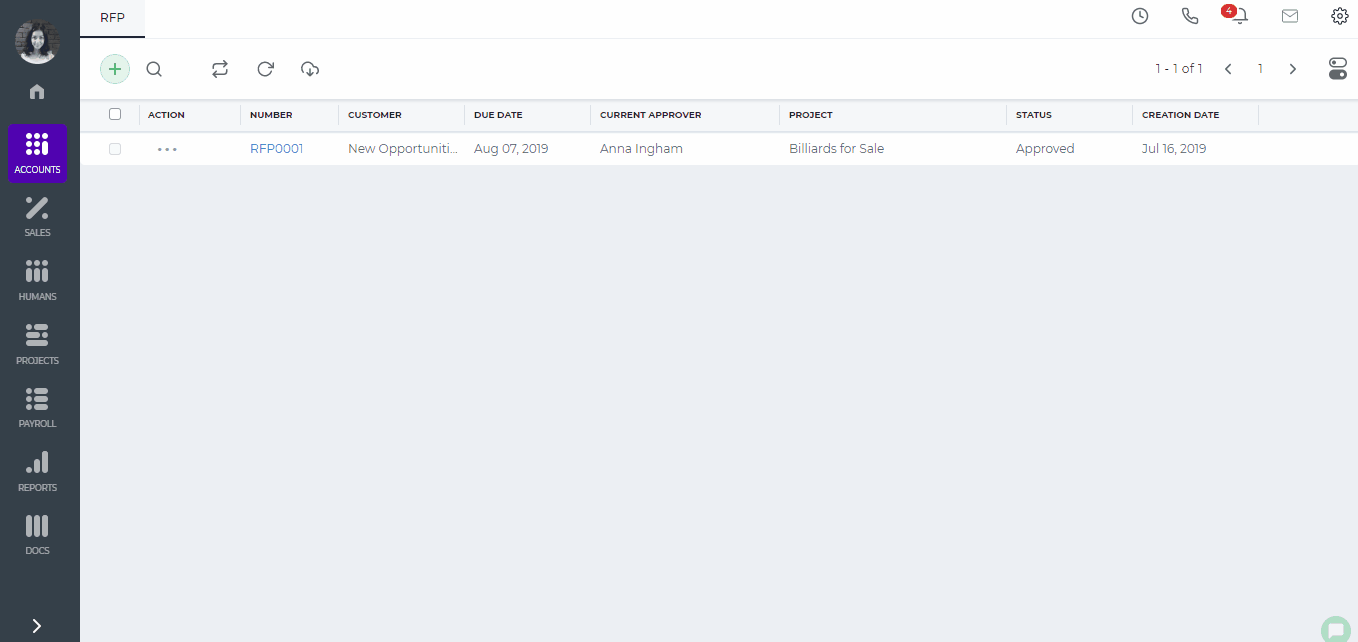 After the purchase order is sent to the supplier, the purchase order will be shown as project expenses under the project budget sheet.
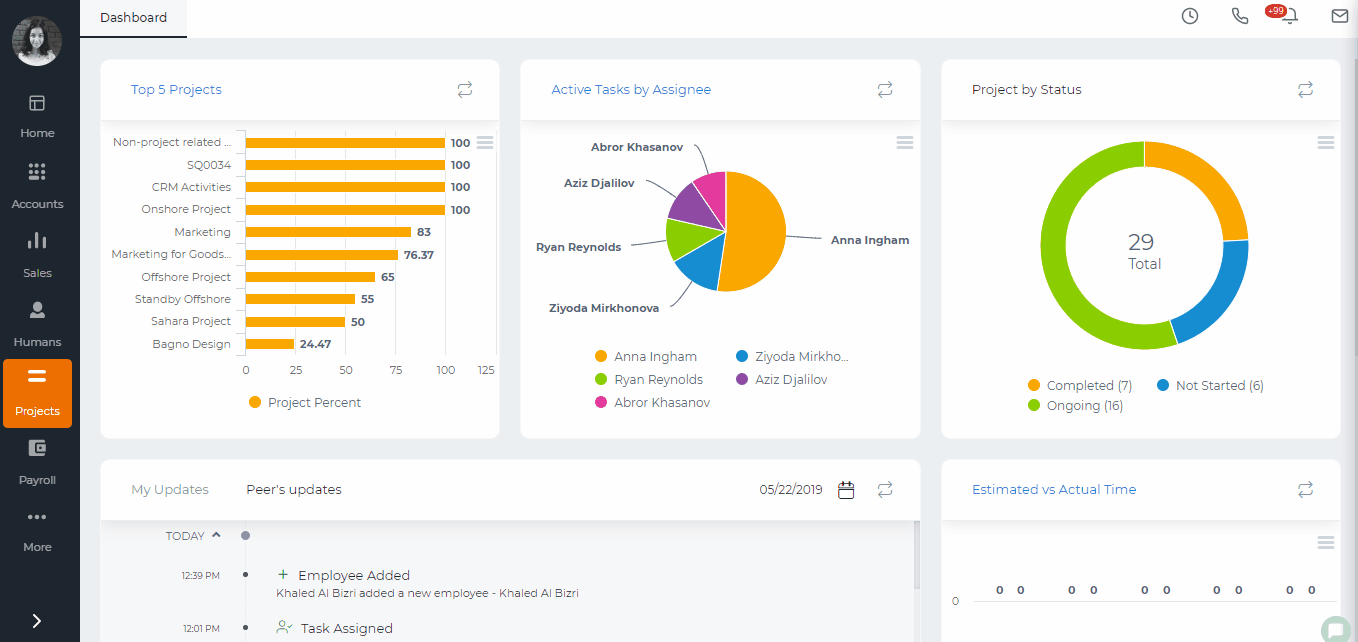
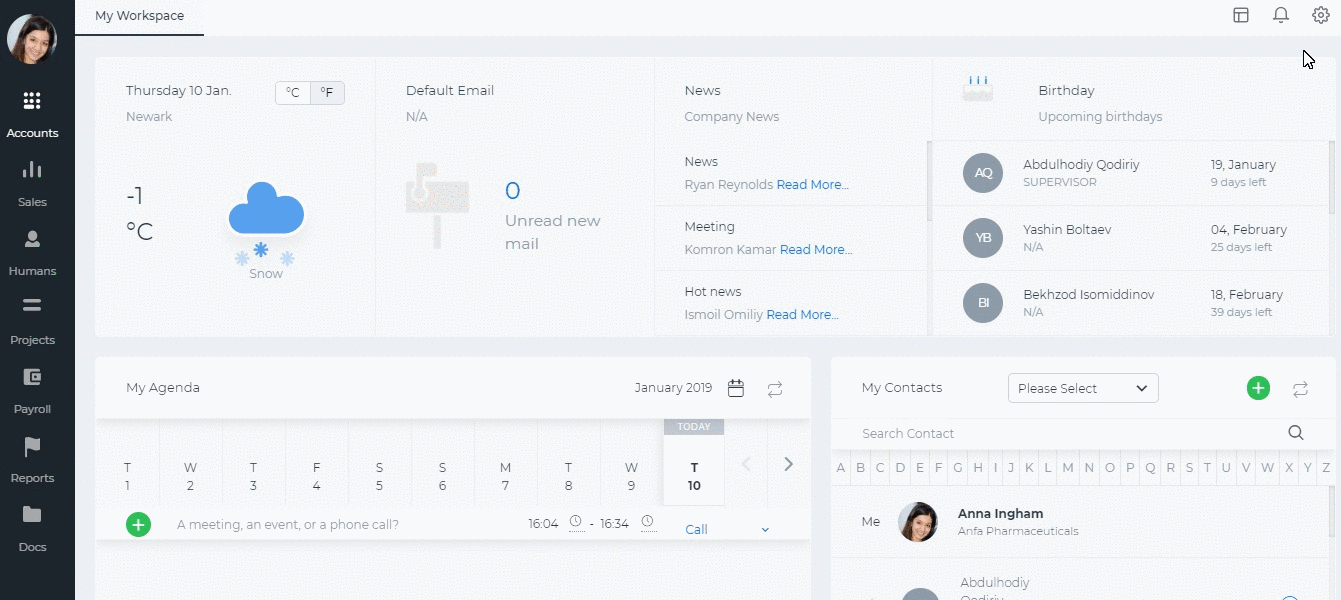
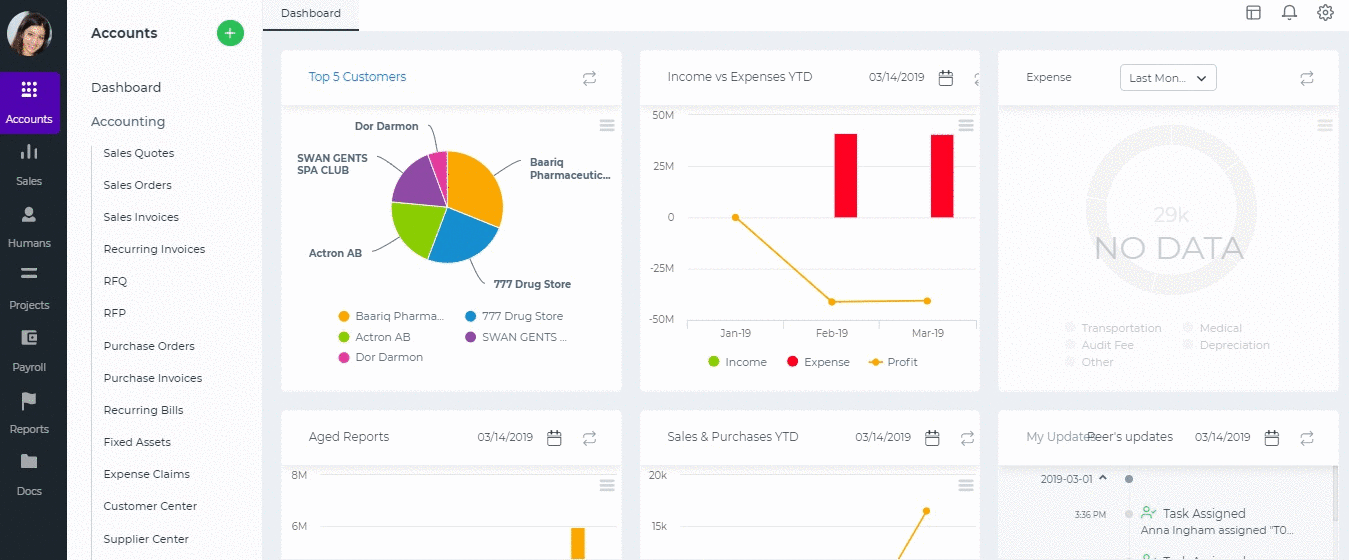
 Quick add event option is available right in the calendar itself. Click on the date and write the event name and click Create Event.
 Other options in Calendar
The calendar not only shows your events or tasks but also your active projects you are involved in, holidays, issues and leave requests. You can switch them on from the lower left side of the calendar.
Other options in Calendar
The calendar not only shows your events or tasks but also your active projects you are involved in, holidays, issues and leave requests. You can switch them on from the lower left side of the calendar.
 Edit/Delete Event
You can edit or delete an event directly from the Calendar page. Click on the event which shows you the details of the event and below the details you can see the "Edit Event" and "Delete Event" options.
Alternatively, Sales>>Activities also shows the events in a list view. Click the actions and choose either edit or delete.
Edit/Delete Event
You can edit or delete an event directly from the Calendar page. Click on the event which shows you the details of the event and below the details you can see the "Edit Event" and "Delete Event" options.
Alternatively, Sales>>Activities also shows the events in a list view. Click the actions and choose either edit or delete.
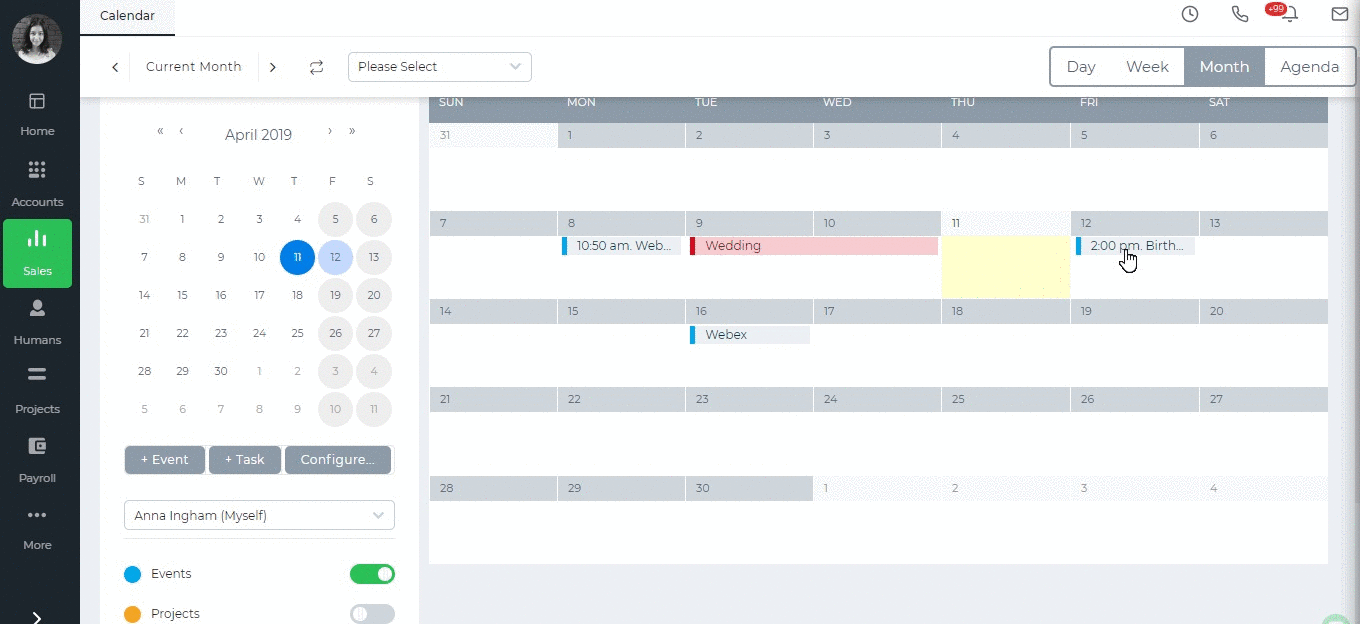
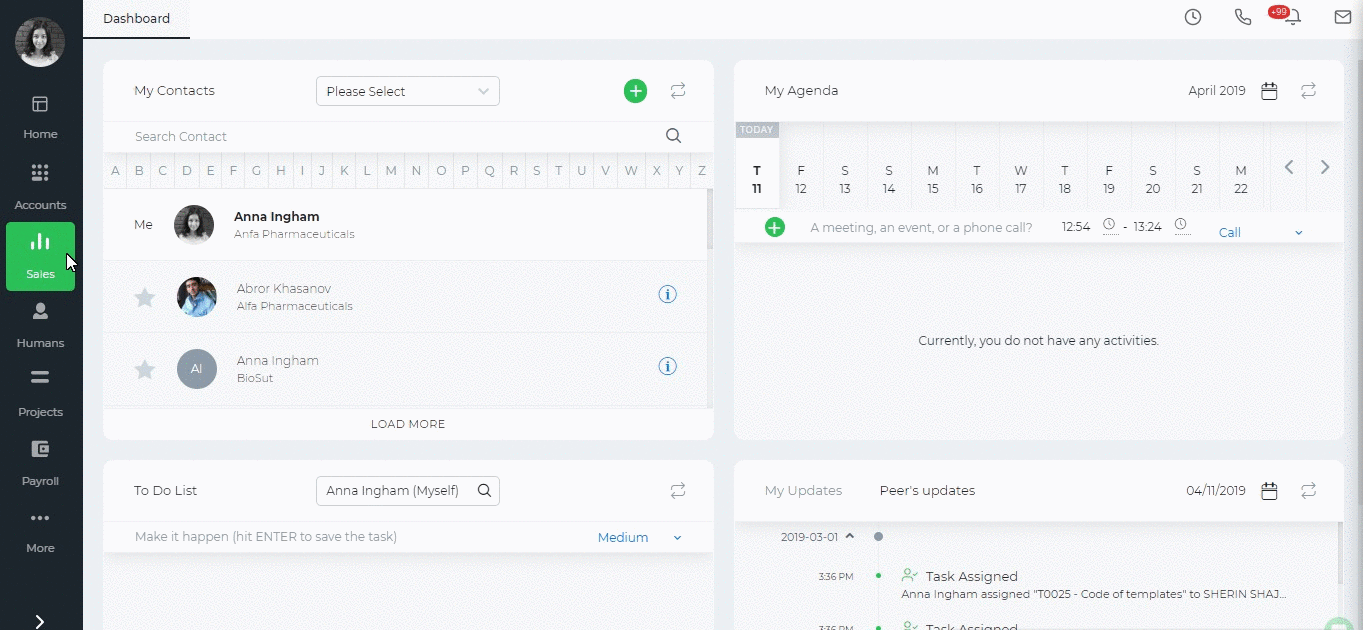 After you have allowed access, sync your events and choose the date for the synchronization.
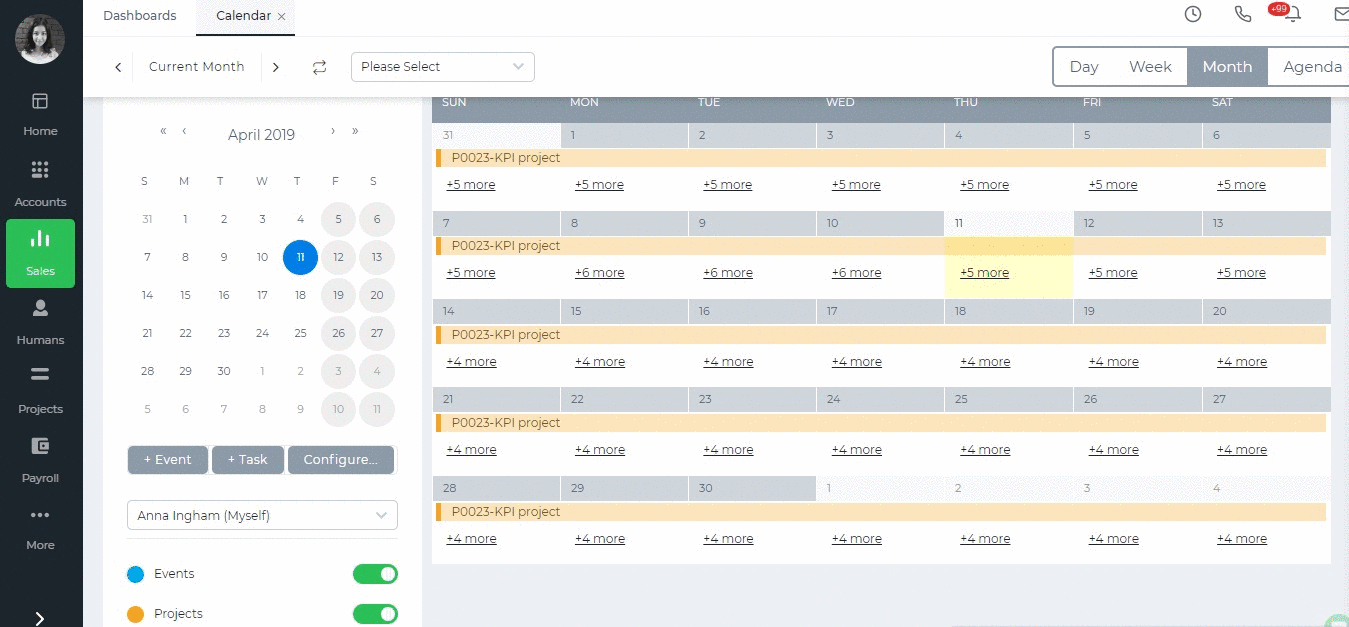 You can revoke Calendar synchronization if needed from Settings>> User Credentials>>Authorized access to your kpi.com account. Under the Calendar click Revoke Access.

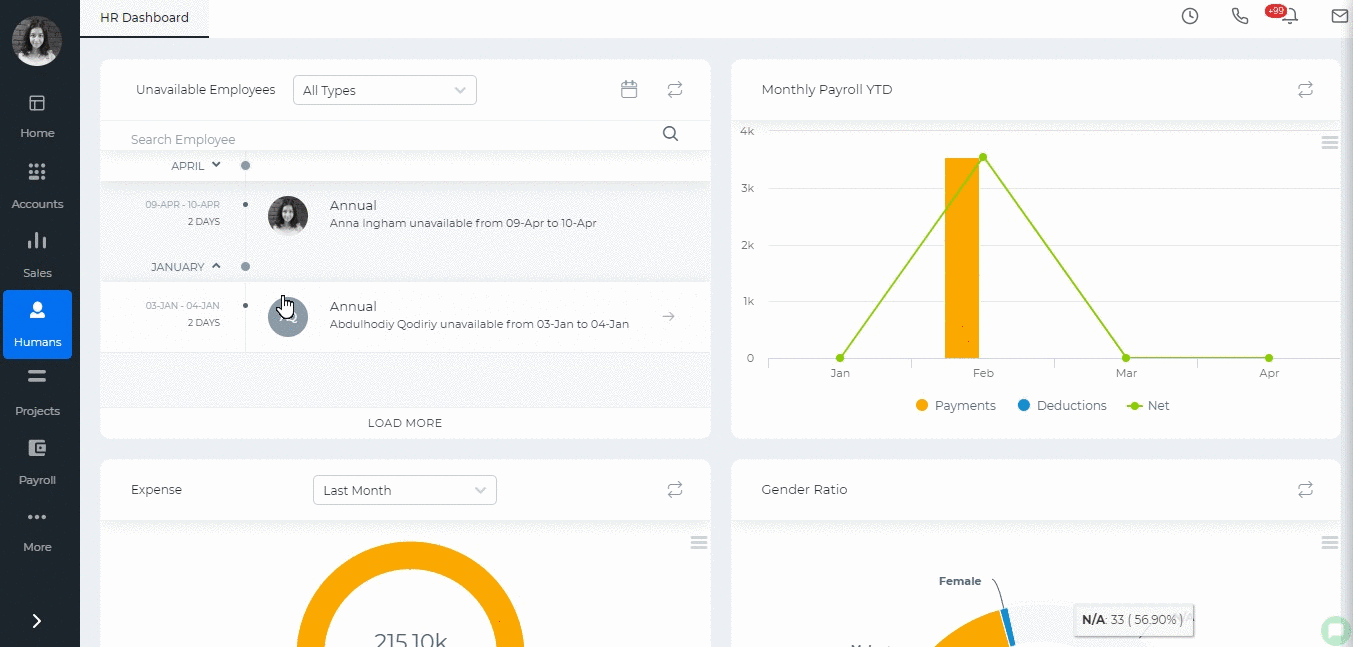 To add candidates manually click the plus button, choose Candidate or Quick Add. Quick add is a short candidate form with only necessary information to fill in.
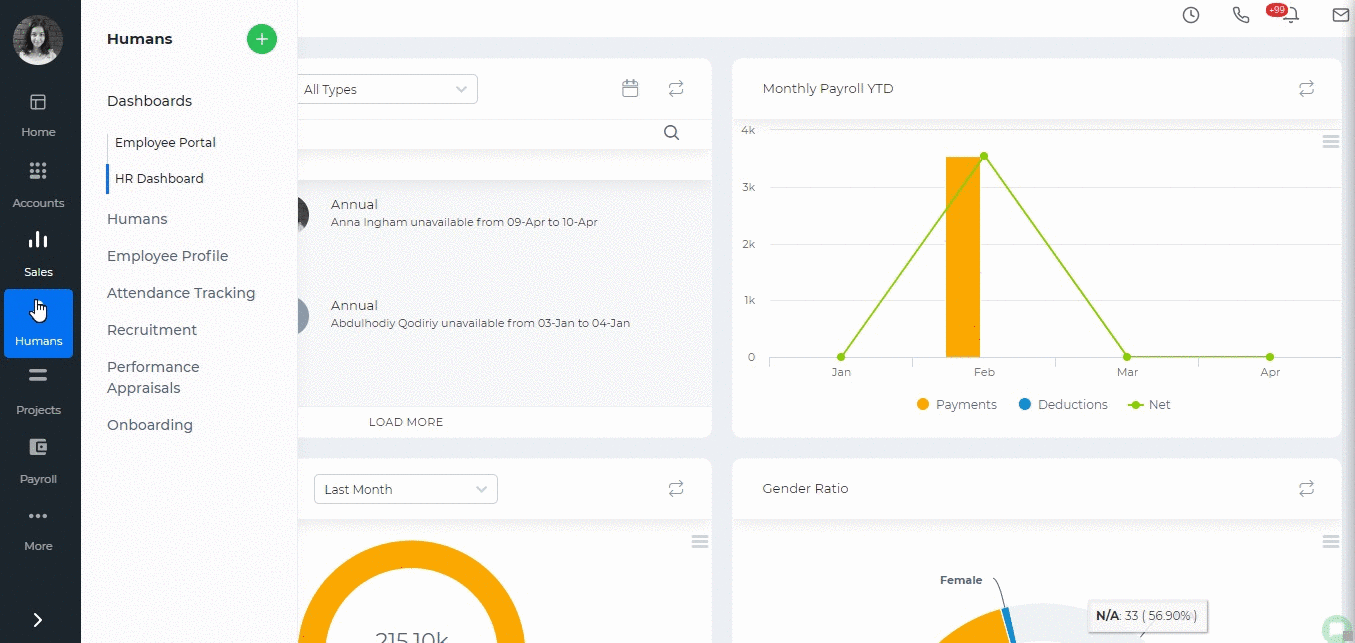
 After the cash advance is approved, it will be deducted from the next payrun.
The remaining payments of the cash advance can be viewed from the cash advance listing under the Remaining Amount column.
If you want to make the payment for the cash advance without deducting it from each payrun, you can open the cash advance and choose the Paid From account and Cash Advance account and Post.
The status of the cash advance changes to Posted. Then you can receive the payment by clicking the Payment button and entering the amount, account and date. The status of the cash advance then changes to Paid.
After the cash advance is approved, it will be deducted from the next payrun.
The remaining payments of the cash advance can be viewed from the cash advance listing under the Remaining Amount column.
If you want to make the payment for the cash advance without deducting it from each payrun, you can open the cash advance and choose the Paid From account and Cash Advance account and Post.
The status of the cash advance changes to Posted. Then you can receive the payment by clicking the Payment button and entering the amount, account and date. The status of the cash advance then changes to Paid.
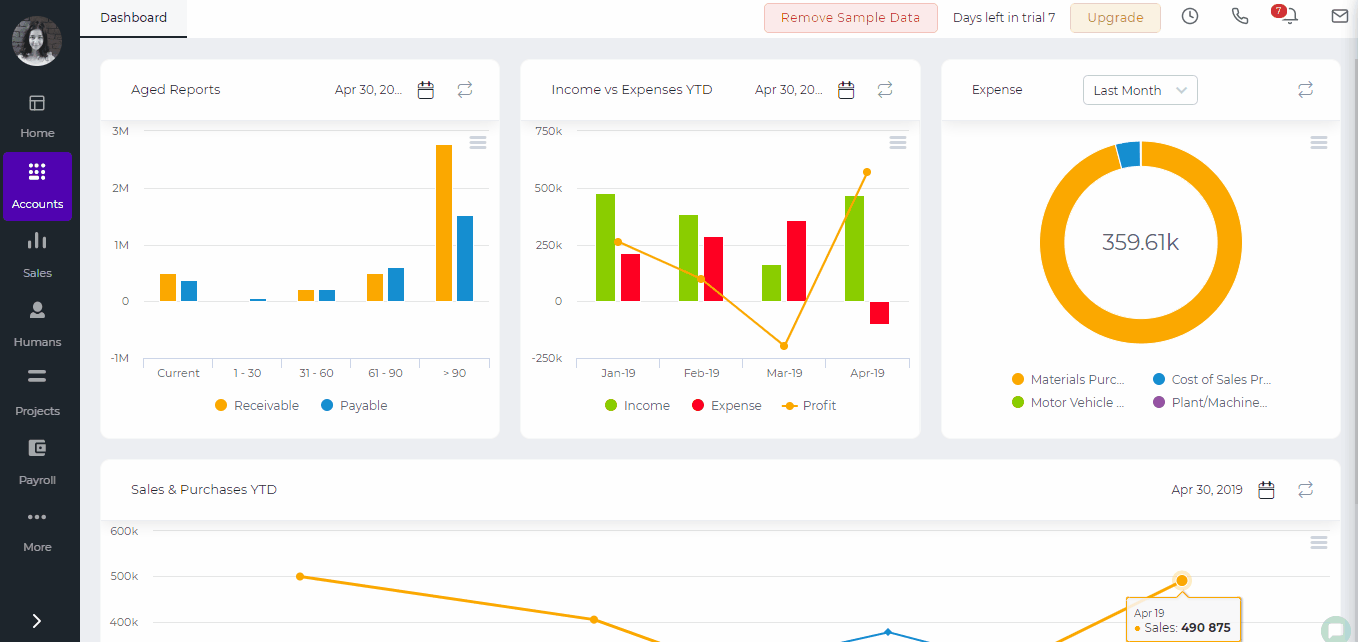
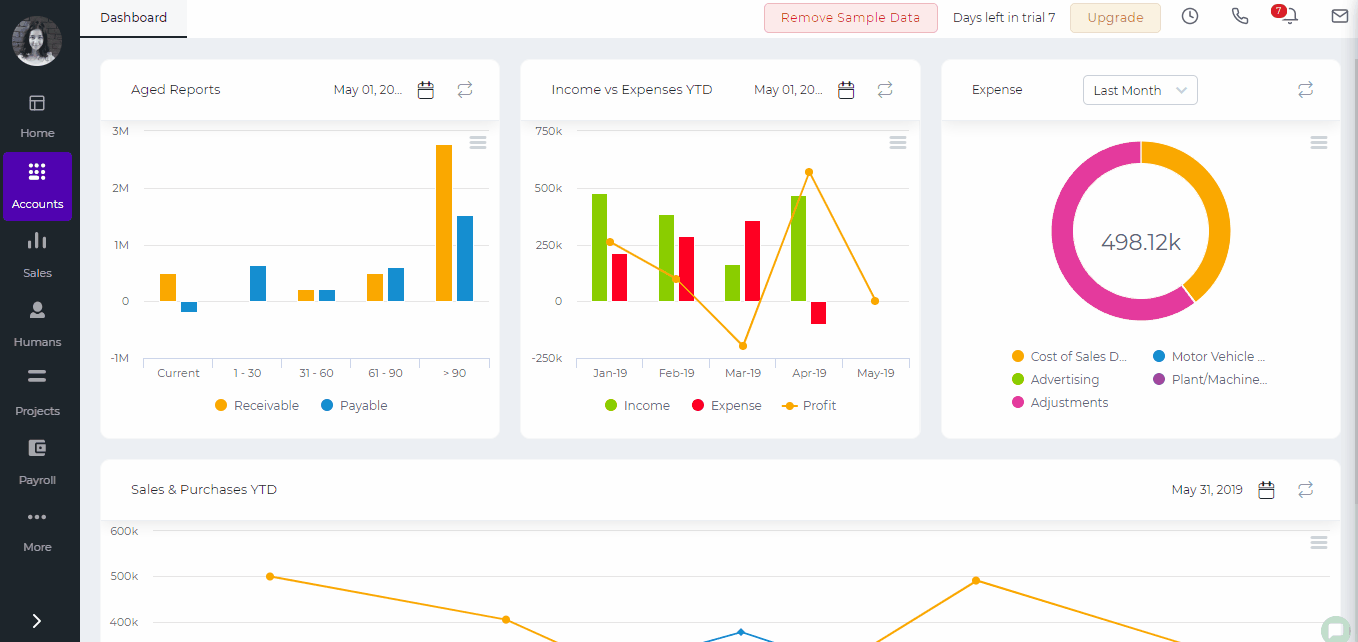
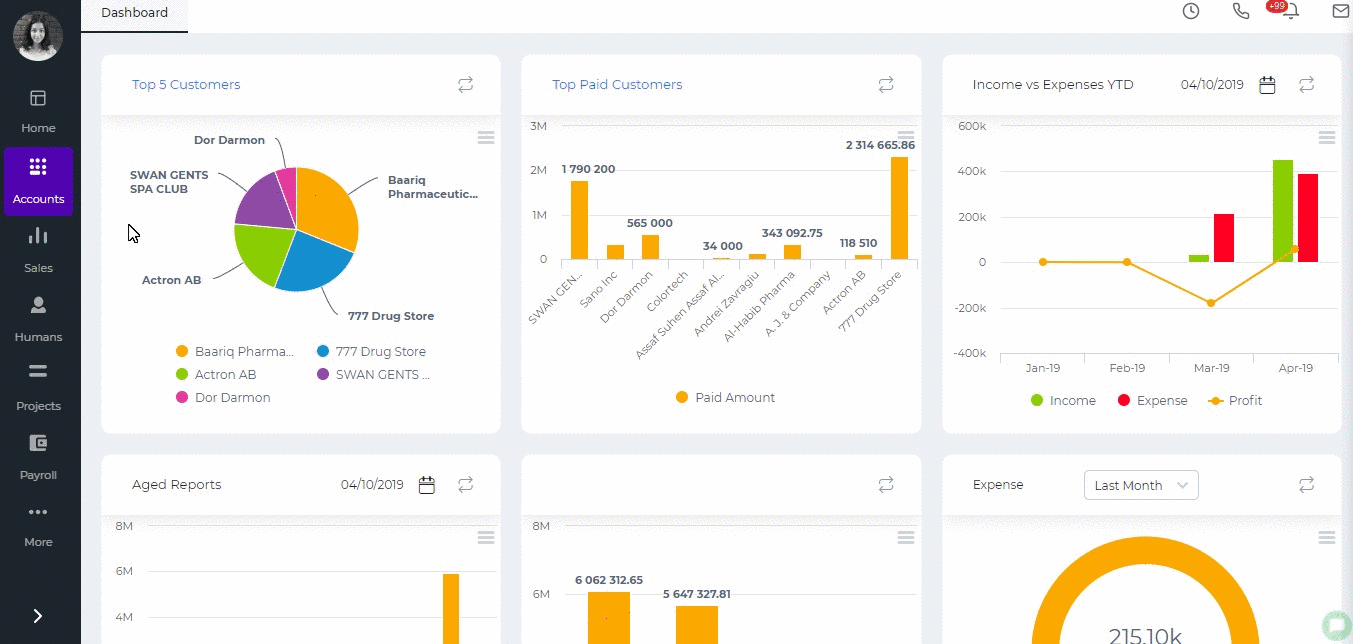
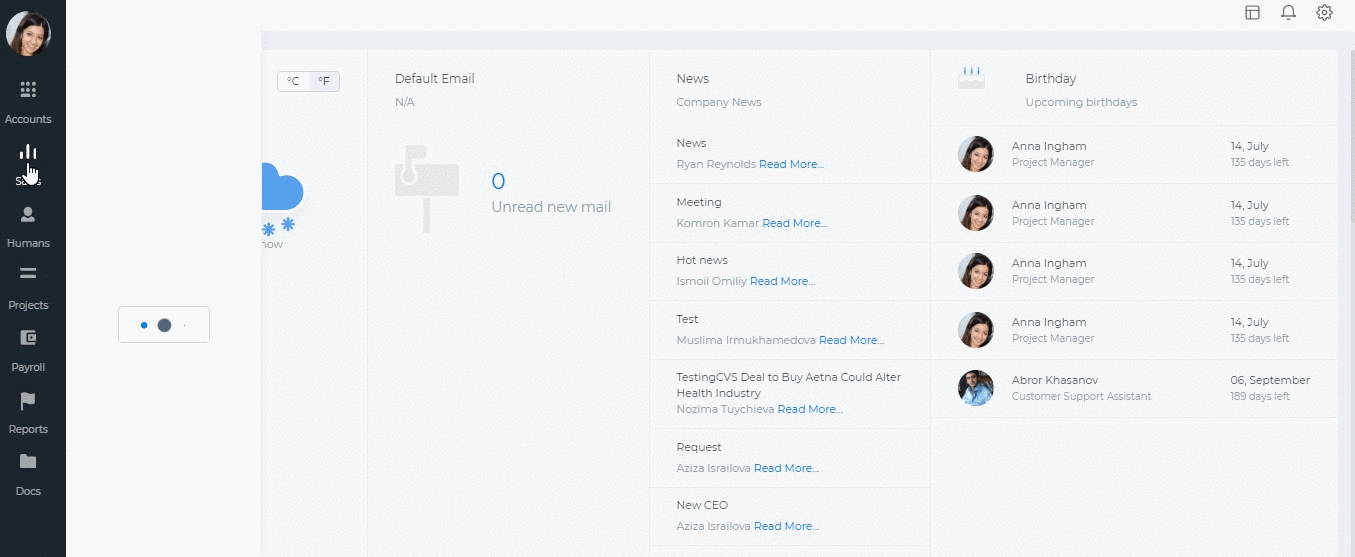 The customer contact will have access to the following:
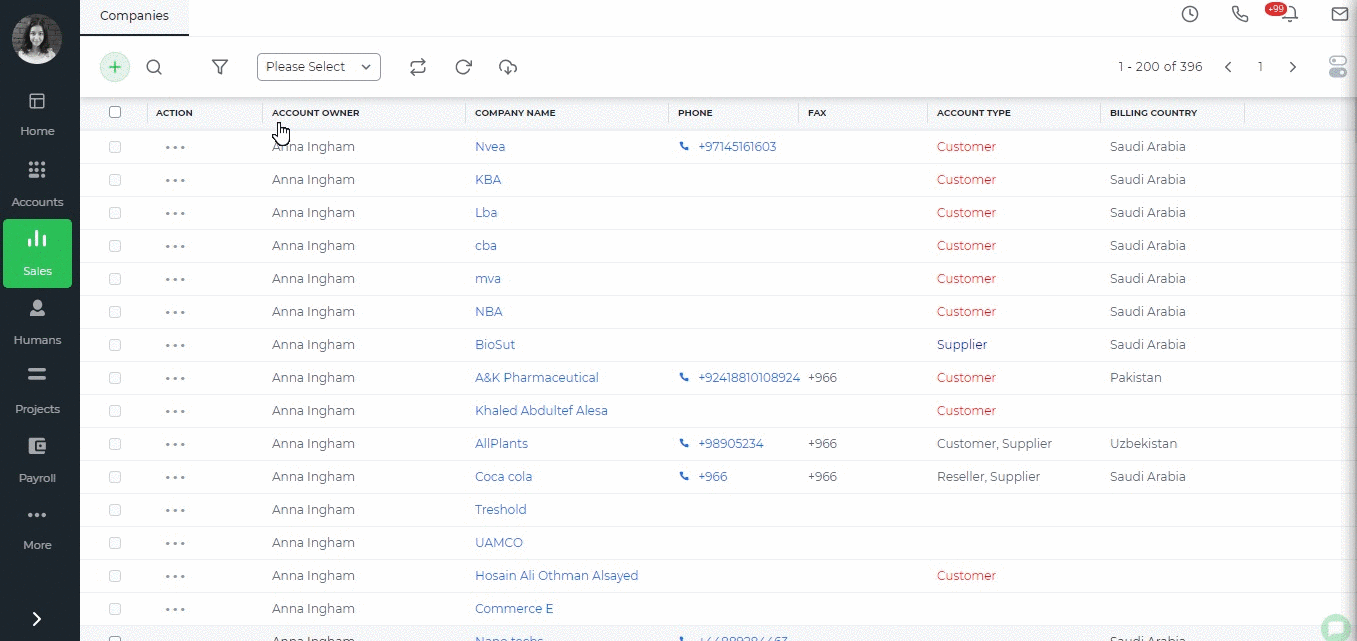 If the company is your re-seller, partner or any other then choose Company option and fill in the details and save.
You can also import accounts which saves your time rather adding them one by one manually. The import option is explained here.
If the company is your re-seller, partner or any other then choose Company option and fill in the details and save.
You can also import accounts which saves your time rather adding them one by one manually. The import option is explained here.
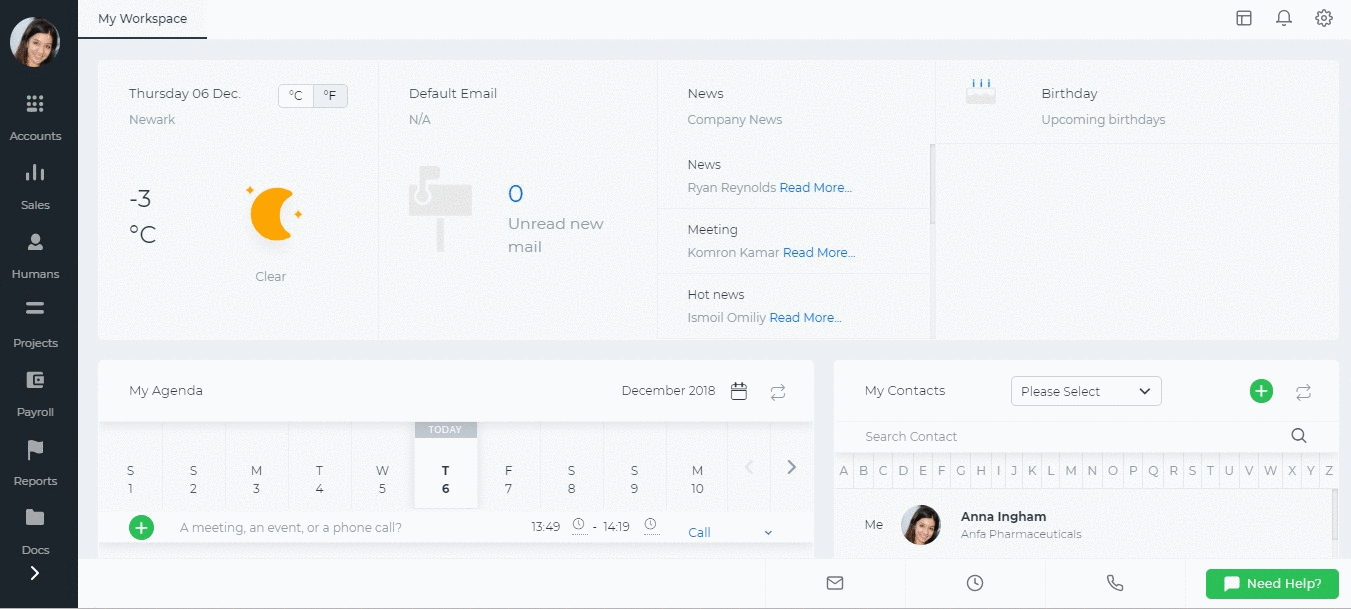
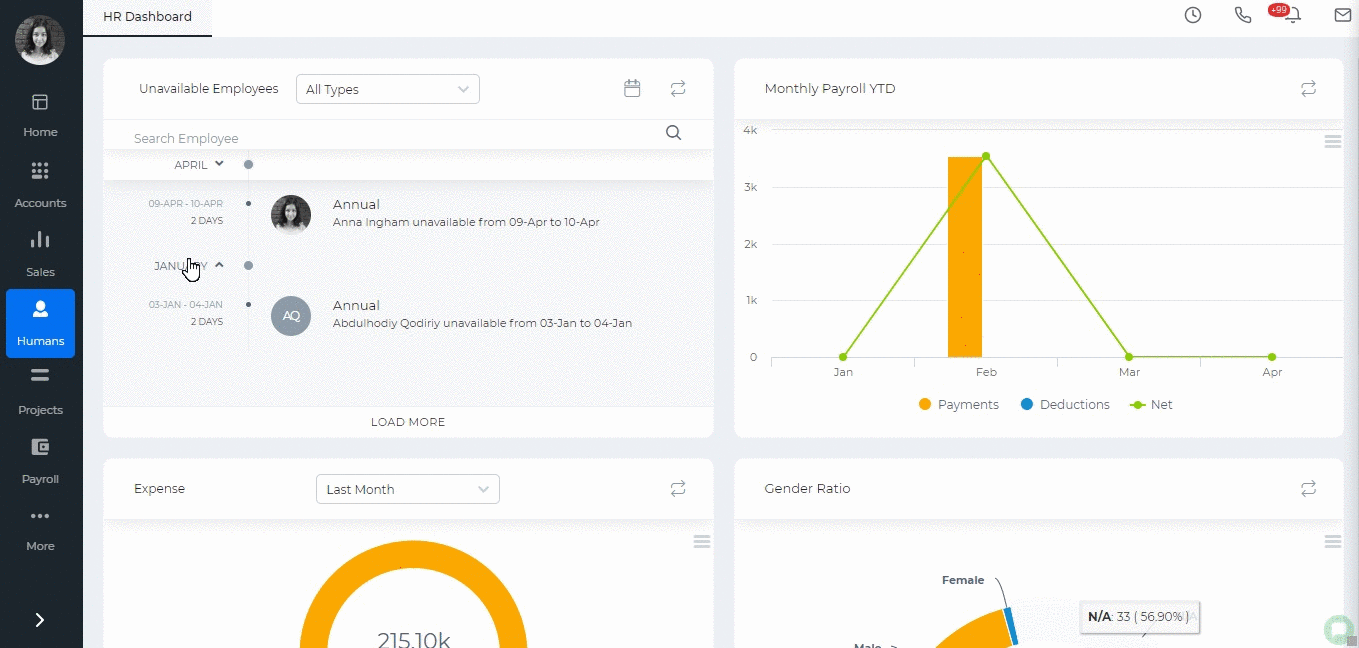
 Once the upload is complete, the file's data will show up on the screen. You can deselect some of the column which you do not need and decide what type of data they contain whether it is numeric, money, or date. Click "Import".
Once you have successfully imported, you will be able to filter the report, customize the column, create chart, create summaries and so on.
Once the upload is complete, the file's data will show up on the screen. You can deselect some of the column which you do not need and decide what type of data they contain whether it is numeric, money, or date. Click "Import".
Once you have successfully imported, you will be able to filter the report, customize the column, create chart, create summaries and so on.
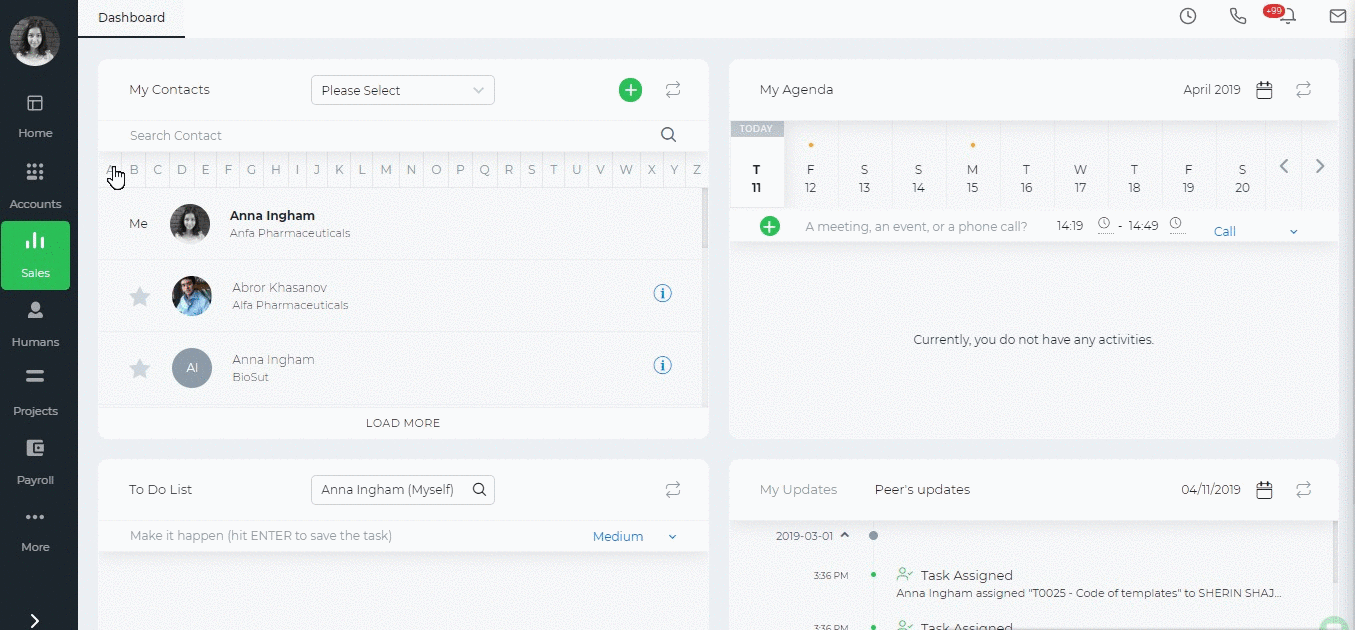 Click Allow and click the Export/Import button again. Choose Settings Folders. Match the Contacts Categories with kpi.com Contact Categories and save.
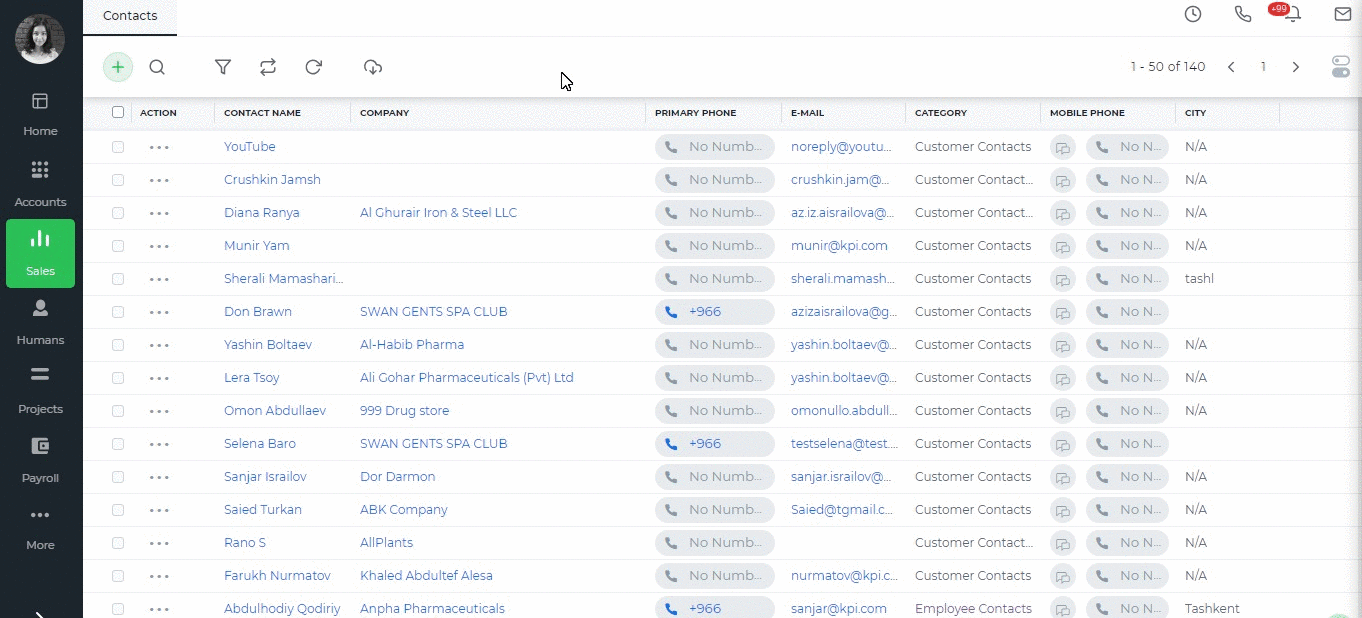 Stop Synchronization
If you need to stop the synchronization go to Settings>>User Credentials>>Authorized access to your kpi.com account. Under the Contacts click Revoke Access.
Stop Synchronization
If you need to stop the synchronization go to Settings>>User Credentials>>Authorized access to your kpi.com account. Under the Contacts click Revoke Access.
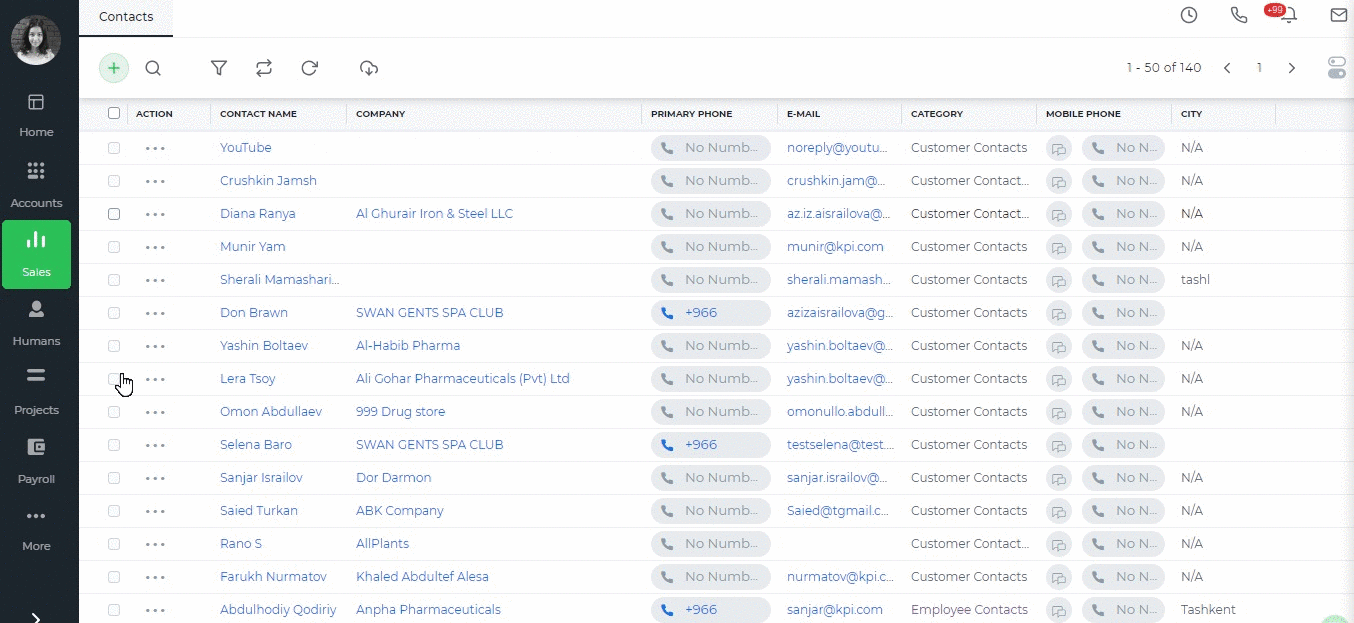
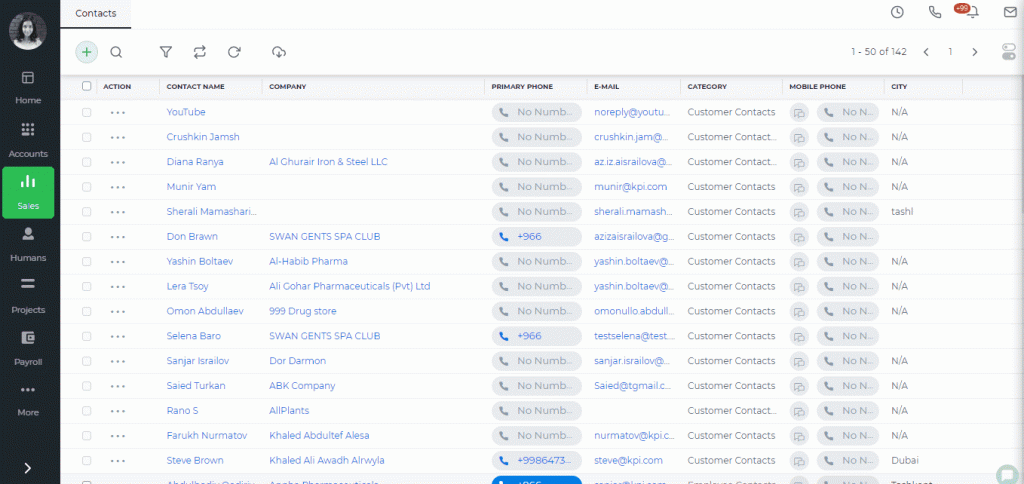
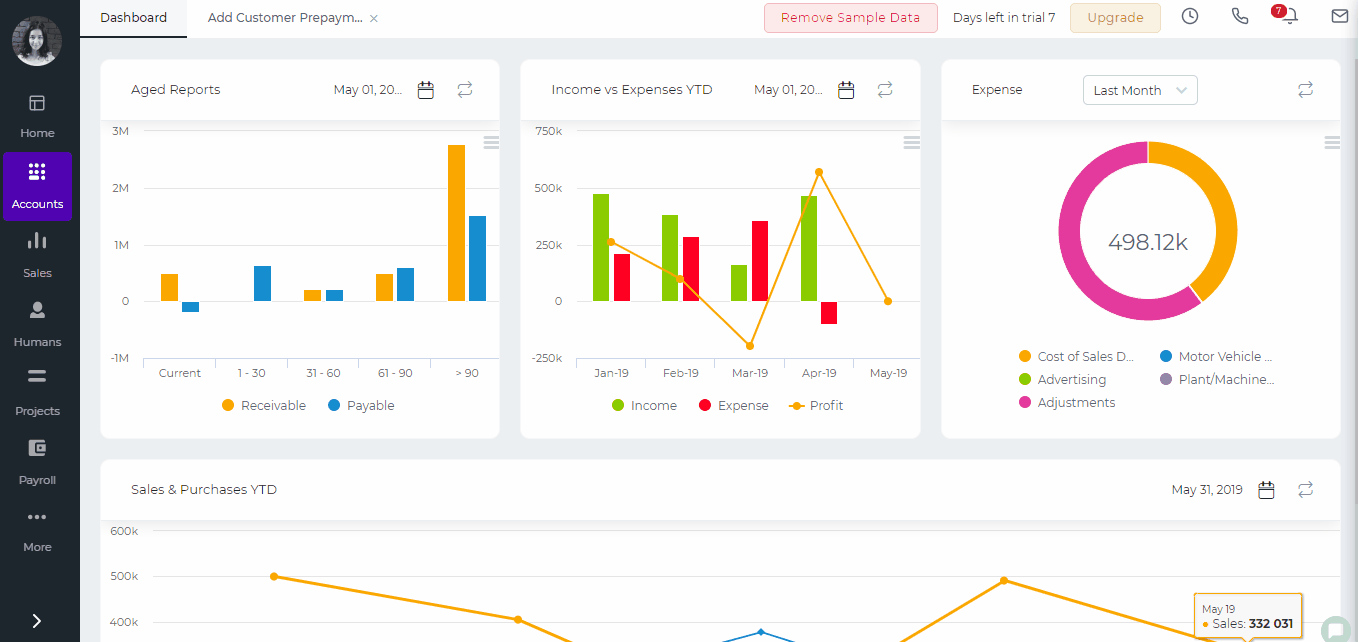
 To add a new widget first you need to save your desired report through the Reporting module.
Go to Reporting, add your report, select columns, summaries, group and create the chart, add it to the module widget and then save the report.
To add a new widget first you need to save your desired report through the Reporting module.
Go to Reporting, add your report, select columns, summaries, group and create the chart, add it to the module widget and then save the report.
 Then go to Settings>>Dashboards>>Dashboard list and customize the dashboard in the correct module. Click "Add Widget", place it to the right location and save.

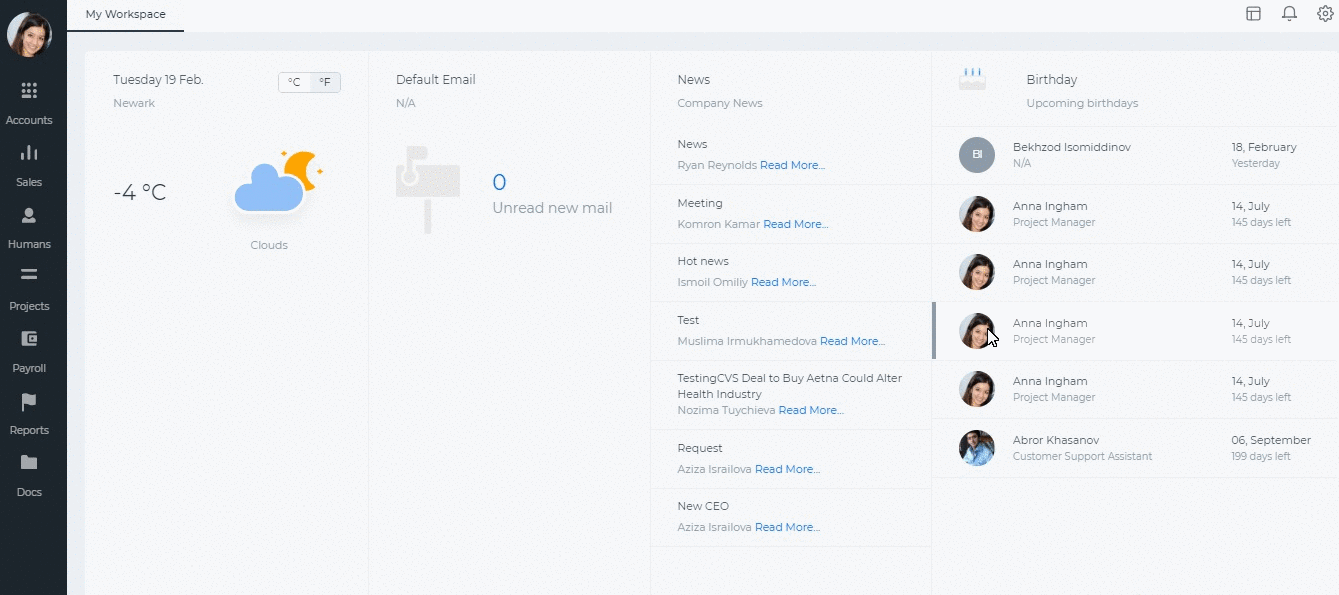
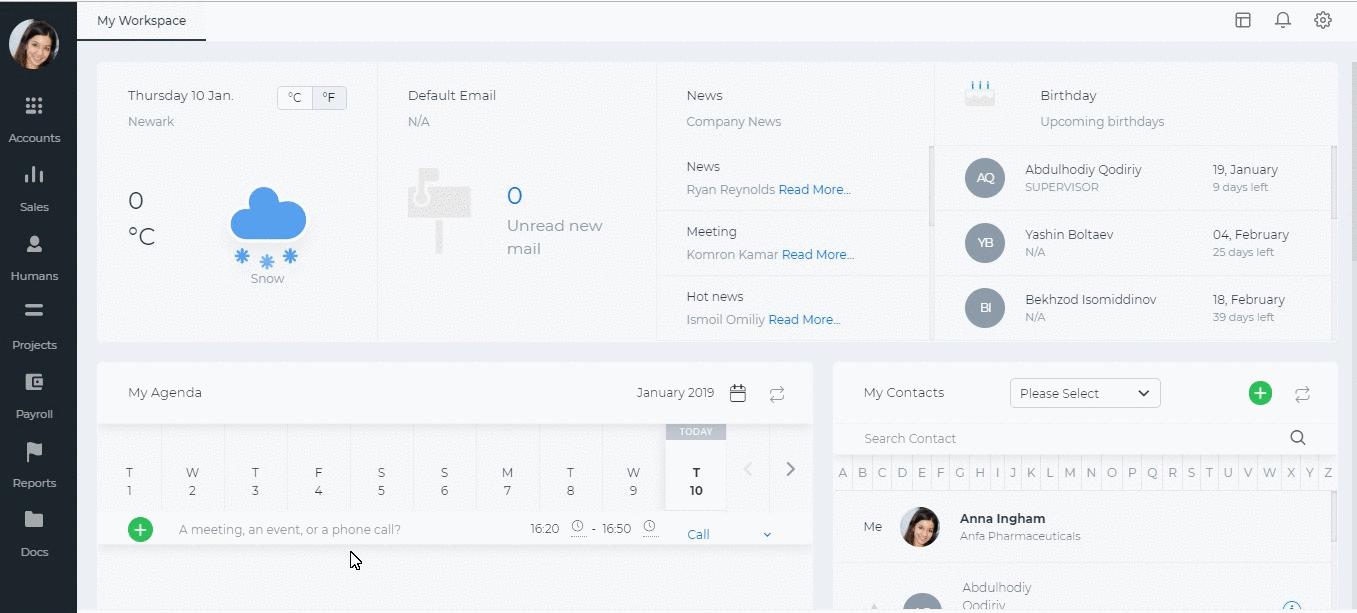
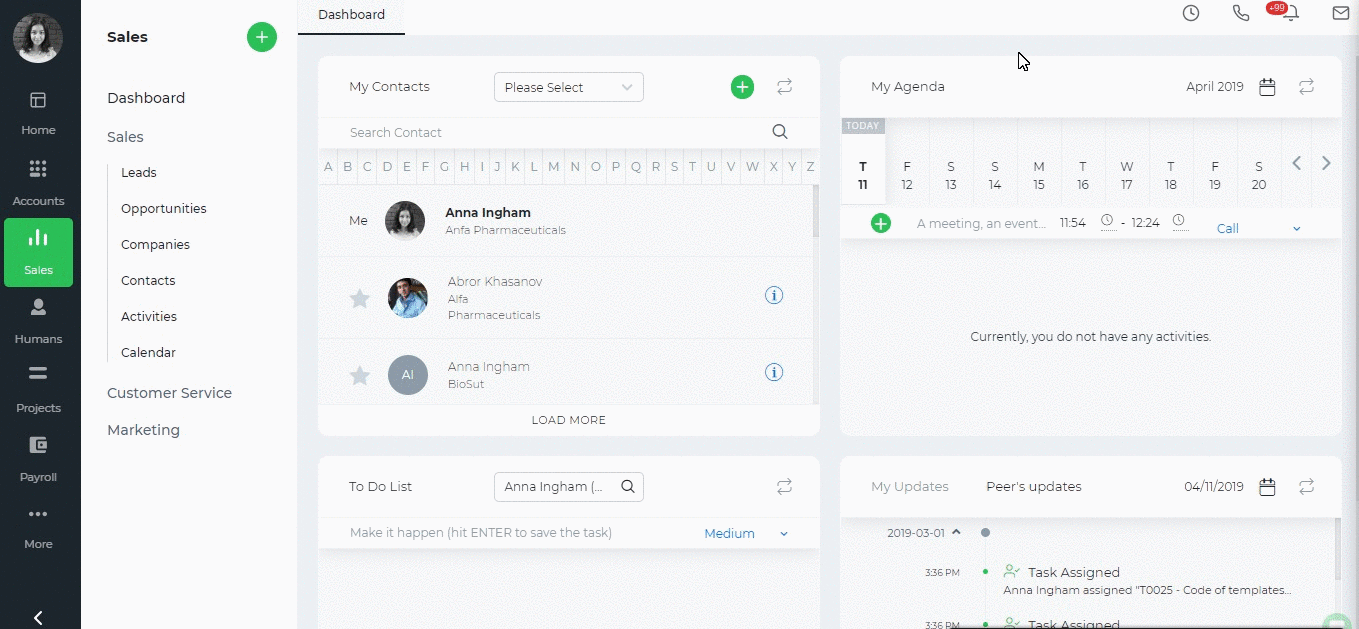 Click save and if the configuration is successful you will be able to go to your inbox, sent mails and draft and manage your folders using the same message button on top right side.
Go to your email account, show the left side menu and click customize to manage folders. Choose your folders and save.
You can share the email with other users in the system. Click share and add the users. The users will have the same access to the email as yourself.
The Delete option will delete your email account from the system.
Click save and if the configuration is successful you will be able to go to your inbox, sent mails and draft and manage your folders using the same message button on top right side.
Go to your email account, show the left side menu and click customize to manage folders. Choose your folders and save.
You can share the email with other users in the system. Click share and add the users. The users will have the same access to the email as yourself.
The Delete option will delete your email account from the system.
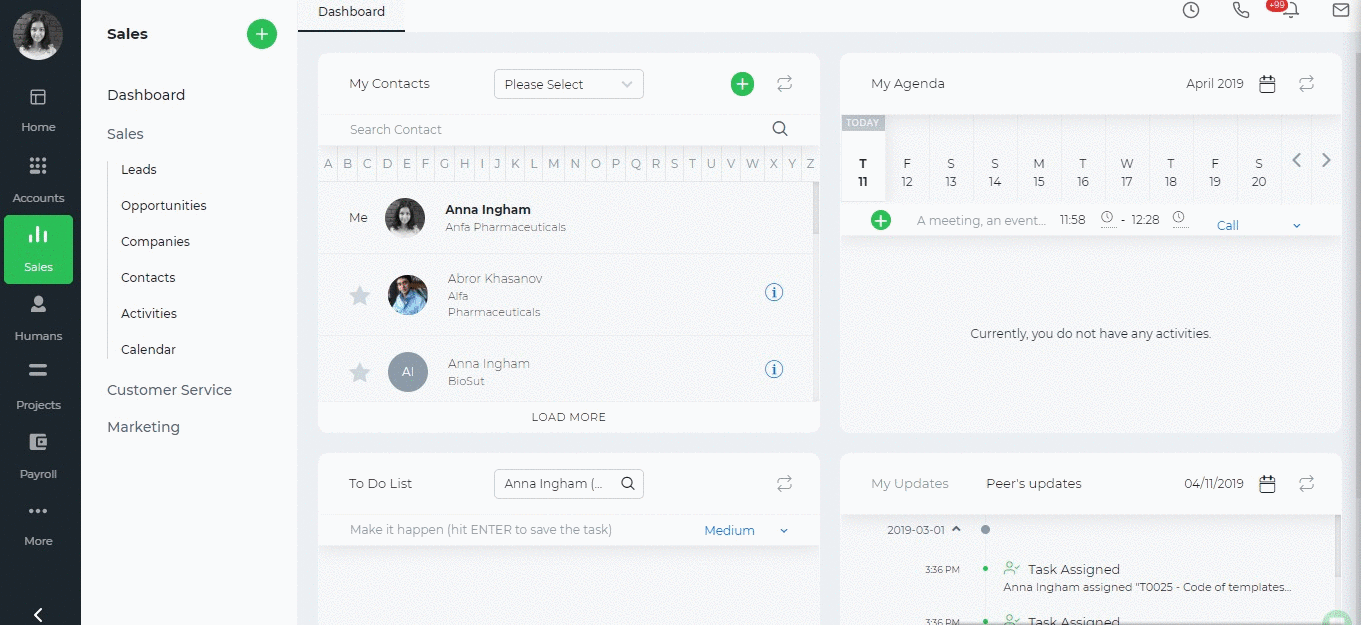
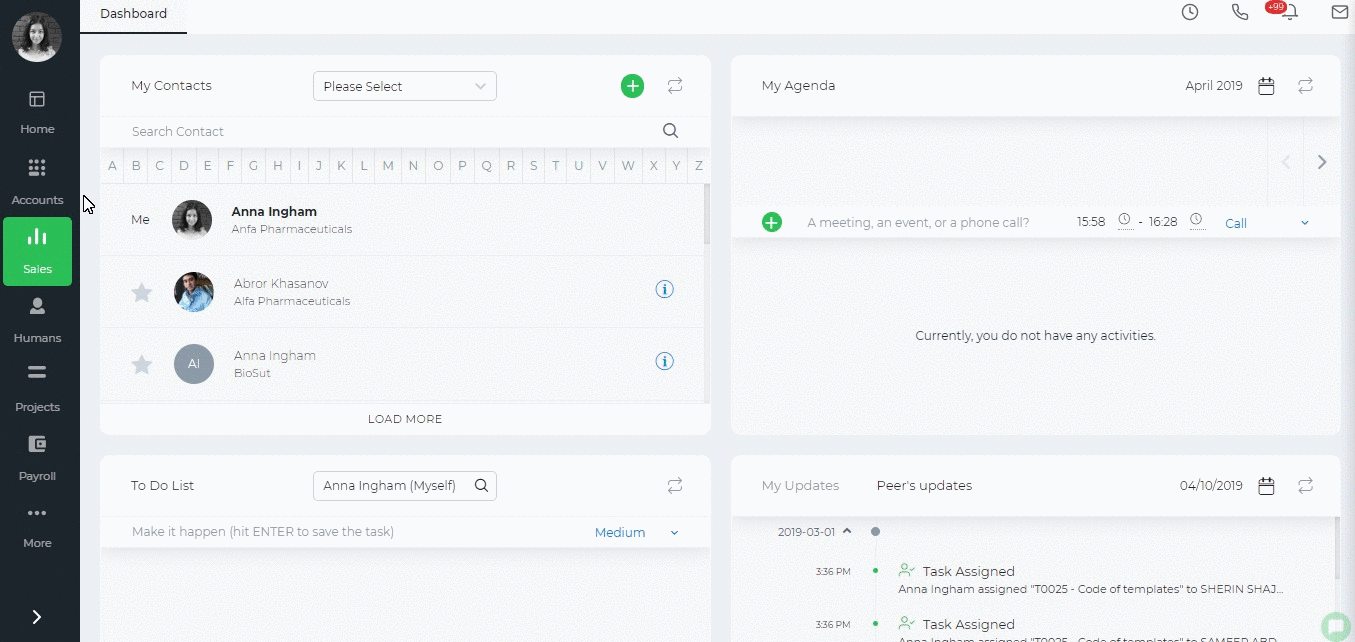 Add Message
To add a message for mass mailing, click on Add New button in Waiting Messages section and choose Mail Message.
Type in the Subject, select a mailing list, choose date and time, from email and write the content of the message.
While writing the content, you can make effective use of personalization attributes which will make the message personalized. If you have templates for the mass mailing, choose from the Choose Template drop-down. You can find more about templates here.
Once the message is ready, you can schedule a time for the message to be sent.
Note that the scheduled time should be at least 5 minutes after the time shown on your computer.
Before scheduling the message, you can send a text message to your own email address to see how the final message looks...
Note that your mass email will contain a link for the recipients to unsubscribe.
Add Message
To add a message for mass mailing, click on Add New button in Waiting Messages section and choose Mail Message.
Type in the Subject, select a mailing list, choose date and time, from email and write the content of the message.
While writing the content, you can make effective use of personalization attributes which will make the message personalized. If you have templates for the mass mailing, choose from the Choose Template drop-down. You can find more about templates here.
Once the message is ready, you can schedule a time for the message to be sent.
Note that the scheduled time should be at least 5 minutes after the time shown on your computer.
Before scheduling the message, you can send a text message to your own email address to see how the final message looks...
Note that your mass email will contain a link for the recipients to unsubscribe.
 Sent Messages
In this page, you can view the statistics about your sent messages such as who viewed, who unsubscribed, how many sent, how many bounced, etc.
If you click on the numbers, you will see the name of the contact who viewed or unsubscribed.
Sent Messages
In this page, you can view the statistics about your sent messages such as who viewed, who unsubscribed, how many sent, how many bounced, etc.
If you click on the numbers, you will see the name of the contact who viewed or unsubscribed.
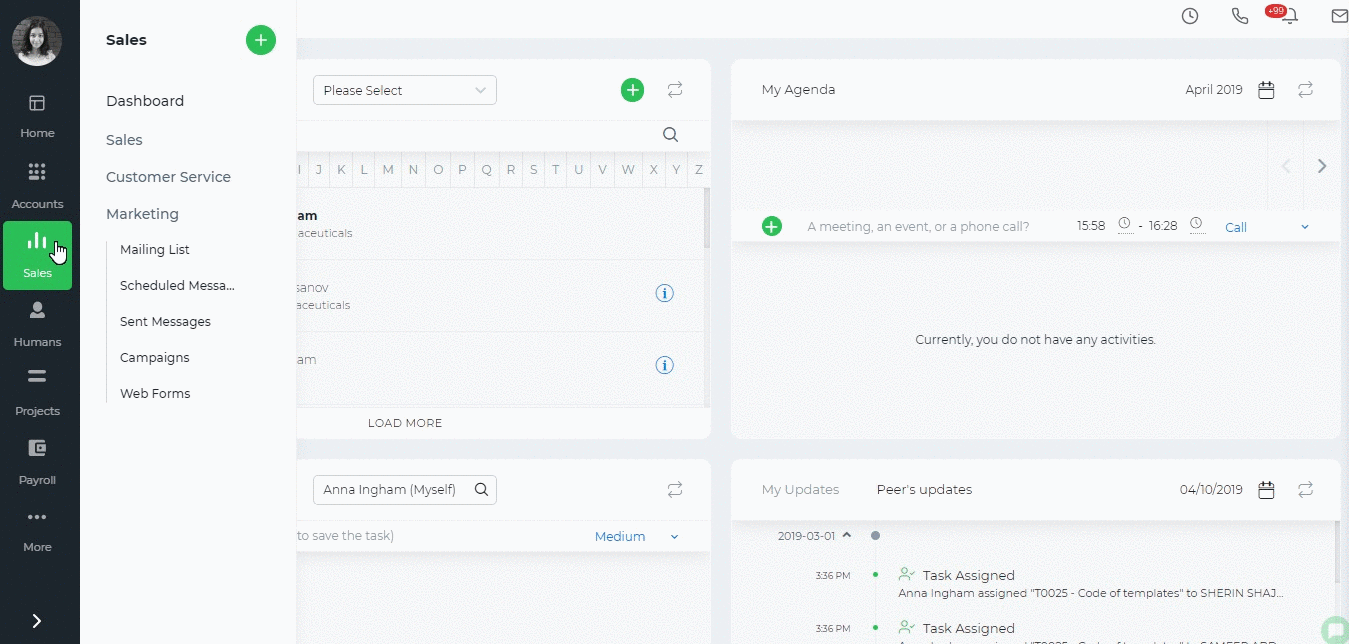

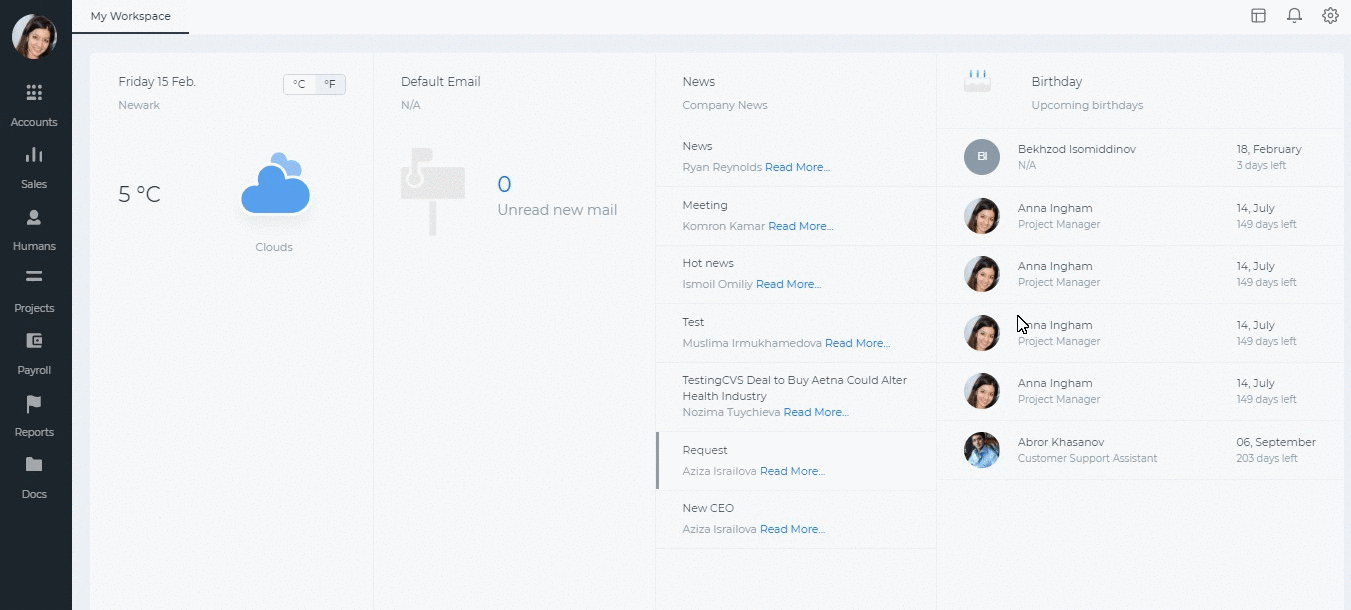
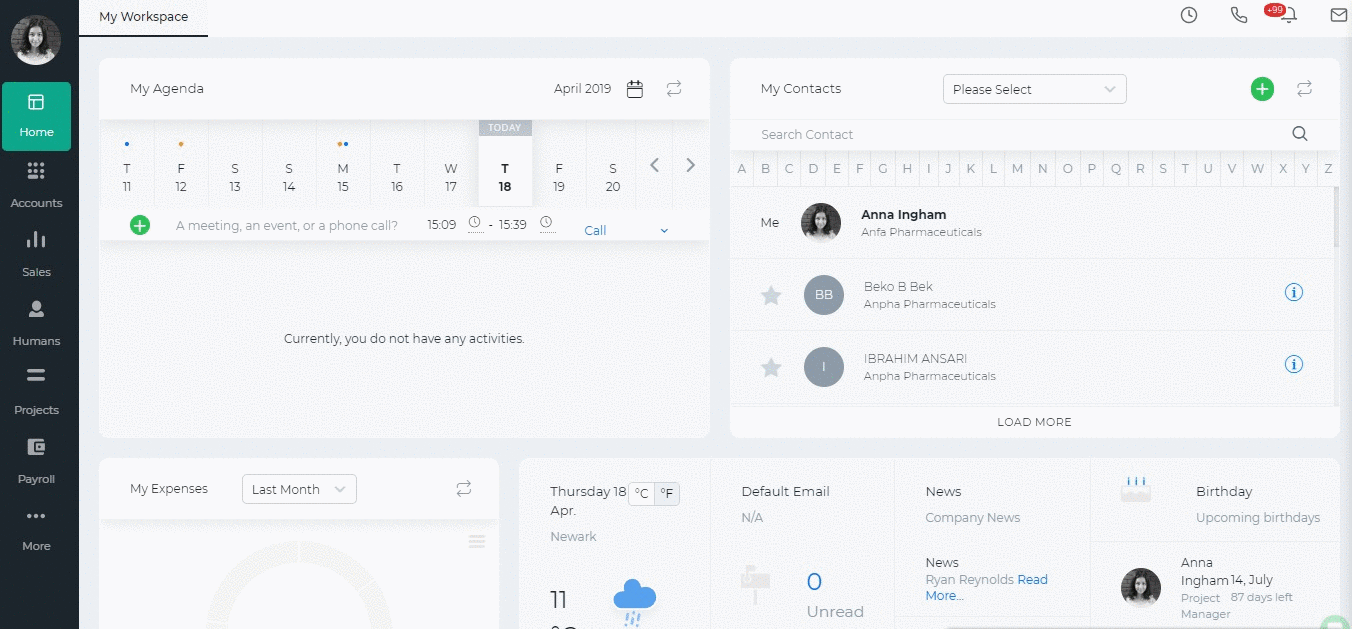
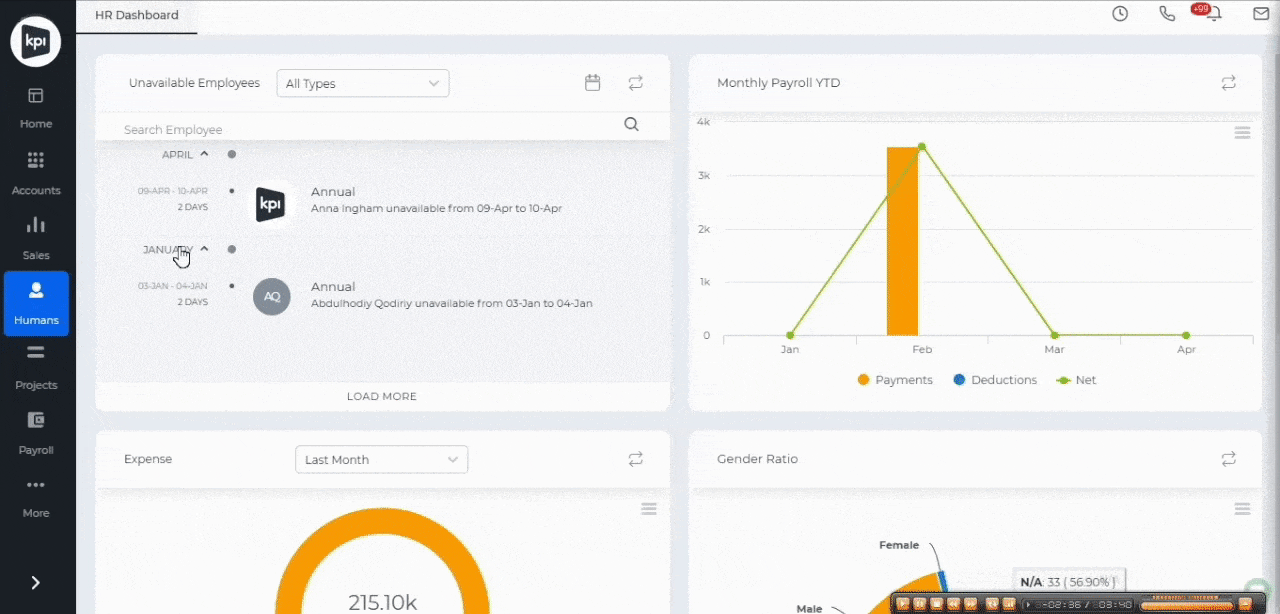
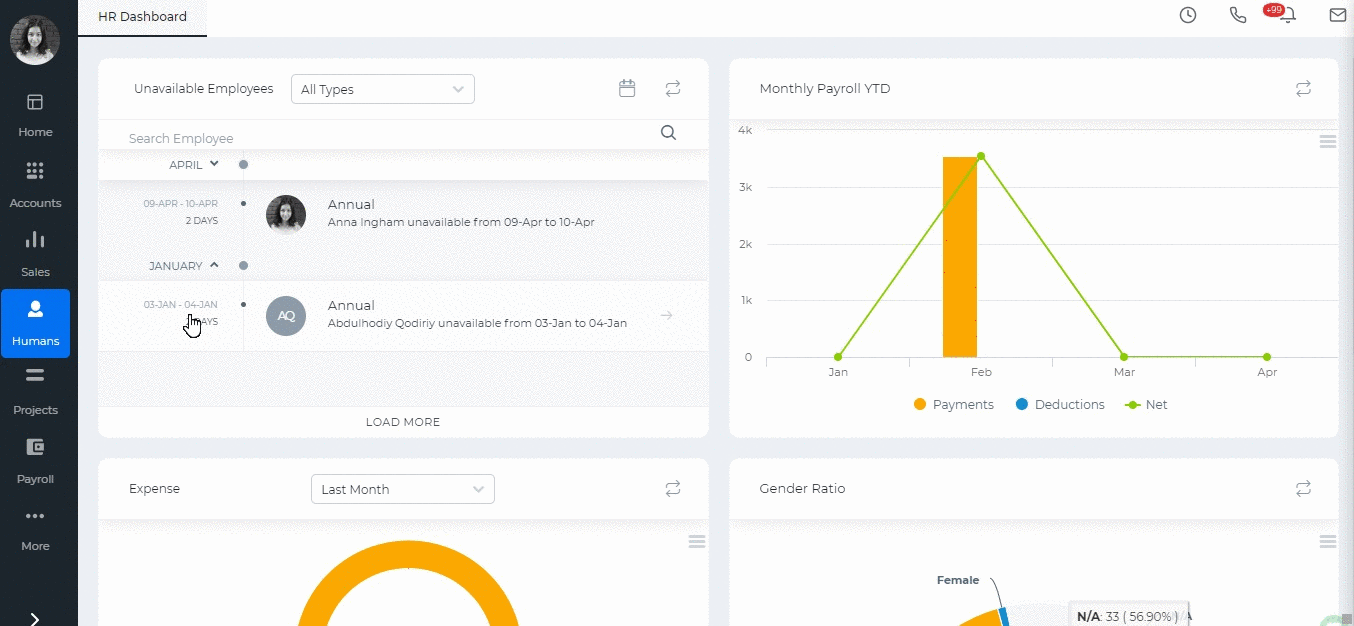
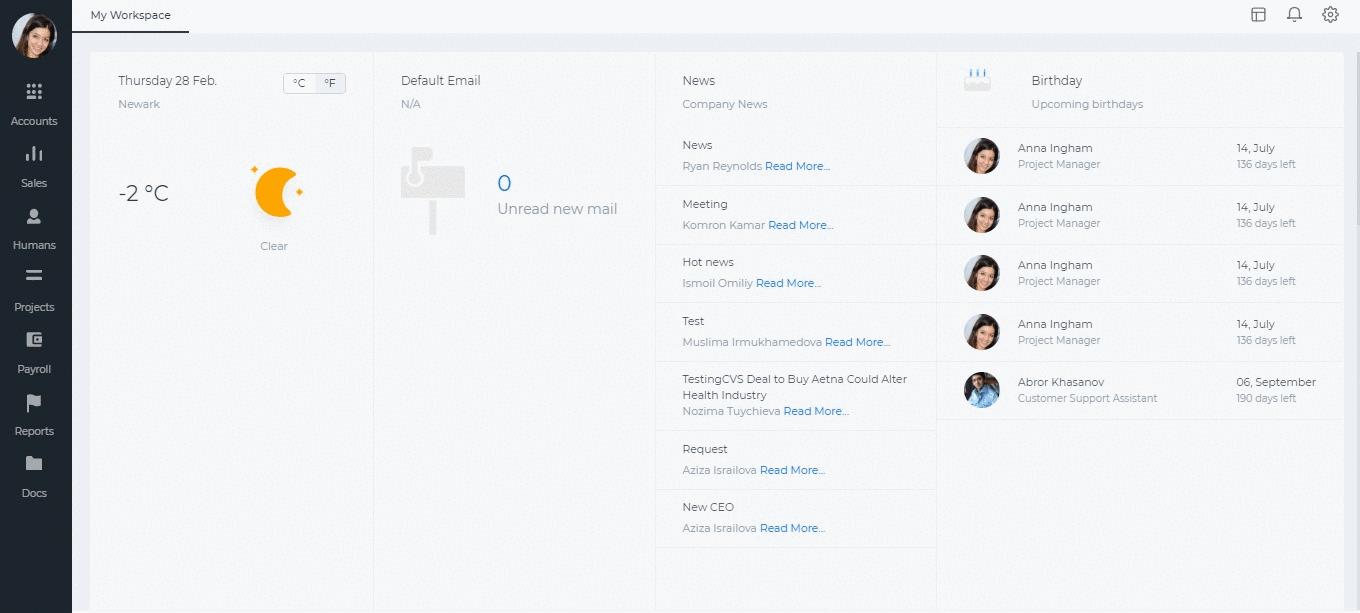
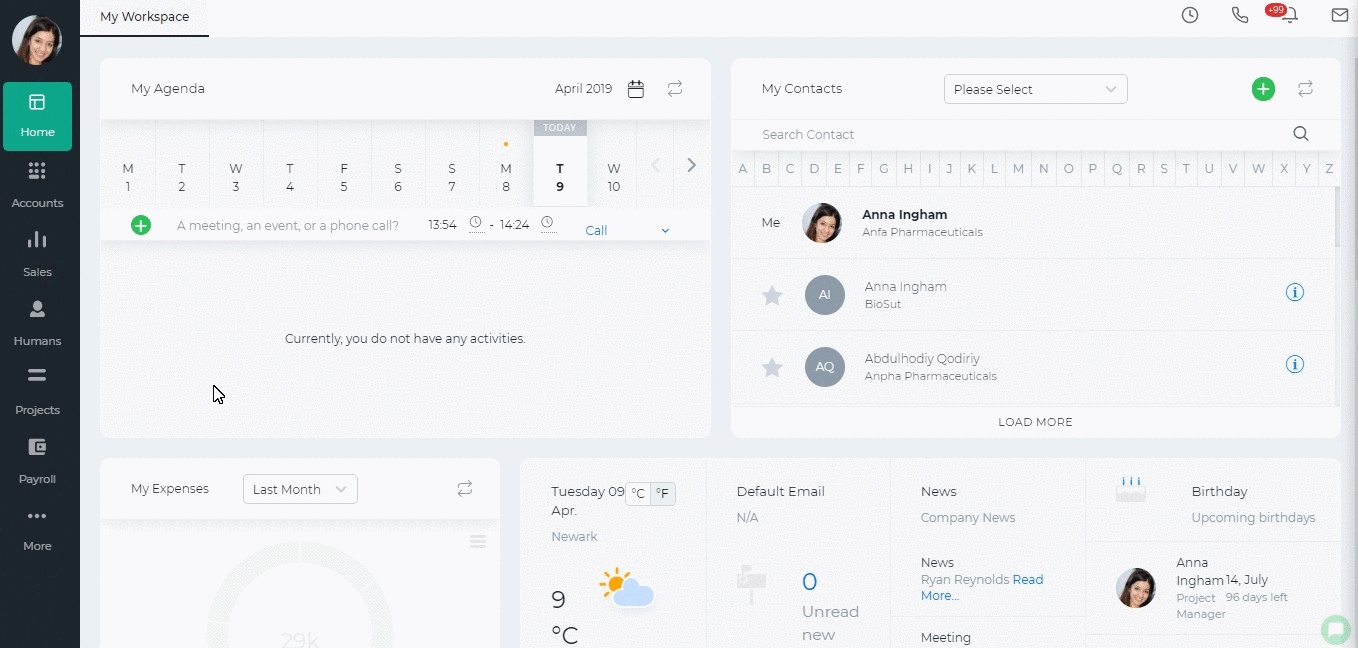 The system calculates end of service gratuity either by Resignation or by Termination. Let's calculate the end of service gratuity of an employee who has a limited contract.
If the employee has completed more than 5 years of continuous service with your company and has resigned, then for the first 5 years he/she is eligible for 21 day’s basic salary and for service above 5 years, he/she is eligible for 30 day’s basic salary for every year of service.
Calculation:
Hire Date: Jan 01, 2012
As of Date: Dec 15, 2017
Basic Salary: 5000 per month
Basic Salary per Day: 5000*12/365 = 164.3836
Total Number of Days Worked: Hire Date - As of Date = 2176
Total Number of Years Worked: 2176/365 = 5.96164
21 Days Basic Salary: 164.3836*21 = 3452.055
30 Days Basic Salary: 30*164.3836*(5.96164-5) = 4742.353 (for above 5 years).
Total Gratuity: 5*3452.055 + 4742.353 = 22002.63
The end of service calculates the gratuity total according to the reason you choose and date you choose. Other calculations are made according to the End of Service Settings in your account using the same formula.
The system calculates end of service gratuity either by Resignation or by Termination. Let's calculate the end of service gratuity of an employee who has a limited contract.
If the employee has completed more than 5 years of continuous service with your company and has resigned, then for the first 5 years he/she is eligible for 21 day’s basic salary and for service above 5 years, he/she is eligible for 30 day’s basic salary for every year of service.
Calculation:
Hire Date: Jan 01, 2012
As of Date: Dec 15, 2017
Basic Salary: 5000 per month
Basic Salary per Day: 5000*12/365 = 164.3836
Total Number of Days Worked: Hire Date - As of Date = 2176
Total Number of Years Worked: 2176/365 = 5.96164
21 Days Basic Salary: 164.3836*21 = 3452.055
30 Days Basic Salary: 30*164.3836*(5.96164-5) = 4742.353 (for above 5 years).
Total Gratuity: 5*3452.055 + 4742.353 = 22002.63
The end of service calculates the gratuity total according to the reason you choose and date you choose. Other calculations are made according to the End of Service Settings in your account using the same formula.
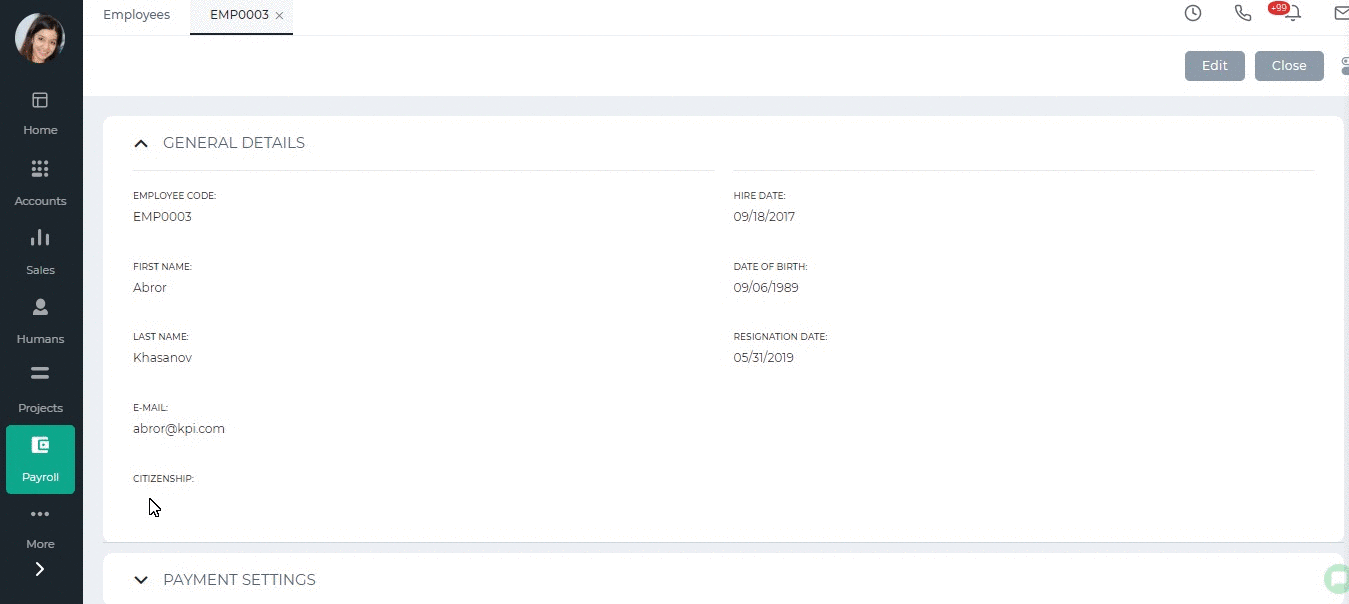 Resigned Employees
If the employee is already resigned, the gratuity can be added from the End of Service Gratuity page. In order to add it, the employee should have the Resignation Date set in his/her profile.
Once the End of Service Gratuity is added for the resigned employee, a single payrun will be automatically added in the Single Payrun list with a draft status.
Resigned Employees
If the employee is already resigned, the gratuity can be added from the End of Service Gratuity page. In order to add it, the employee should have the Resignation Date set in his/her profile.
Once the End of Service Gratuity is added for the resigned employee, a single payrun will be automatically added in the Single Payrun list with a draft status.

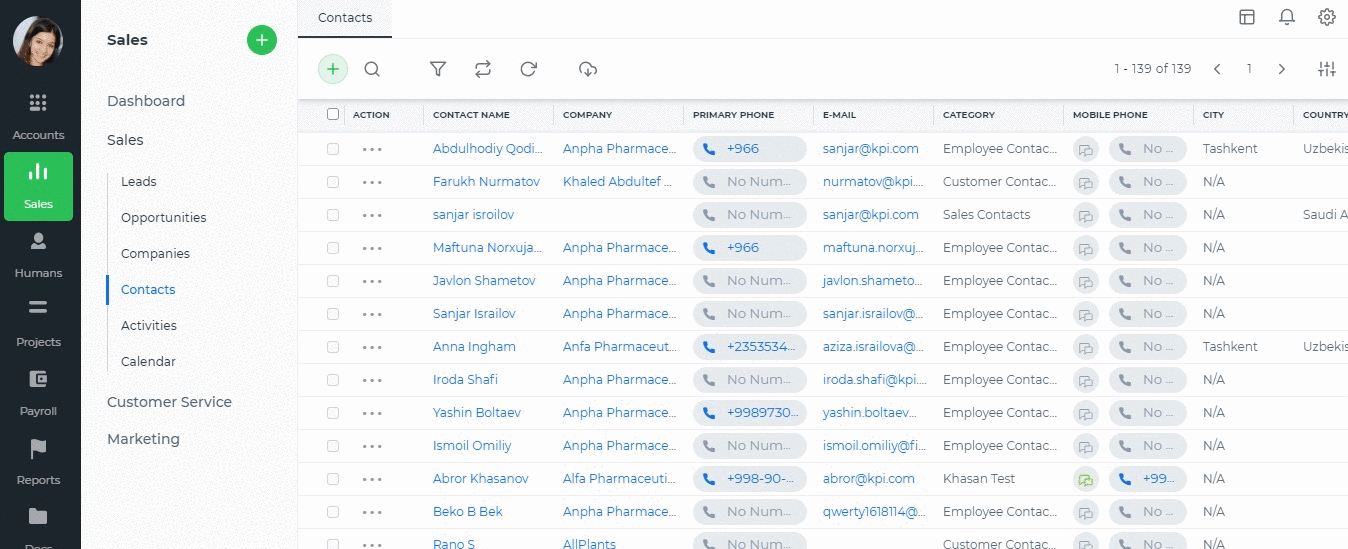
 Currencies
The foreign currencies should be set up under Settings>>Accounts>>Currency Rates.
Currencies
The foreign currencies should be set up under Settings>>Accounts>>Currency Rates.
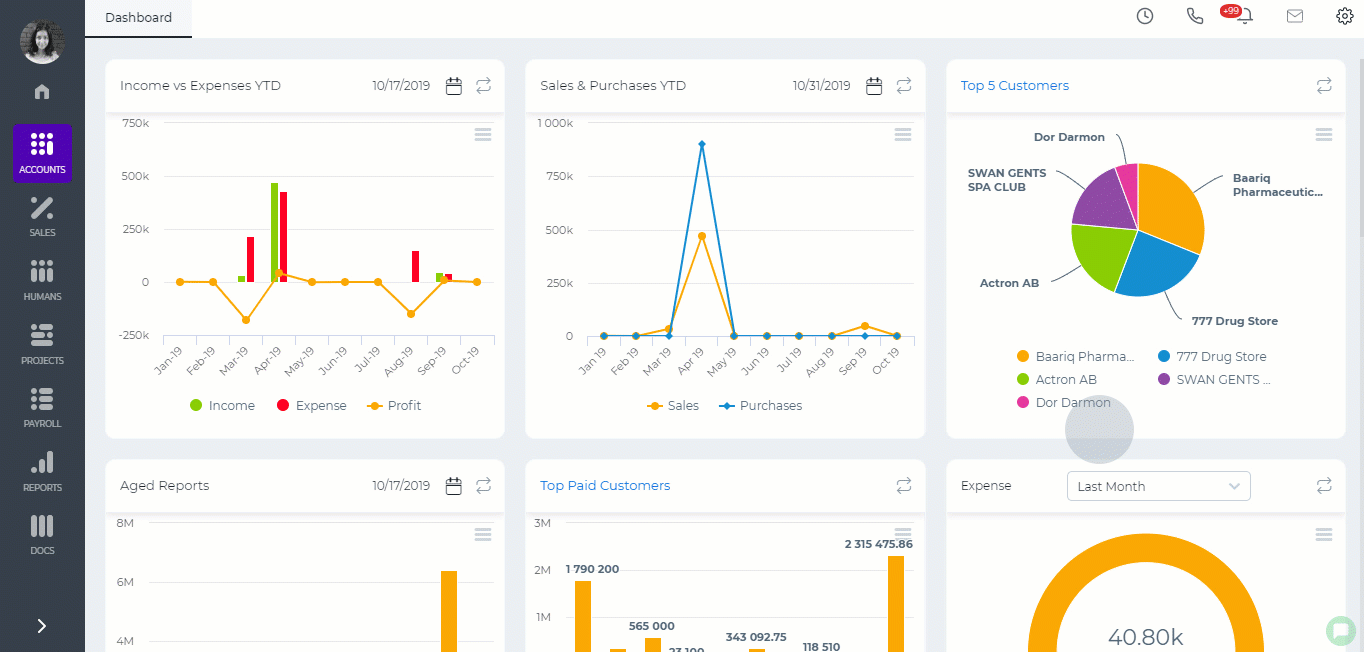 Employee Payroll Settings
Employees who receive their payruns in a foreign currency should have the right currency set in their payroll profile.
Employee Payroll Settings
Employees who receive their payruns in a foreign currency should have the right currency set in their payroll profile.
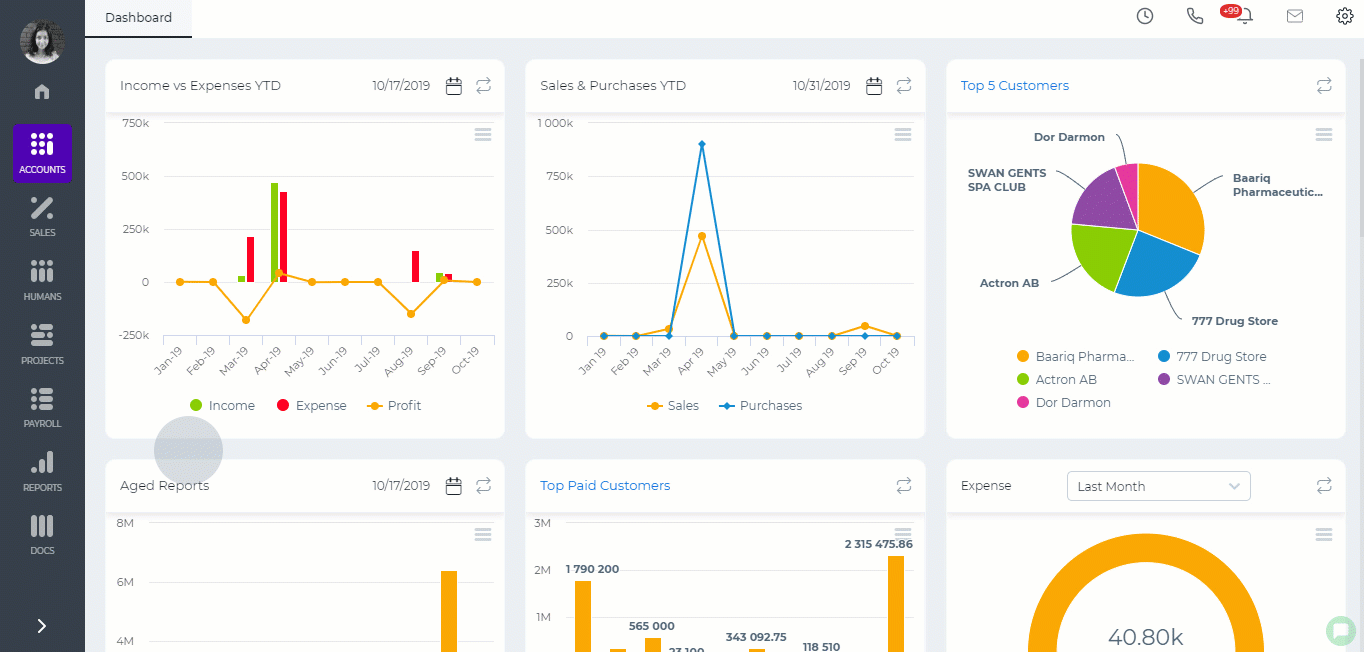 Single Payrun
After you have set up all the currencies, you will be able to generate payruns in other currencies.
Single Payrun
After you have set up all the currencies, you will be able to generate payruns in other currencies.
 For group payruns, add the employee payroll groups who need payruns in a foreign currency from Settings>>Payroll>>Payroll Groups.
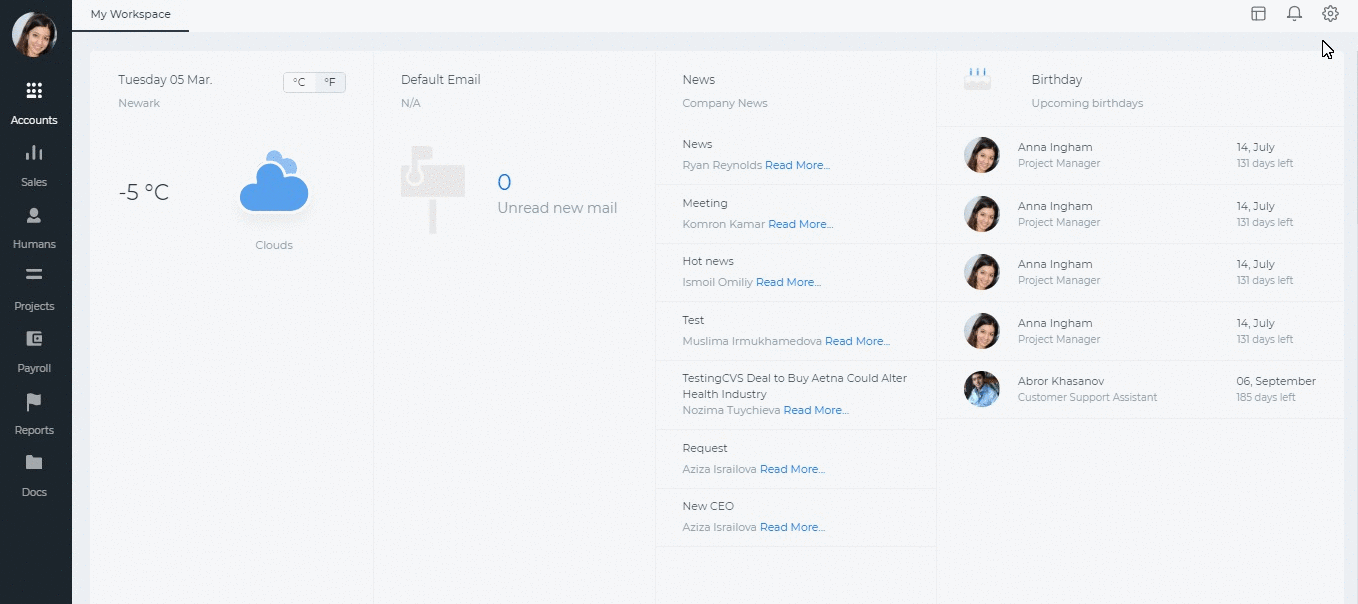
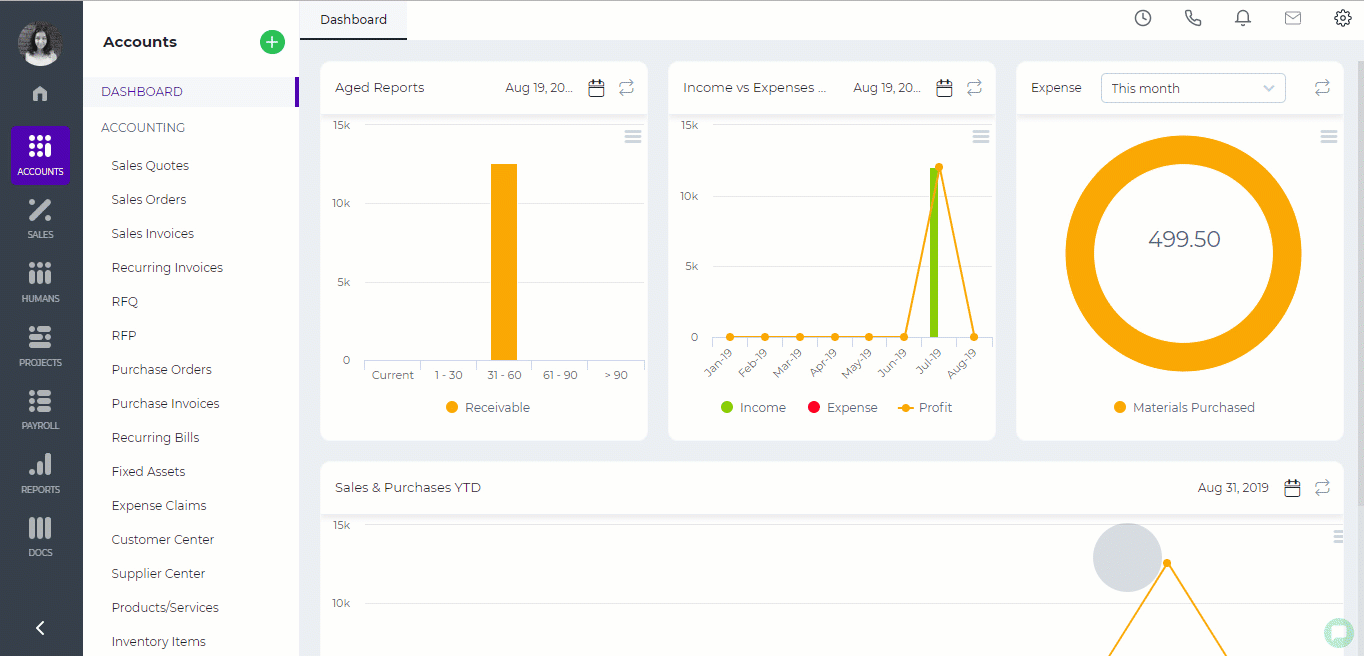
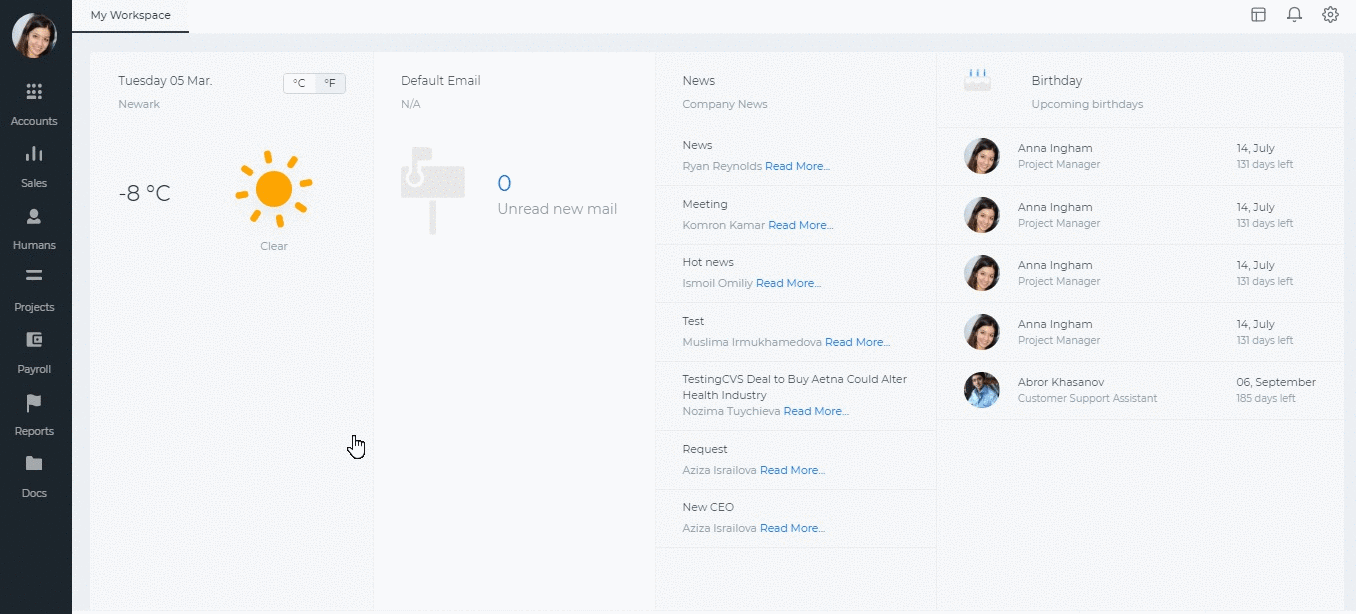
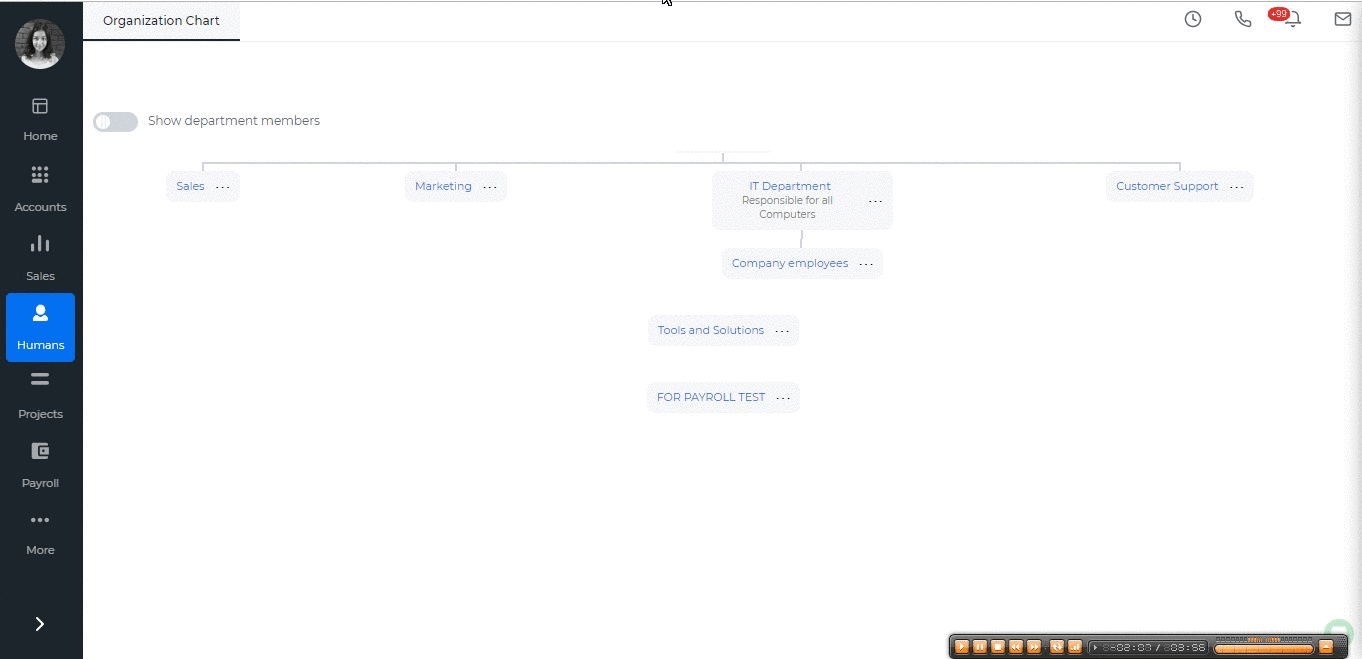 You can also set a parent department right in the organization chart. Click the more option in the department name and click "Set as Parent".
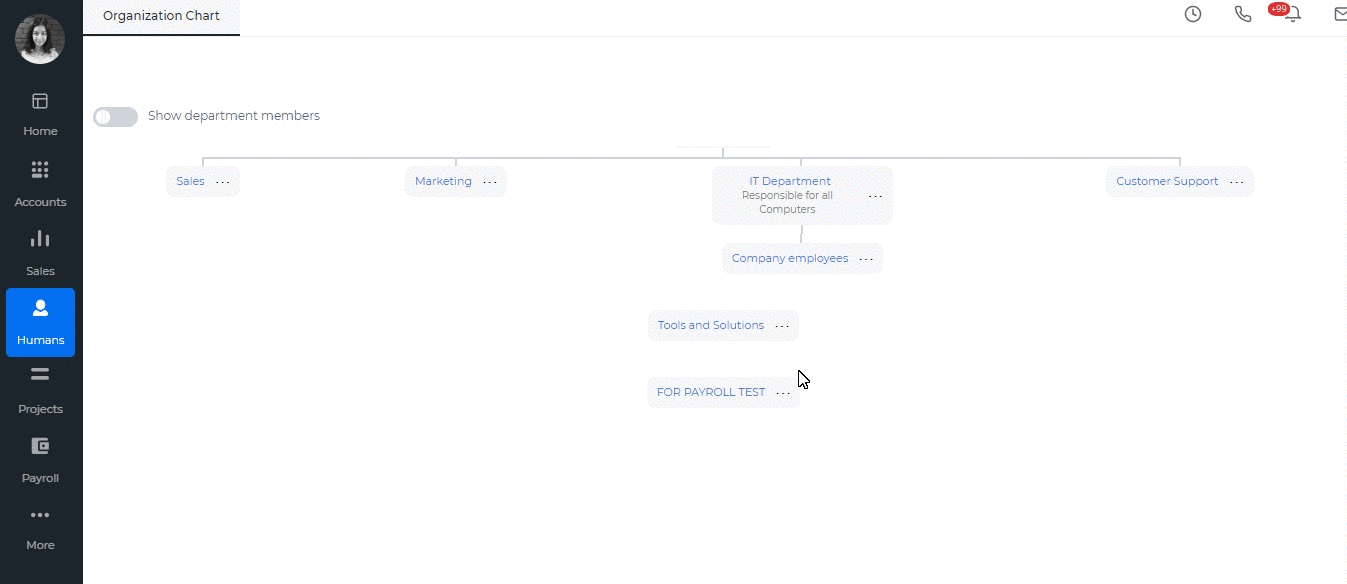
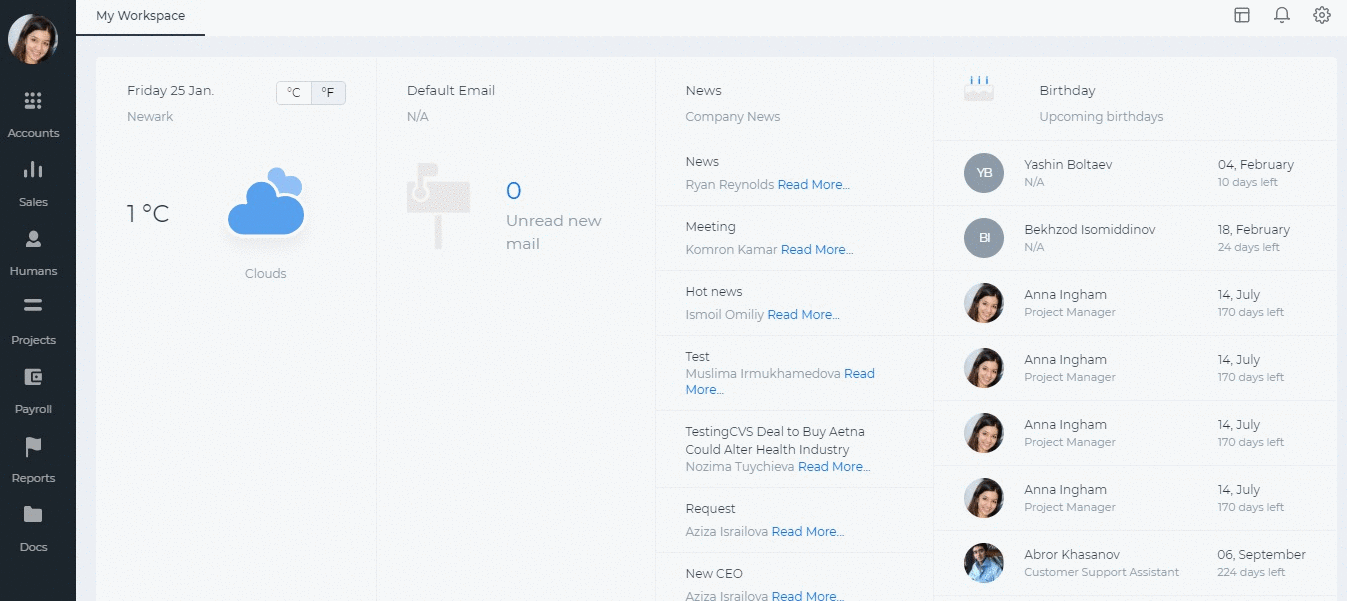
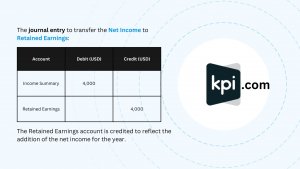
 In order to see the imported items in the system, please refresh the page.
You will be notified about the number of accounts imported in an email sent by the system. You can also view the status of the import from Settings>>System Logs>>Import logs.
In order to see the imported items in the system, please refresh the page.
You will be notified about the number of accounts imported in an email sent by the system. You can also view the status of the import from Settings>>System Logs>>Import logs.
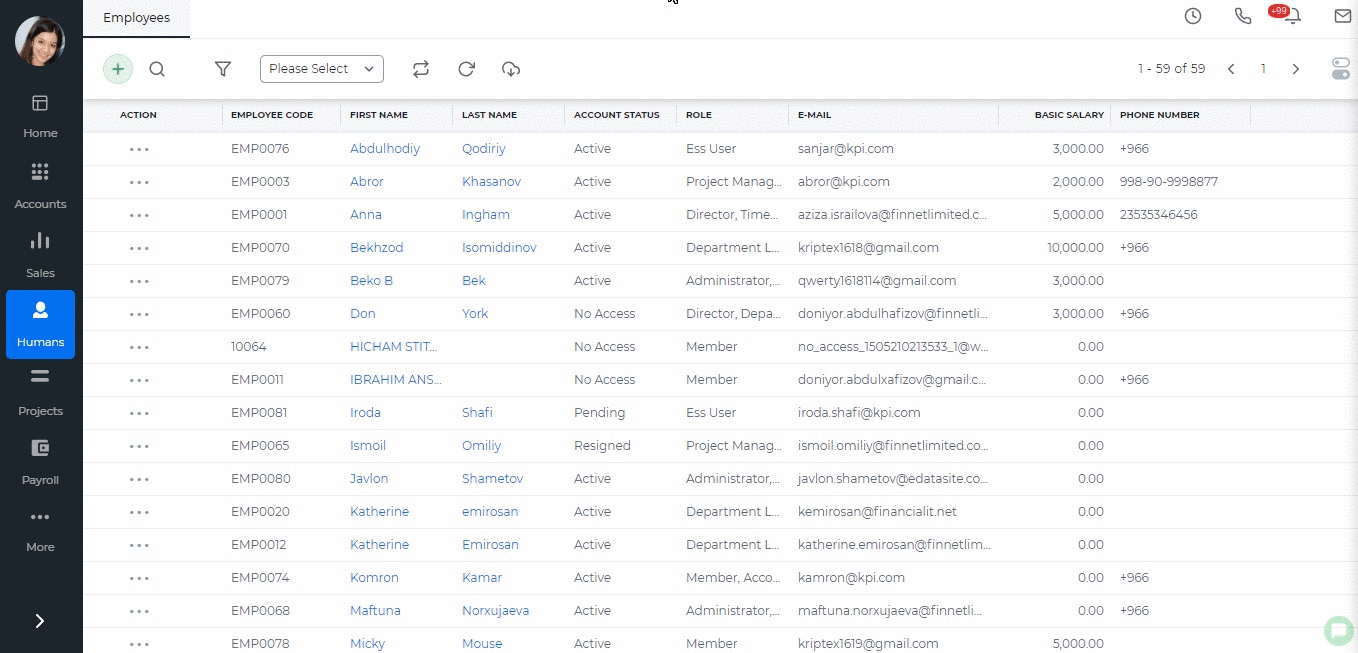
 You can check the status of the import process from Settings>>System Logs>>Import Logs.
The logs shows the date the file was uploaded, the number of requested items to be uploaded, imported and rejected items, skipped and overwritten items as well as the rejected file to see the reason why the items were rejected.
You can check the status of the import process from Settings>>System Logs>>Import Logs.
The logs shows the date the file was uploaded, the number of requested items to be uploaded, imported and rejected items, skipped and overwritten items as well as the rejected file to see the reason why the items were rejected.
 When you choose the related employee name and save the incident, it will be available in that employee's profile. The status field helps you to track whether the incident is new, under progress or resolved.
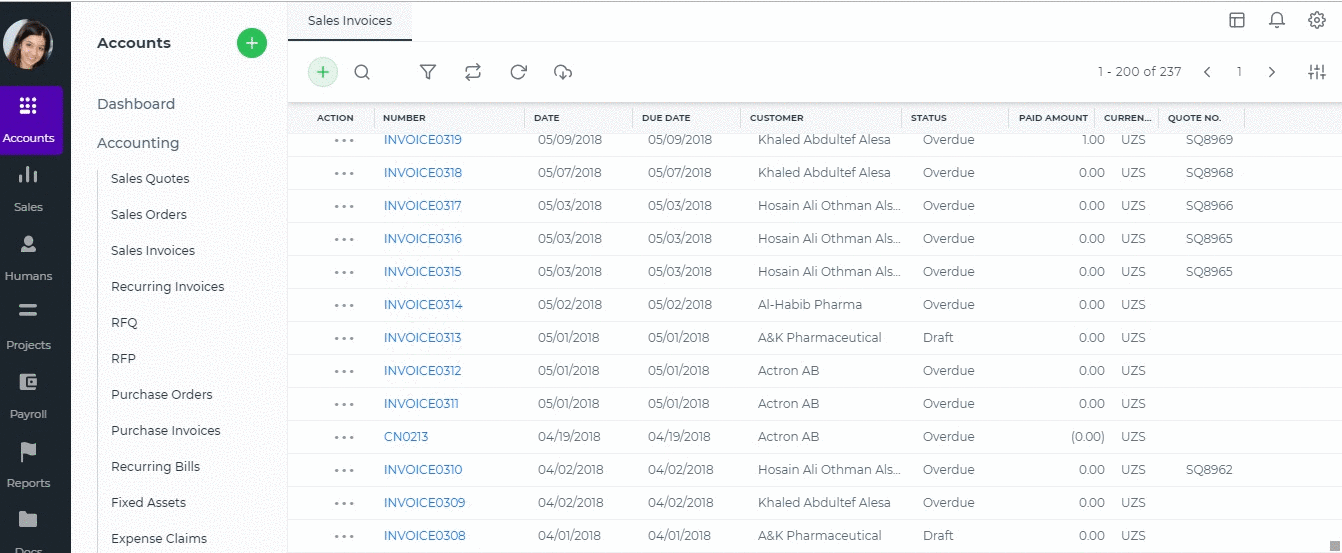
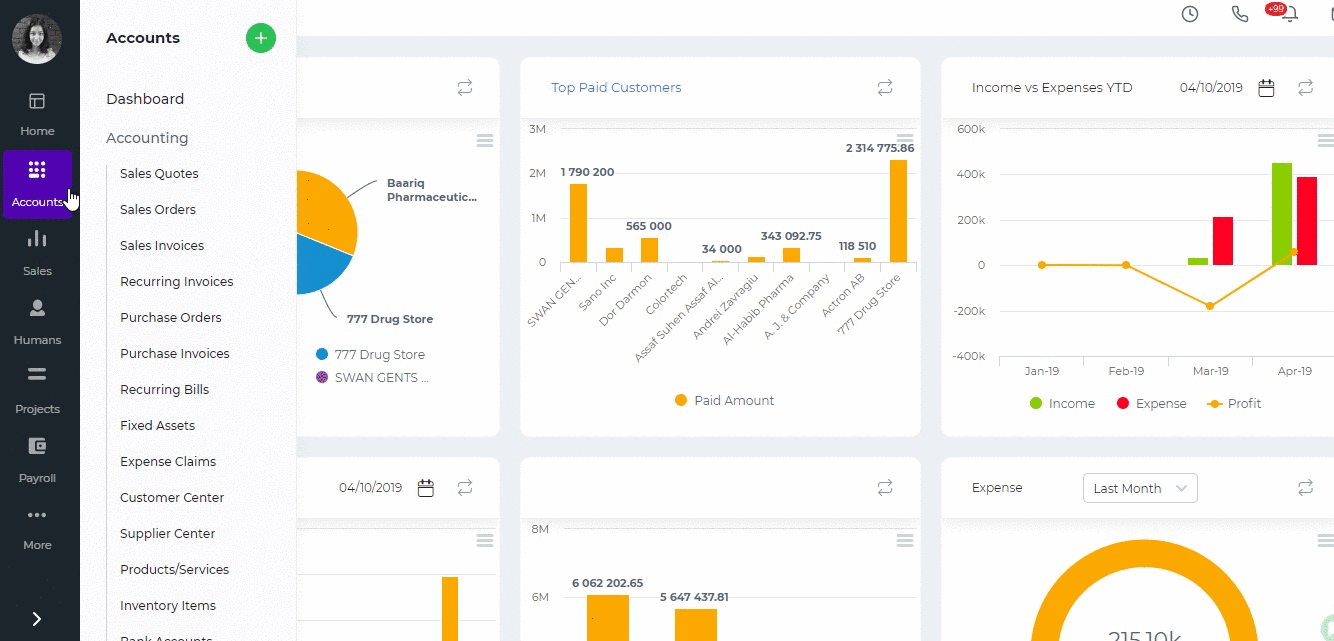 After the expense is approved, go to purchase order summary and click receive. Choose the allocation type under Related Expenses. You will see the allocated costs. Click save. The average cost of each item will change accordingly.
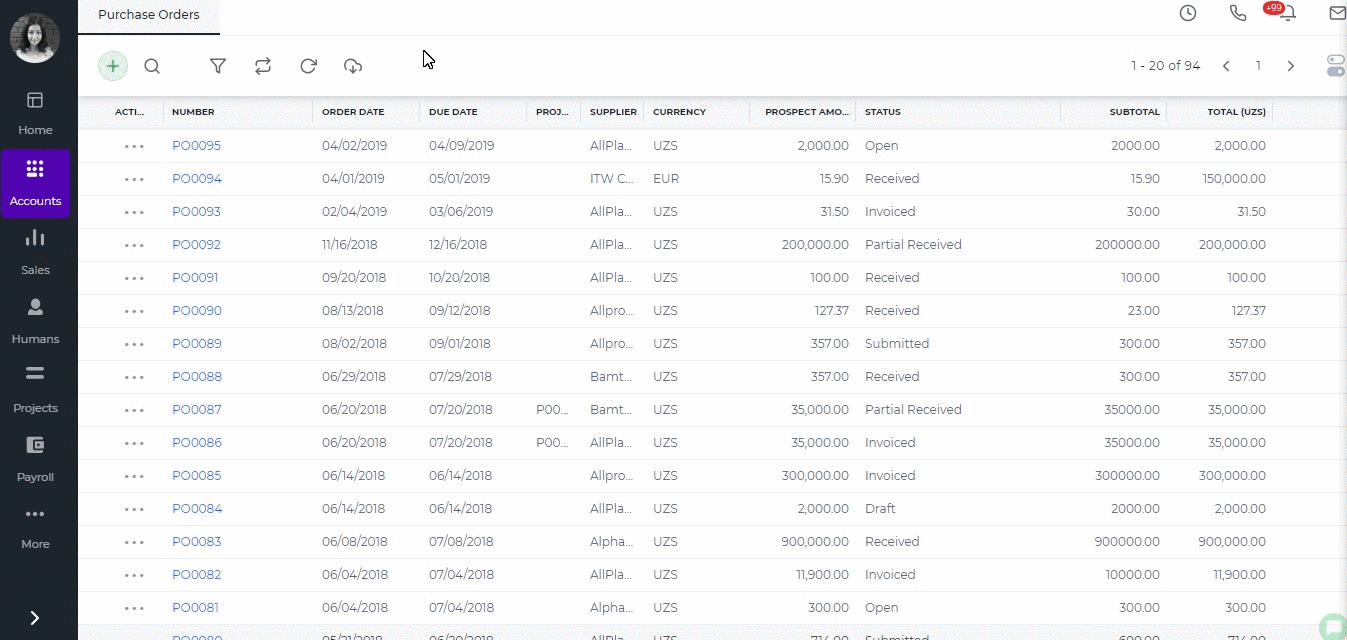 You can view the allocated expense from Accounts>>Statements>>Journal Report.
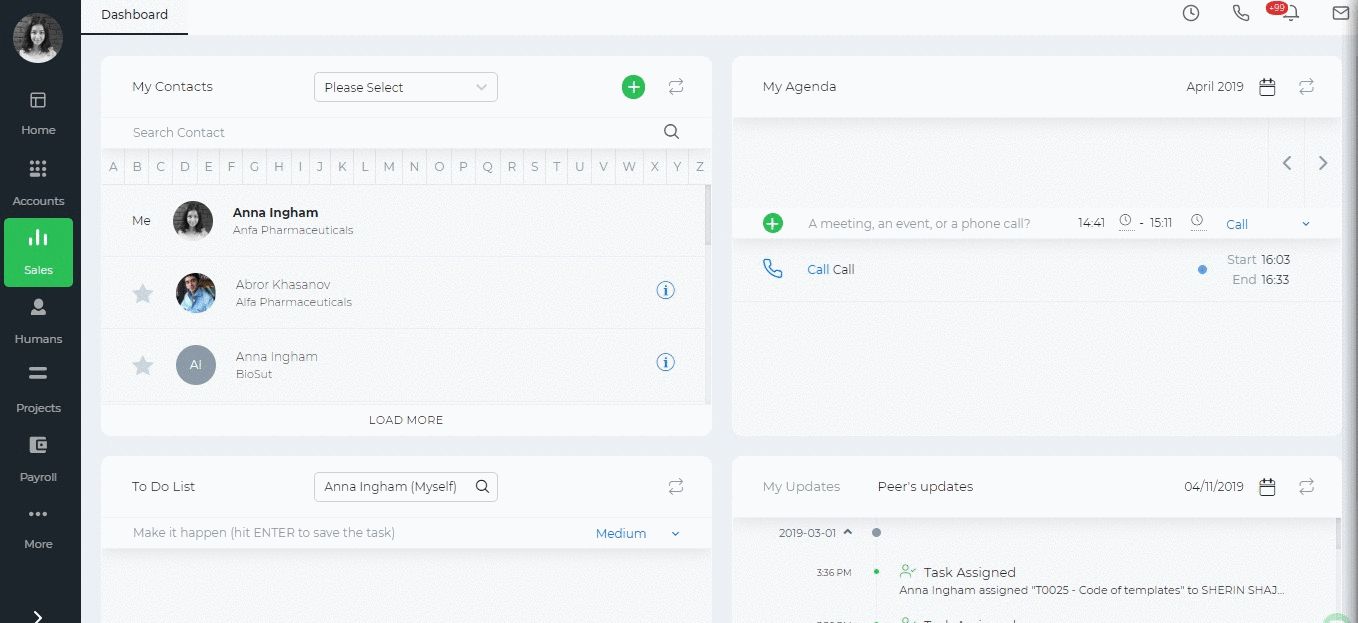 Leads can be imported from .csv file to save your time. More information about the import option is discussed here.
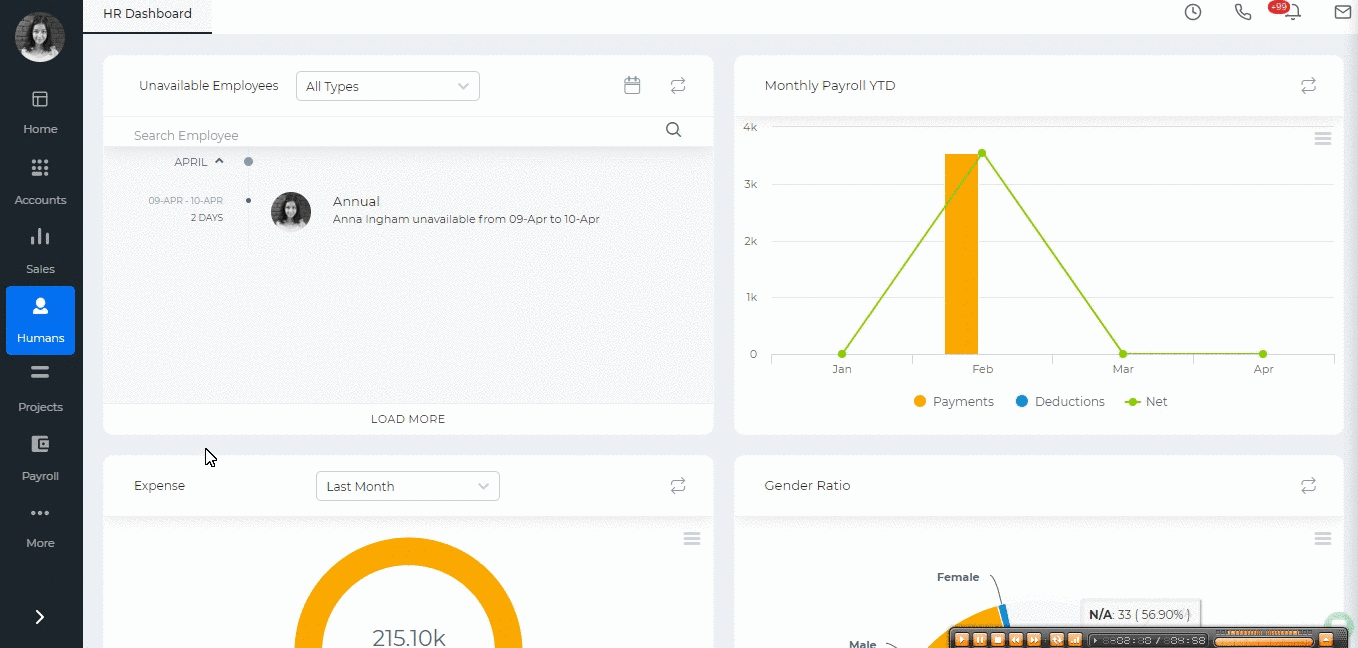
 After the changes are saved in the settings, the leave encashment will be added as a payment category in the employee payrun for the period the leave was taken. For example, an employee is allowed to take 30 days as an annual leave, however, 20 days are taken as the money type which means employee is still working for those allowed days.
Once the Money type leave request is approved, the employee will be entitled for the leave enchashment in his/her payrun for that month.
After the changes are saved in the settings, the leave encashment will be added as a payment category in the employee payrun for the period the leave was taken. For example, an employee is allowed to take 30 days as an annual leave, however, 20 days are taken as the money type which means employee is still working for those allowed days.
Once the Money type leave request is approved, the employee will be entitled for the leave enchashment in his/her payrun for that month.
 Go to Payroll>>Single Payruns and add a new payrun for the employee for the same month when the money type leave was taken.You will see "Leave Salary" payment category in the list of payments.
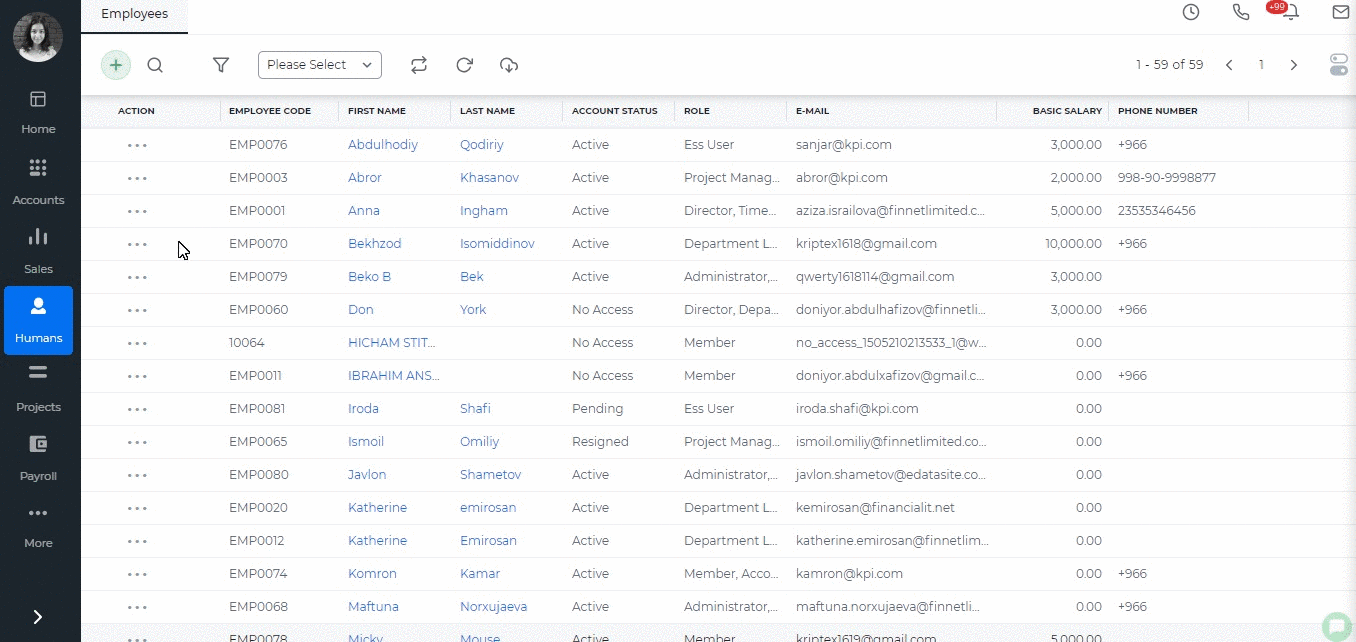
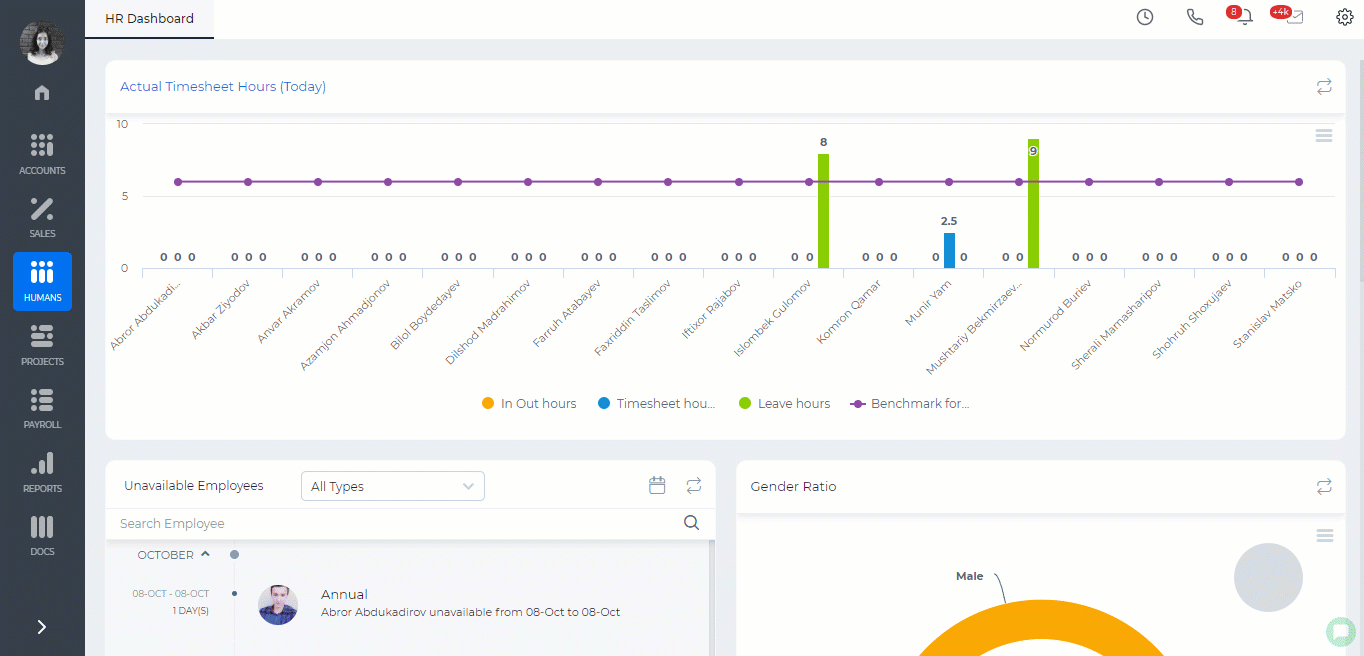

 Edit a Location
You will find Edit Location function from the Action dropdown in Locations list. You need to implement changes and click Update.
Edit a Location
You will find Edit Location function from the Action dropdown in Locations list. You need to implement changes and click Update.
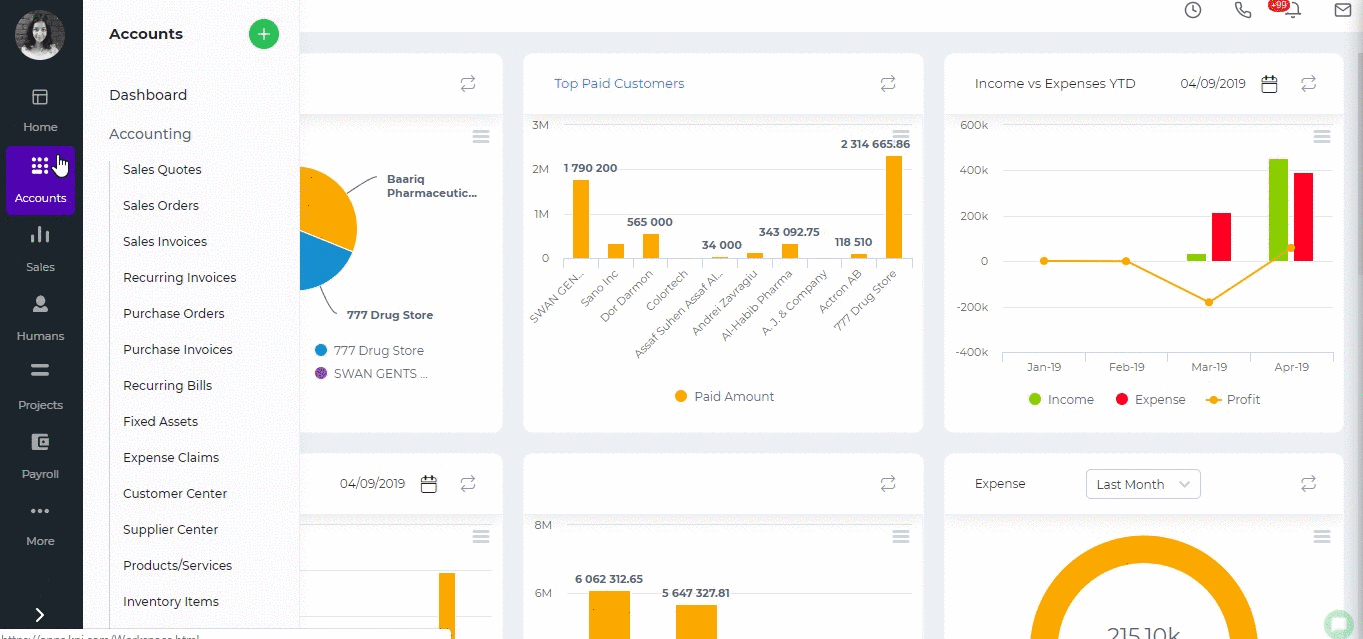
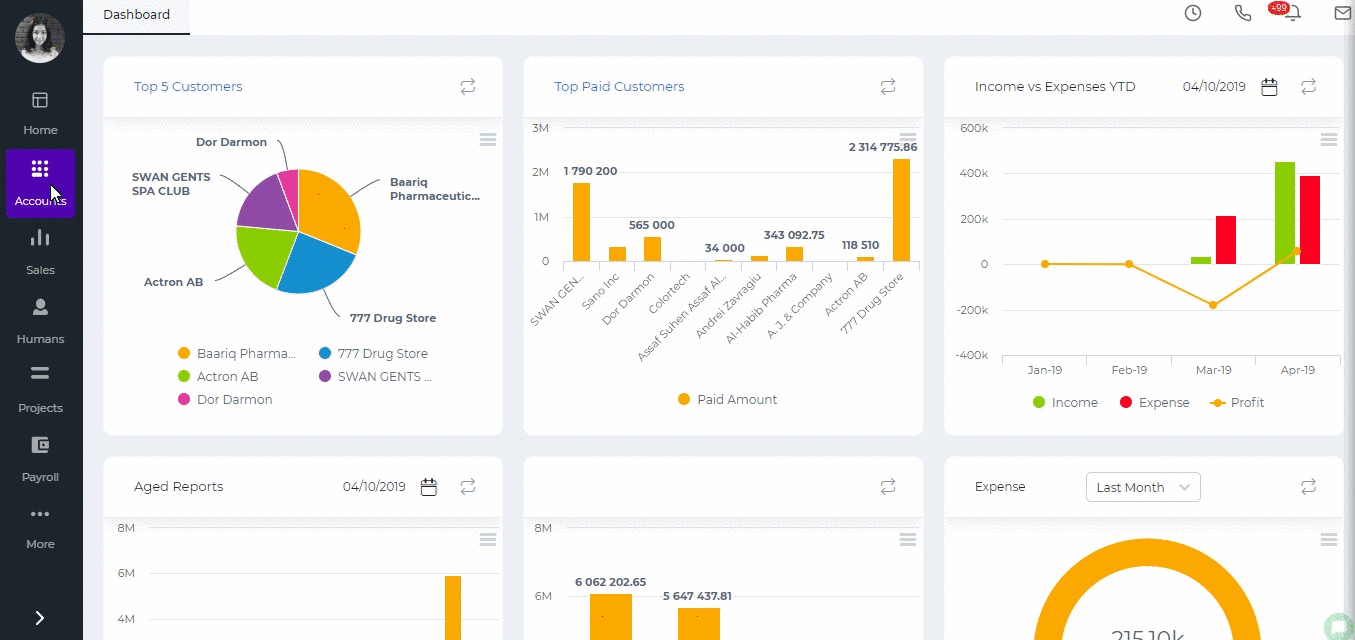
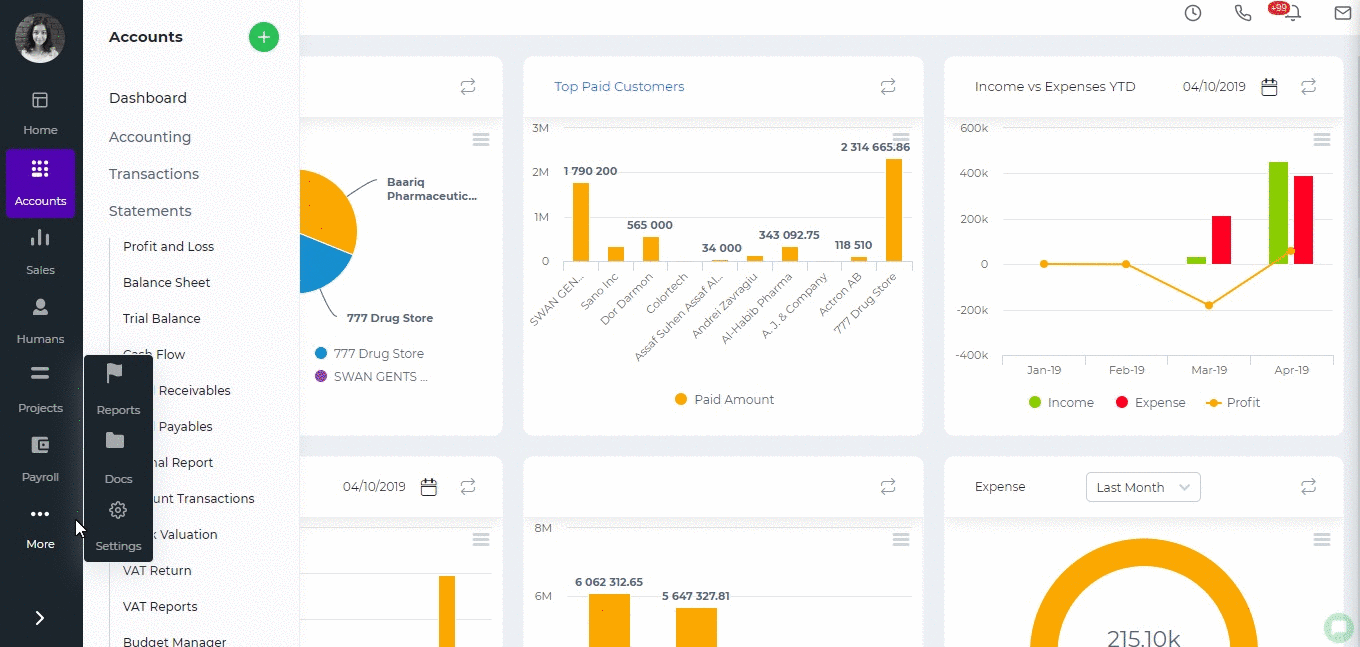

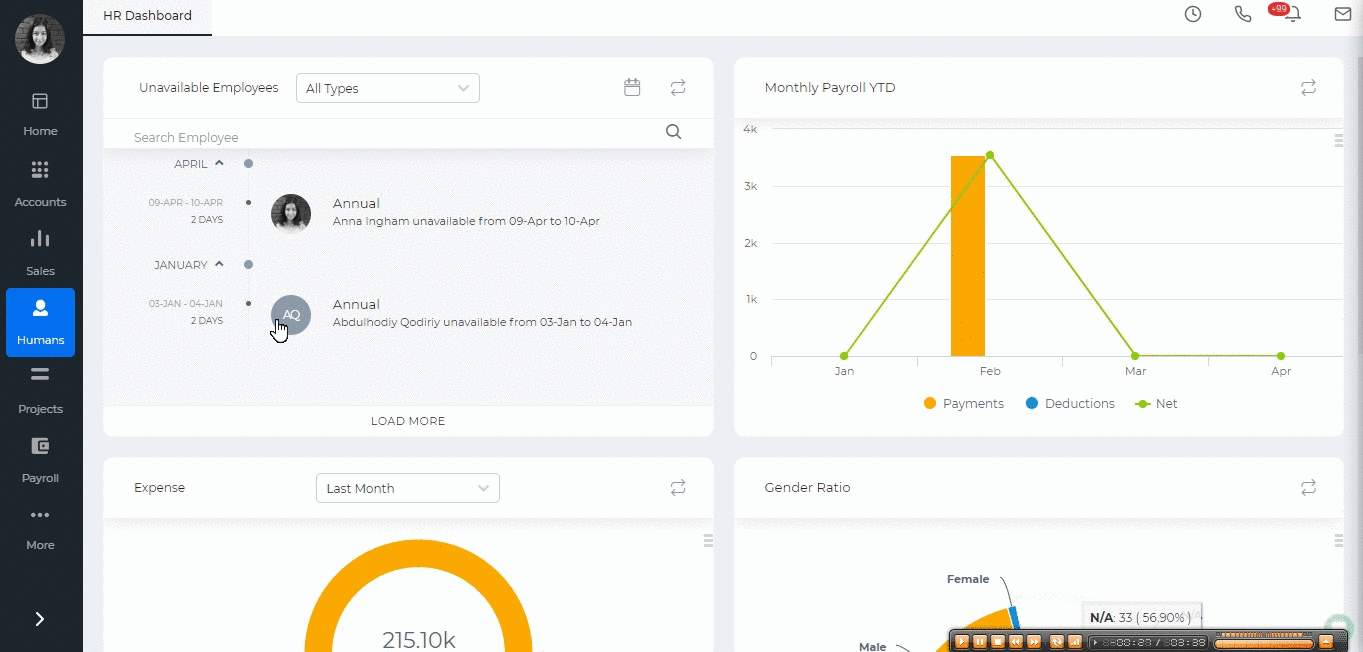
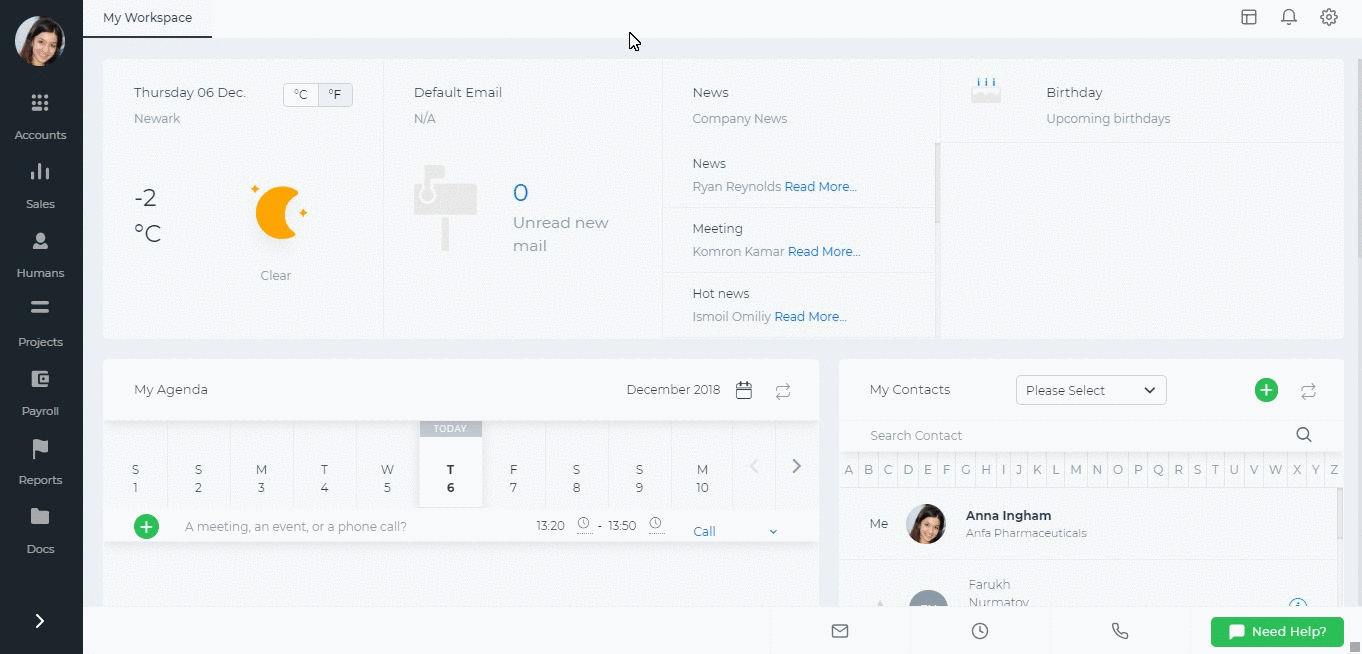

 After you have created all onboarding phases, go to Humans>>Onboarding Steps and create the procedures. Click the plus button and fill in the form.
 If you check the box "Create Onboarding Entry Form", the step will be added as a separate section under the Onboarding module which you can later link to your candidates or your employees with different statuses.
 You can convert a lead with an opportunity as well. Go to Leads section, click actions and choose Convert. Check the box called "Add new opportunity for this account".
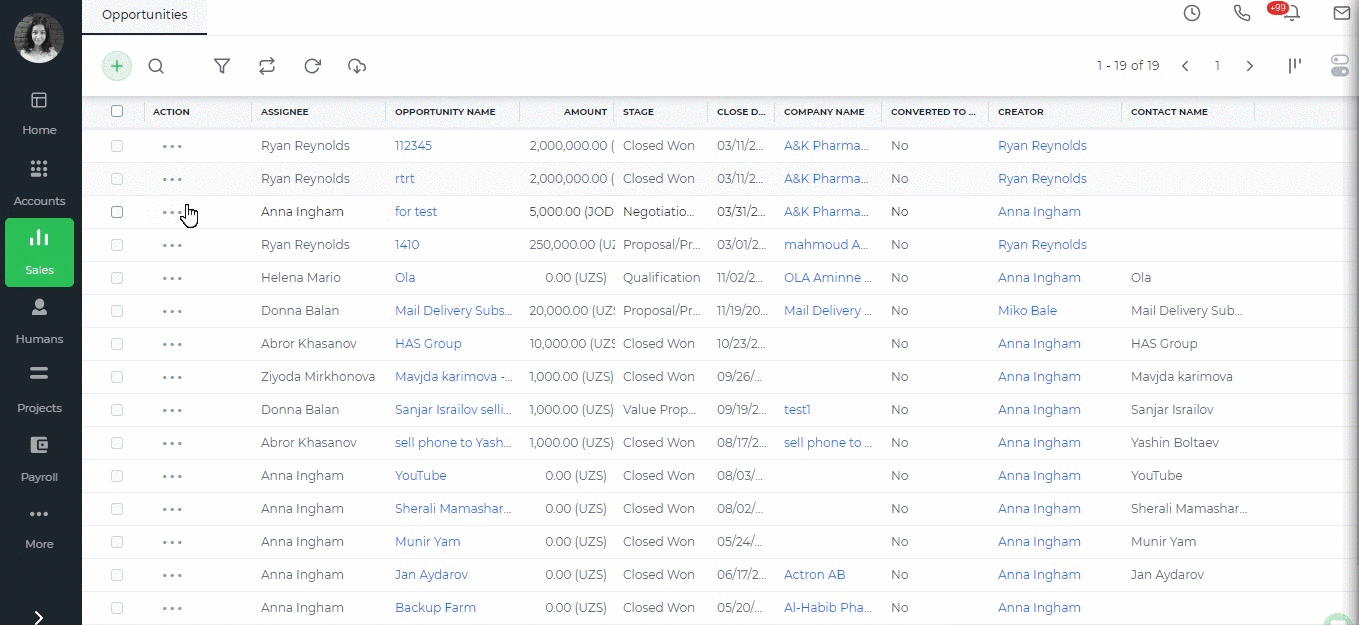
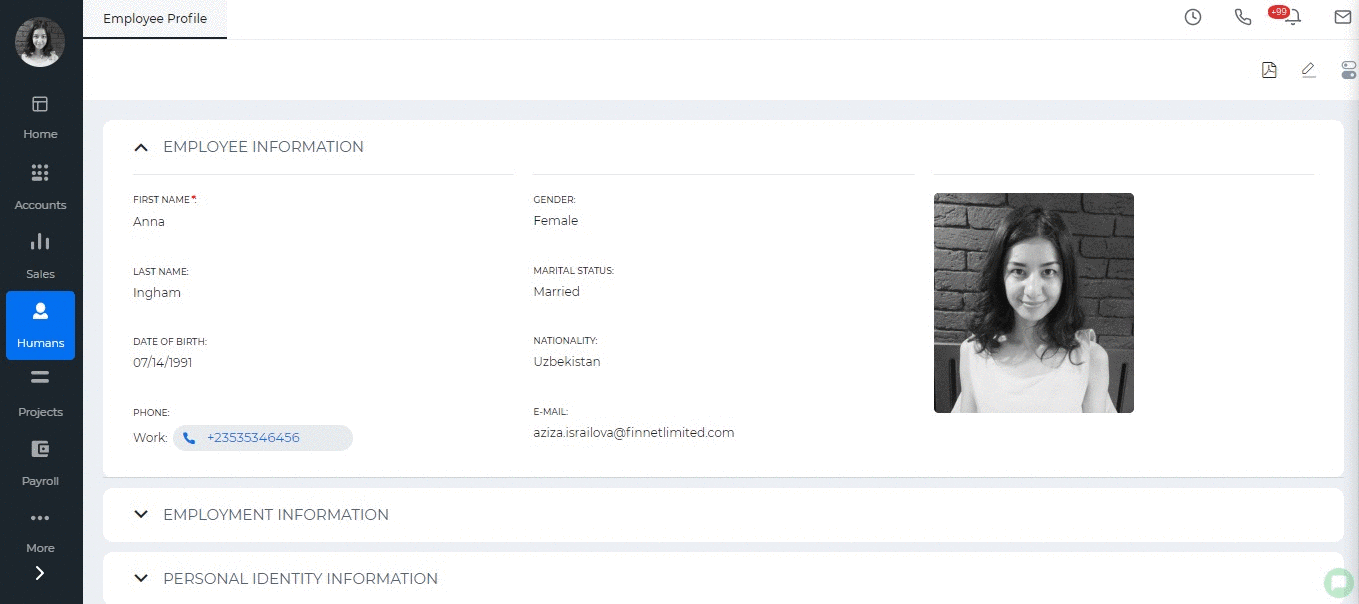
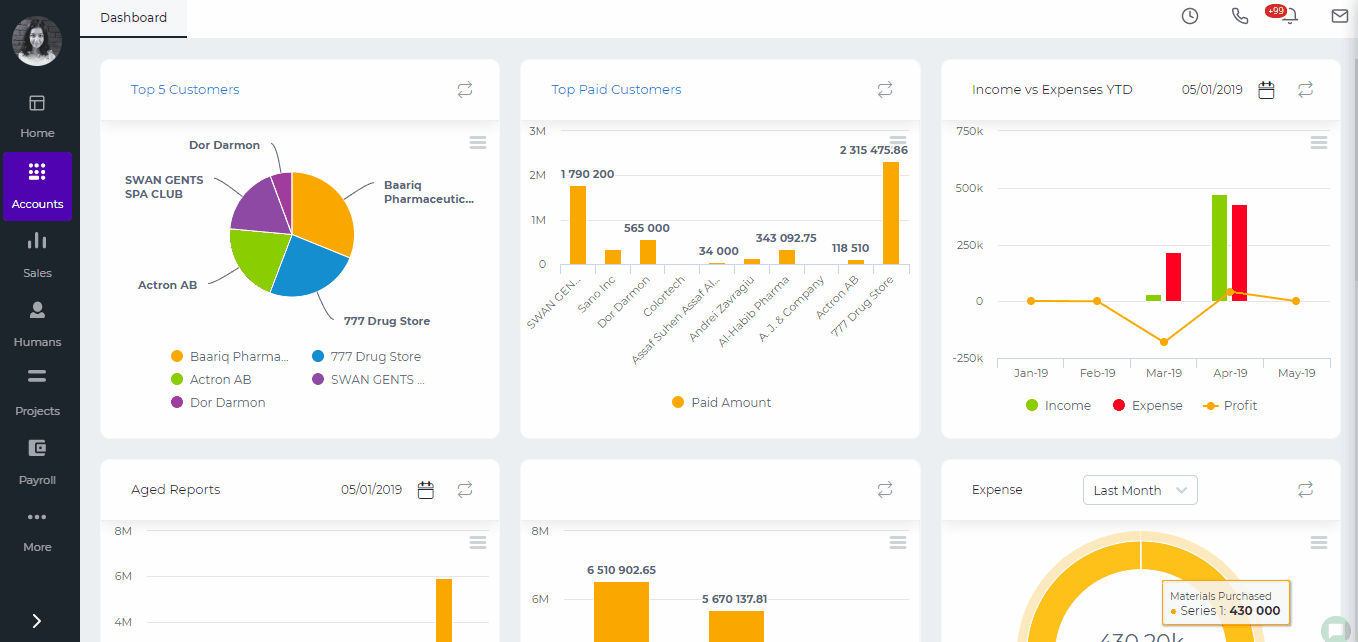
 After that create a single payrun or a group payrun. Once you approve the payrun, the debit and credit balances will be updated accordingly. Then you can go to Accounts>>Transactons>>Manual Entries page and create a transaction for the paid salaries.
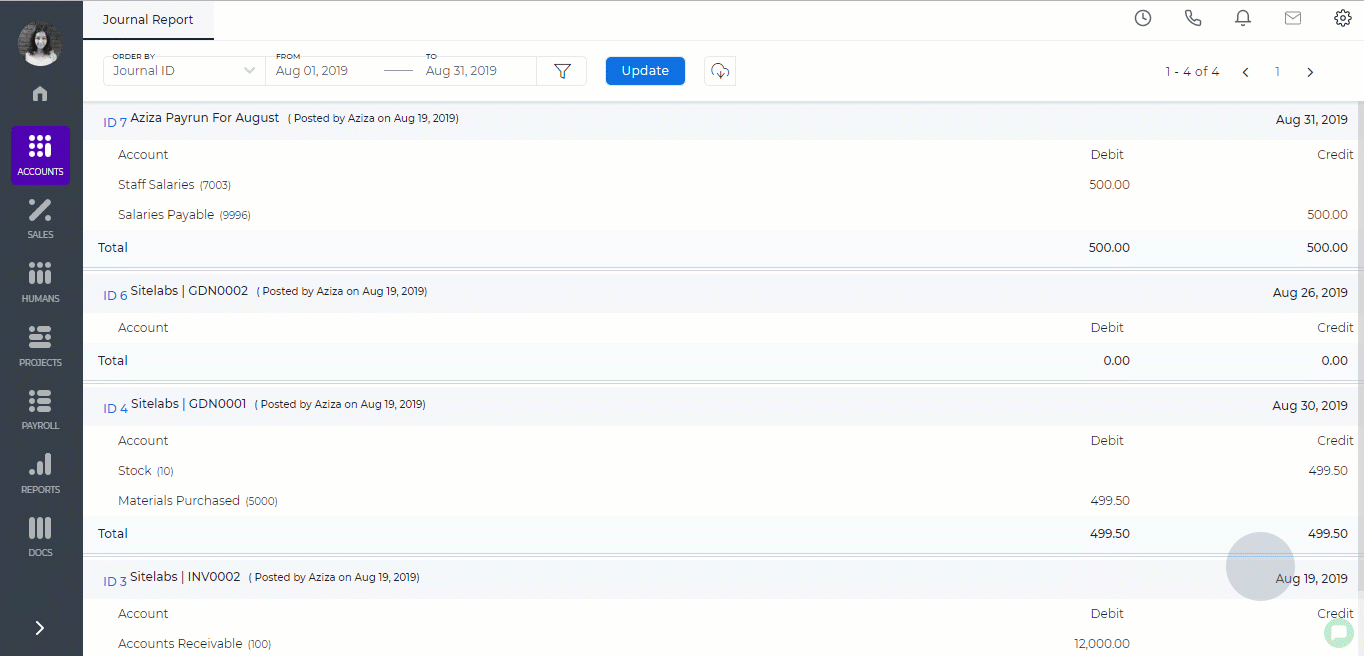

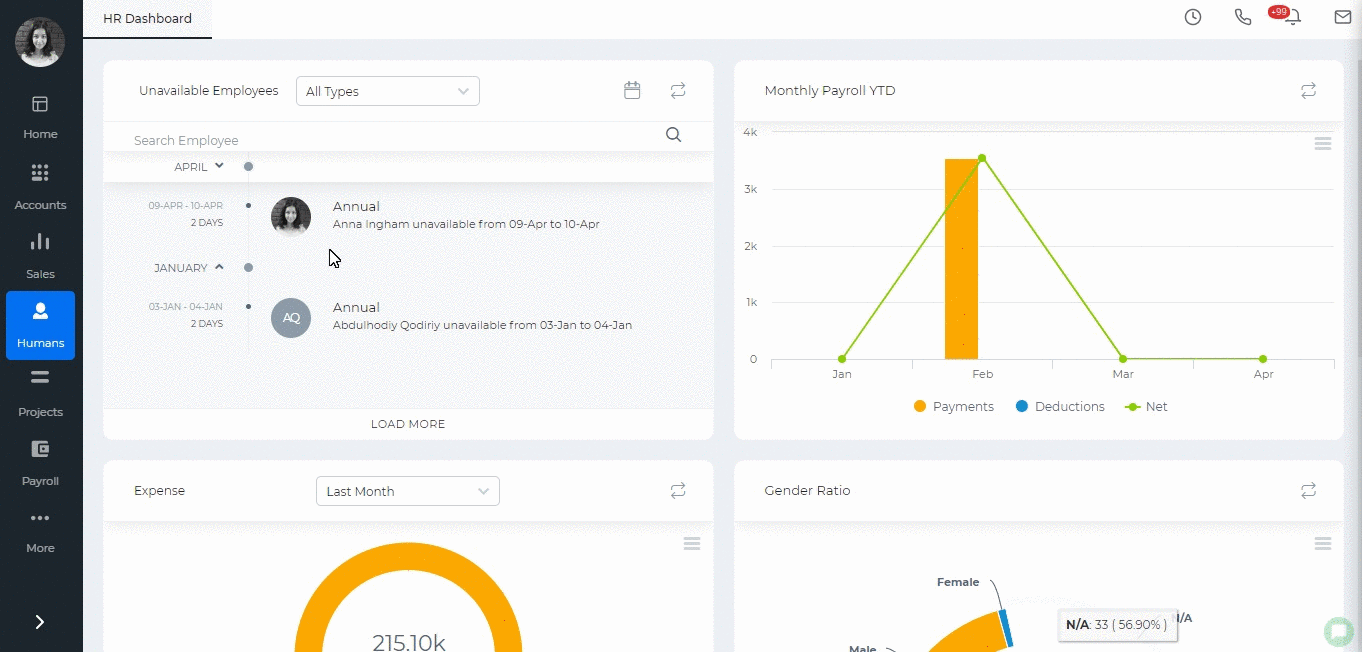 When you Initiate and Send it to the Employee, the appraisal will be pending to employee's review. You can complete the appraisal after the employee sends it back to the manager.
When you Initiate and Review you will be able to assess the employee with each competency, give scores and leave your comments and approve.
When you Initiate and Send it to the Employee, the appraisal will be pending to employee's review. You can complete the appraisal after the employee sends it back to the manager.
When you Initiate and Review you will be able to assess the employee with each competency, give scores and leave your comments and approve.
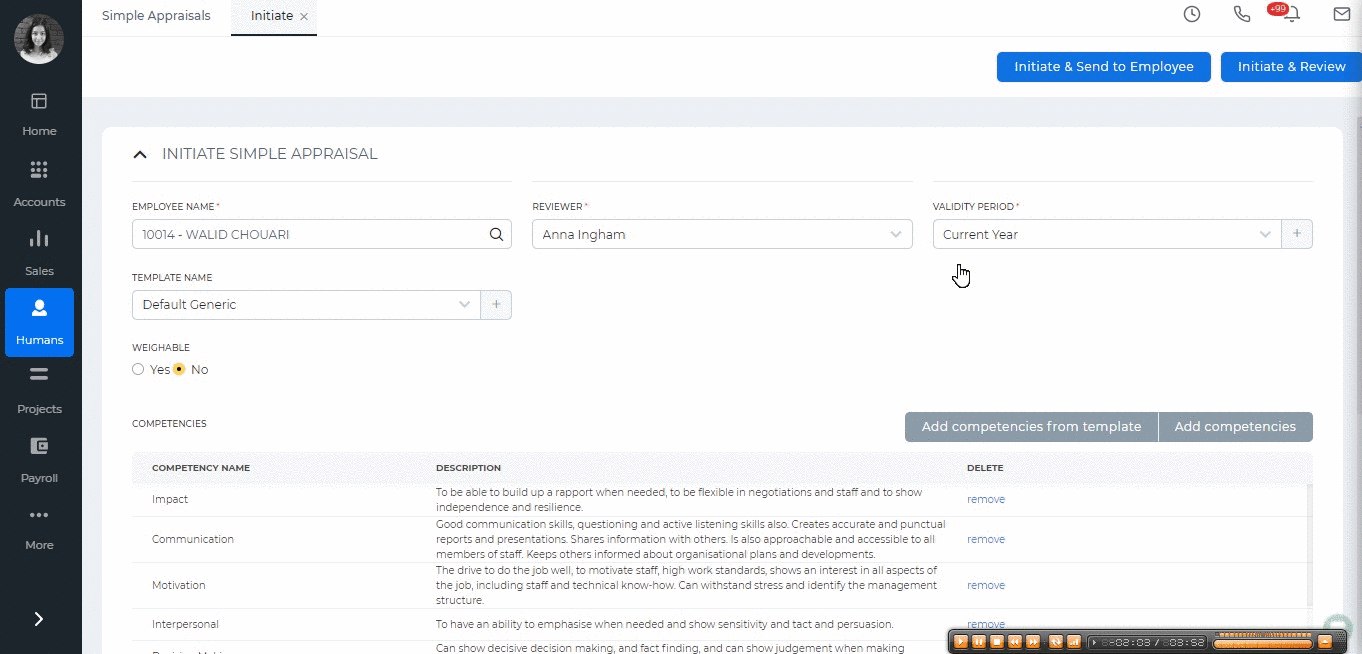 You can view the saved appraisals in the Simple Appraisals page and generate the PDF version of the appraisal.
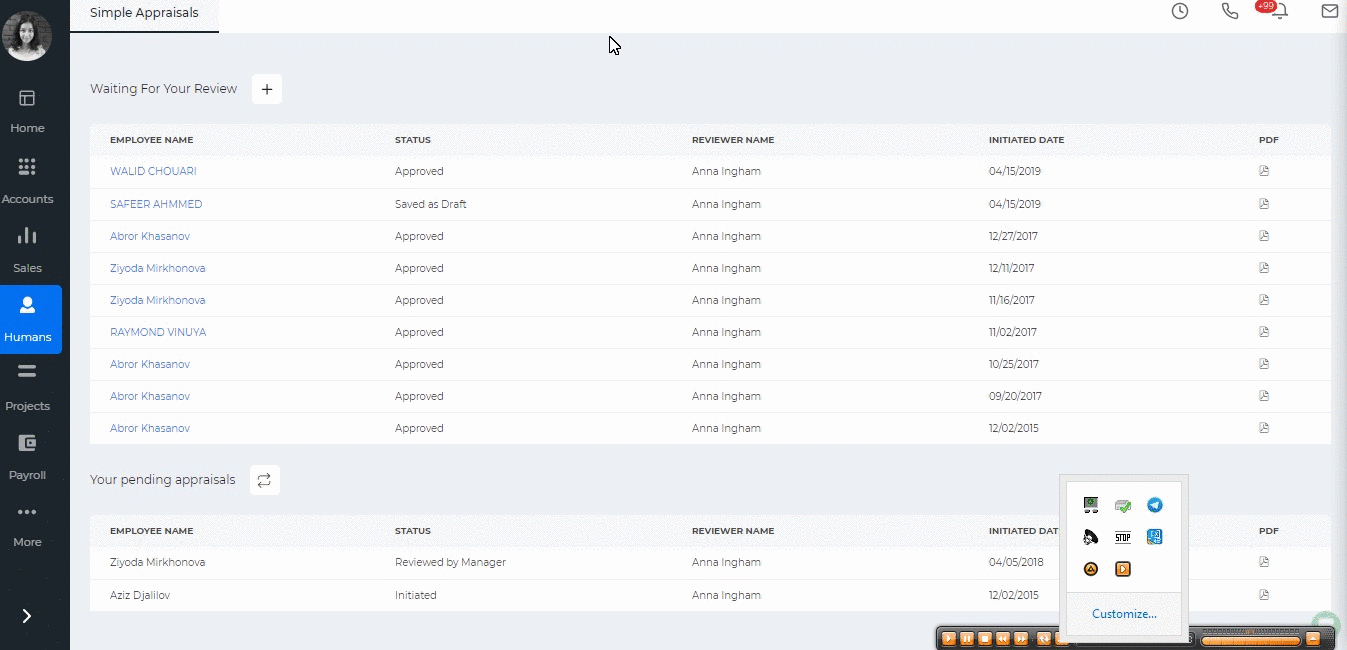

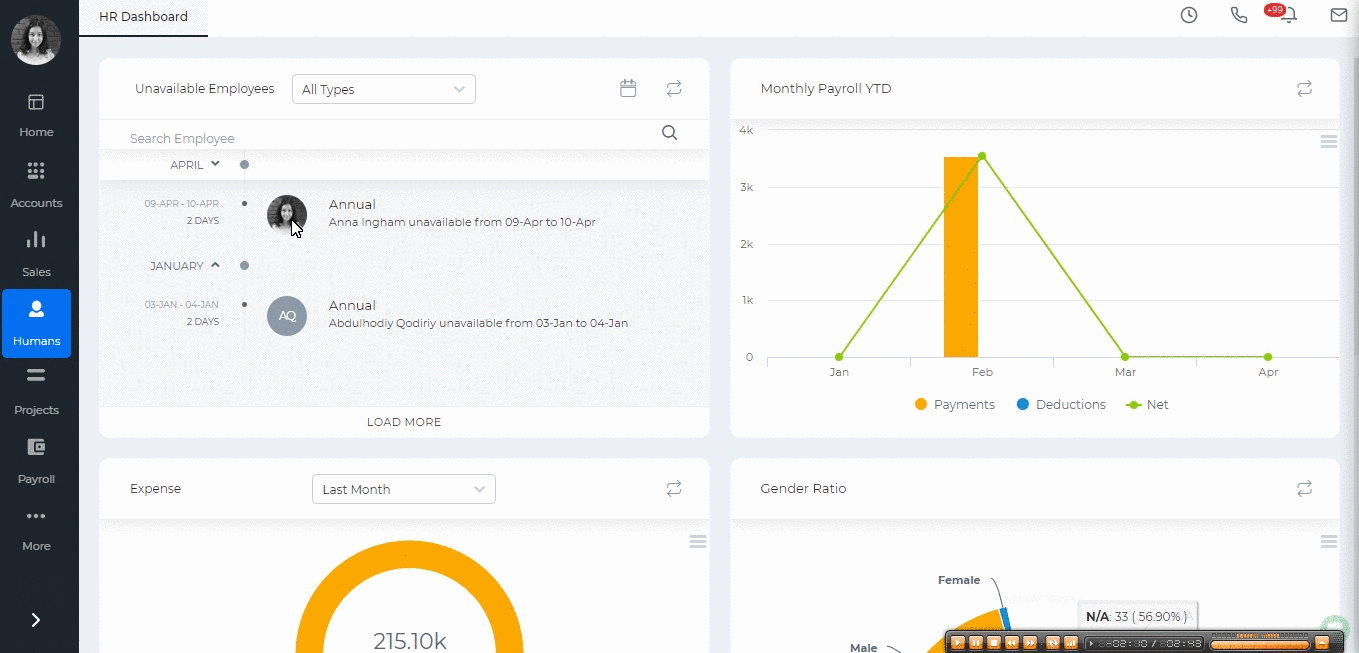
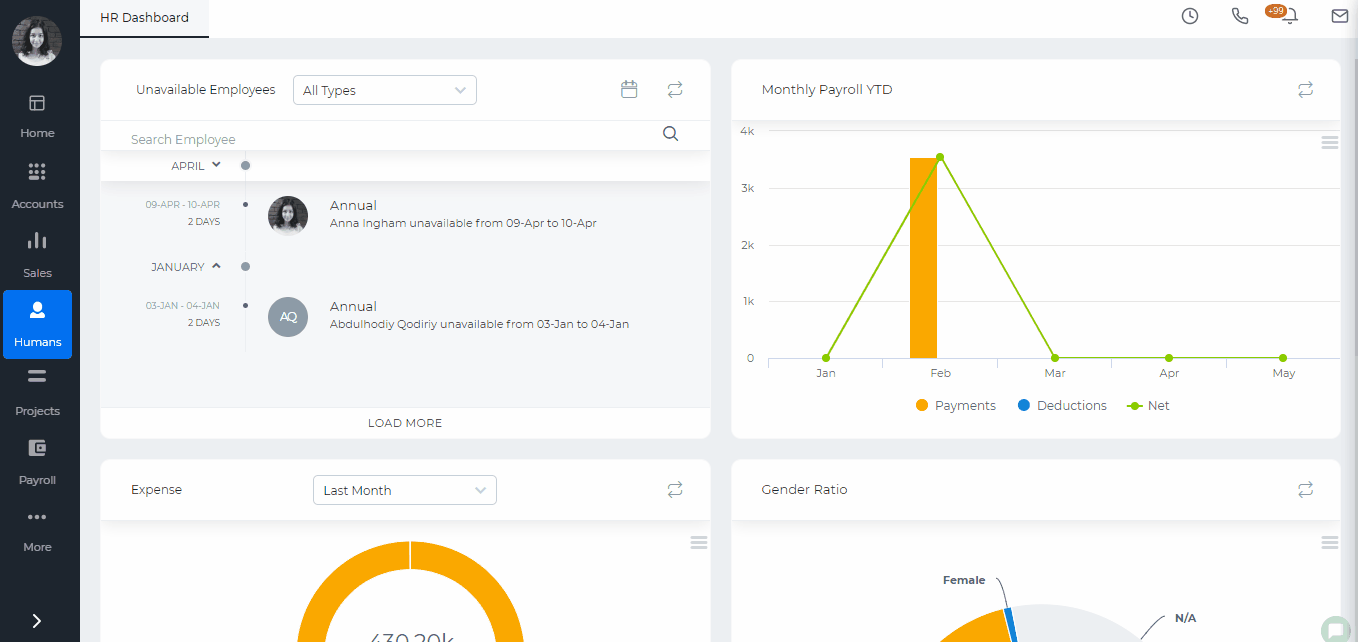
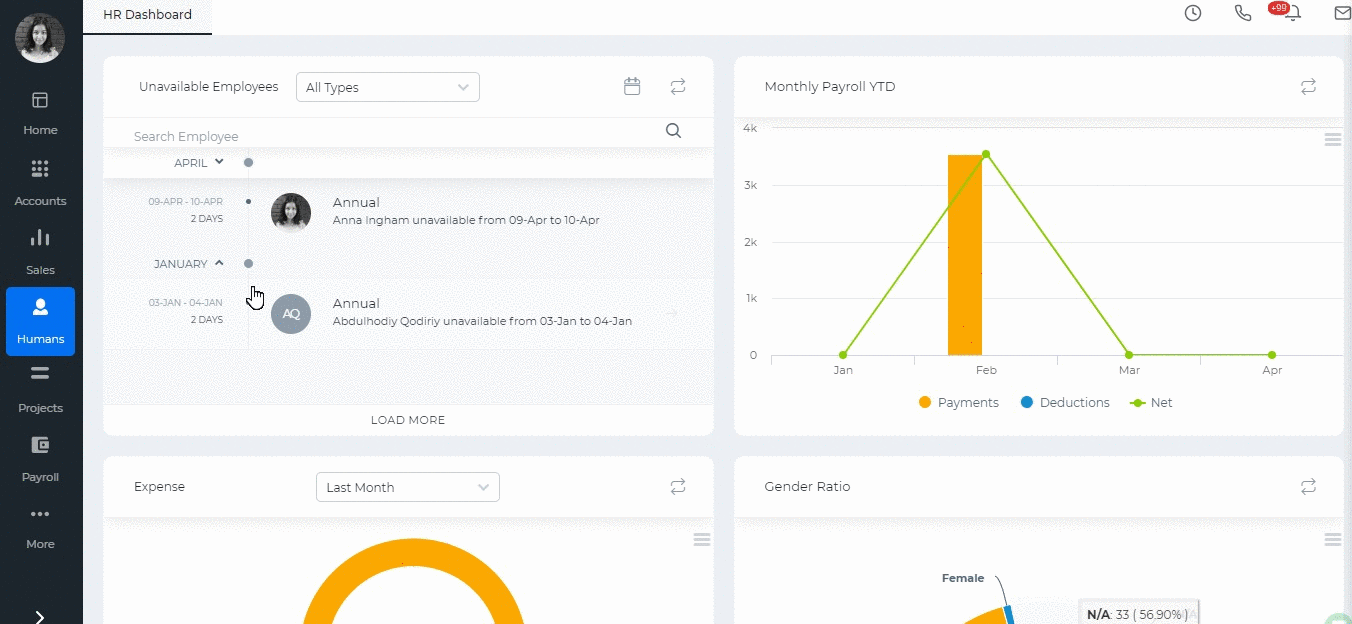 Later you can hire the candidate as an employee with approved placements. The hired employees will be listed in your employees list under Humans section.
 PDC for customers
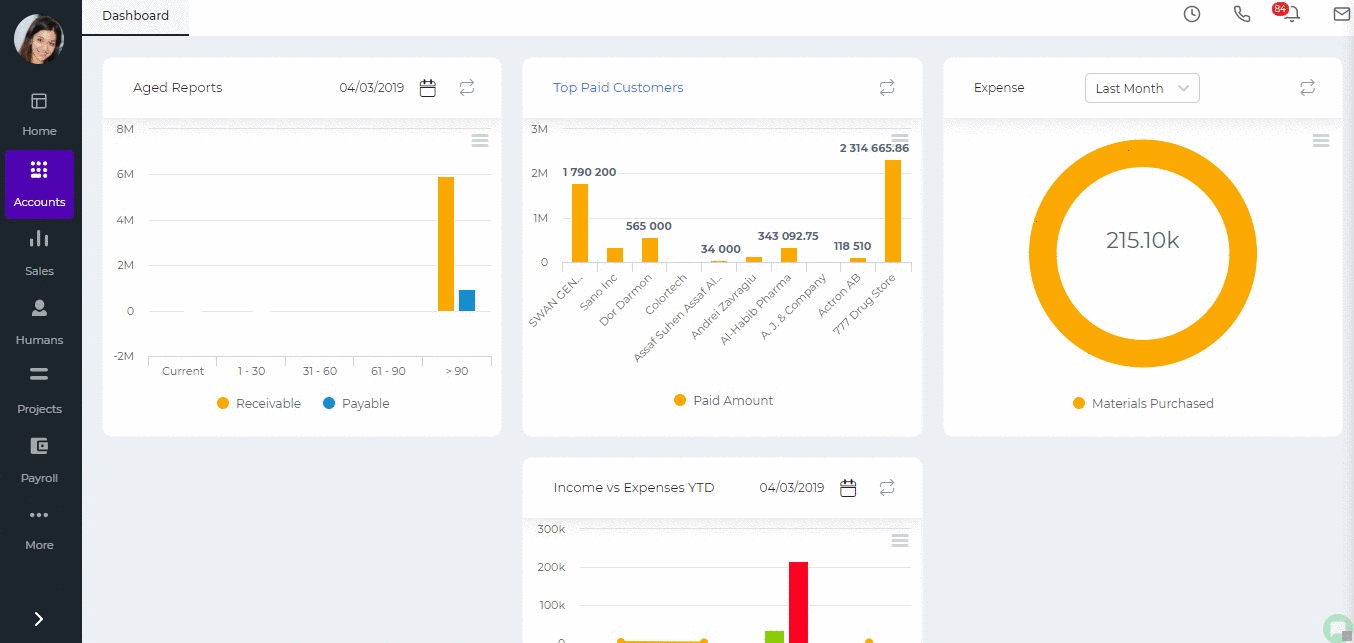
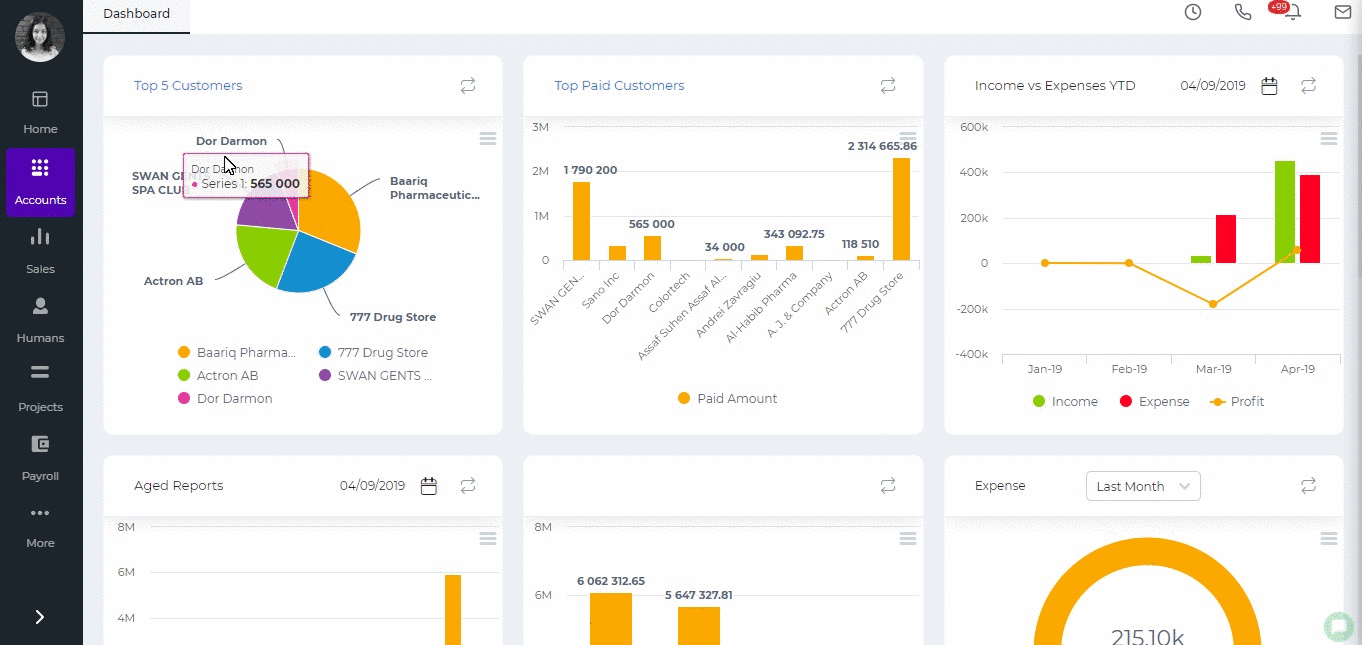
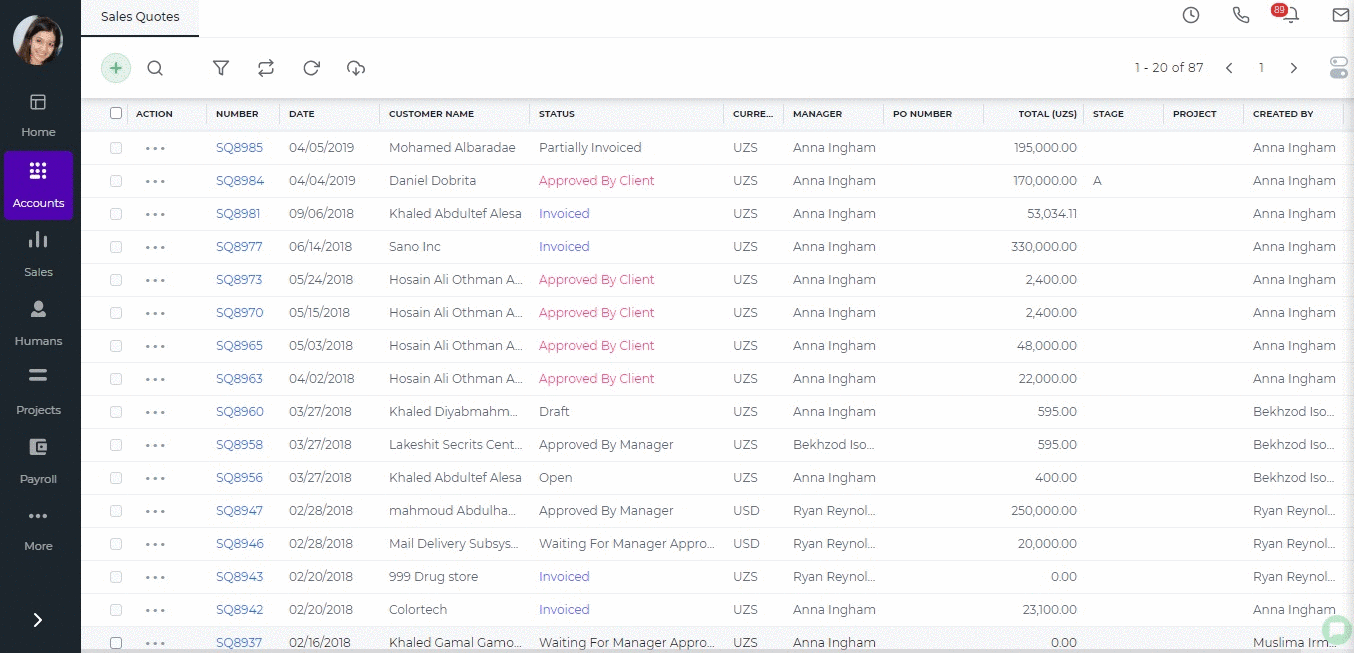 Click on the quote, click more options at the bottom of the quote and choose Convert to Invoice. A pop up will ask you to choose whether you want to convert the quote by percentage, by quantity or by amount. Choose the option you need and click "OK". You will be forwarded to Add Sales Invoice form with all the details of the quote. Review the invoice, add more details if needed and click Save and Approve. Once you save the invoice, the status of your quote will change to "Partially Invoiced".
Quotes with progress invoices enabled show all the related invoices for your reference inside the quote summary.
You will be able to convert the quote to invoices until you have fully converted the quote. When you fully convert the remaining balance becomes zero and status of the quote changes to "Invoiced".
Click on the quote, click more options at the bottom of the quote and choose Convert to Invoice. A pop up will ask you to choose whether you want to convert the quote by percentage, by quantity or by amount. Choose the option you need and click "OK". You will be forwarded to Add Sales Invoice form with all the details of the quote. Review the invoice, add more details if needed and click Save and Approve. Once you save the invoice, the status of your quote will change to "Partially Invoiced".
Quotes with progress invoices enabled show all the related invoices for your reference inside the quote summary.
You will be able to convert the quote to invoices until you have fully converted the quote. When you fully convert the remaining balance becomes zero and status of the quote changes to "Invoiced".
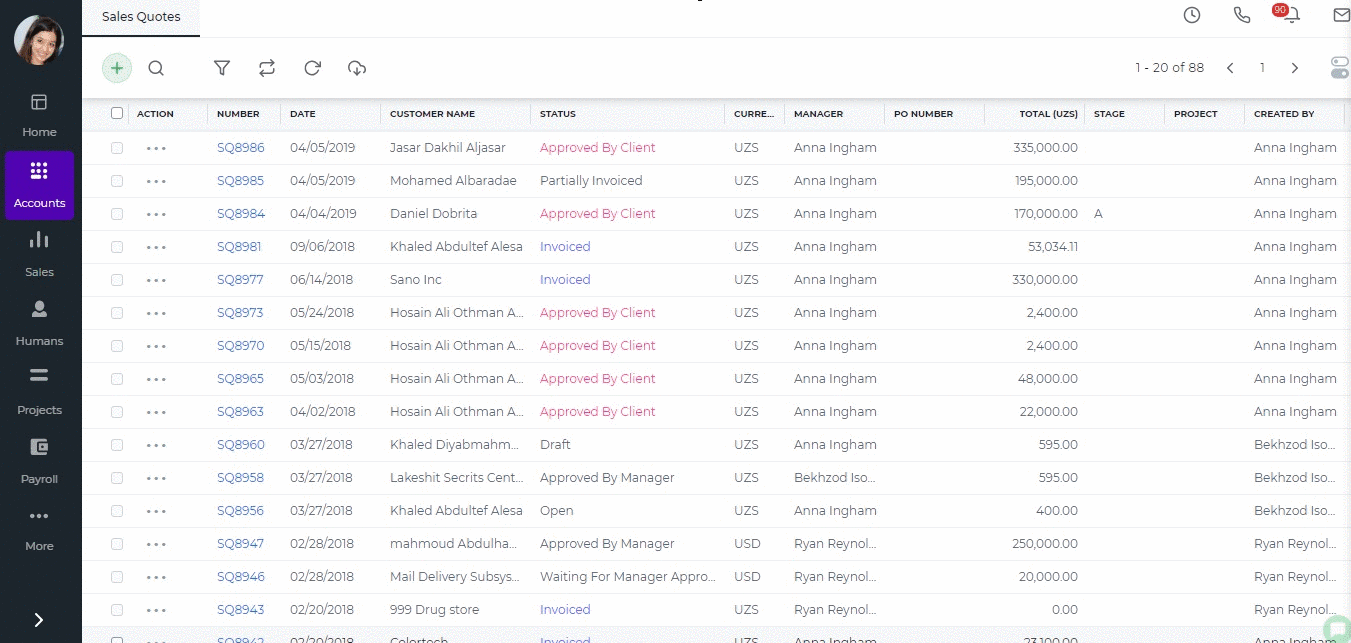
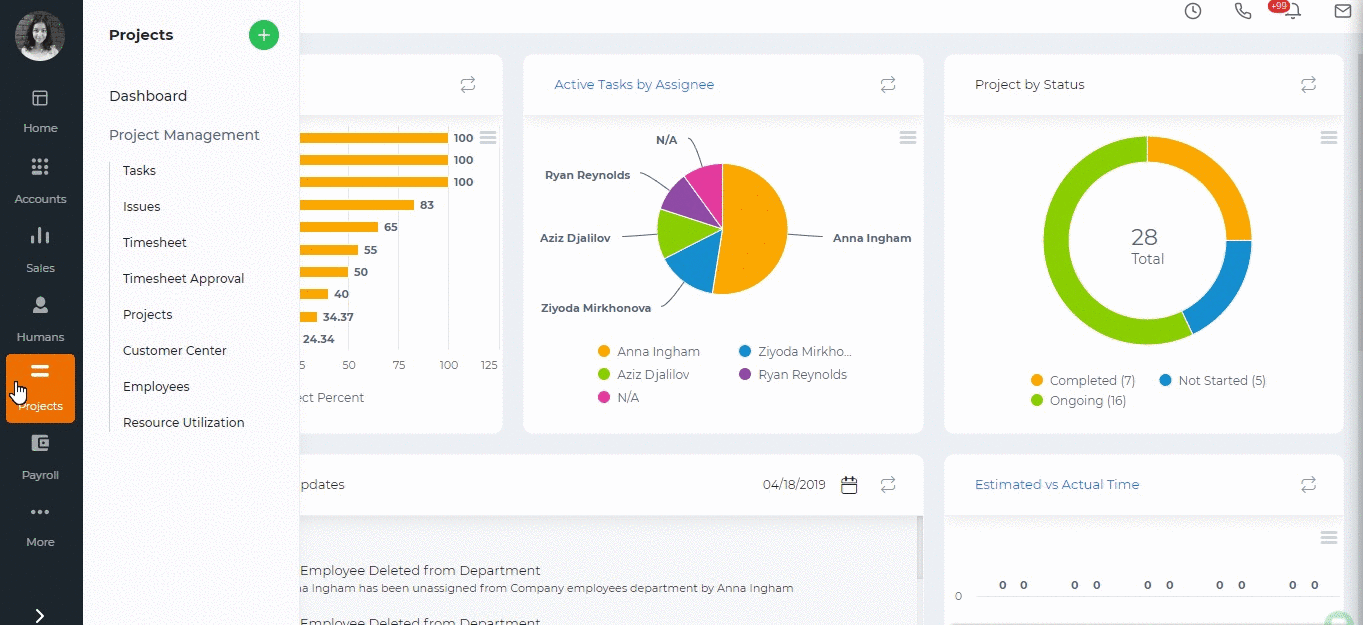

 While adding the fixed asset, under the Financing Account, choose the account you have chosen while creating the Purchase Order.
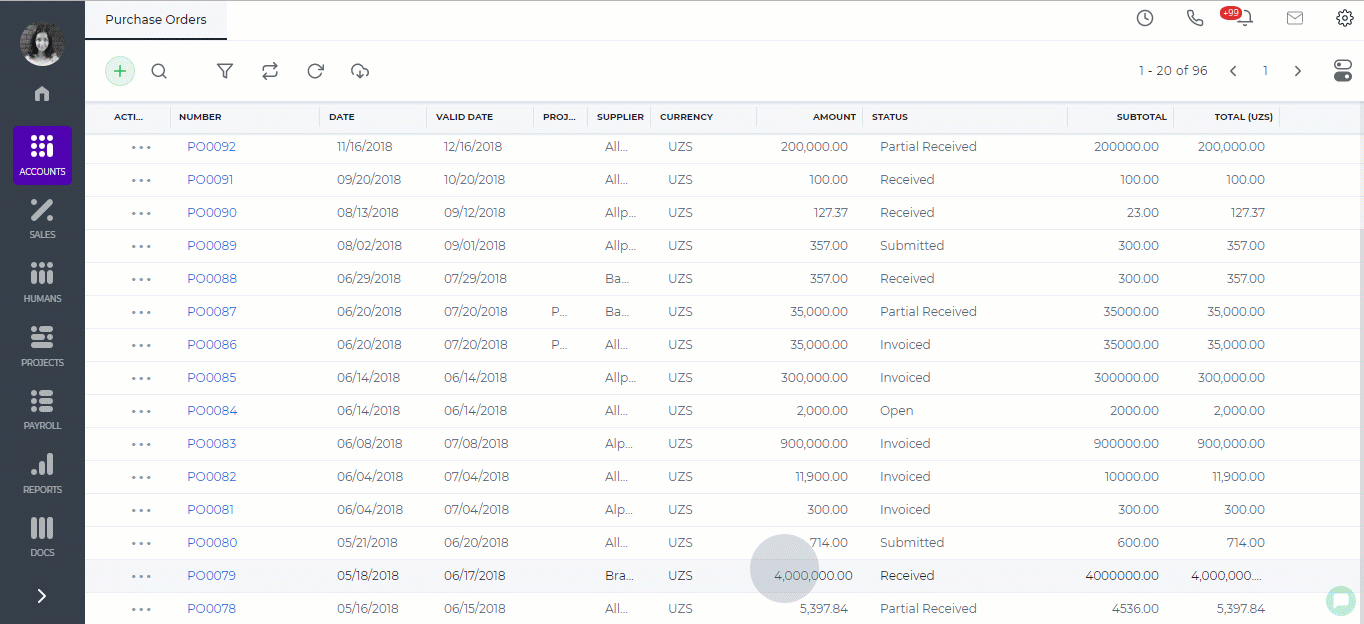


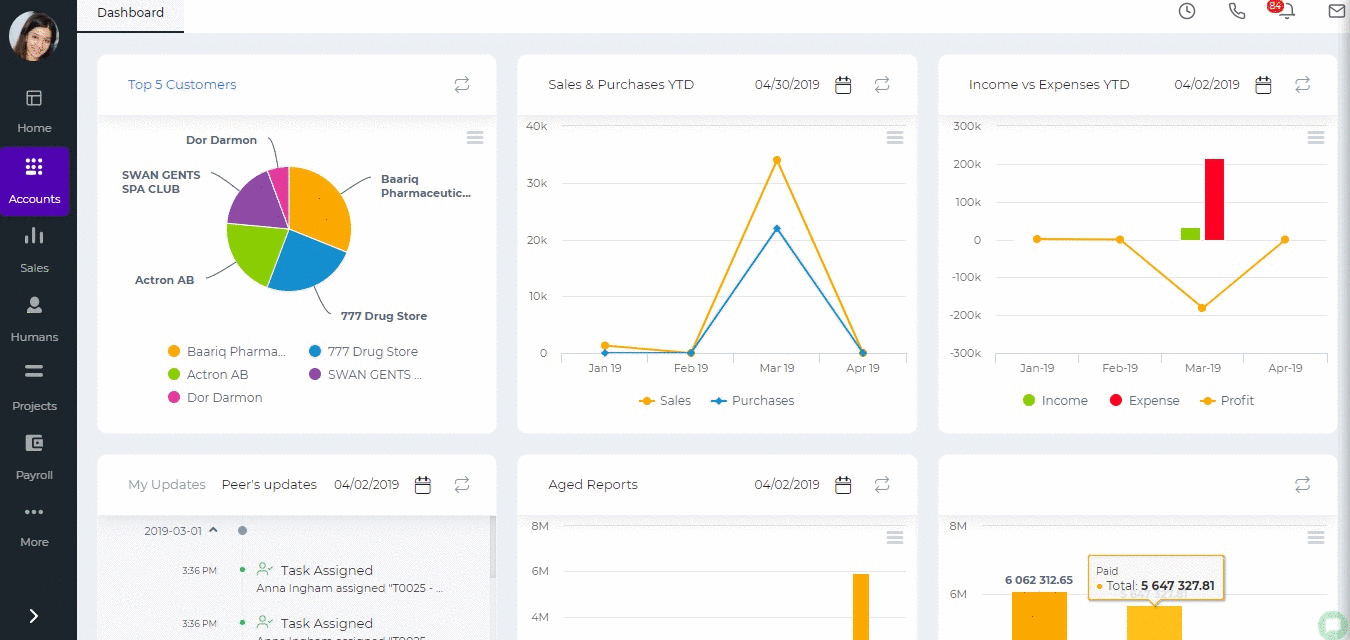
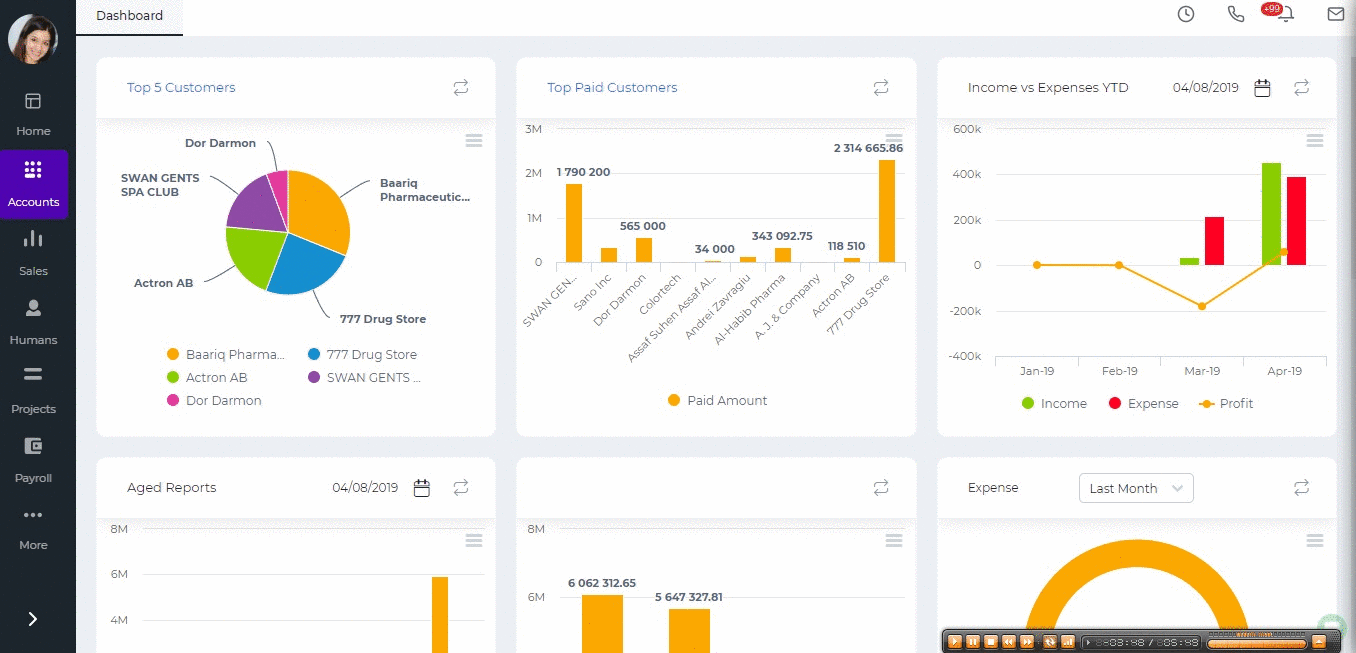

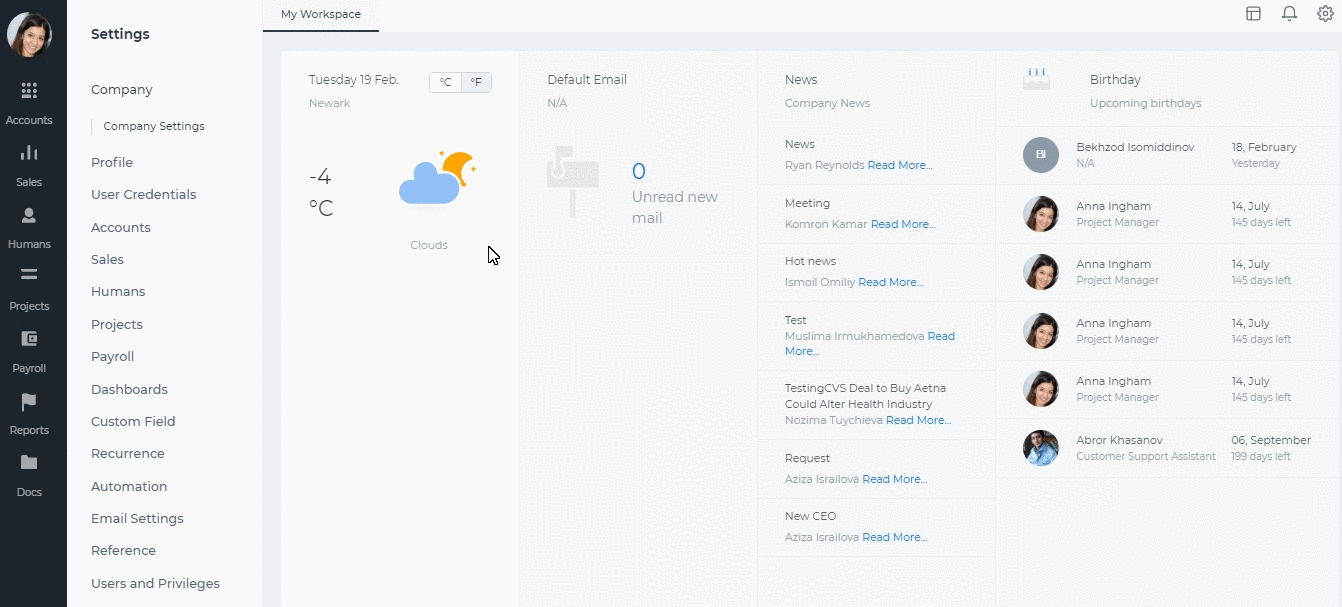
 Add Report
Click on the Plus icon and choose New Report. Choose the report type whether it is a timesheet reports, sales invoice, employee report etc. Then you can customize the columns and the report itself by clicking the customize icon and going to the tabs on top of the report. You can choose the report type, group the column, select summaries, create charts and apply filters.
[video width="1342" height="610" mp4="https://www.kpi.com/wp-content/uploads/2016/12/Report-creation.mp4"][/video]
Save Report
In order to save the report you need to click Save Report button and fill in the fields given.
Share Report
With this function you are able to share the ready reports with your collaborators and even schedule recurring emails with attached report. Click the Share button once you have saved the report and set up the notification recurrence.
You can export the report to Excel, PDF or CSV files using the export button on top of the report.
Add Report
Click on the Plus icon and choose New Report. Choose the report type whether it is a timesheet reports, sales invoice, employee report etc. Then you can customize the columns and the report itself by clicking the customize icon and going to the tabs on top of the report. You can choose the report type, group the column, select summaries, create charts and apply filters.
[video width="1342" height="610" mp4="https://www.kpi.com/wp-content/uploads/2016/12/Report-creation.mp4"][/video]
Save Report
In order to save the report you need to click Save Report button and fill in the fields given.
Share Report
With this function you are able to share the ready reports with your collaborators and even schedule recurring emails with attached report. Click the Share button once you have saved the report and set up the notification recurrence.
You can export the report to Excel, PDF or CSV files using the export button on top of the report.

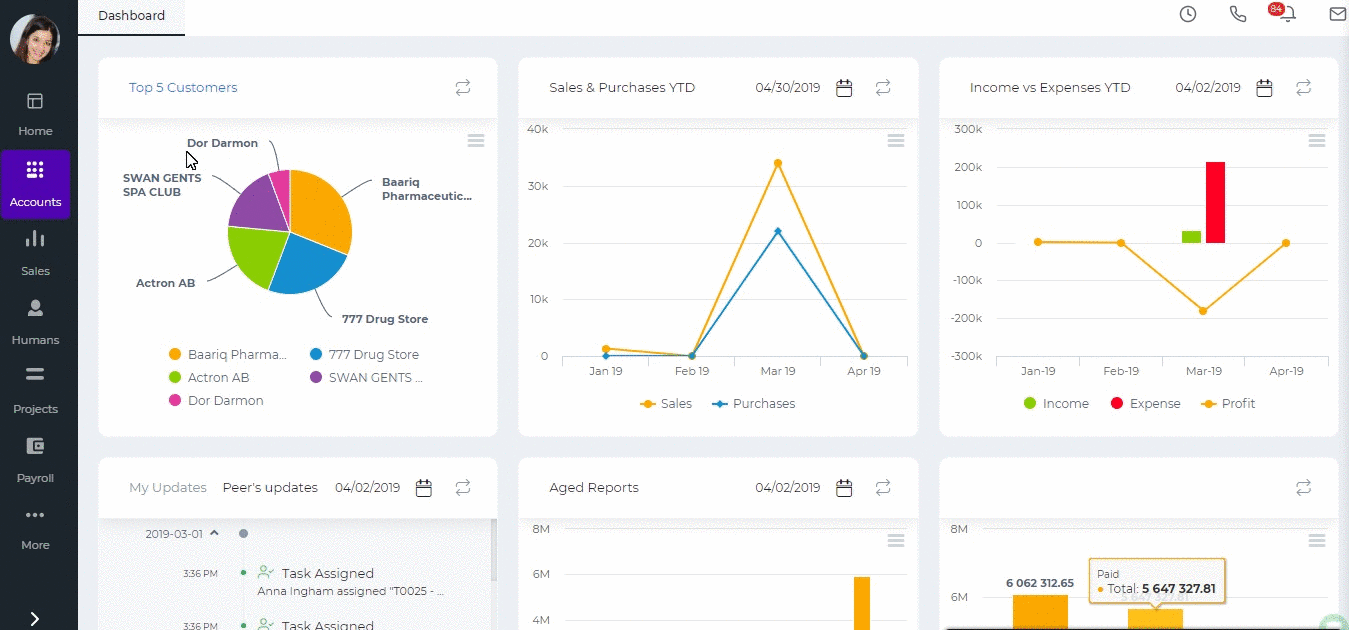
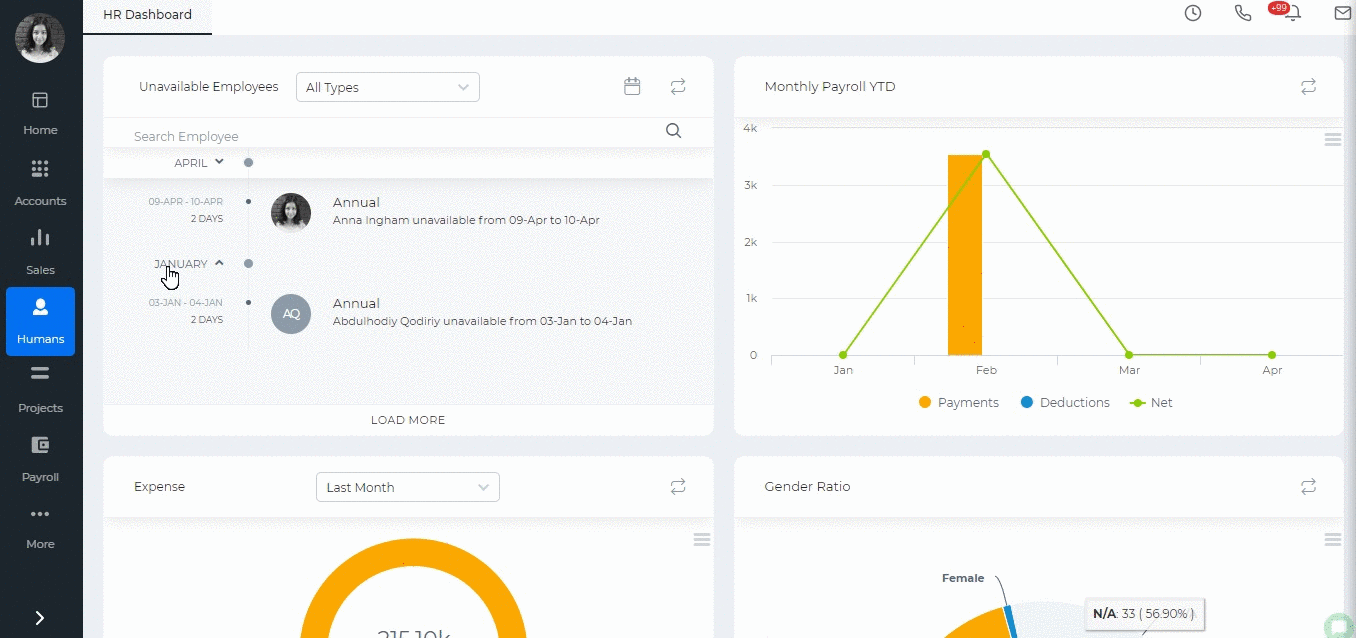
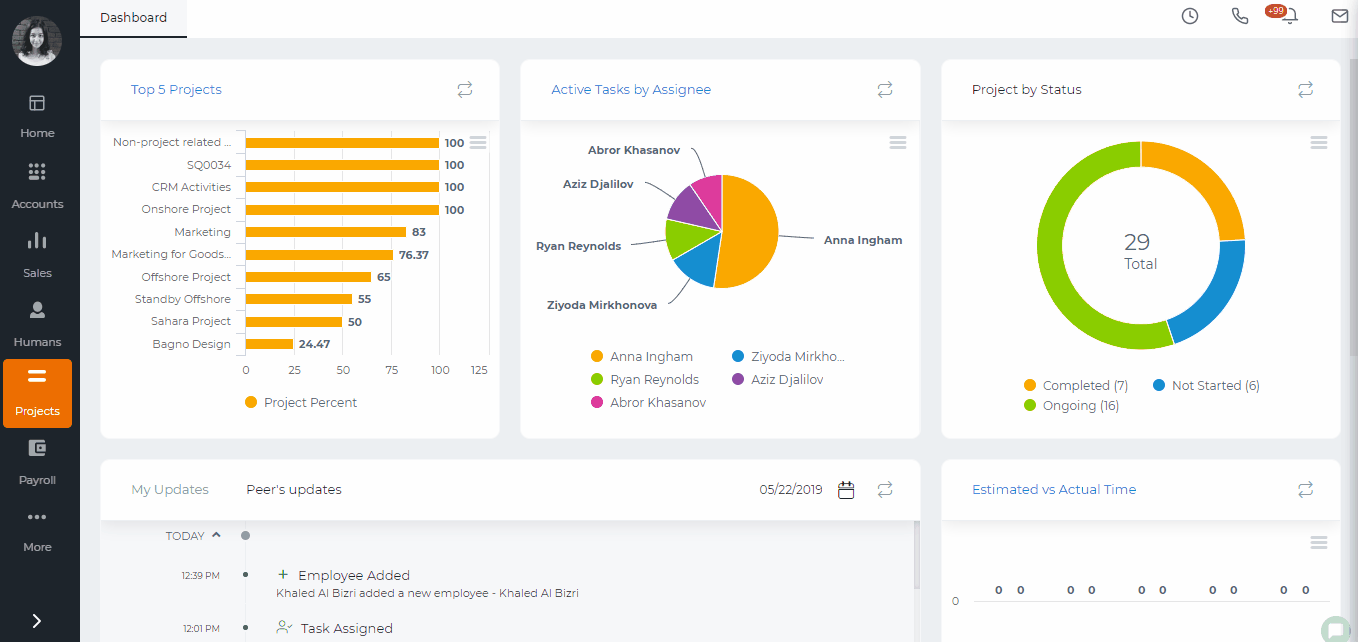
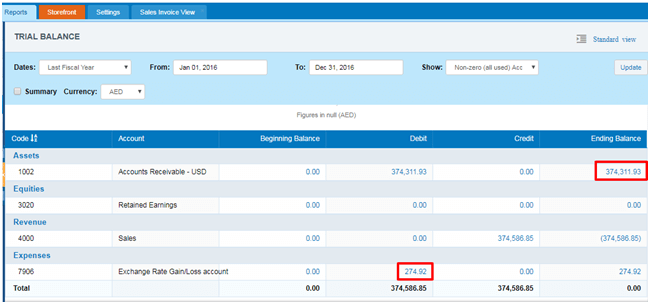 And, if Accounts Receivable – USD account has balance for the previous period (Dec 31, 2015). This amount will be converted to base currency with rate at the end date of previous reporting period. It will be Dec 31, 2015 in our case. And if converted amount is different from the amount in base currency, gain or loss will be recorded to Retained Earning account.
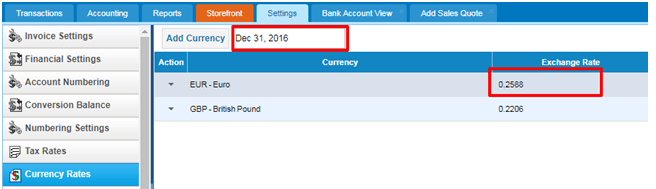 So, NBD EUR bank account’s balance in base currency (AED) will be – 105,000.00/0.2588 = 405,718.70
Next, this amount will be compared to the base equivalent of the NBD EUR bank account’s EUR amount. This amount will be calculated from all historical transactions. Base amount is 438,935.49
Then, system will calculate gain or loss subtracting Base Amount from Converted amount: 405,718.70 – 438,935.49 = - 33,216.79.
This amount (- 33,216.79) will be shown as loss in Exchange Rate Gain/Loss account.
So, NBD EUR bank account’s balance in base currency (AED) will be – 105,000.00/0.2588 = 405,718.70
Next, this amount will be compared to the base equivalent of the NBD EUR bank account’s EUR amount. This amount will be calculated from all historical transactions. Base amount is 438,935.49
Then, system will calculate gain or loss subtracting Base Amount from Converted amount: 405,718.70 – 438,935.49 = - 33,216.79.
This amount (- 33,216.79) will be shown as loss in Exchange Rate Gain/Loss account.
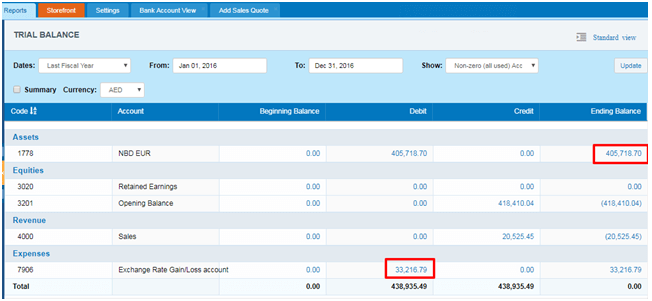 And, if NBD EUR bank account has balance for the previous period (Dec 31, 2015). This amount will be converted to base currency with rate at the end date of previous reporting period. It will be Dec 31, 2015 in our case.
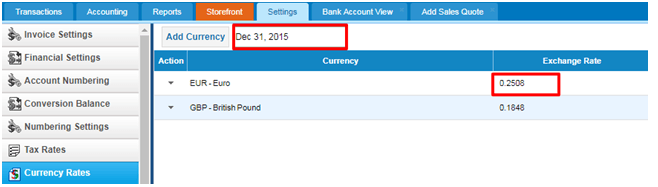
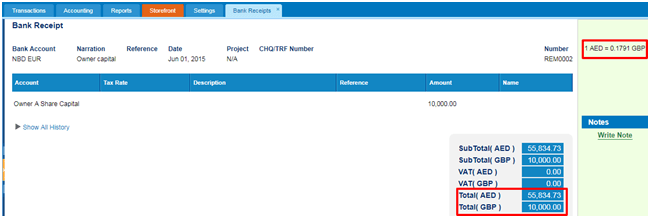 EUR amount at the end of 2015 is 10,000.00 EUR. This amount will be converted to base currency with the rate of at the end date of previous reporting period: 10,000.00/0.2508 = 39,872.41
And, if the converted amount is different from the amount in base currency, gain or loss will be recorded to Retained Earning account.
39,872.41 – 55,834.73 = 15,962.32
15,962.32 - this is loss amount reflected in Retained Earnings.
EUR amount at the end of 2015 is 10,000.00 EUR. This amount will be converted to base currency with the rate of at the end date of previous reporting period: 10,000.00/0.2508 = 39,872.41
And, if the converted amount is different from the amount in base currency, gain or loss will be recorded to Retained Earning account.
39,872.41 – 55,834.73 = 15,962.32
15,962.32 - this is loss amount reflected in Retained Earnings.
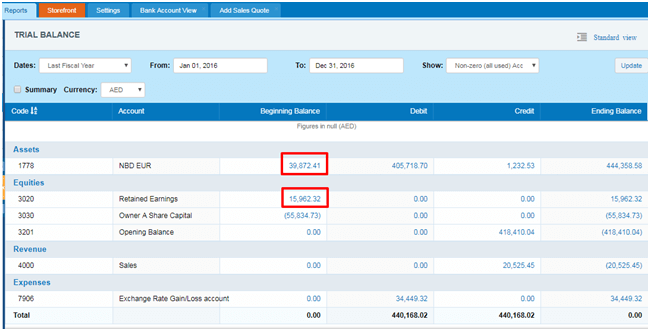

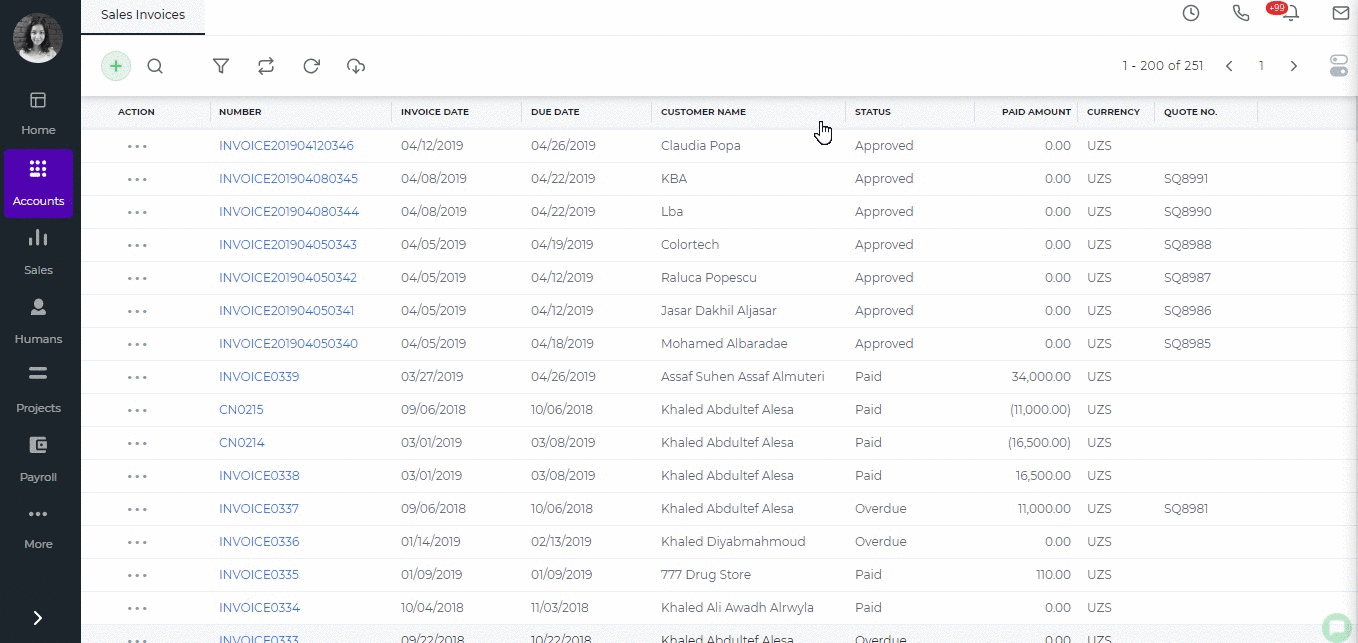
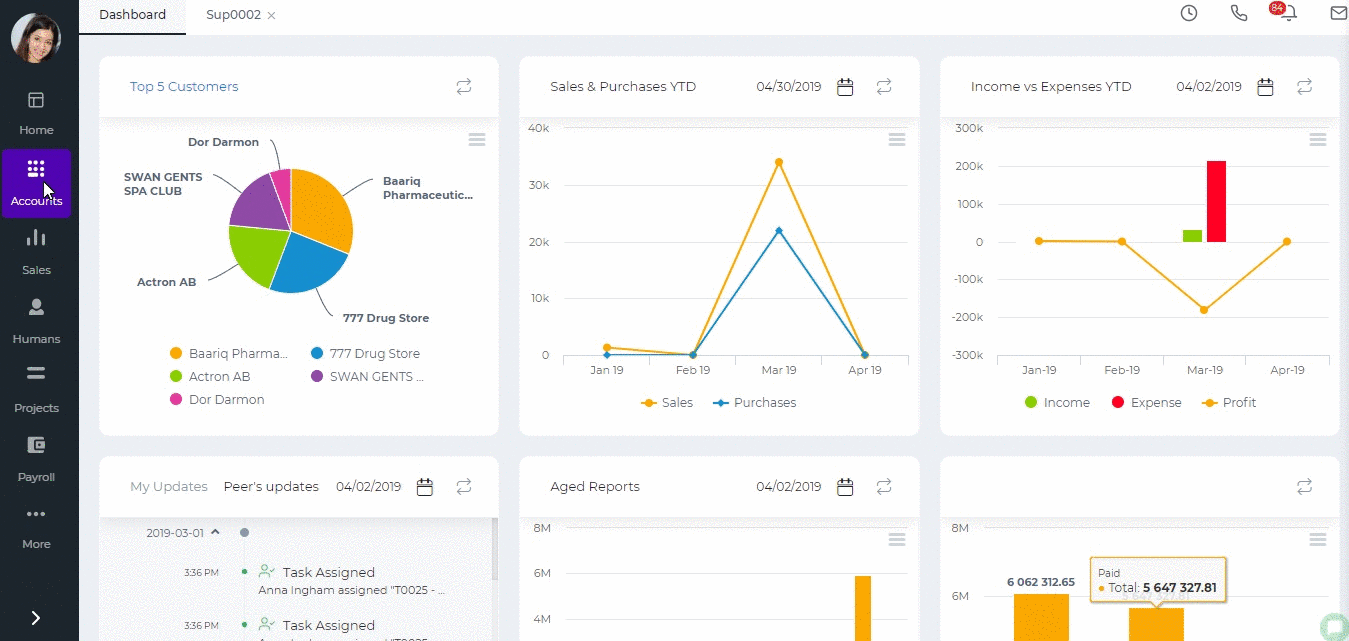
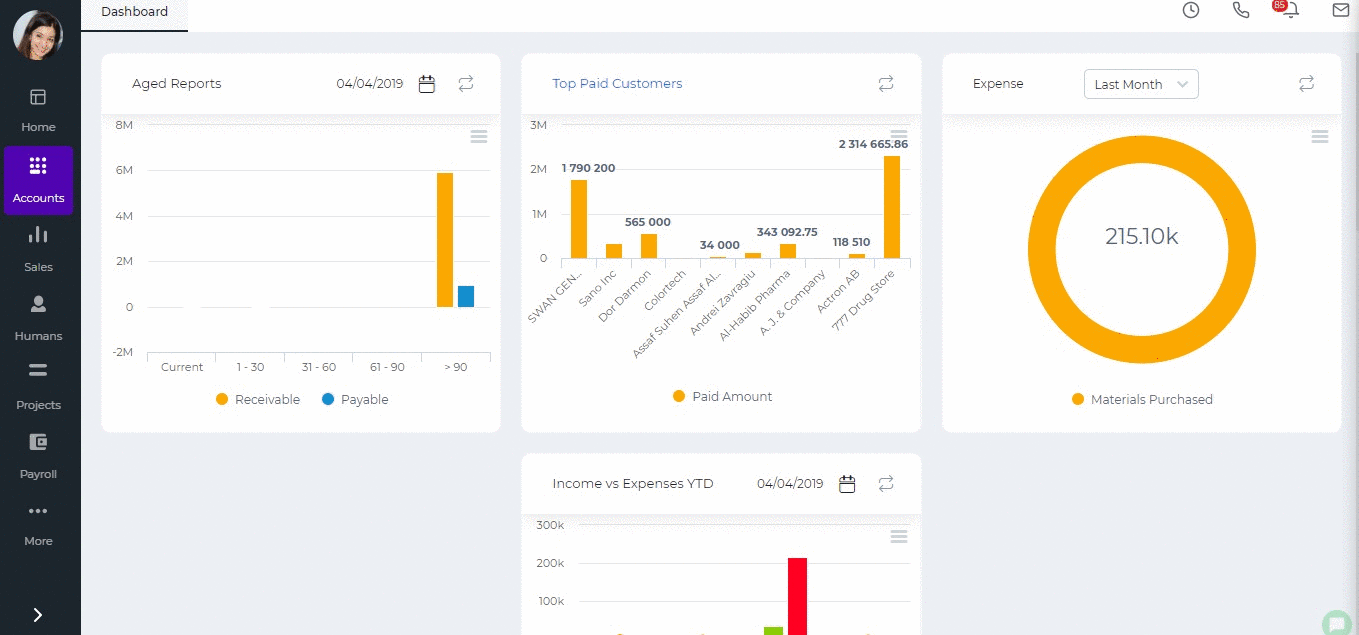
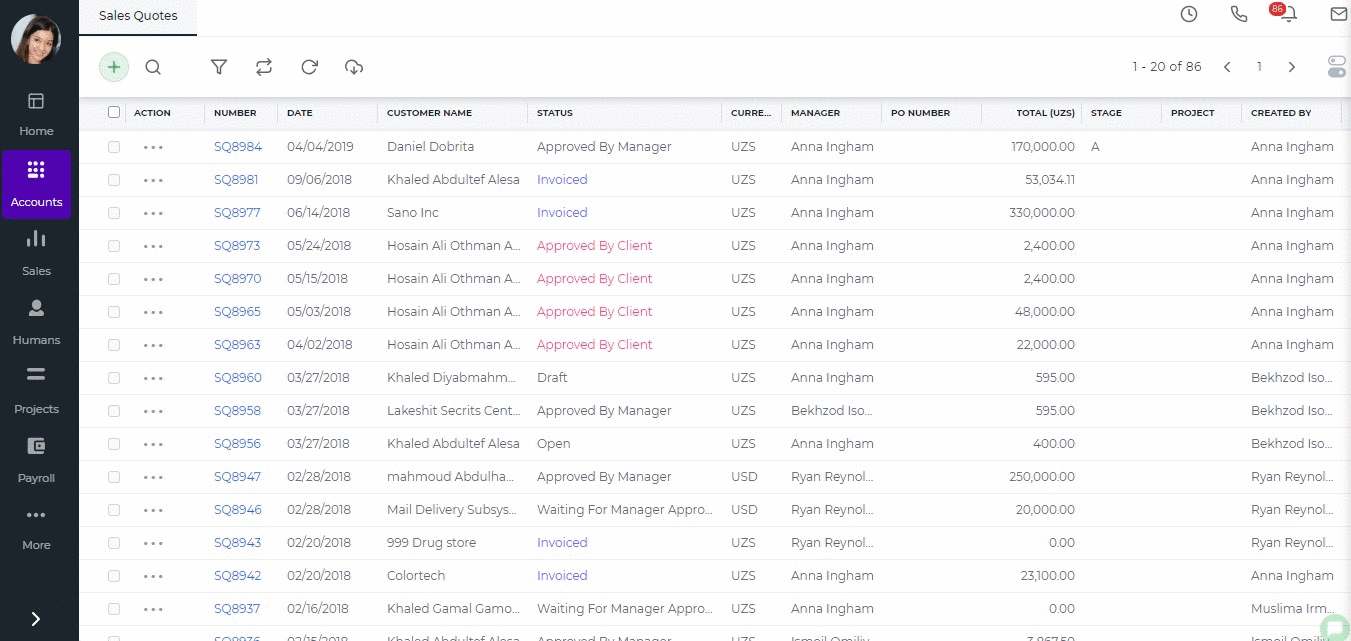 Progress invoicing
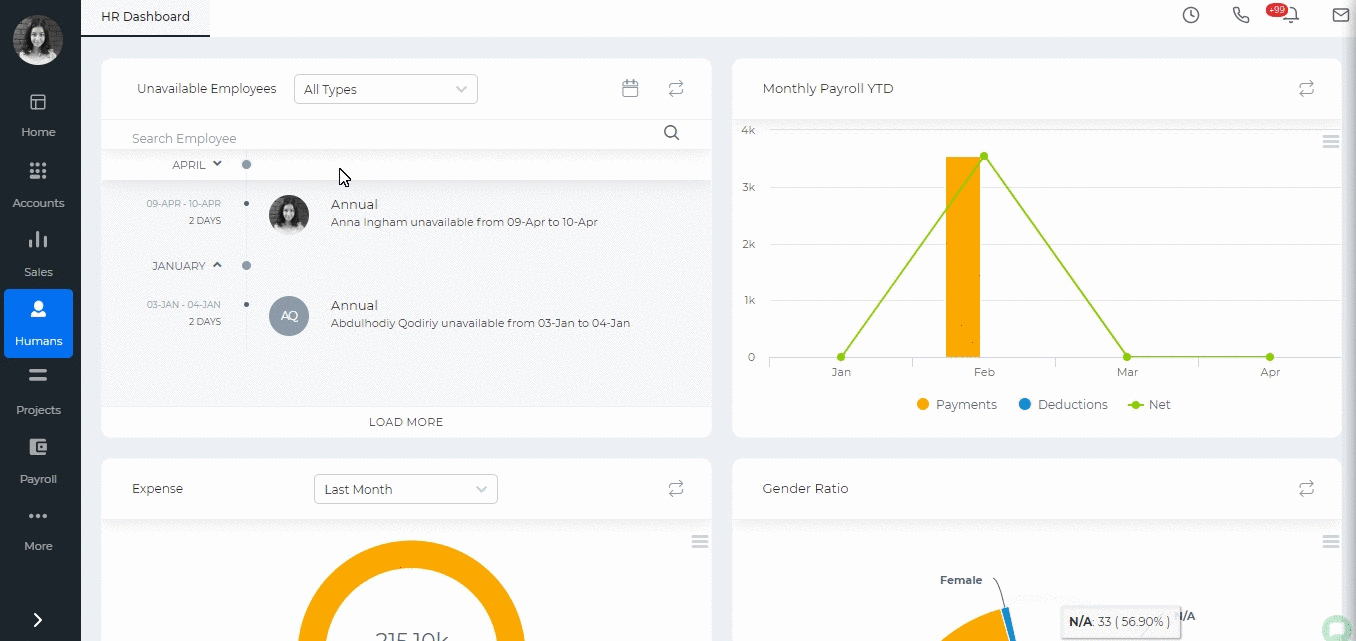
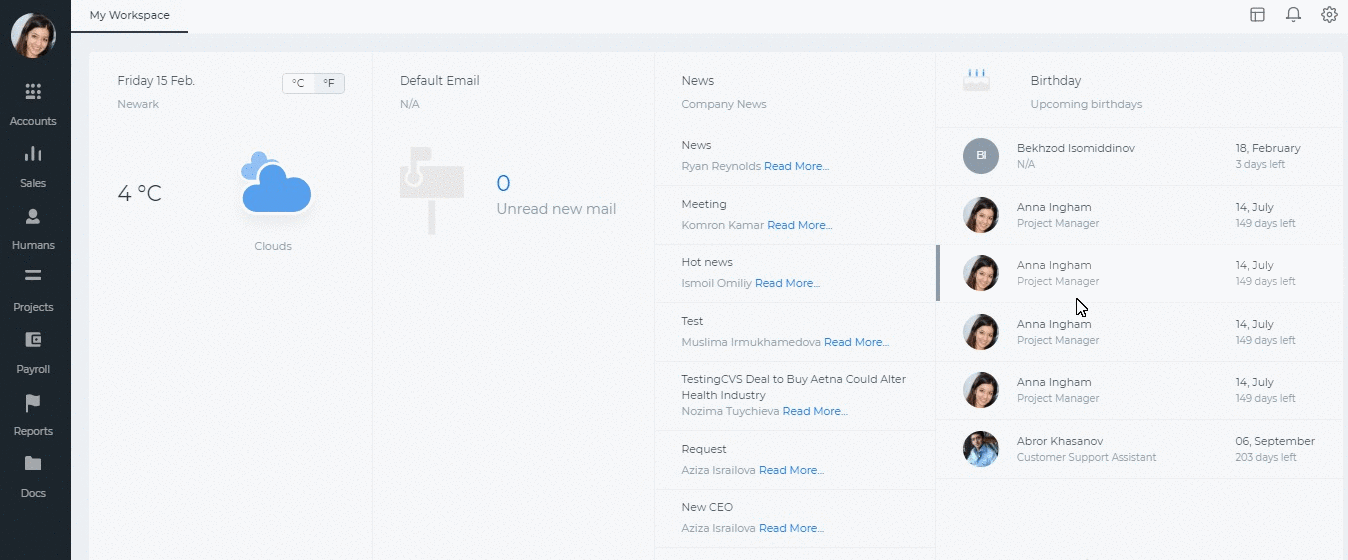
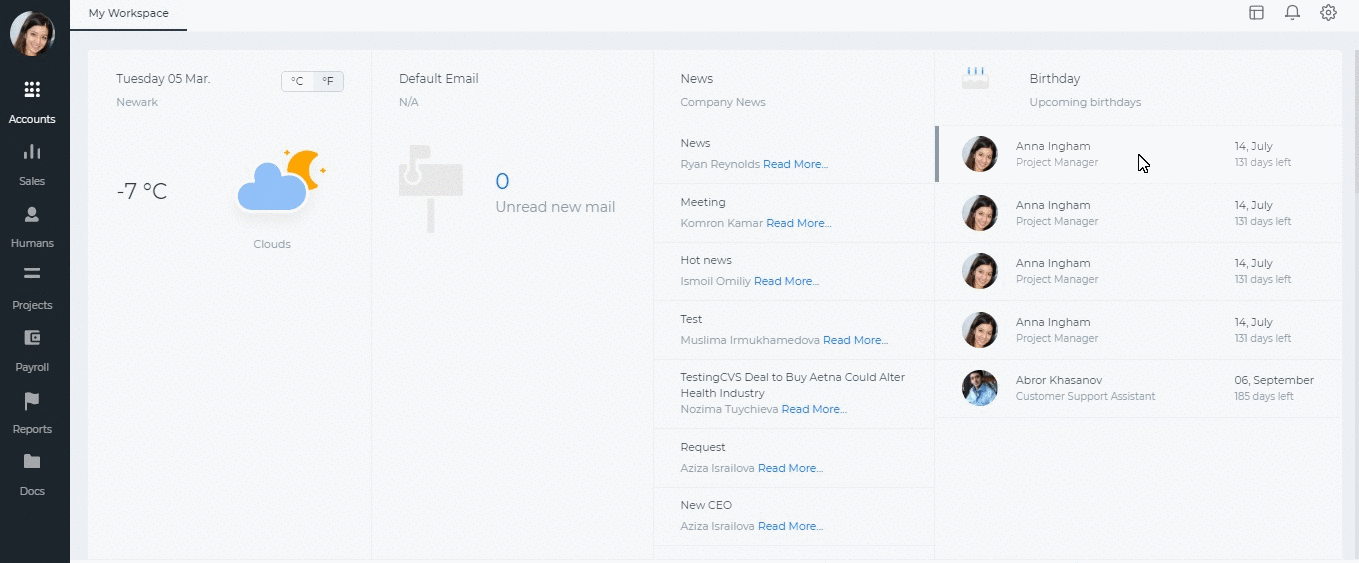
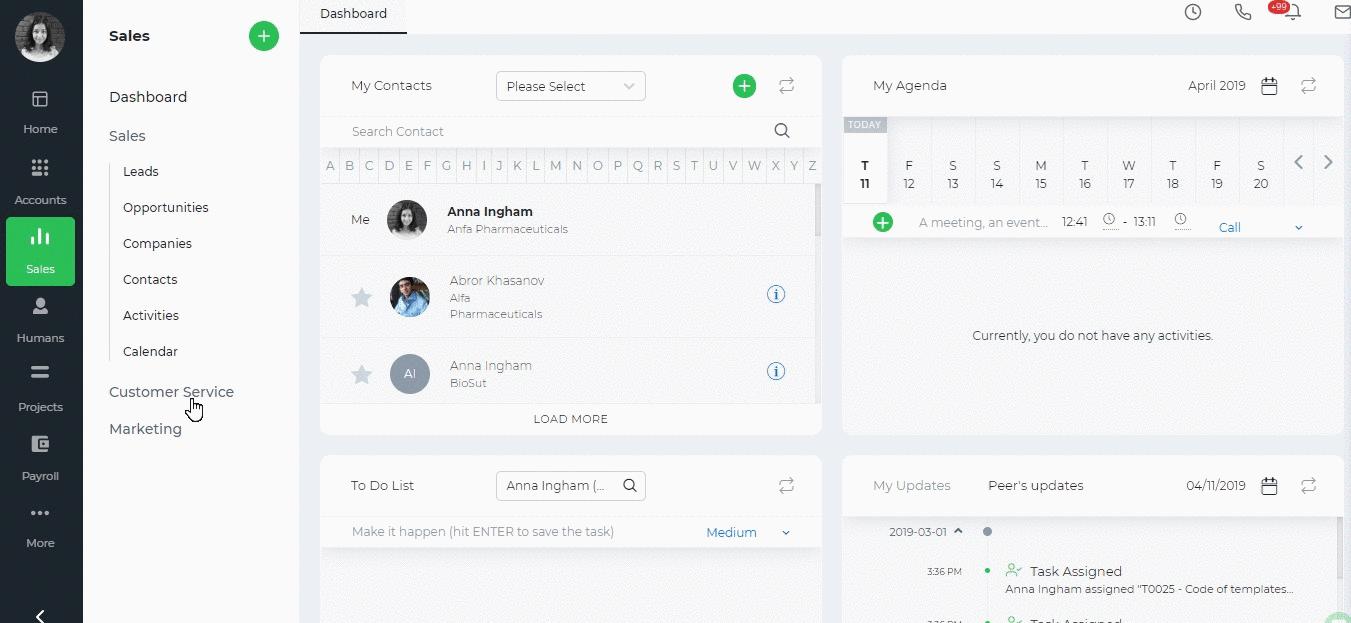
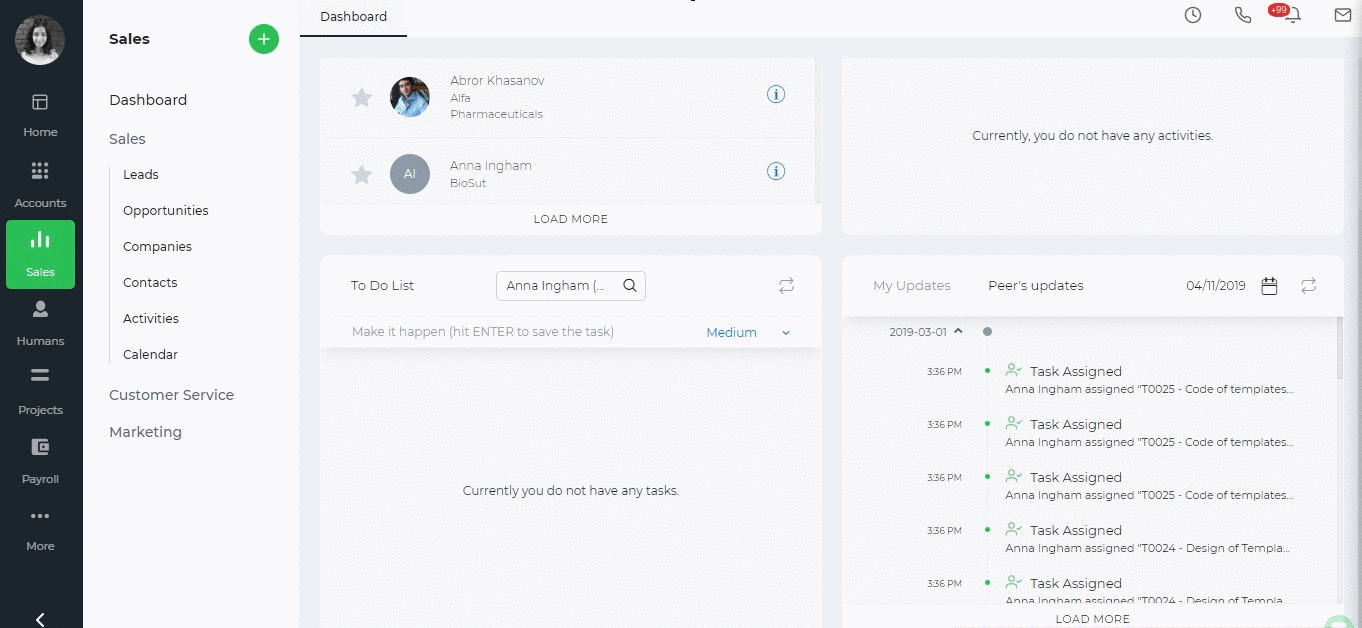

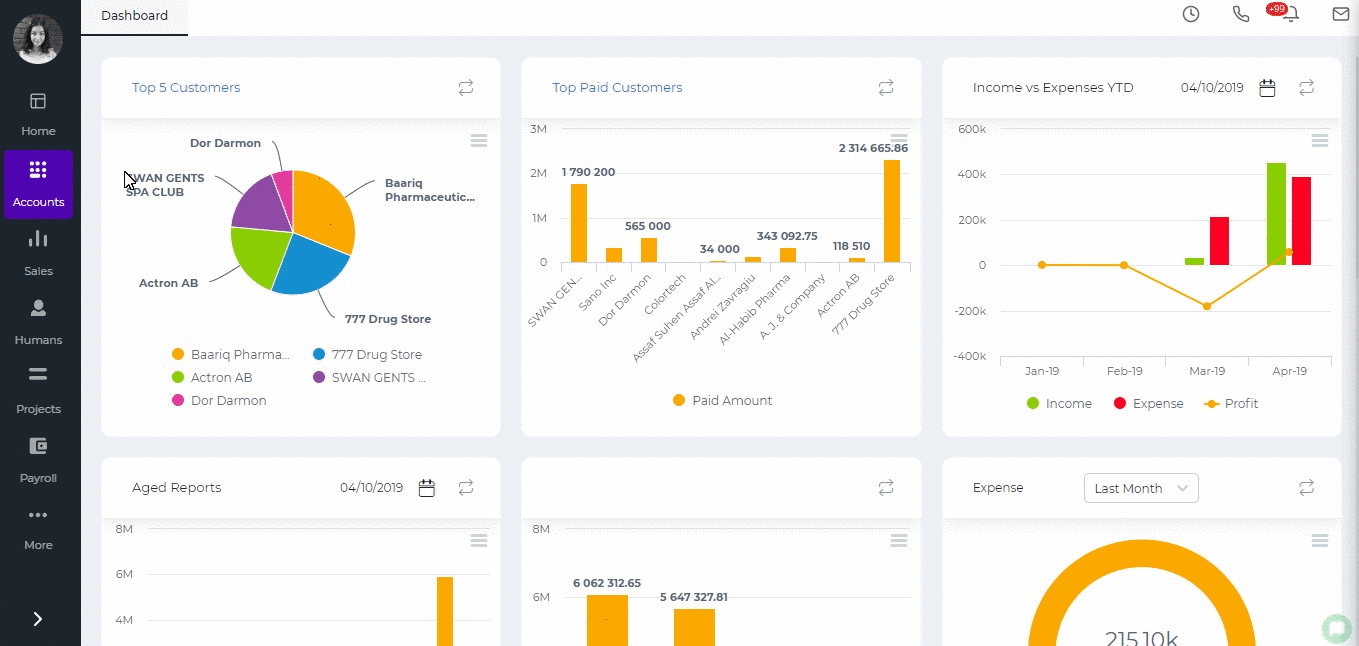
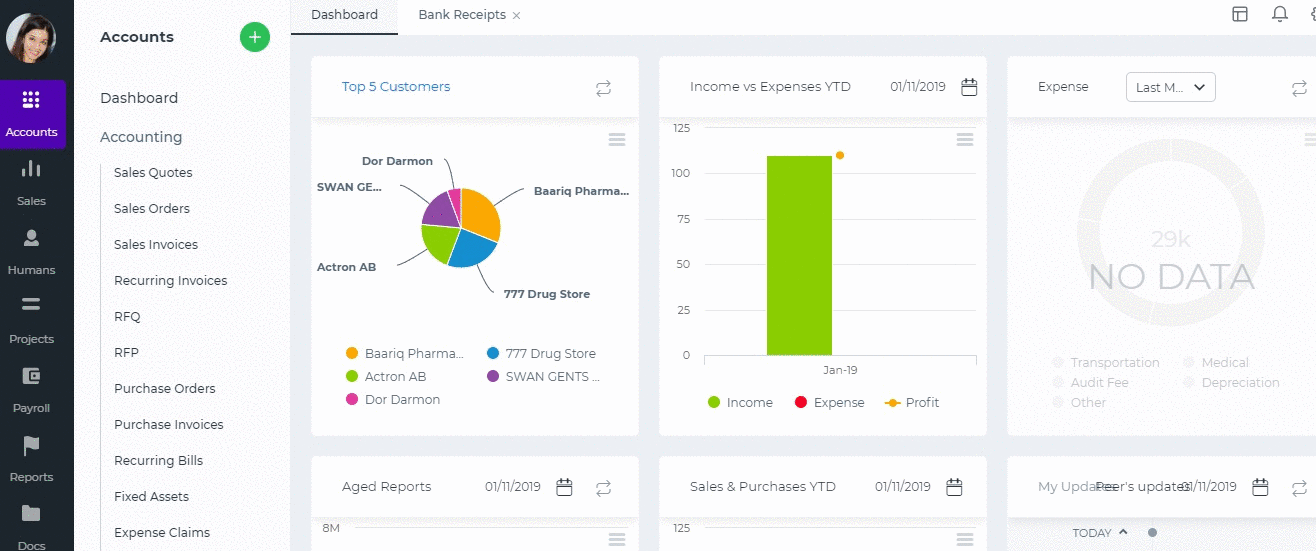
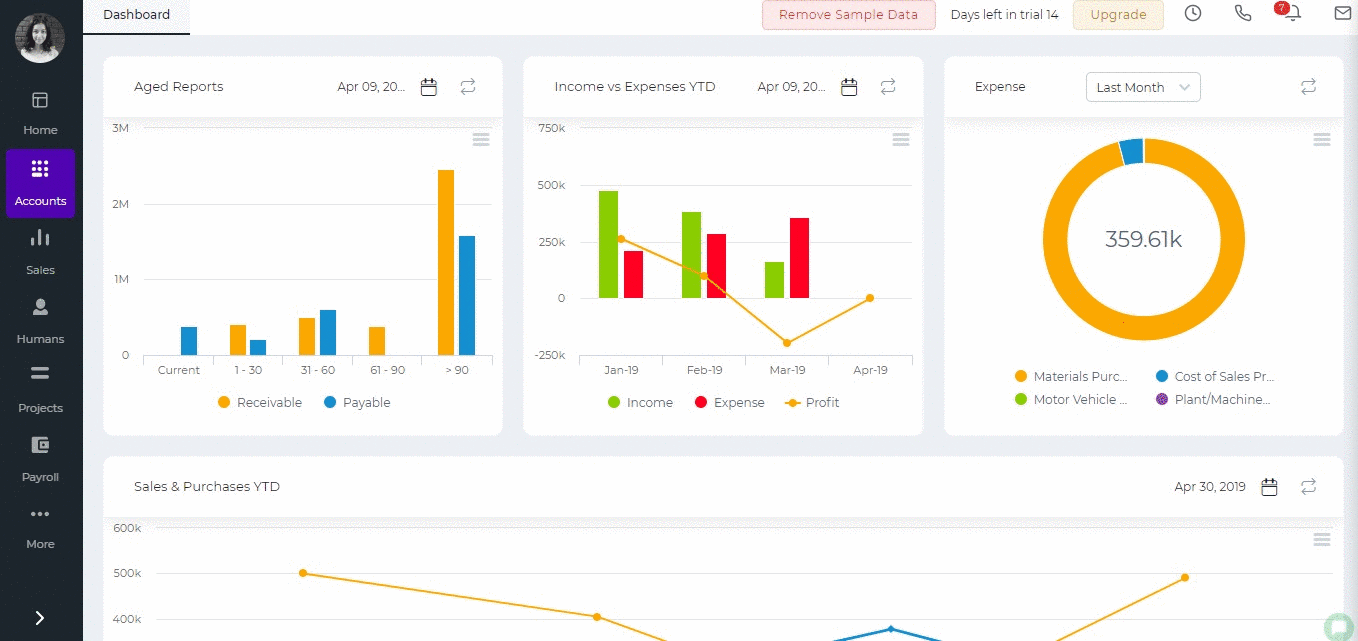
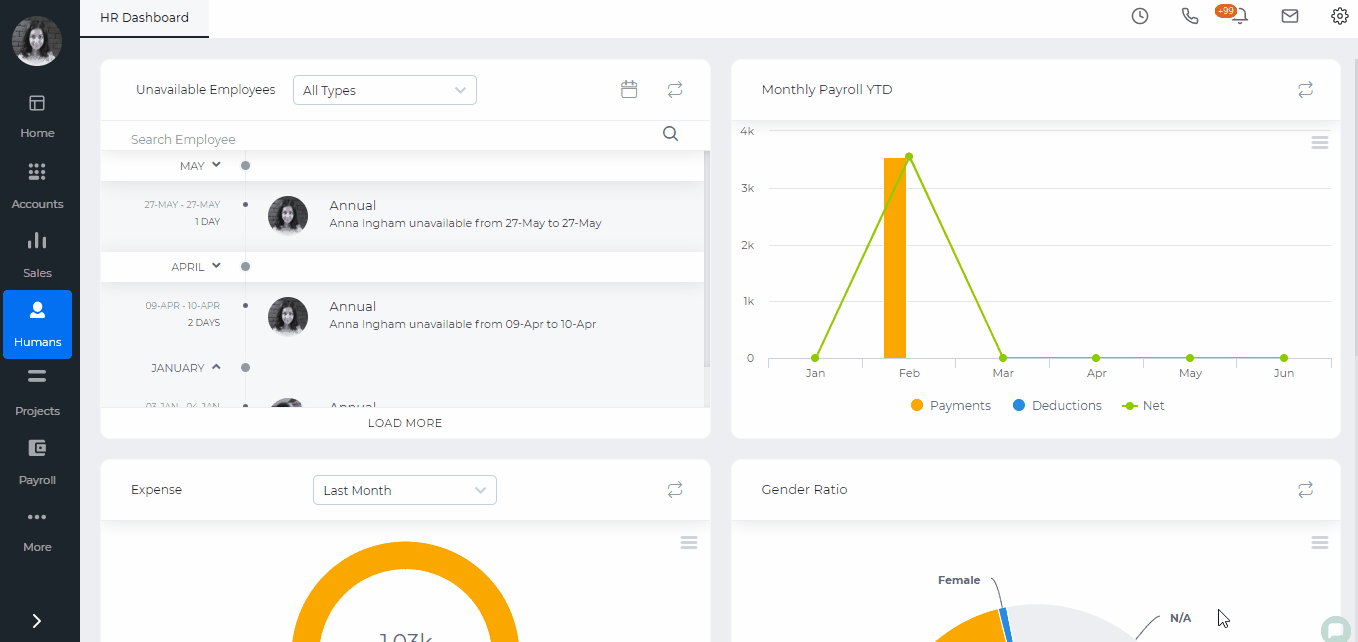
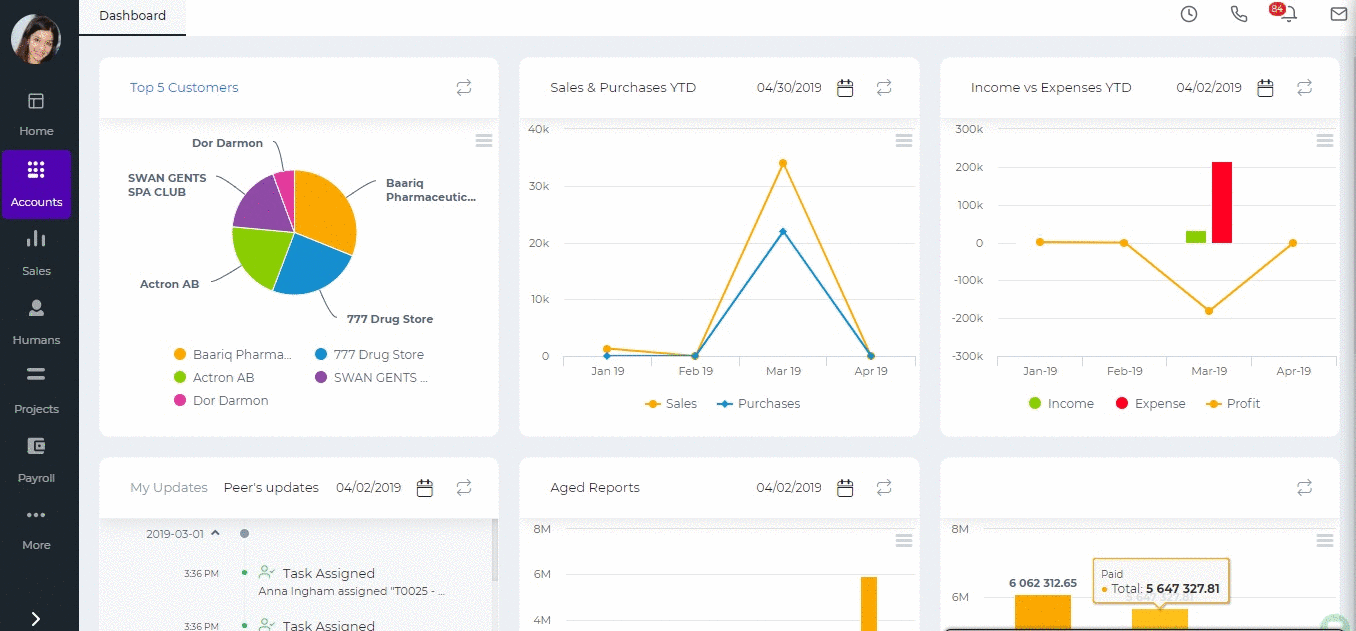
 Once you have saved the supplier details, you will be able to create purchase order, purchase invoice, payment and other transactions with the supplier.
You can view the supplier balance from the Balance column in the Supplier Center. You can also send the supplier statement to the supplier or generate the Excel or PDF versions.
Once you have saved the supplier details, you will be able to create purchase order, purchase invoice, payment and other transactions with the supplier.
You can view the supplier balance from the Balance column in the Supplier Center. You can also send the supplier statement to the supplier or generate the Excel or PDF versions.


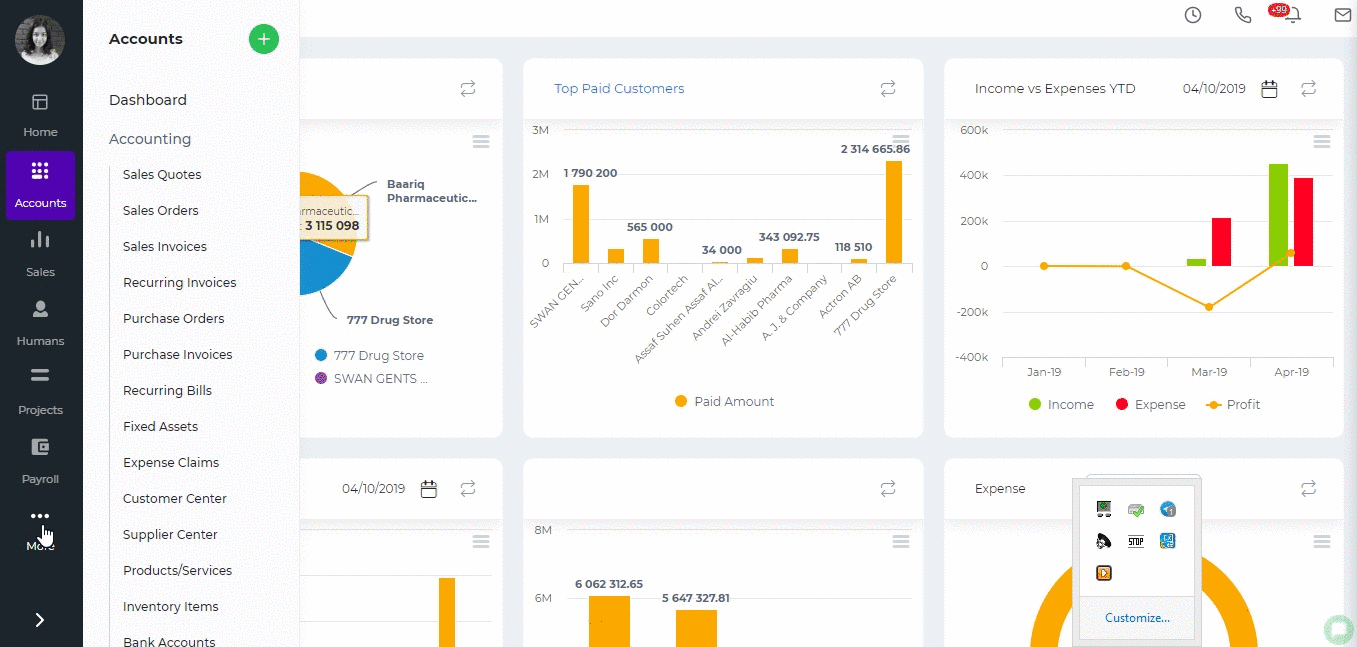
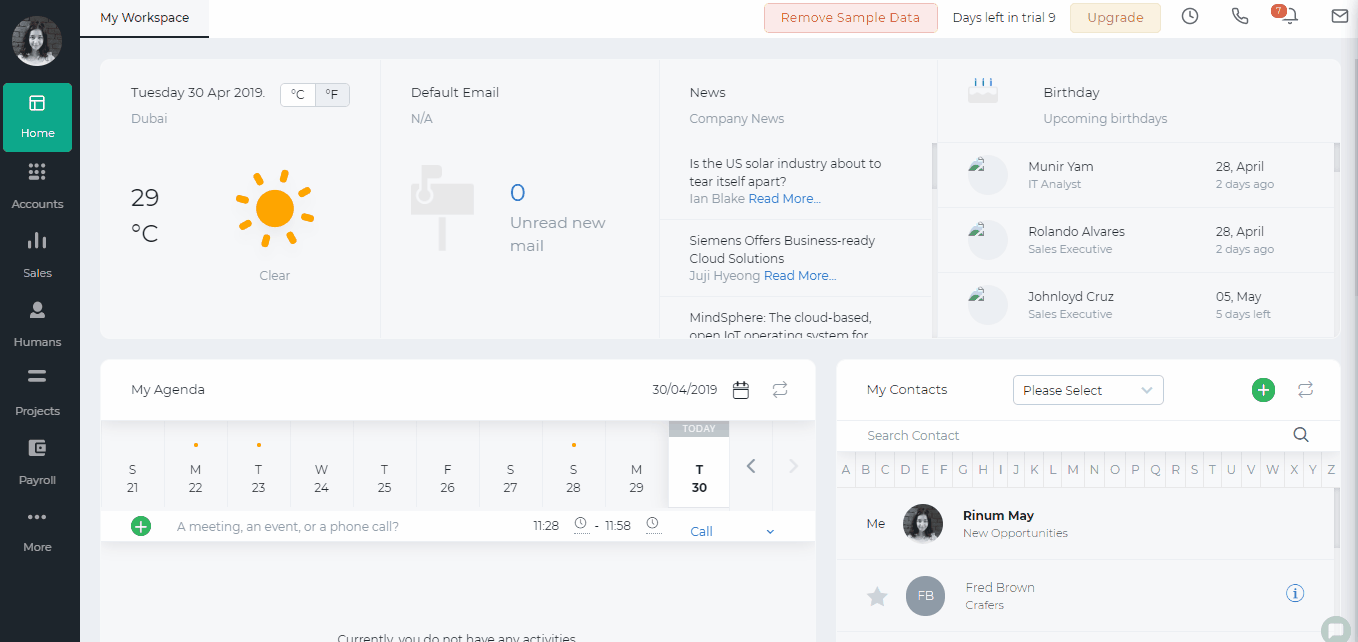
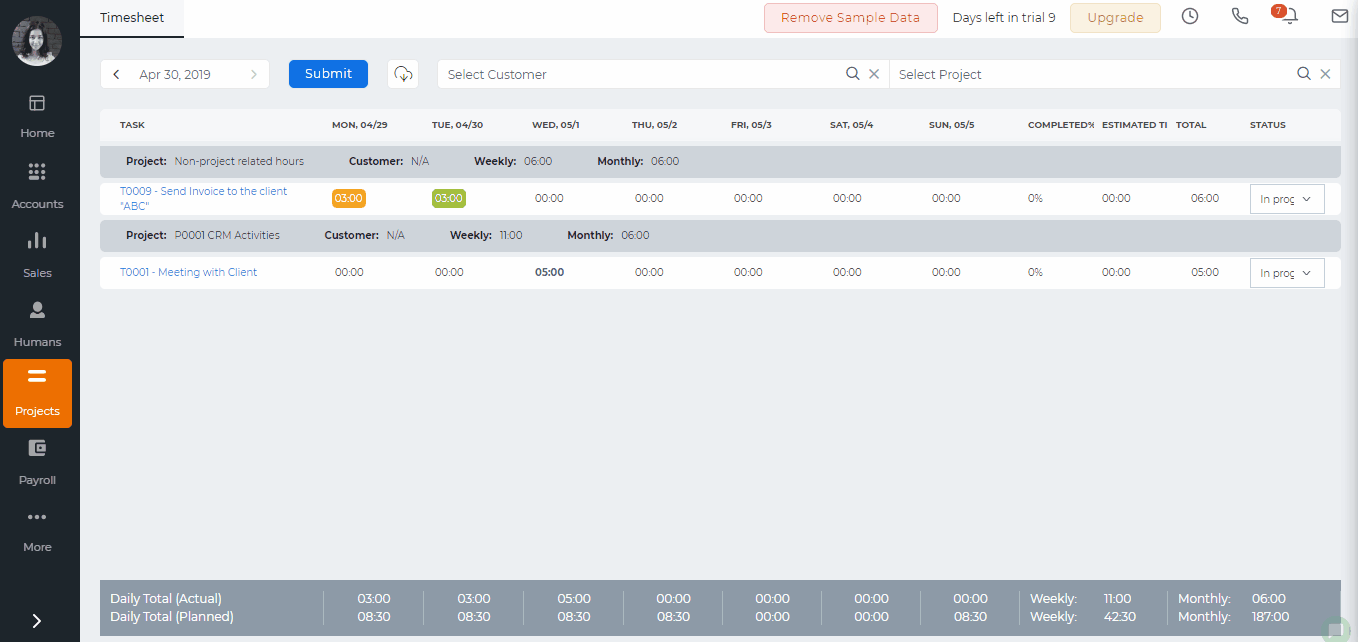
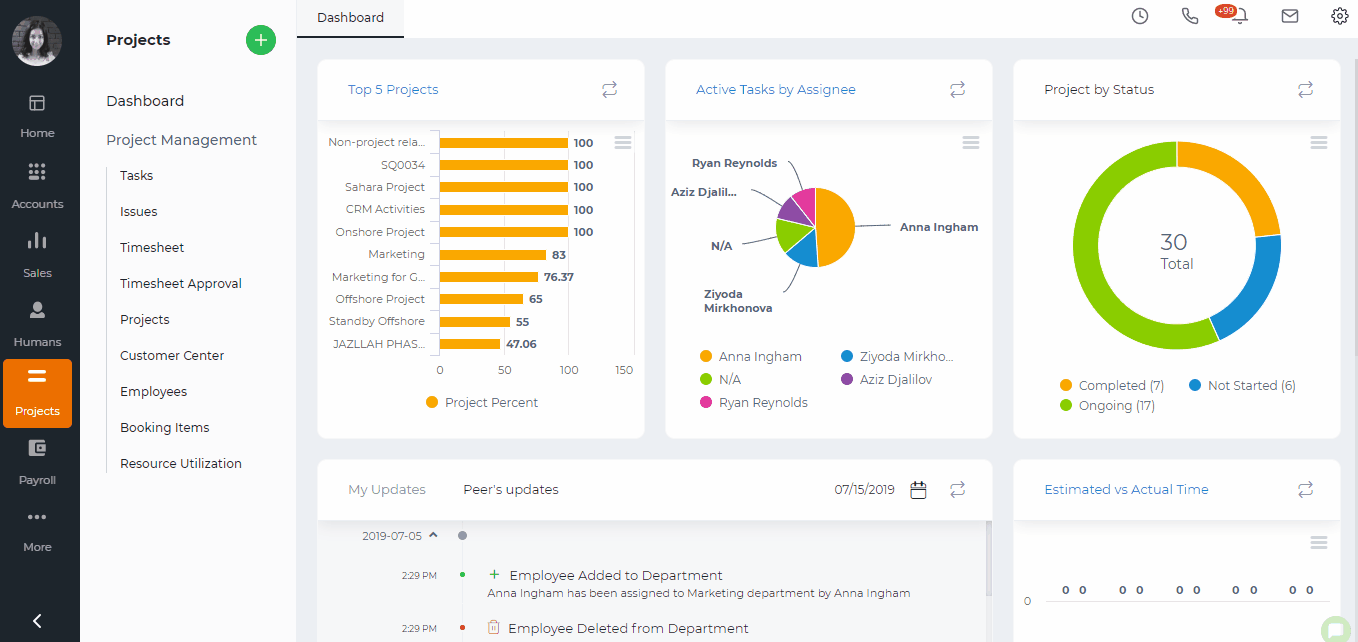
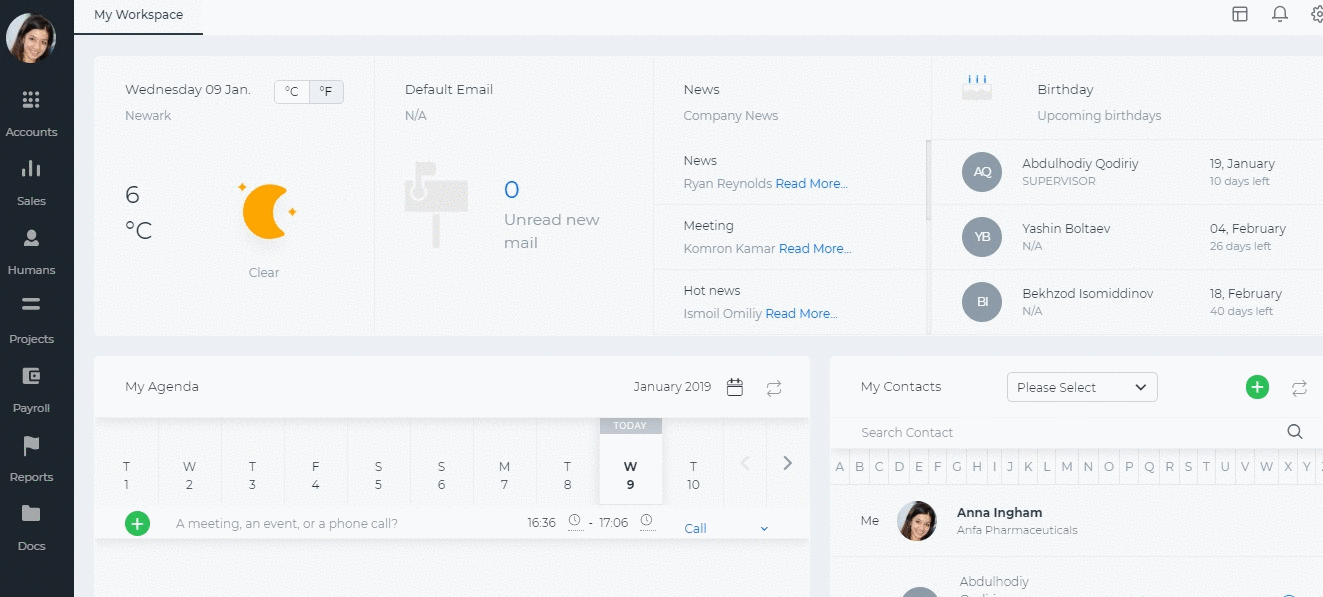
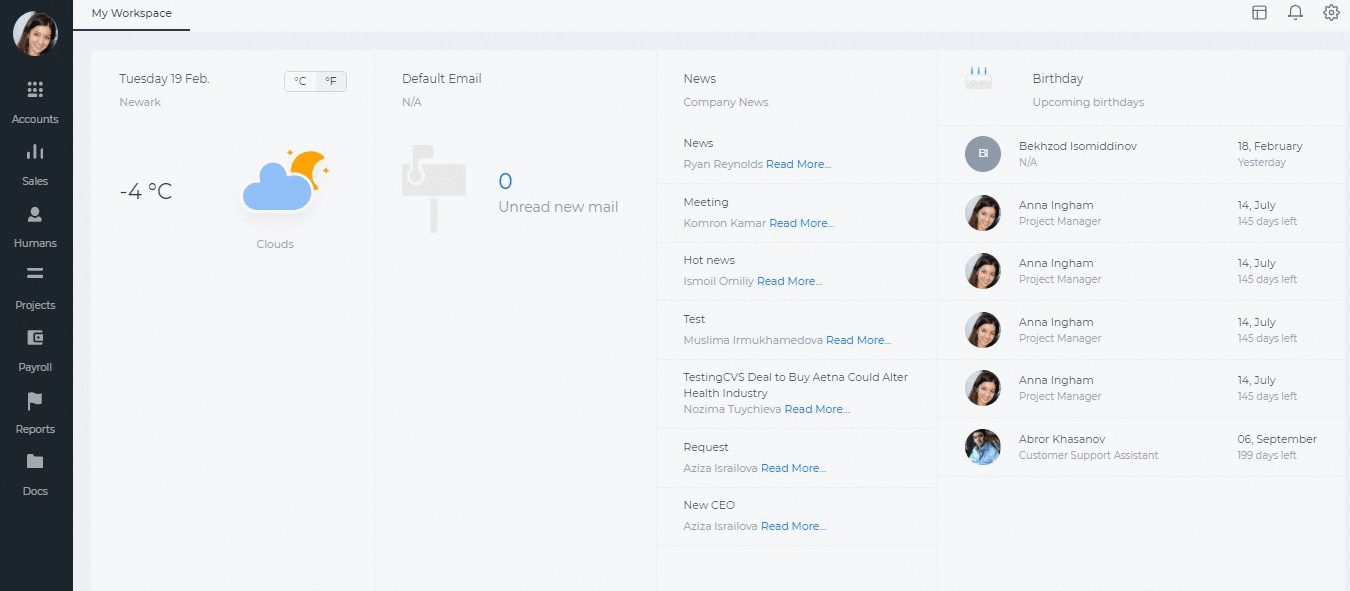
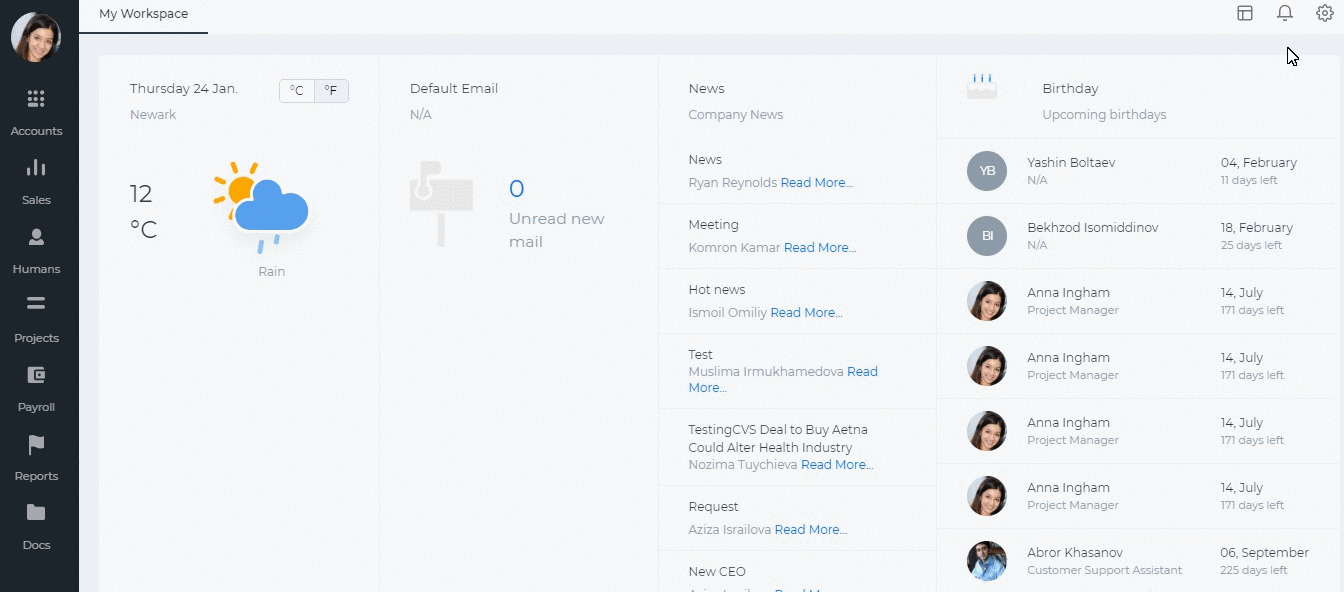
 It is important to tick the option “Yes” for the “Is your business registered for VAT” and enter your TRN number.
Check “ ” box if you are doing business with other GCC/Non-GCC countries and also for reverse charge handling.
You will have tax and financial settings correctly set up in your account. On the Settings>>Accounts>>Tax Rates section, you will have 4 types of taxes already created for you that are available in UAE: Zero Rate, Standard Rate, Out of Scope and Exempt.
It is important to tick the option “Yes” for the “Is your business registered for VAT” and enter your TRN number.
Check “ ” box if you are doing business with other GCC/Non-GCC countries and also for reverse charge handling.
You will have tax and financial settings correctly set up in your account. On the Settings>>Accounts>>Tax Rates section, you will have 4 types of taxes already created for you that are available in UAE: Zero Rate, Standard Rate, Out of Scope and Exempt.
 Zero Rate tax is applied for:
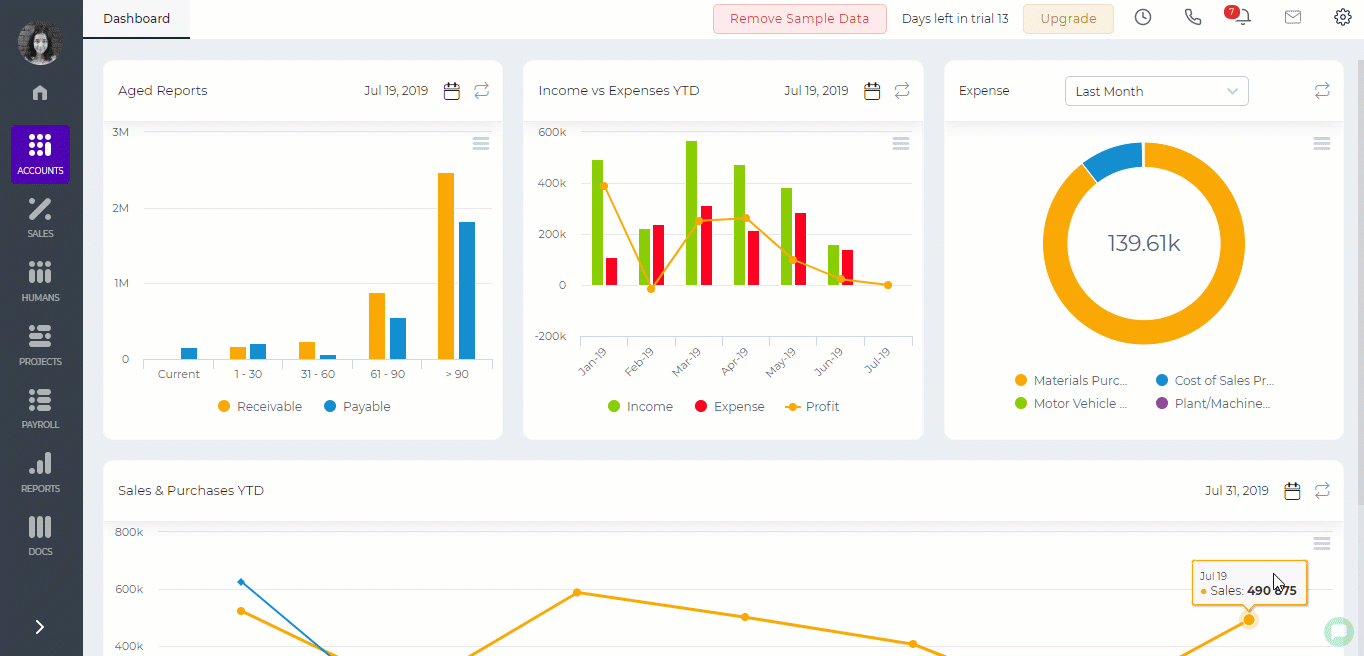
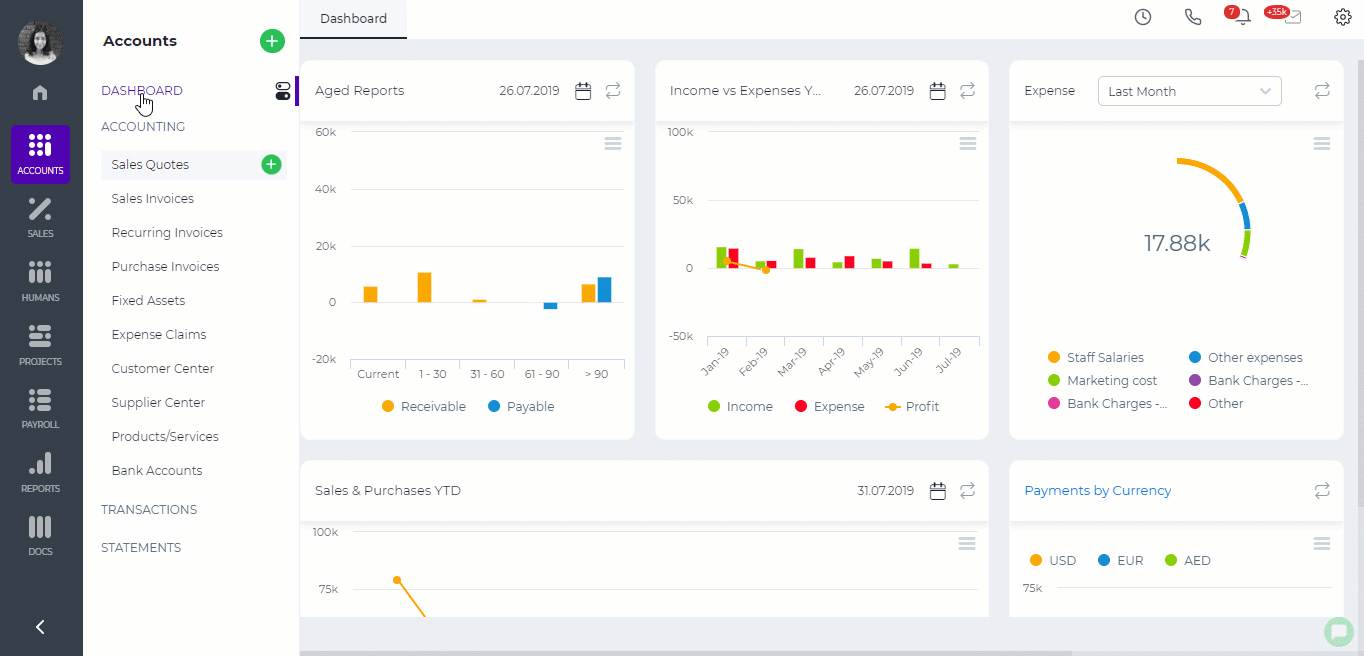
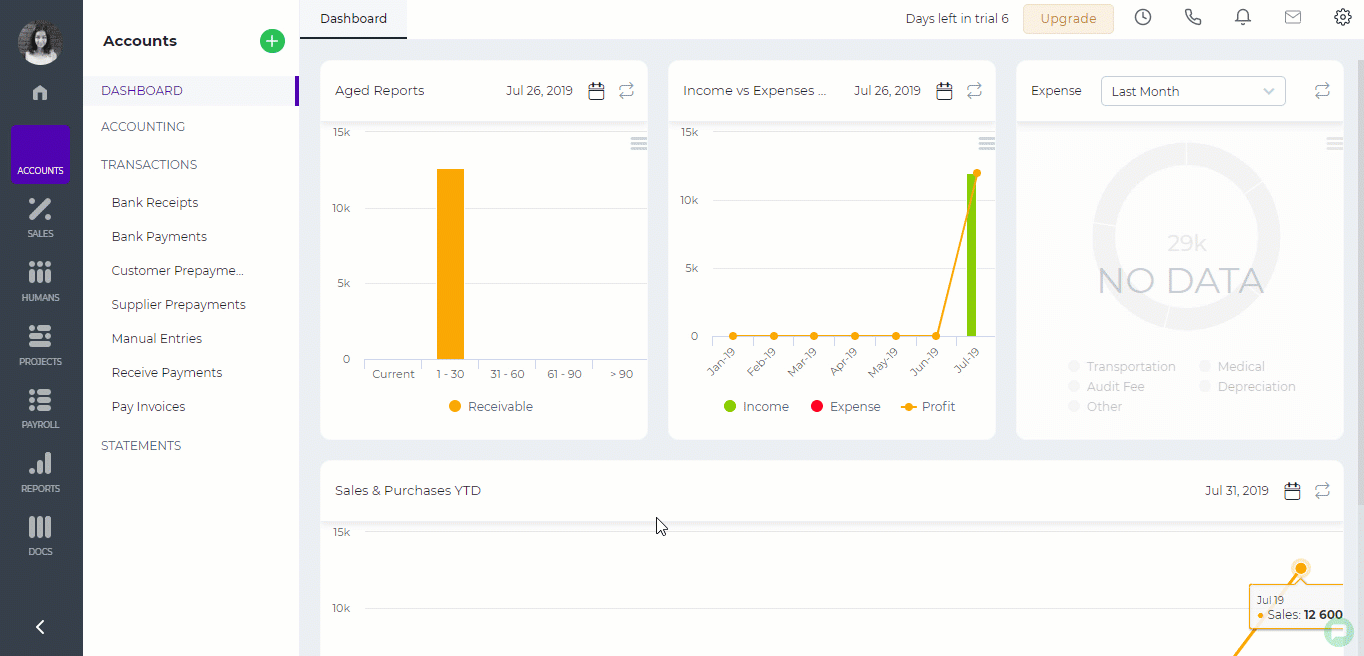
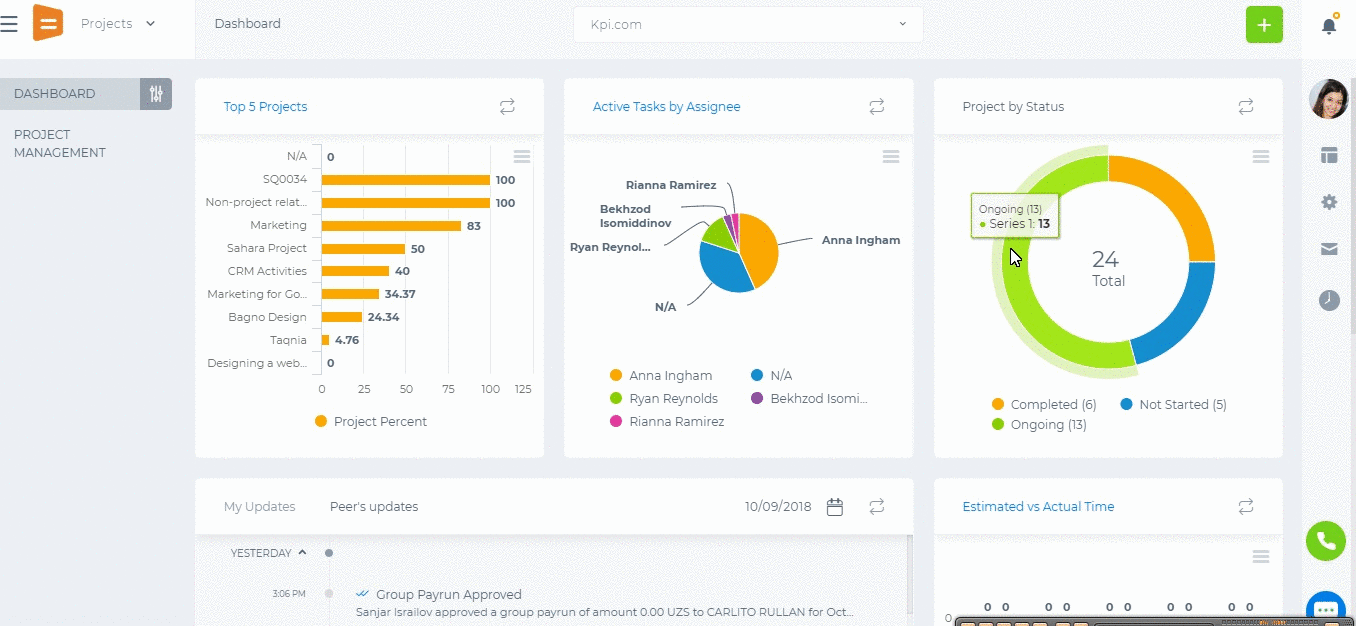 This setting is available only for Administrators. Administrators are not listed in the Permissions table since they are power users and their access cannot be changed.
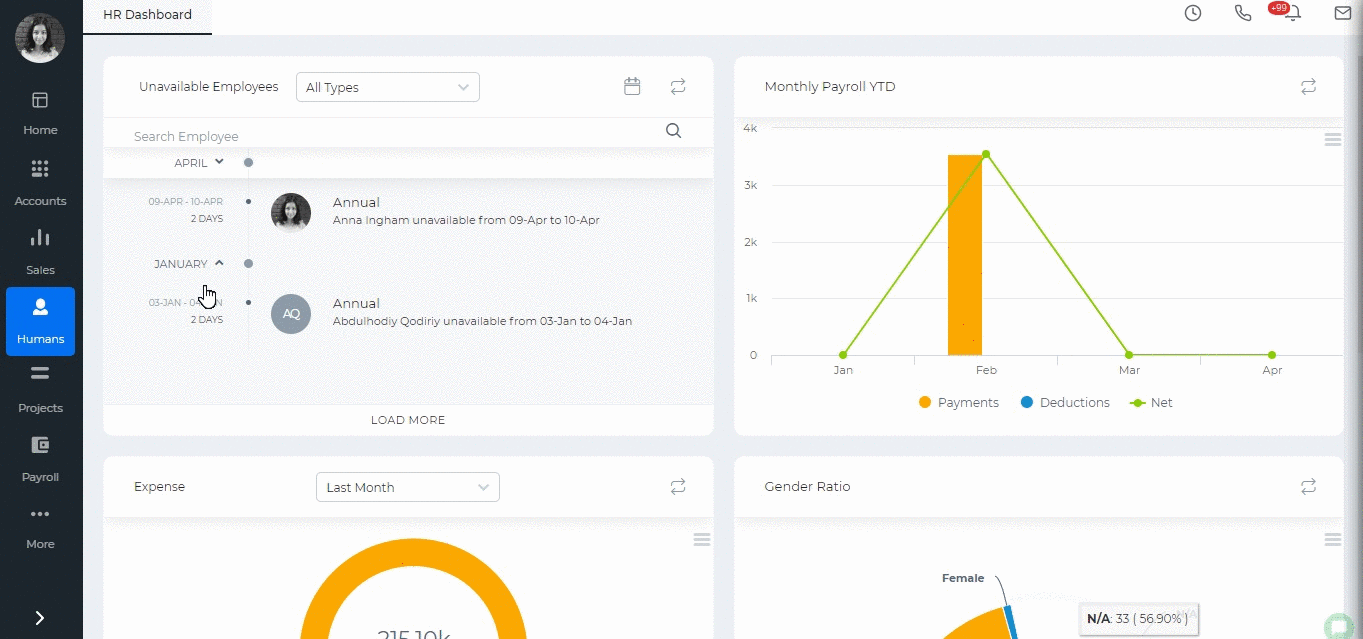
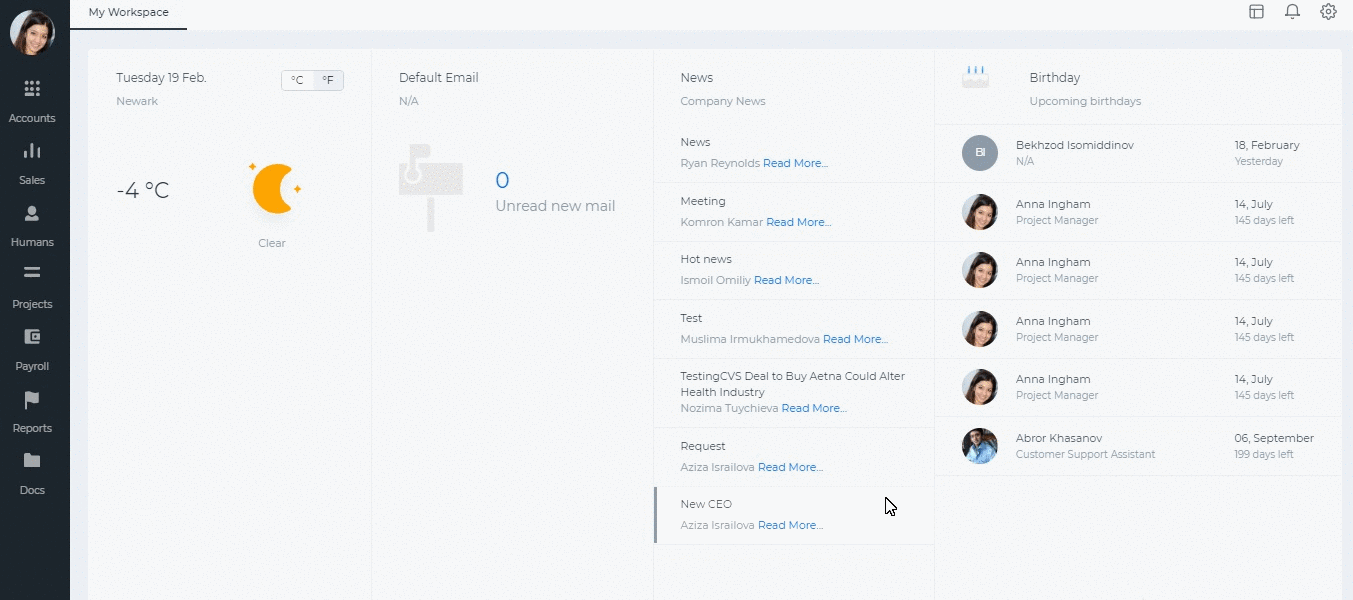
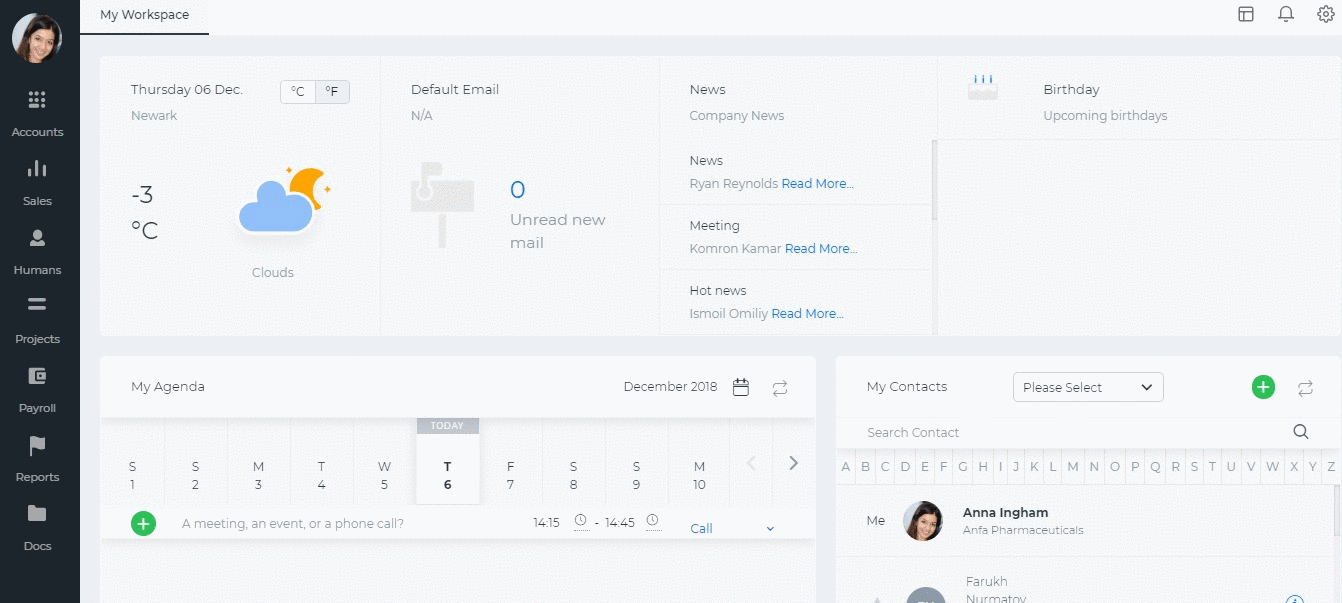 To add new products to your warehouses go to Inventory Items and click on the plus button. Under the inventory stock information part, choose the warehouse.
 To move the existing products to another warehouse, go to Warehouse>>Stock Transfer and add new Stock Transfer. More details can be found here.
To view the statistics about how many products are available in each warehouse, go to the Warehouses section and click the Actions and choose "Products". You will see how many quantities are available for each product.
Alternatively, you can go to Statements>>Stock Valuation report and run by filtering by product and by the warehouse to view the value and quantity of the products.
To move the existing products to another warehouse, go to Warehouse>>Stock Transfer and add new Stock Transfer. More details can be found here.
To view the statistics about how many products are available in each warehouse, go to the Warehouses section and click the Actions and choose "Products". You will see how many quantities are available for each product.
Alternatively, you can go to Statements>>Stock Valuation report and run by filtering by product and by the warehouse to view the value and quantity of the products.
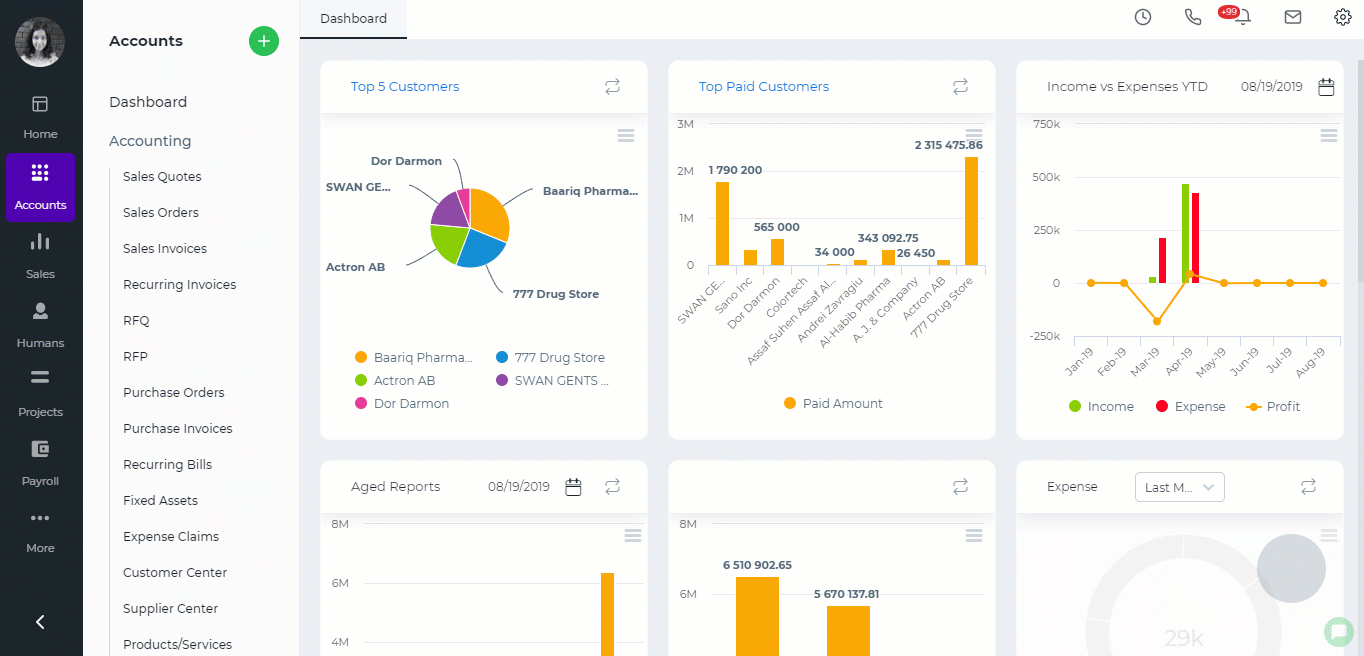
 You can preview the form using the IFRAME URL.
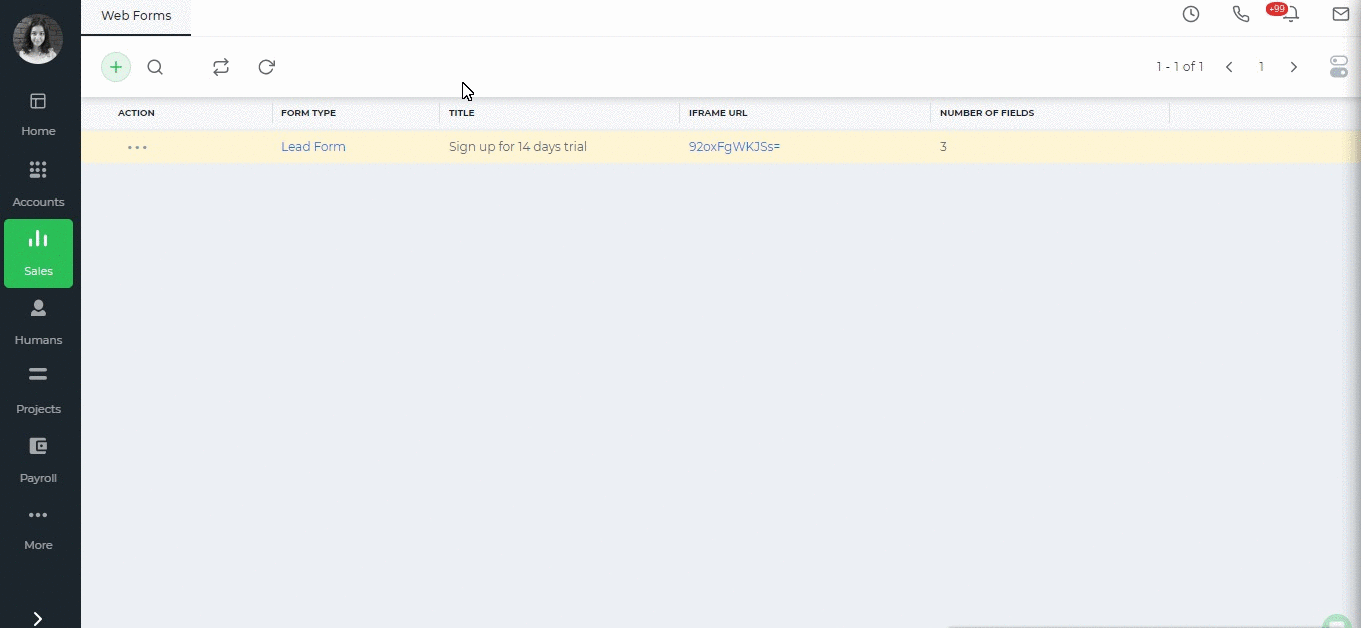 All the information filled up in the web form will be available in the system automatically.
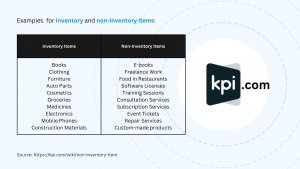
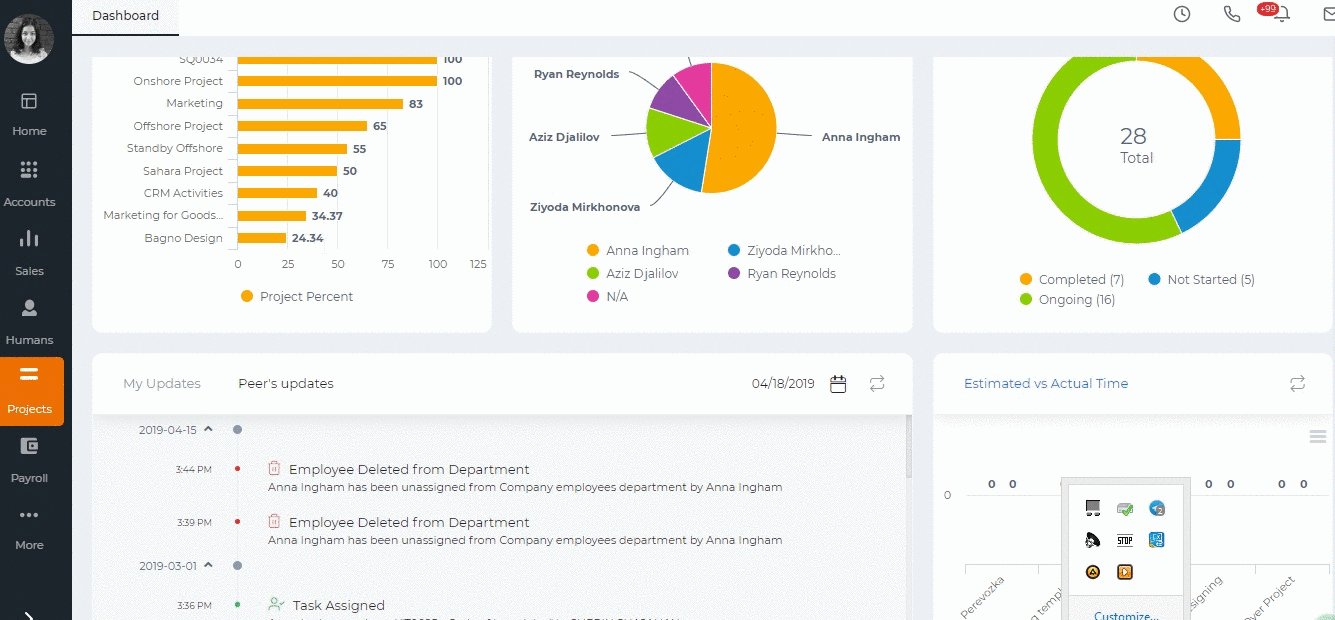 When add a new task to the project you will be able to choose the task workstream under Dependencies tab.