Many international companies need to issue payruns in foreign currencies. By default in kpi.com, you can generate payruns in your country's base currency. To issue the payruns in other currencies, go to Settings>>Payroll>>Employer Settings and check the box "Enable Multi-Currency for Payroll".
Currencies
The foreign currencies should be set up under Settings>>Accounts>>Currency Rates.
Employee Payroll Settings
Employees who receive their payruns in a foreign currency should have the right currency set in their payroll profile.
Single Payrun
After you have set up all the currencies, you will be able to generate payruns in other currencies.
For group payruns, add the employee payroll groups who need payruns in a foreign currency from Settings>>Payroll>>Payroll Groups.
Approval Process
Approval Process
Some organization procedures require top management's approval like expense claims, cash advances, leave requests etc. Kpi.com offers approval processes for Leave Requests, Cash Advances, Expense Claims, Additional Payments, Sales Quotes, RFP, Manual Entries, RFQ, Company Rules.
To set up the approval process go to Settings>>Automation>>Approval Process and select the form from the dropdown.
Choose the "Approver". The approver can be determined by the role or by the employee name. Then choose the conditions which further determines the actions if the item is approved or rejected.
You can add as many steps as needed in your organization. The approval can be two-level, three-level and so on.
Once you are done, "Save" the settings.
Purchase Order for Fixed Assets
Purchase Order for Fixed Assets
If you need to create a purchase order for a fixed asset, you will need to create the Purchase Order first. Receive it and then create the fixed asset.
While adding the fixed asset, under the Financing Account, choose the account you have chosen while creating the Purchase Order.
Connect your own data
Connect your own data
In kpi.com Reports you can upload your own sheets and customize them using the features available in the system. To upload your sheet, go to Reports and click the plus button. Click on the "Connect your own data" and choose the file type you are trying to upload: XLS, XLSX, CSV or Google Sheet. Upload your file. The guidelines for the csv file are available on the link on the right side. The help video is also available.
Once the upload is complete, the file's data will show up on the screen. You can deselect some of the column which you do not need and decide what type of data they contain whether it is numeric, money, or date. Click "Import".
Once you have successfully imported, you will be able to filter the report, customize the column, create chart, create summaries and so on.
Pay Salaries
Pay Salaries
Before paying salaries to your employees in the system, you need to make sure that you have set up everything correct in your Payroll Settings. Go to Settings>>Payroll>>Payment or Deduction page and set up the credit and debit account for each payment you make for your employees.
After that create a single payrun or a group payrun. Once you approve the payrun, the debit and credit balances will be updated accordingly. Then you can go to Accounts>>Transactons>>Manual Entries page and create a transaction for the paid salaries.
Created by Aziza IsrailovaMay 2019
Goods Delivered Notes
Goods Delivered Notes
Goods Delivered Notes are created from Sales Orders which are not invoiced yet. When you create a sales order, no financial transactions will be created in your books. However, when you ship the products ordered by your client, the stock transactions will be created in your books.
Go to a Sales Order view page the status of which is either Sales Order or Partial Shipped. Go to the Pick List of using the Options button.
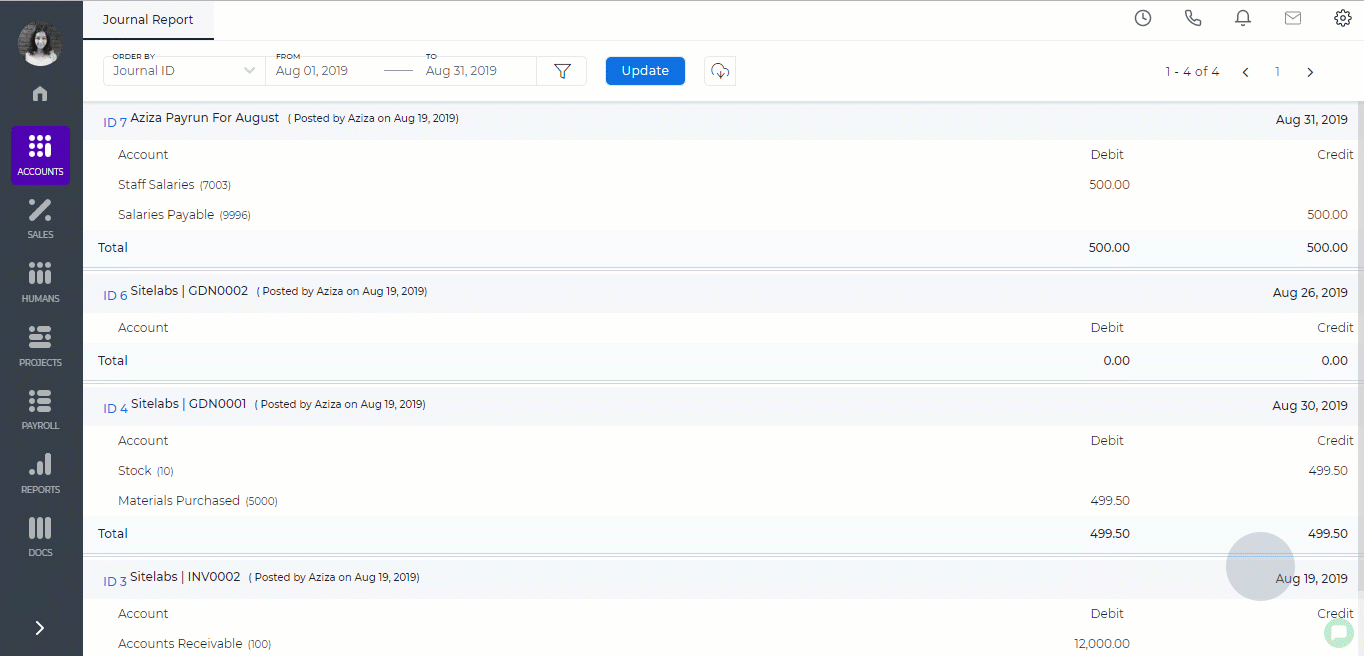
Fill in the form with the shipping information. Click Save. You will see the Goods Delivered Notes created from the Sales Order which you can then convert to a Sales Invoice. The GDN transaction can be found from Statements>>Journal Report.
UAE VAT
UAE VAT
The UAE VAT was introduced and came into effect on January 1st, 2018. The tax rate imposed by the Federal Tax Authority is 5%.
The electronic registration is available on the Federal Tax Authority website. Companies need to create an account there first and then after creating an account, they need to complete the VAT Registration form with necessary details and documents. It is suggested to upload supporting documents to confirm the information provided like the following: passport copy, Emirates ID, trade license, other documents authorizing your business in UAE.
Once you submit the form, the FTA will its response via email confirming the Tax Registration Number (TRN).
Criteria for Registration
The VAT registration is compulsory for the companies revenues and imports of which make more than AED 375,000 annually
Some companies can voluntarily apply for VAT registration if their taxable revenues and imports exceed AED 187,500 per annum.
New and small size businesses have the option of becoming VAT Registered if their expenses exceed the voluntary registration threshold.
Foreign businesses may also recover the VAT they incur when visiting the UAE.
Keeping Records
As a VAT compliant accounting software, kpi.com offers clear and easy VAT transactions, reverse charges, VAT reports, and other financial transactions. The proper sign up helps you to get everything ready for Tax transactions.
Go to the kpi.com and click sign up. Enter your name and your email address. Choose the United Arab Emirates in the country field. You will receive an activation email upon sign up. Click the “Activate Account” button and start your account using the screen gif below:
It is important to tick the option “Yes” for the “Is your business registered for VAT” and enter your TRN number.
Check “ ” box if you are doing business with other GCC/Non-GCC countries and also for reverse charge handling.
You will have tax and financial settings correctly set up in your account. On the Settings>>Accounts>>Tax Rates section, you will have 4 types of taxes already created for you that are available in UAE: Zero Rate, Standard Rate, Out of Scope and Exempt.
Zero Rate tax is applied for:
Certain education and healthcare supplies.
Goods and services exported outside the GCC.
International transportation.
Certain investment-grade precious metals (e.g. gold and silver of 99% purity).
Newly constructed residential properties sold within 3 years of construction.
Standard Rate is applied for the goods and services that do not come under other category tax rates.
Out of Scope is applied for goods and services that do not fall in UAE and sent directly to other foreign countries. For example, in the case of merchant trading when an overseas supplier sells products to an overseas buyer, without the products being brought into the UAE and if a VAT registered entity supplies products to another VAT registered entity in another GCC country.
Vat Exempt applies for:
Residential properties.
Public transport.
Undeveloped land.
Life insurance.
Certain financial services.
Every organization, once VAT registered, should keep records of Tax transactions like Invoices, Credit Notes, and Debit Notes. Before creating your invoices, you will need to add your customer and supplier accounts. Depending on the type of financial information you enter in the customer/supplier accounts, their further invoice tax settings will be set accordingly.
Tax Treatment
There are several options under the Tax Treatment column defining the customer’s tax status like
VAT Registered - Company established in UAE and VAT Registered.
Non VAT Registered - Company established in UAE but not registered for VAT.
GCC VAT Registered - Company established in one of GCC countries and VAT registered (if you are buying products outside UAE with GCC countries, Reverse Charge).
GCC Non VAT Registered - established in one of the GCC countries but non VAT registered.
Non GCC - Company is established in none of GCC Countries (customer outside UAE and GCC).
VAT Registered– Designated Zone - Company is established in designated zones of UAE and VAT Registered
Non VAT Registered – Designed Zone - Company is established in designated zone but non VAT Registered
Invoicing
Tax Invoice is a document confirming the information about the taxable transaction made. Businesses should issue tax invoices for both taxable sales and taxable purchases. The tax invoice is required to include the following details:
A unique sequential number.
The date of issue.
The supplier’s name, address and Tax Registration Number (TRN).
The customer’s name, address and Tax Registration Number (TRN).
Description of goods or services supplied.
Total amount excluding VAT.
Total VAT chargeable.
Price and quantity of each item.
Rate of discount per item.
Rate of VAT charged per item – if an item is exempt or zero-rated, then mention there is no VAT on these items.
Total amount including VAT.
To create a tax invoice, go to Sales Invoices section of the Accounts module and click the plus button. Once you choose the customer, all the customer details will be brought to the invoice like the customer address details, TRN number, currency etc.
Fill in the invoice details and save. Click PDF to generate the PDF version of the tax invoice.
VAT Return
To generate a VAT Return Report go to Statements>>VAT Report and click Generate VAT Return button. Choose the period and click Save.
Created by Aziza Israilova,
July 2019
Value Added Tax
Value Added Tax
Tax is a fee charged by the government on consumer goods, services, business revenues and other financial transactions to provide funding for public services and other government expenses incurred. There are two types of government taxes: direct and indirect tax.
Direct tax - it is paid by the taxpayer directly to the government without any intermediary.
Indirect tax - paid by the taxpayer to an intermediary who acts on behalf of the government for tax collection.
The VAT is a Value-added Tax also in some countries referred to as Goods and Services Tax (GST.) It is an indirect type of tax which is imposed on each step of supply of goods and services. VAT-Registered businesses get a refund on the tax paid from the previous step at the current step of the sales process. Ultimately, the end customers are the ones who will pay the VAT, the rate of which is added to the price of products and services they purchase.
VAT Registration Process
VAT Registration is a process that includes collecting and filing the documents to the responsible tax authorities so that your company listed as VAT-Registered. The registration rules and processes can be different from government to government.
The UAE VAT registration process is discussed here.
For KSA, US and UK registration processes click the links below:
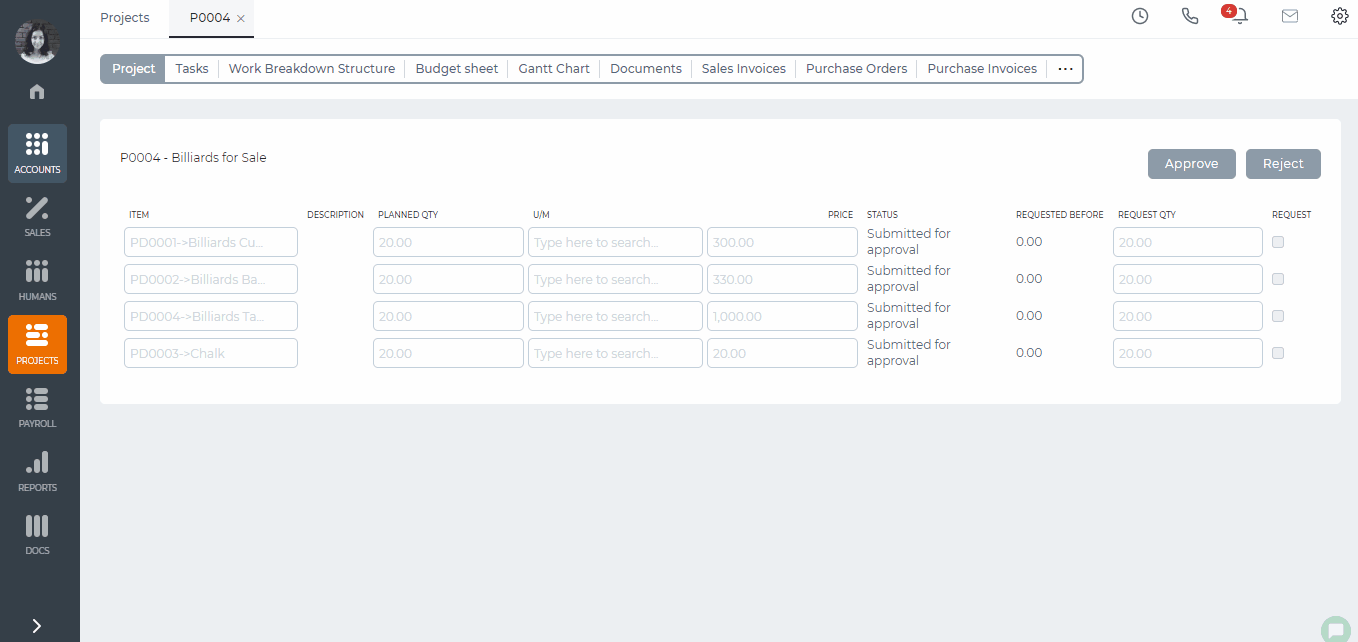
Bill of materials (BOM) is a complete form of specific items that are needed to complete a project. The bill of materials can be submitted for a project manager to draft a project for the estimates and budget in kpi.com.
First, start your project by going to the Projects module and fill in the project details.
Then go to the Bill of Materials page and list the bill of materials needed
Item - the name of the material needed
Planned Quantity - the quantity needed to complete the project
U/M - unit of measurement
Price - the unit price of each bill of material
Requested Before - the quantity requested before this in the project
Requested Quantity - the quantity you are requesting/you need now.
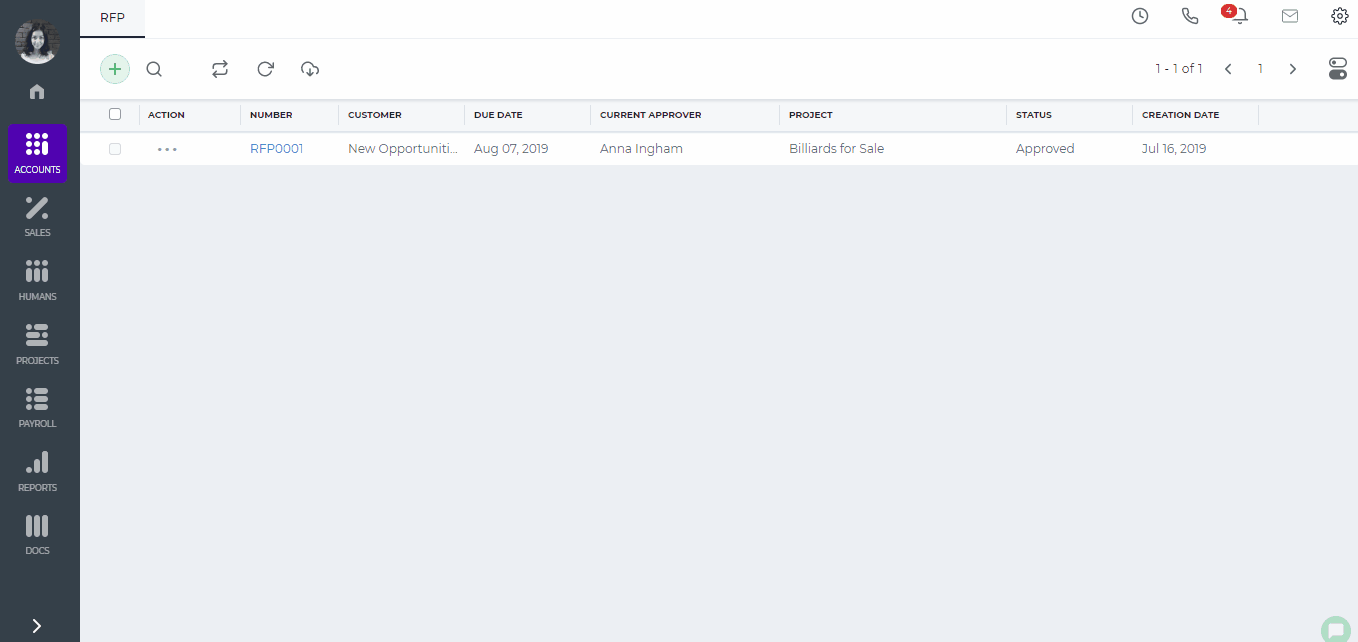
As soon as you submit the bill of materials to the manager, company directors will be informed about it via email. The director can then click the link sent in the email notification and approve or reject the requested bill of materials for purchase and convert the requested bill of materials to "Request for Purchase".
The Request for Purchase, after the approval, can be converted to a Purchase Order.
After the purchase order is sent to the supplier, the purchase order will be shown as project expenses under the project budget sheet.
Created by Aziza Israilova,
July 16
Timesheet Editor Role
Timesheet Editor Role
For project managers it is important to take control of project employees' activities. Besides approving timesheets, reviewing tasks and managing the project involvement, project managers sometimes need to fill timesheet on behalf of employees. Timesheet editor role helps them to do that.
Timesheet editor role gives full access to employee timesheets: add time, change task status, submit for approval, remove time etc.
To assign a timesheet editor role go to Humans>>Employees>>Edit Employee profile and choose Timesheet Editor role under Account Information part.
The timesheet editor can then go to Projects>>Timesheet and enter the employee name in the Employee field which then shows employee's timesheet.
Created by Aziza Israilova,
July 2019
Incidents
Incidents
There can be unplanned events that happen to employees during the work time or when the employee is employed in your company. Such events may result in but not limited to exposure, damage or illnesses. In order to record such incidents that happen to employees, go to Humans>>Employee Profile>>Incidents section and click the plus button to add new and fill in the form.
When you choose the related employee name and save the incident, it will be available in that employee's profile. The status field helps you to track whether the incident is new, under progress or resolved.
Created by Aziza Israilova,
July 2019
Supervisor Structure
Supervisor Structure
Supervisor structure can be accessed from Humans module and it is available for Administrators, Directors and HR Managers.
You need to set up each employee's supervisors from Humans>>Employees>>Edit Employee page. After you set up all the supervisors, the structure will be available as a scheme.
Created by Aziza Israilova,
June, 2019
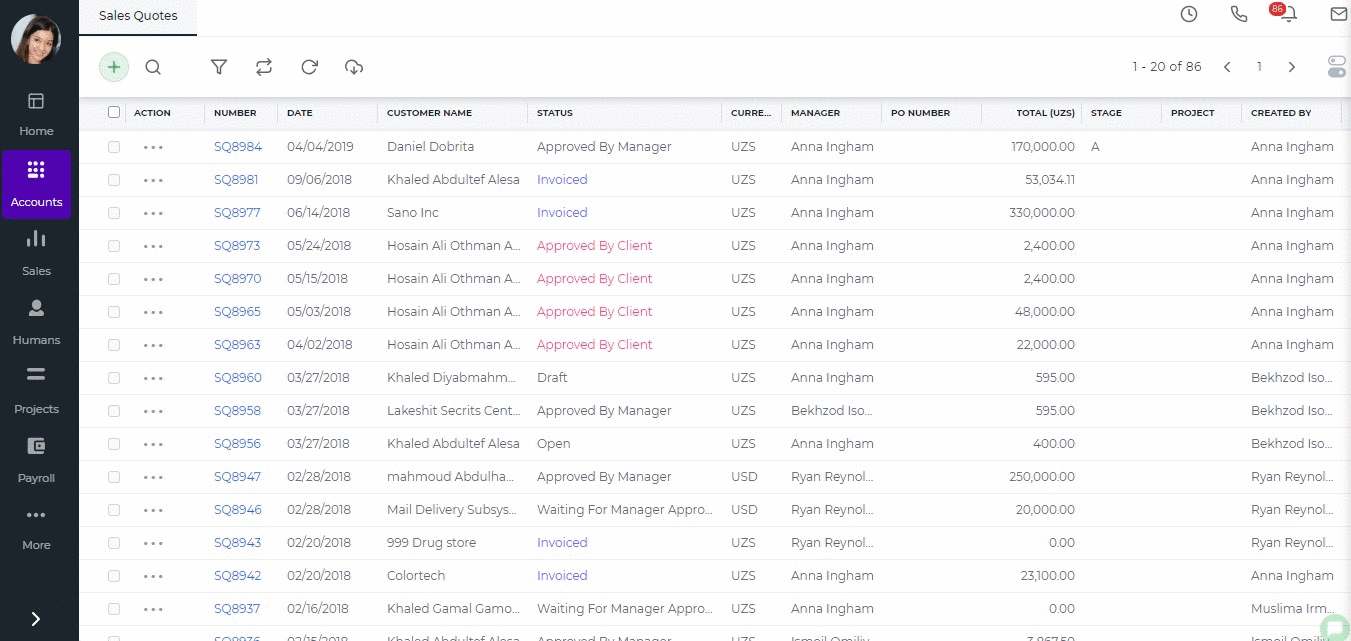
Sales Quote
Sales Quote
Sales Quote provides the prospective customer with a quote of how much a product or service would cost. With this function, a manager can handle Sales Order and Sales Invoice. Sales Quote can also be used in kpi.com as part of Sales and Projects Modules. It can be sent to contacts, leads, accounts and customers. Project Managers can use Sales Quotes in order to create proposals and send them to clients before the start of the project
To create a Sales Quote, go to Accounts>>Accounting>>Sales Quote and click on plus icon. Fill in the form.
After you have filled in the quote form, you can:
Save as a Draft - you will be able to edit the quote later again. The status of the quote changes to "Draft".
Save & Approve – if you have enough rights, you can choose yourself in the Manager field and approve the quote yourself. The status of the quote changes to "Approved by Manager".
Approve & Email – when you click Approve & Email Sales Quote will be approved and you will be able to send the quote as an email with the PDF version attached. The status of the quote changes to "Open" after you have emailed the client.
Submit for Approval – you can submit Sales Quote for manager's approval by choosing manager in Manager field. Managers who can approve Sales Quote are Administrators, Directors and Accountants. The status of the quote changes to "Waiting for Manager's approval".
Print PDF Version – You can view how the final quote look by printing the PDF.
Client Approve – Once you receive quote approval from your customer, you will be able to change the status to "Approved by Client" by clicking the Client Approve button.
Client Reject – If the client has rejected the quote, you can change the quote terms and send the quote back to the client later. The status of the quote changes to "Rejected".
Convert to Order – Once the quote is approved by the customer, you can convert your quote to sales order using Convert to Order button.
Convert to Invoice - Once the quote is approved by the customer, you can convert your quote to sales invoice using Convert to Invoice button. The status of the quote changes to "Invoiced" after you have converted.
Progress invoicing - (also called progress billing, percentage of completion billing, or partial billing) Progress Invoicing enables you to create an invoice from a sales quote by billing your customer for a percentage of the original quote.
In order to generate Progress Invoicing go to the Sales Quote Add Form and tick Progress Invoicing on right-top. For more detailed information click here.
Created by Aziza IsrailovaApril, 2019
Sales Order
Sales Order
Sales Order is a second deed, once the Sales Quote is accepted and is an affirmation document mailed to the purchaser before delivering the goods or services.
Sales orders help you manage the sales of the products and services your customers order. Using sales orders is optional that you can convert Sales Quote to Sales Invoice directly.
Once Sales Order created the stock amount of the inventory will not be deducted, however you can see how many items were ordered (On Sales Order) in Products/Services listing page.
To add a new sales order go to Accounts>>Accounting>>Sales Order list and click on the plus icon. Fill in the form and save.
You can also covert a sales quote to a sales order. Once the sales order is approved, you will be able to convert it to a sales invoice, to a project, view the Pick List or edit it..
Created by Aziza Israilova,
April 2019
Sales Invoice
Sales Invoice
Sales Invoice section is available under Accounts>>Sales Invoice. Sales Invoices can be created from conversion of sales quotes/orders or using the "Add" button from the Sales Invoice listing.
There are two types of invoices: Sales Invoice and Timesheet Based Invoice. The Timesheet Invoice is covered in another wiki article here.
Sales Invoices can be added by Sales Persons, Managers, Accountants, Directors and Admins. While adding an invoice, you need to fill in some mandatory fields like Customer Name, Dates, Item Name, Quantity and Price. The Invoice number is provided automatically. However, you can still change it manually.
If you use multiple warehouse feature, then you will also need to choose the warehouse from which you are selling the item.
The invoice can be saved as Draft, Approved or Open. When you click "Save & Approve", the status of the invoice changes to Approved. When you save and email the invoice to your client, the status changes to "Open". Whenever the invoice due date is exceeded, the invoice status changes to "Overdue".
Invoice Payments
For any Overdue, Approved or Open invoices, you can receive payments.
Enter the amount paid, date paid and the account the payment is made to. Then click the Receive button. The invoice status changes to Paid.
The PDF version of the invoice can be generated either from the Actions in the listing page or from the Invoice summary. If you click the arrow in the PDF button, you will be able to generate the Packing Slip or Shipping Label PDF.
Invoice Actions
A click on the actions in the invoice list gives you several options as shown in the screen shot below.
All Approved, Overdue, Draft and Open invoices can be edited or voided.
Void creates a reverse transaction, which means the historical data will remain.
Delete removes the invoice and clears all transactions related to it from the application.
Copy to either copies all invoice details to a new invoice or a new purchase order.
Add Credit Note is used in cases when customer returns the products sold fully or partially (for any default or other reasons). The Credit Note deducts the amount returned.
Paid Invoices
Paid invoice summary includes the "Generate Receipt" button which exports the PDF version of the payment receipt.
As mentioned above, paid invoices cannot be edited. However, if you still need to make changes to the paid invoice, then you should first delete the payment and then edit the invoice.
Go to the invoice summary, click the Less Payment option from the totals and choose either delete or void. After that you will be able to edit the invoice details.
Created by Aziza Israilova,
April 2019
Recurring Invoice
Recurring Invoice
If you have partners or clients whom you bill invoices on a certain amount of goods and services on a recurring basis, it may be time-consuming as you have to fill the same Sales invoice for the specific client repeatedly. However, you can automatize this process with kpi.com to save your time and energy. In kpi.com you can create recurring invoices which will be automatically sent on particular date and time.
To create a recurring invoice, go to Accounts>>Recurring Invoice and click plus button to add.
Enter the customer name, invoice dates, products, and services and then set up the recurrence.
If you save and approve the recurring invoice, the invoice will be created in the Sales Invoice list on due date/time. If you approve and email, the invoice will be created and sent to the customer. You can also save it as a draft.
Created by Aziza Israilova,
April 2019
Request for quote
Request for quote
Request for quote (RFQ) - a request of an organization interested in purchasing goods or services, to suppliers in order to determine possible purchase prices.
In kpi.com you can find Request for Quote from Accounts >>Accounting>> Request for Quote (RFQ).
Fill in the form with the necessary details like the date, items you are requesting from suppliers, quantity of items and choose the supplier name.
If you want to inform suppliers about the request, click Show Additional Fields and check Send notification to suppliers.
When you have approved Request for Quote, there is an option to Send Quote to suppliers or convert it to Purchase Order.
Once you convert the RFQ to a purchase order, the status of the RFQ changes to "Converted".
Created by Aziza Israilova,
November, 2018
Request for purchase
Request for purchase
Request for Purchase is a document requesting from your purchasing department to provide a particular quantity of a material or a service for a particular date.
You can add Request for Purchase (RFP) in kpi.com using Accounts >> Request for Purchase.
Customer - the customer who you need to provide the products with.
Due Date – required field to fill, date until that particular request is active
Approver– the manager who will review and approve the request.
Project – to which project this request is related
Then choose products or services, their quantity you are requesting. When you fill all the fields, click Submit to Manager. It will automatically send the request to responsible Manager. If you are the manager, system shows Save and Approve button. automatically.
When the request is already approved by the manager, you can convert your request to PDF version or convert to Purchase Order, Request for Quote (RFQ), or Stock Adjustment.
Created by Aziza Israilova,
April 2019
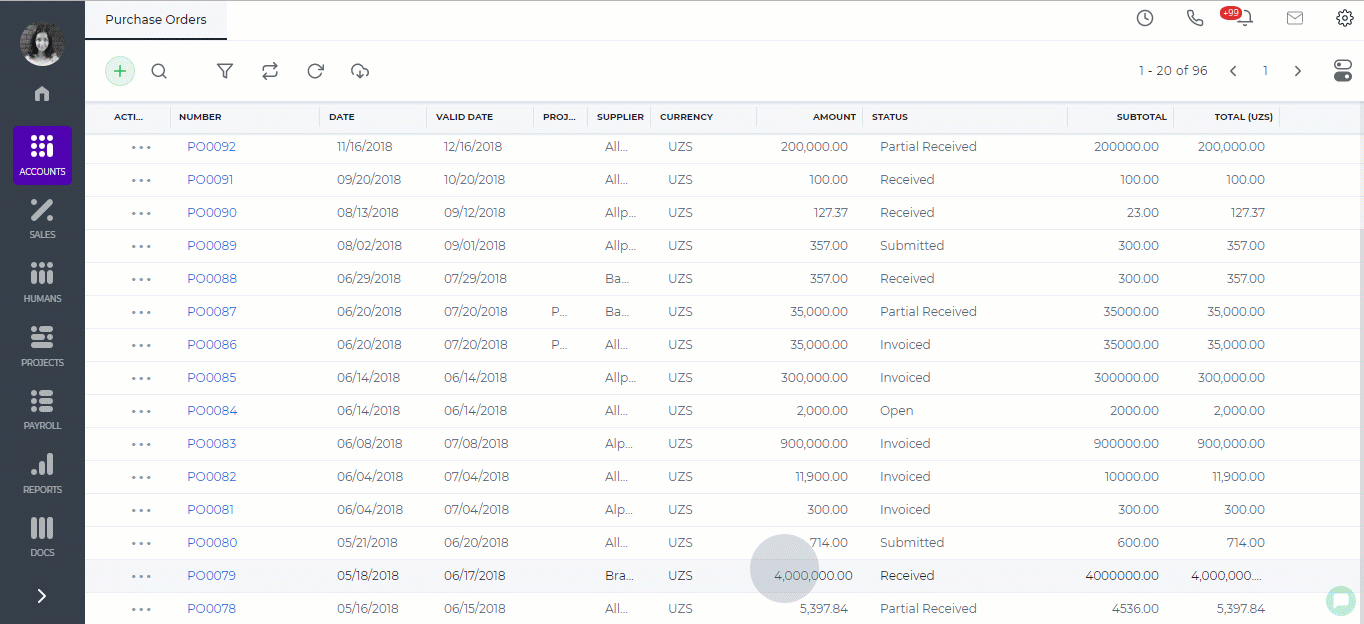
Purchase Order
Purchase Order
The Purchase Order section is available under the Accounts>>Accounting>>Purchase Order. To add a new purchase order click the green plus icon and fill in the form.
Supplier- Choose a company or an organization or a person you are sending the order from the list of suppliers. You can also lookup the suppliers from the search box. If there are no suppliers registered in your company you can add new Supplier from Add new link just in the Supplier dropdown.
Project- Select the project which you want to relate this Purchase Order to.
Date- Indicate the date order is created.
Due Date- Indicate the expected Ship Date which this order will be shipped.
PO Number- Edit or use default order number generated.
Reference - Enter the reference to the transaction.
Currency - The dropdown shows all the currencies you use in your company transactions.
Manager - Select the manager who will approve your purchase order. You can select yourself as a manager if you have an administrator, direct or accountant user roles.
Show Additional Fields - A click on this shows you extra fields like custom fields, billing and shipping address, payment type, payment terms and more.
Item – Title of the product or services, required field. You can select from existing products/services or type here not-listed items.
Description – Description of the product or services which can be editable.
Qty – Enter the quantity of the product or services.
U/M – You can specify the unit of measurement.
Price – Cost price of the product or services.
Discount – Enter the discount percentage.
Account – Enter an expense or asset type General Ledger (GL) account for bookkeeping purposes.
Net Amount – Net amount displays the amount after applying the discount.
Tax Rate – Choose the tax rate from the tax rate drop-down menu. Tax rates are applied in percentage.
Total Amount – The total amount of each line is displayed.
Terms and Conditions – Write terms and conditions in the box below. This will be printed in the PDF version of the Purchase Order.
History and Notes - You can leave your comments in the box.
Attachments - you can upload fields related to the PO.
After you have finished, you can save the PO as draft, print the PDF or Save and Approve (Submit if you have the manager).
[video width="1336" height="646" mp4="https://www.kpi.com/wp-content/uploads/2016/12/add-po.mp4"][/video]
Purchase Invoice
Purchase Invoice
Go to Accounts>>Purchase Invoice list and click on the plus button to add a new Purchase Invoice.
Supplier- Choose a company or an organization or a person you are sending an order from the list of Suppliers. You can also lookup the suppliers from the search box. If there are no suppliers registered in your company you can add new Supplier from Add new link just in the Supplier dropdown.
Date- Indicate the date Purchase Invoice is created (Transaction will be registered on this date in your General Ledger).
Due Date- Indicate the Due Date which you need to pay for bill.
Invoice #- Enter the number of the Purchase Invoice. You can put here the number of the invoice that your supplier send you. Alternatively, you can set up automatic numbering in Accounts Settings.
PO Number – if you have converted the Purchase Invoice from Purchase Order the number of the purchase order will be set here or you can add manually while creating the new Purchase Invoice.
Amounts – Select the type of applying taxes (Tax Exclusive or Tax Inclusive).
Item – Title of the product or service, required field. You can select from existing products/services or type here not listed items.
Description – Description of the product which can be editable.
Qty – Enter the quantity of the product or services.
U/M – You can specify the unit of measurement.
Price – Cost price of the product or services
Discount – Enter the discount percentage.
Asset Acc. – Enter an expense or asset type General Ledger (GL) account for bookkeeping purposes.
Net Amount – Net amount displays the amount after applying the discount.
Tax Rate – Choose the tax rate from the tax rate dropdown menu. Tax rates are applied in percentage.
Total Amount – The total amount of each line is displayed here.
Payment Instructions/Notes – Write Payment Instructions or Notes. This will be printed in PDF version of the Purchase Invoice.
Show Additional Fields - It will open more fields to specify in your invoice like Billing Address, Custom Fields, Accounts Payable, and other fields.
Once you have filled all required fields, you can print the PDF version, Save and Approve or save it as Draft.
 Currencies
The foreign currencies should be set up under Settings>>Accounts>>Currency Rates.
Currencies
The foreign currencies should be set up under Settings>>Accounts>>Currency Rates.
 Employee Payroll Settings
Employees who receive their payruns in a foreign currency should have the right currency set in their payroll profile.
Employee Payroll Settings
Employees who receive their payruns in a foreign currency should have the right currency set in their payroll profile.
 Single Payrun
After you have set up all the currencies, you will be able to generate payruns in other currencies.
Single Payrun
After you have set up all the currencies, you will be able to generate payruns in other currencies.
 For group payruns, add the employee payroll groups who need payruns in a foreign currency from Settings>>Payroll>>Payroll Groups.
 While adding the fixed asset, under the Financing Account, choose the account you have chosen while creating the Purchase Order.
 Once the upload is complete, the file's data will show up on the screen. You can deselect some of the column which you do not need and decide what type of data they contain whether it is numeric, money, or date. Click "Import".
Once you have successfully imported, you will be able to filter the report, customize the column, create chart, create summaries and so on.
Once the upload is complete, the file's data will show up on the screen. You can deselect some of the column which you do not need and decide what type of data they contain whether it is numeric, money, or date. Click "Import".
Once you have successfully imported, you will be able to filter the report, customize the column, create chart, create summaries and so on.
 After that create a single payrun or a group payrun. Once you approve the payrun, the debit and credit balances will be updated accordingly. Then you can go to Accounts>>Transactons>>Manual Entries page and create a transaction for the paid salaries.
 It is important to tick the option “Yes” for the “Is your business registered for VAT” and enter your TRN number.
Check “ ” box if you are doing business with other GCC/Non-GCC countries and also for reverse charge handling.
You will have tax and financial settings correctly set up in your account. On the Settings>>Accounts>>Tax Rates section, you will have 4 types of taxes already created for you that are available in UAE: Zero Rate, Standard Rate, Out of Scope and Exempt.
It is important to tick the option “Yes” for the “Is your business registered for VAT” and enter your TRN number.
Check “ ” box if you are doing business with other GCC/Non-GCC countries and also for reverse charge handling.
You will have tax and financial settings correctly set up in your account. On the Settings>>Accounts>>Tax Rates section, you will have 4 types of taxes already created for you that are available in UAE: Zero Rate, Standard Rate, Out of Scope and Exempt.
 Zero Rate tax is applied for:
 Then go to the Bill of Materials page and list the bill of materials needed
Item - the name of the material needed
Planned Quantity - the quantity needed to complete the project
U/M - unit of measurement
Price - the unit price of each bill of material
Requested Before - the quantity requested before this in the project
Requested Quantity - the quantity you are requesting/you need now.
Then go to the Bill of Materials page and list the bill of materials needed
Item - the name of the material needed
Planned Quantity - the quantity needed to complete the project
U/M - unit of measurement
Price - the unit price of each bill of material
Requested Before - the quantity requested before this in the project
Requested Quantity - the quantity you are requesting/you need now.
 As soon as you submit the bill of materials to the manager, company directors will be informed about it via email. The director can then click the link sent in the email notification and approve or reject the requested bill of materials for purchase and convert the requested bill of materials to "Request for Purchase".
 The Request for Purchase, after the approval, can be converted to a Purchase Order.
 After the purchase order is sent to the supplier, the purchase order will be shown as project expenses under the project budget sheet.
 When you choose the related employee name and save the incident, it will be available in that employee's profile. The status field helps you to track whether the incident is new, under progress or resolved.
 After you have filled in the quote form, you can:
 Progress invoicing - (also called progress billing, percentage of completion billing, or partial billing) Progress Invoicing enables you to create an invoice from a sales quote by billing your customer for a percentage of the original quote.
In order to generate Progress Invoicing go to the Sales Quote Add Form and tick Progress Invoicing on right-top. For more detailed information click here.
Progress invoicing - (also called progress billing, percentage of completion billing, or partial billing) Progress Invoicing enables you to create an invoice from a sales quote by billing your customer for a percentage of the original quote.
In order to generate Progress Invoicing go to the Sales Quote Add Form and tick Progress Invoicing on right-top. For more detailed information click here.