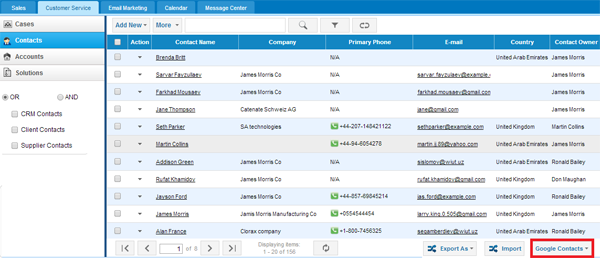
In kpi.com you can synchronize your contacts in the system with the contacts in Google. The procedure of setting synchronization is simple and requires just a few steps to complete.
To configure synchronization go to CRM >> Customer service/Sales >> Contacts and click on the synchronize button, located at the bottom right-hand side of the window and click on the configure.
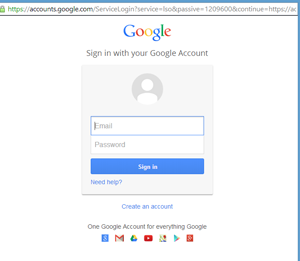
If you are using one of the Google accounts in your browser, a pop-up window shows your Google accounts. Choose the Google account with which you are going to synchronize and proceed. Alternatively, if you have not signed in any Google accounts you can sign in the following pop-up window.
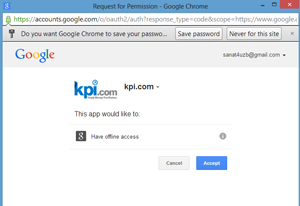
After signing in to your account, the following window will appear where you should confirm that you agree that system will be synchronized with your Google account.
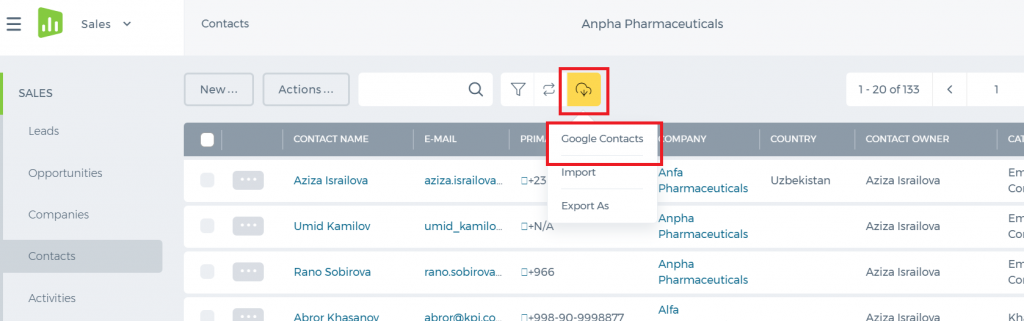
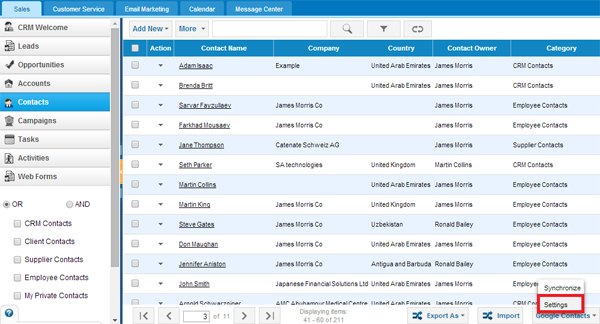
After accepting the term, pop-up window redirects you to the kpi.com system. Before synchronizing system contacts with Google contacts, you should set your kpi.com account settings for synchronization. For that, click on the Google Contacts and choose the Settings
Following box will appear where you should match system contacts’ group with Google contacts’ group.
Save the settings and click on the synchronize button and system starts synchronizing with Google Contacts. It may take a few minutes depending on the number of contacts in the system.
Campaigns
Campaigns
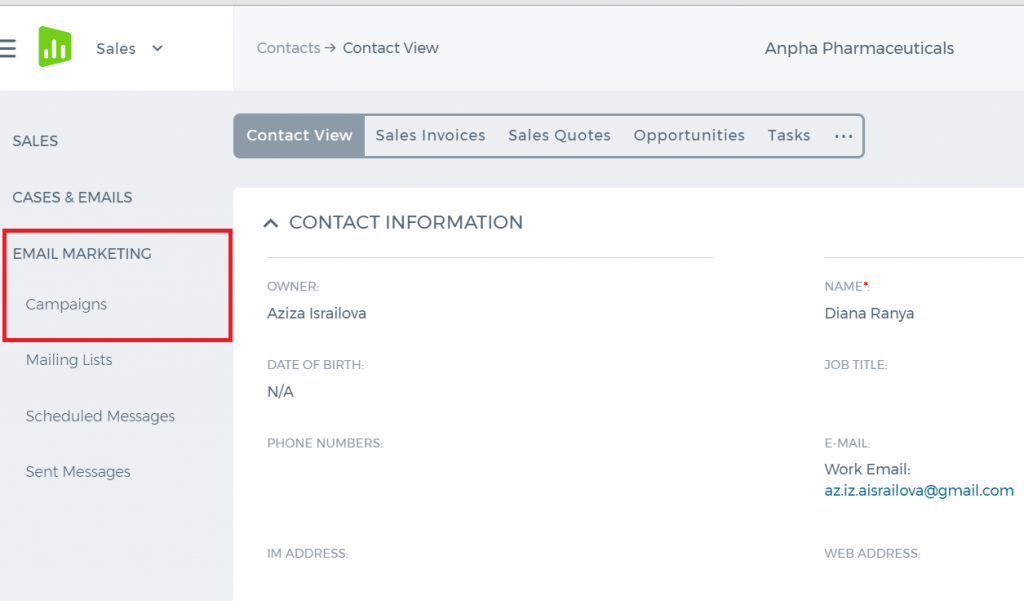
Campaigns are all the marketing and advertising activities that promote your business and generate potential customers. This list contains the campaigns that you have launched.
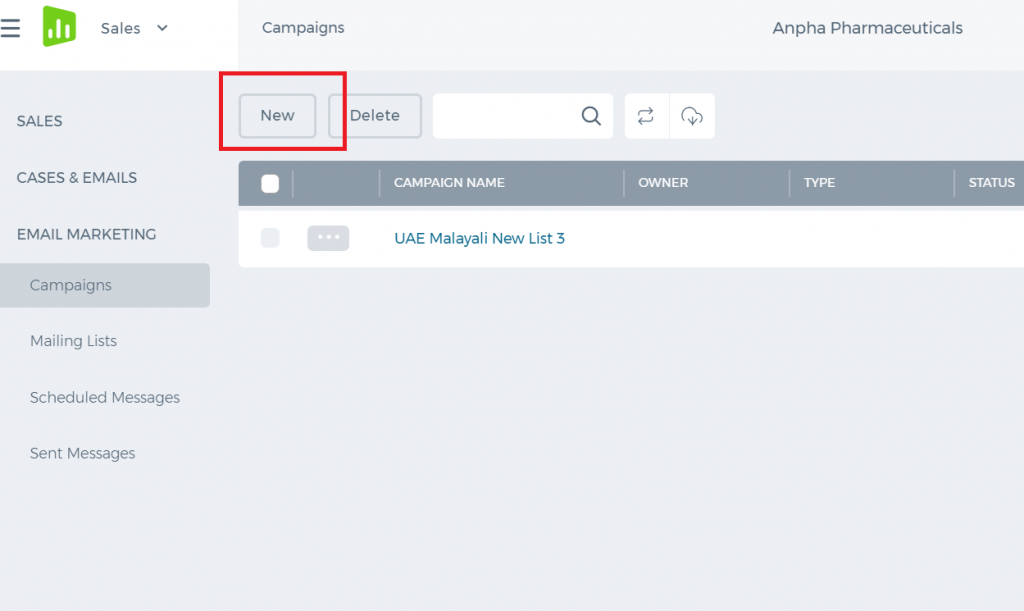
Add New Campaign
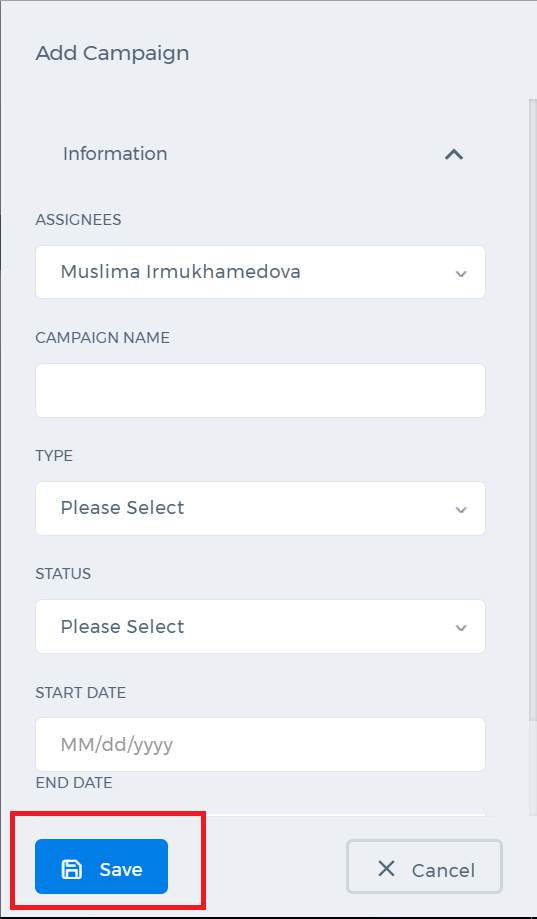
To add a new campaign to the list, you need to click Add New on the top menu and fill in the form which appears on your screen. Once you have finished the form, you may click Save & New, Save & Close or Cancel.
Edit Information of Campaign
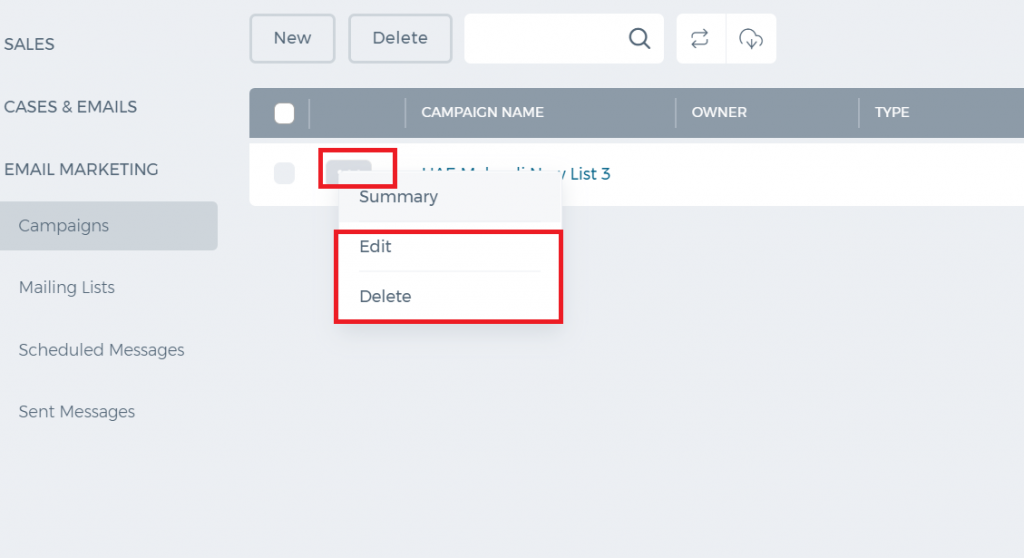
To edit your campaign, click on the Actions drop-down and choose the Edit Campaign feature. The form for your campaign will appear. Make your changes and save the changed campaign form.
Delete Campaign
The Delete function is located in the Actions drop-down of each campaign.
Web Forms
Web Forms
Web Forms allow you to create a contact form and place it on your website (e.g. “Request a sales quote” form). Once the website visitor fills in the form, a Case or a Lead is created in kpi.com CRM.
Add New Web Form
To add a new Web Form, go to Web Forms subsection, and click New Web Form button on the top-left side of the page, fill in the form and click Save button.
Actions List
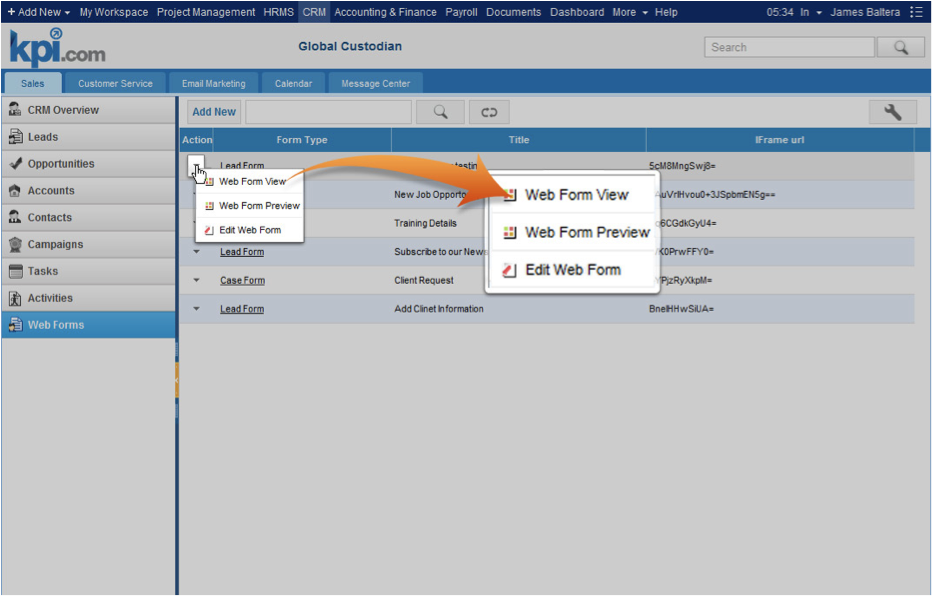
Action dropdown is located next to each Web Form in the list. The dropdown gives several options as displayed on the screenshot:
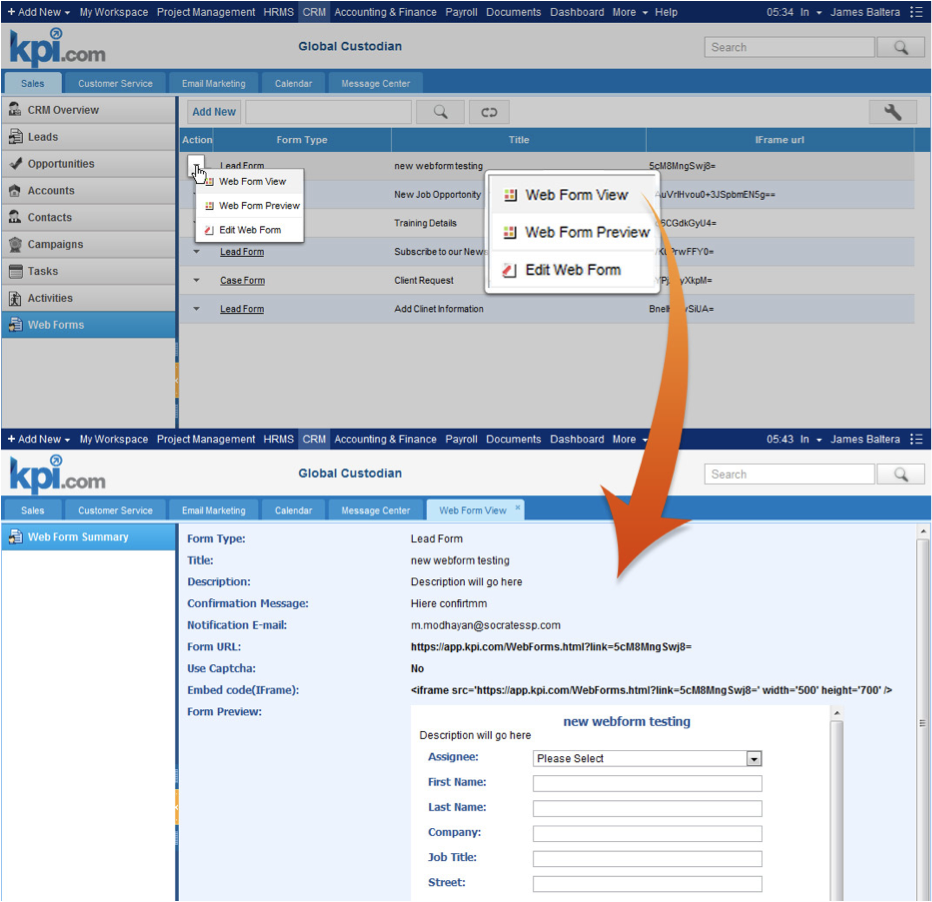
Web Form View
Click the Web Form View button from the Action dropdown to view the full web form information in a new window. Alternatively, you can click the web form name to view the web form details.
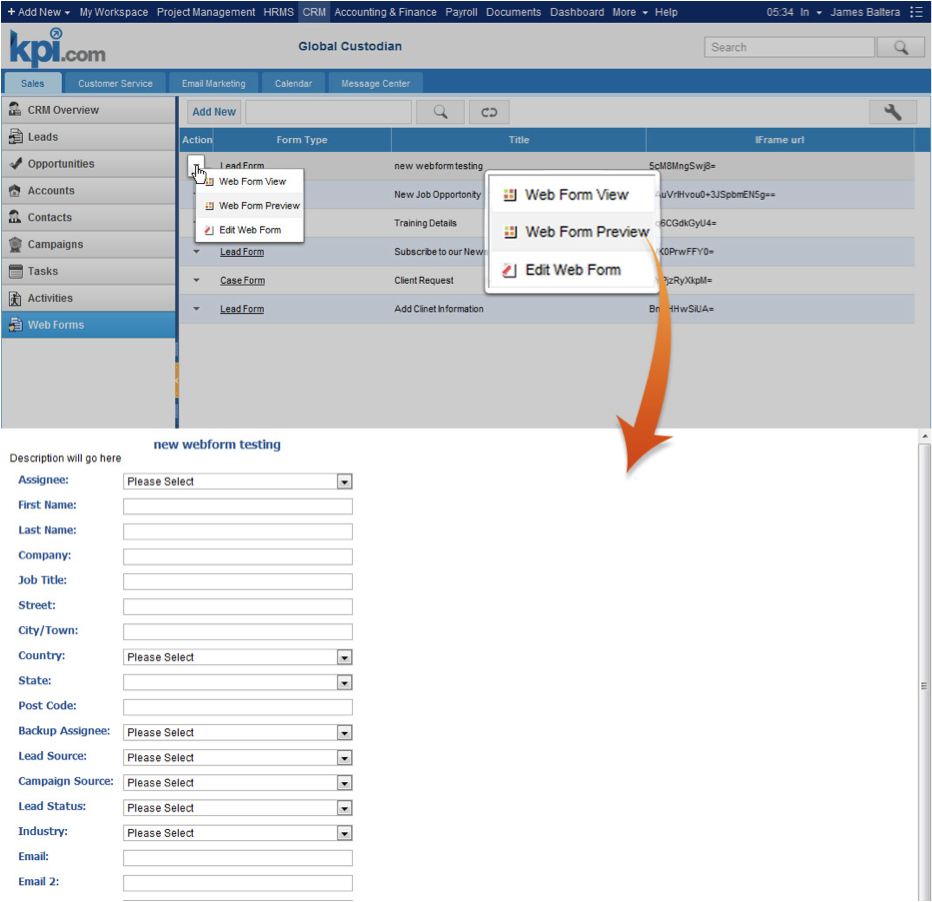
Web Form Preview
Click the Web form Preview option to preview the web form as it is displayed on a web page.
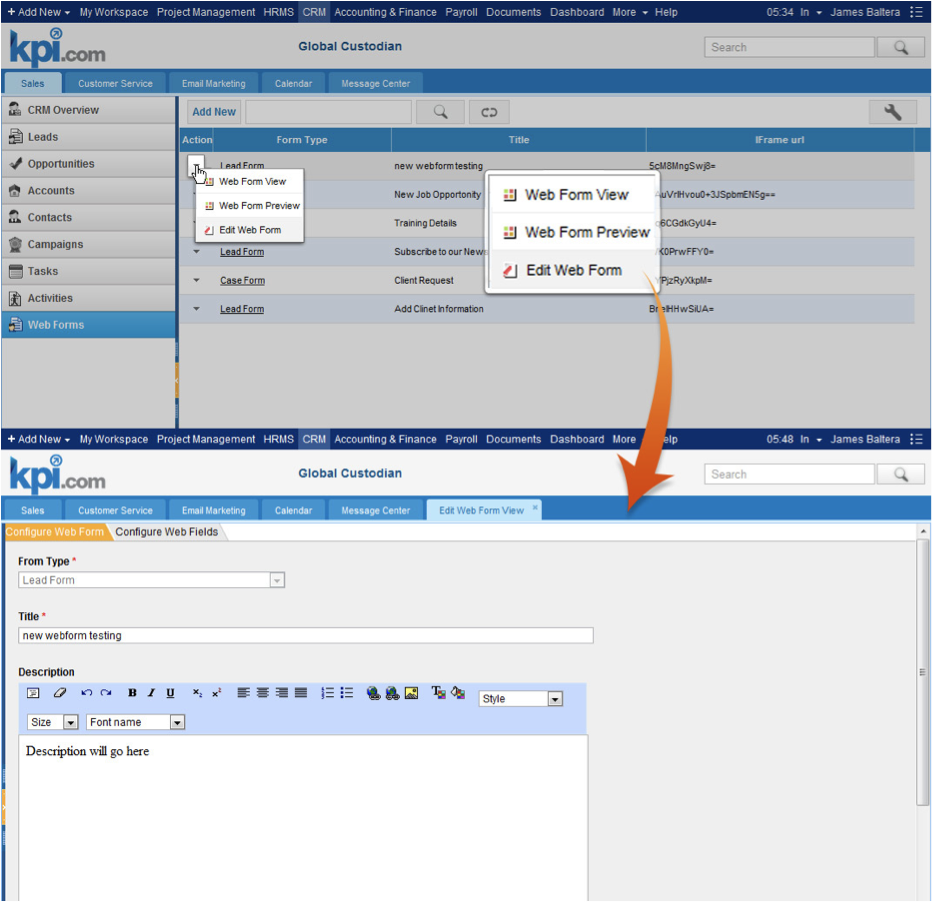
Edit Web Form
Select the Edit Web Form option from the Action dropdown make changes to the Web Form.
Companies
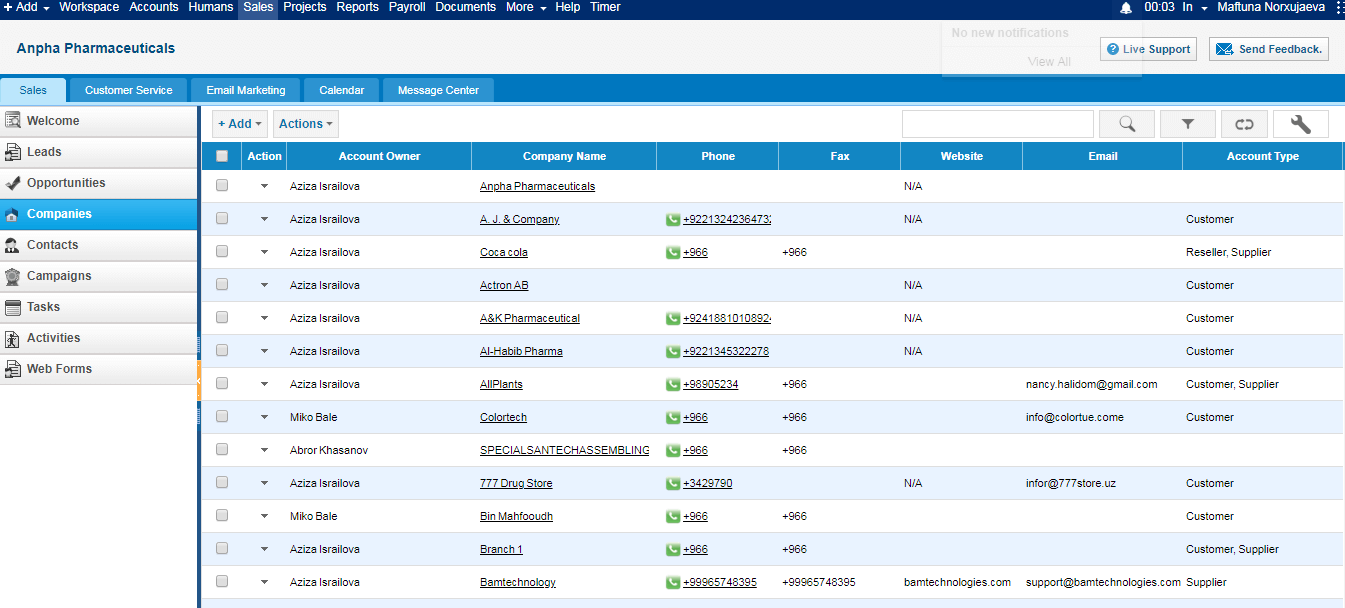
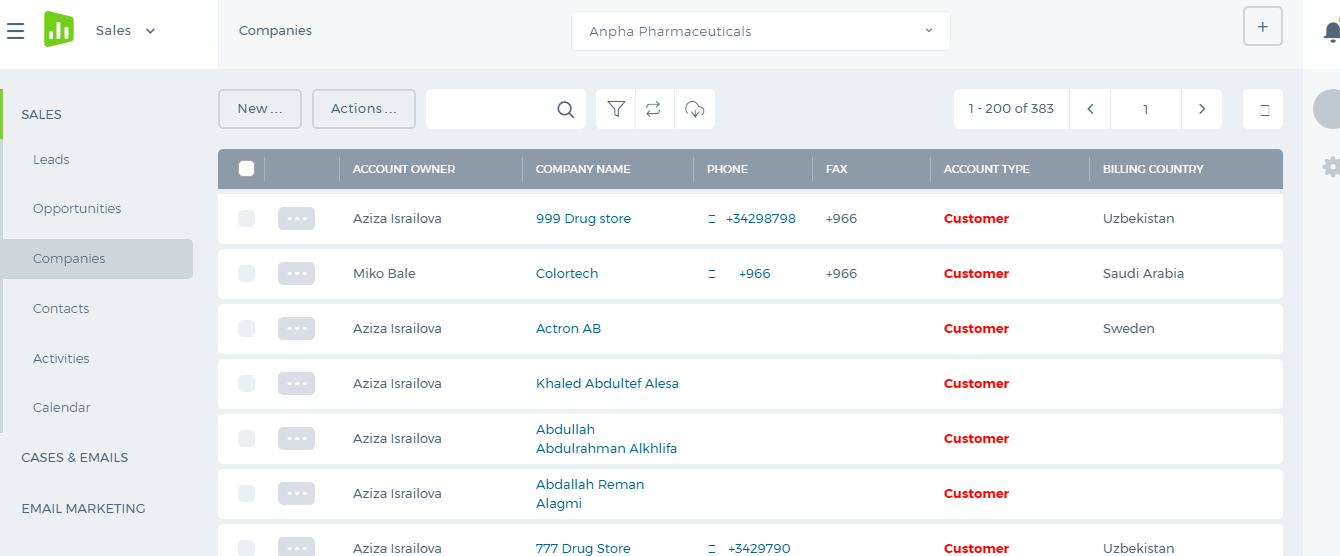
Companies
Companies are company details of your customers, suppliers, re-sellers and etc. Companies can relate to several contacts (representatives of accounts whom you can contact to deal with the company).
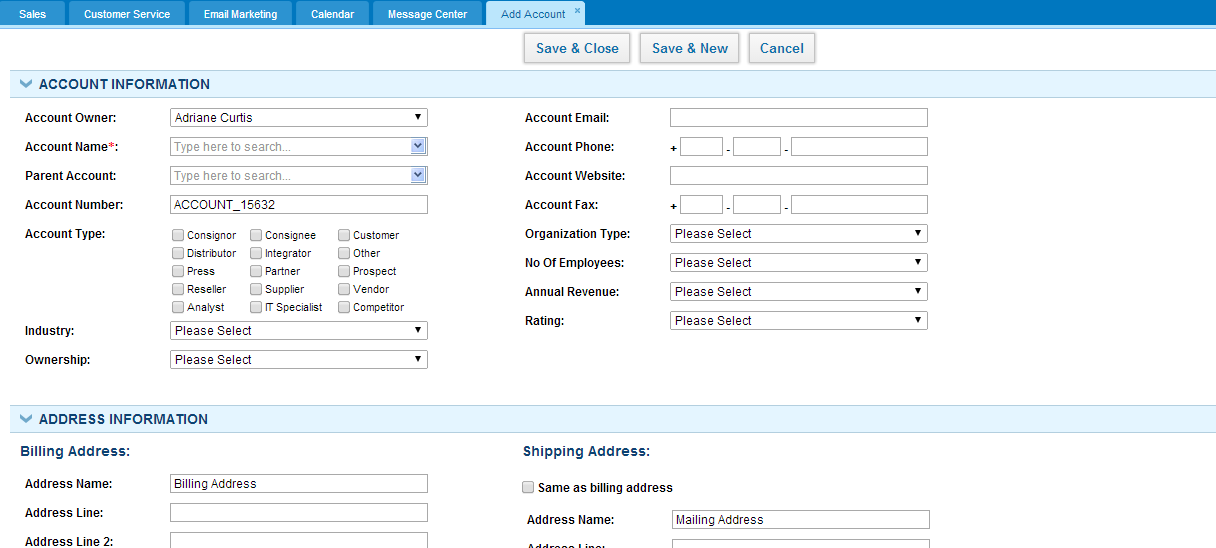
Add a CompanyTo add a new company, supplier or client, click Add New and choose one of them. Then you need to complete the form filling in the required fields.
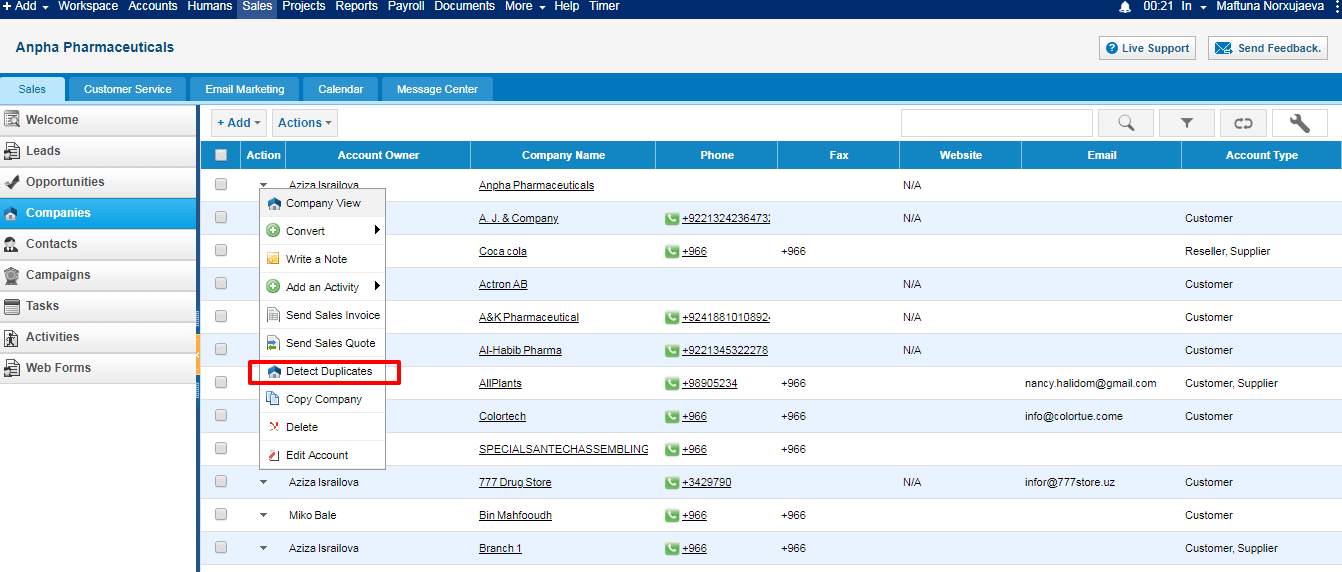
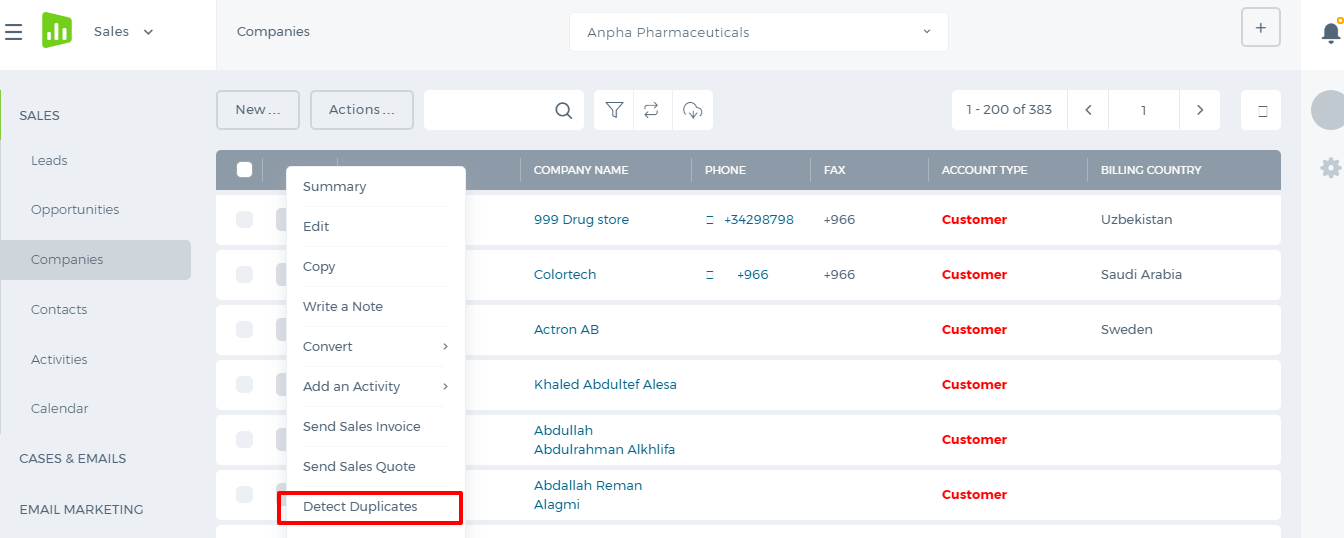
Detect Duplicates
This is one of the options in the Actions dropdown list. Select the accounts from the list and click the Detect Duplicates function. The duplicated accounts list will be shown on your screen.
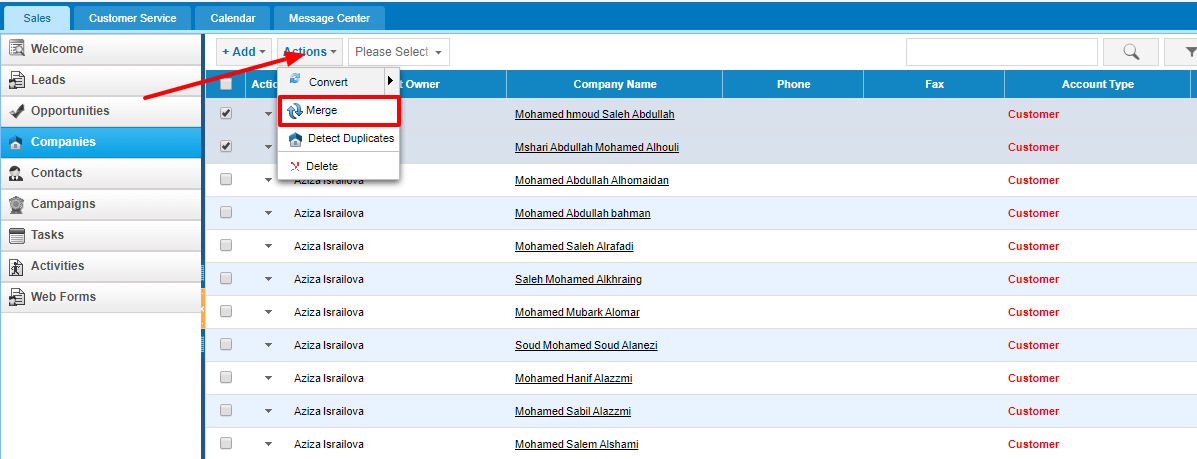
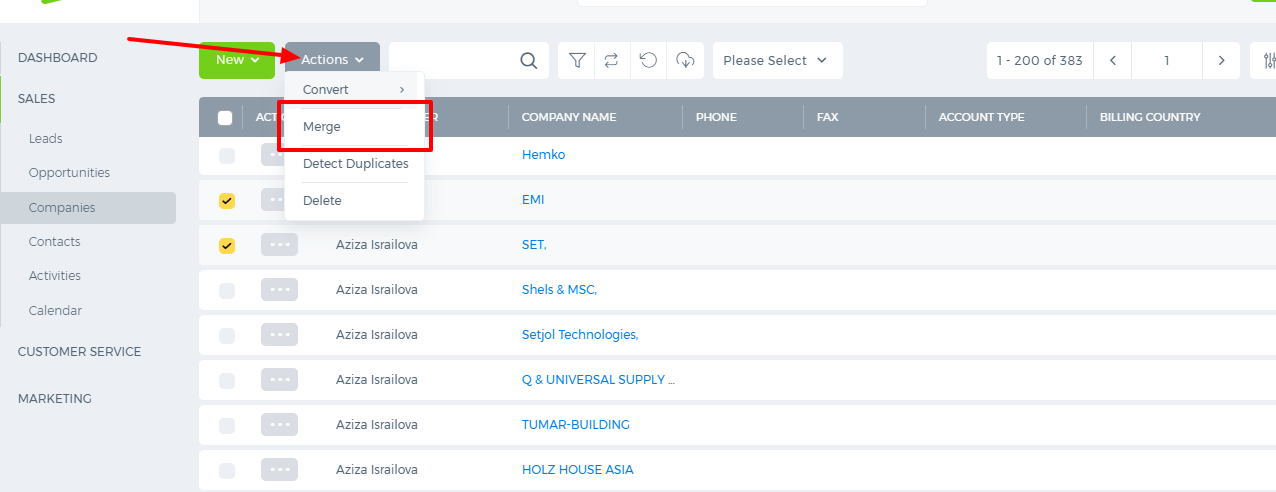
Merge Companies
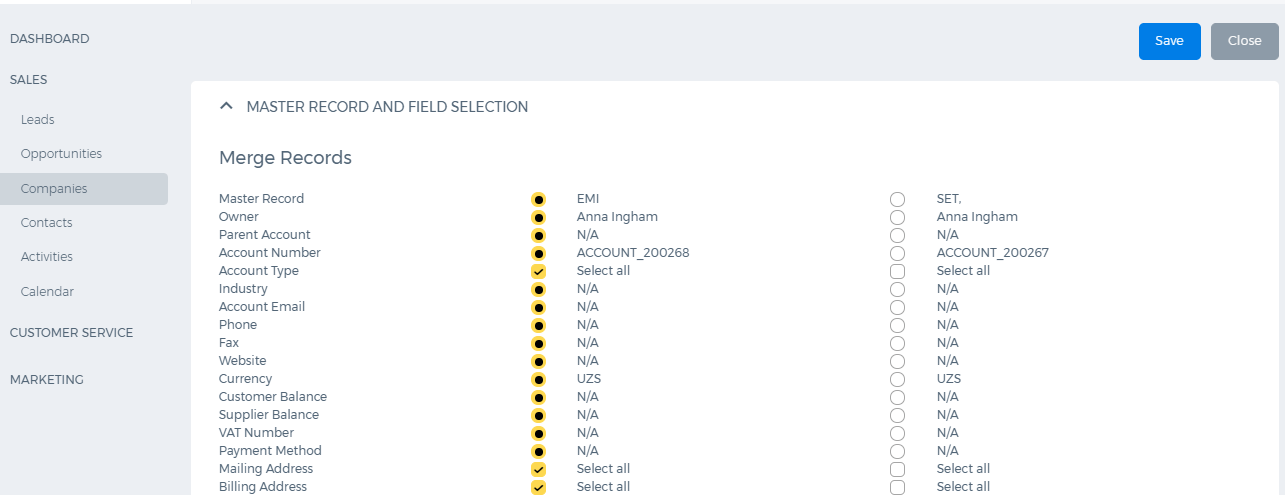
After you have detected the duplicates, select them and choose Merge option from the Actions.
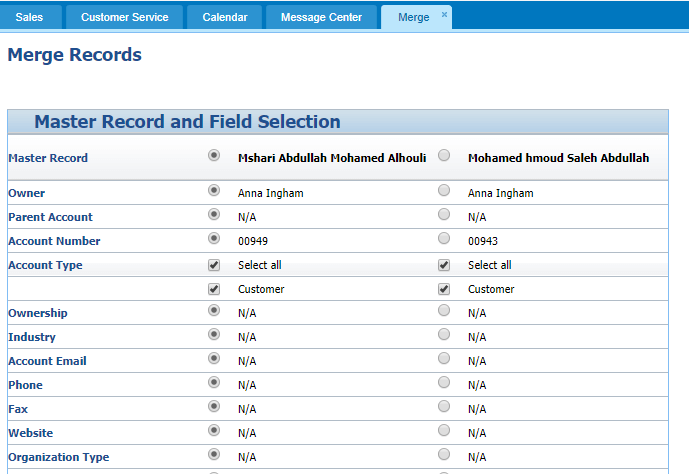
Then select the fields that should be merged and click Save&Close.
Activities
Activities
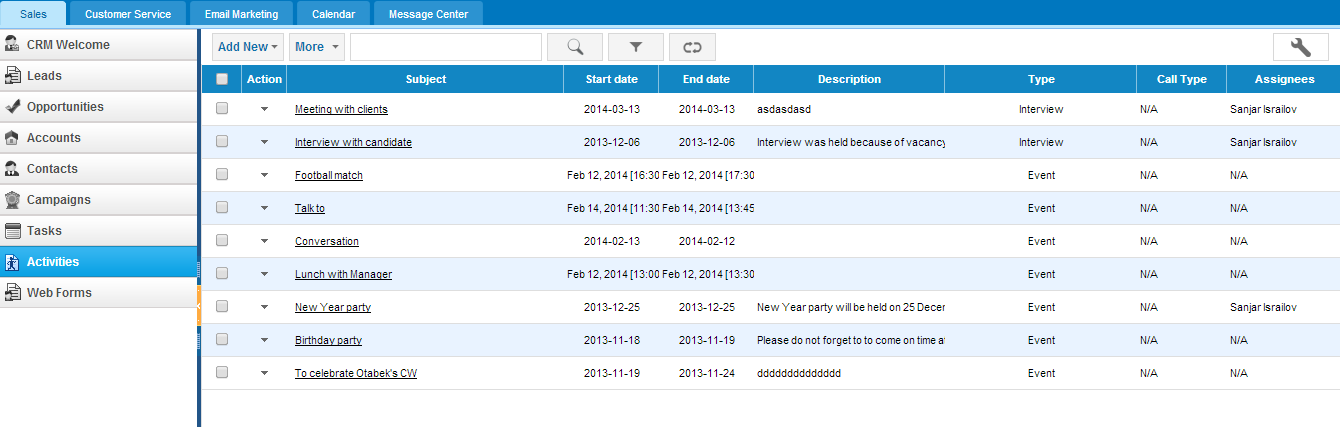
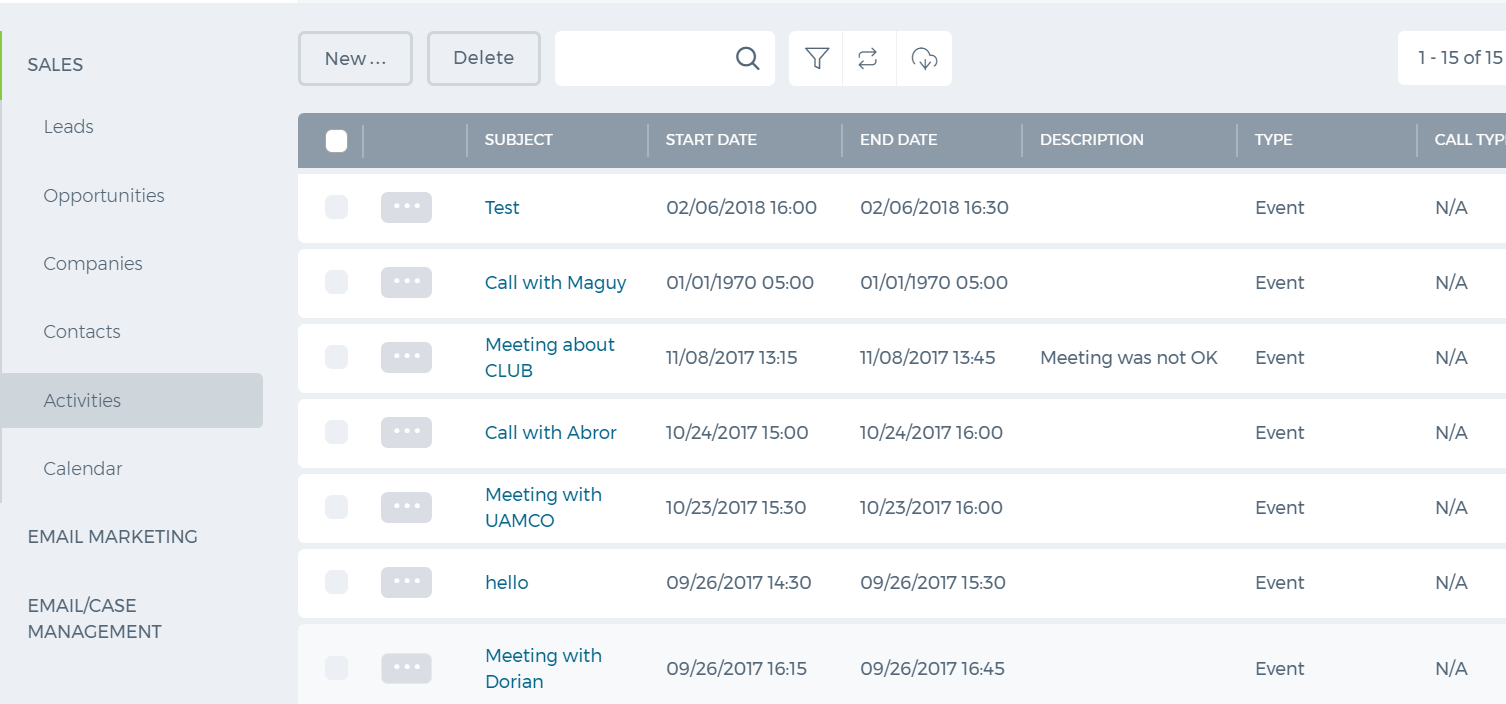
This feature saves all your actions on your Leads, Contacts and Accounts such as calls and events. You can add anEvent or Log a Call on this page.
View/Edit Activities
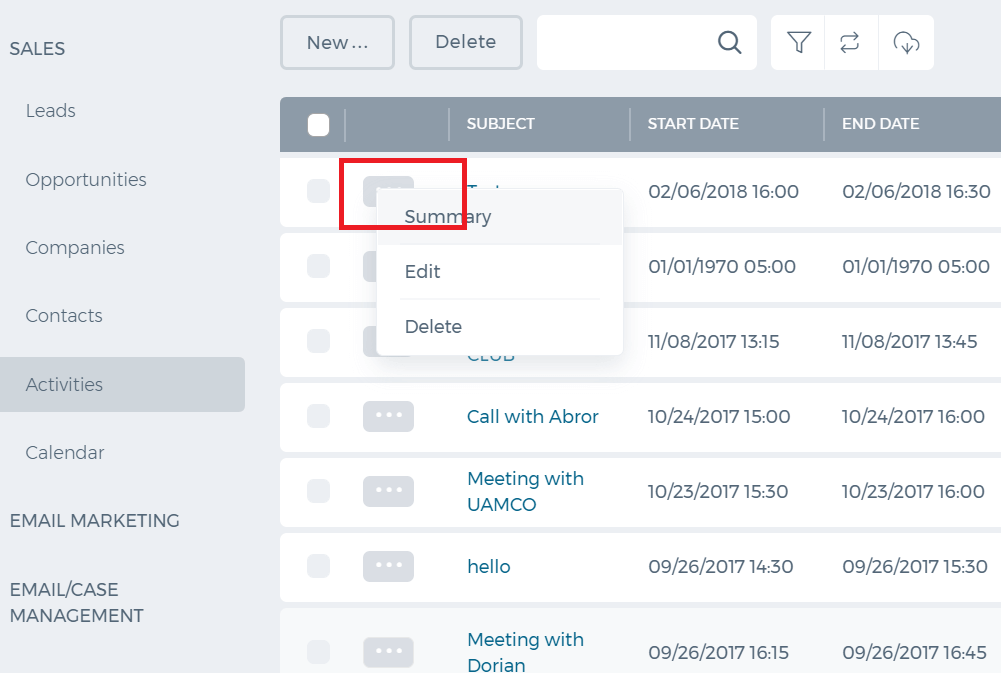
These two features are located in the Actions drop-down of the Activities section.
Delete Activities
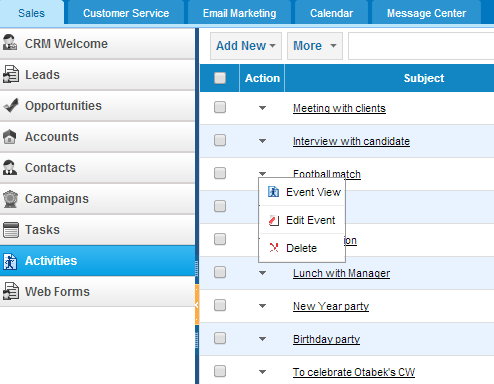
Open the Actions list and click the Delete option.
Edit Activities
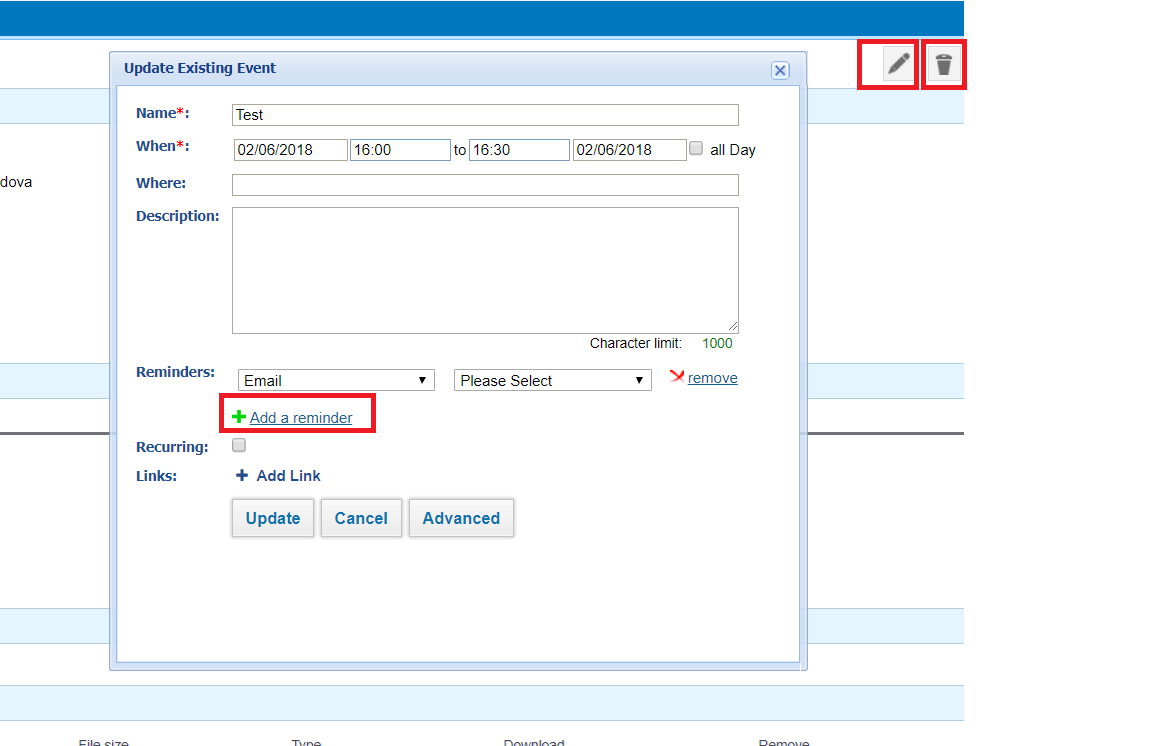
You can edit an event by pressing Edit Event option in the Action list or while viewing an event by clicking on the pencil in the right of the screen. Here you can make any changes related to the event.
When you click for editing, a window appears with detailed information about an event: name, time and location and etc.
In reminders, you can choose an email option and set time - which means how much time before it should remind the user about the event.
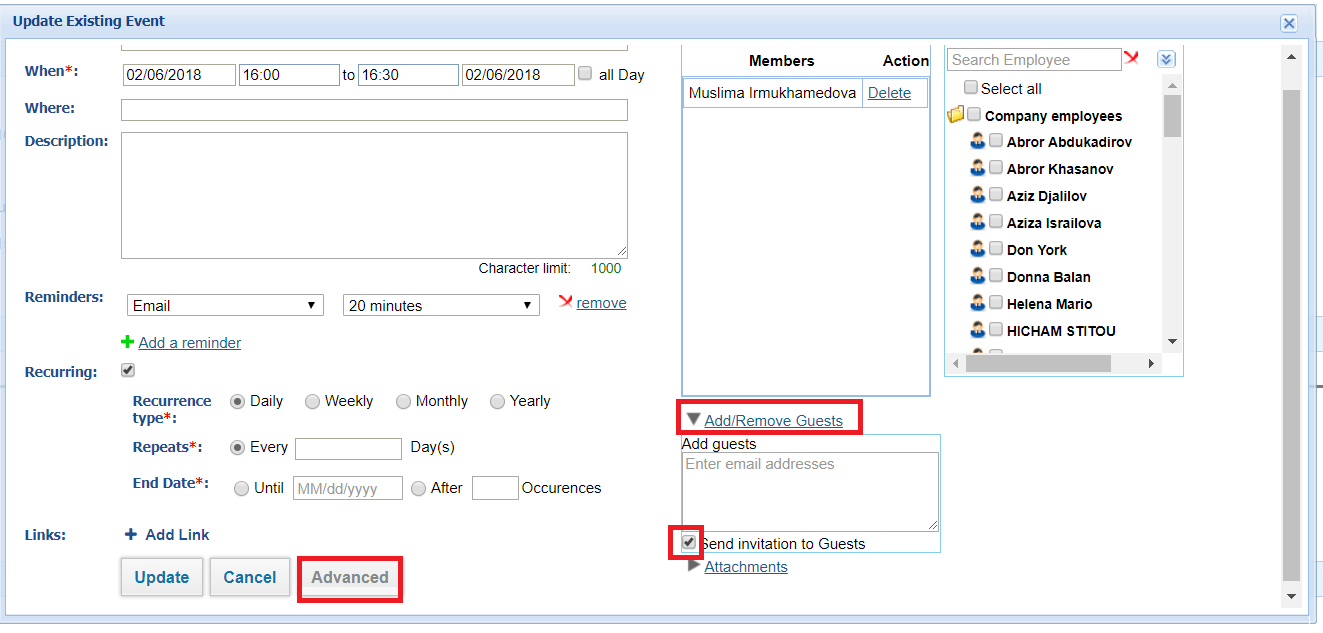
Recurring option helps you create the same event repeatedly.
There is an option Advanced with which you can share the event with your employees - it's showing in the top of the window and guests who are not employees by adding their emails. If you tick Send invitation to Guest, your guests will receive an invitation automatically to their emails.
Tasks
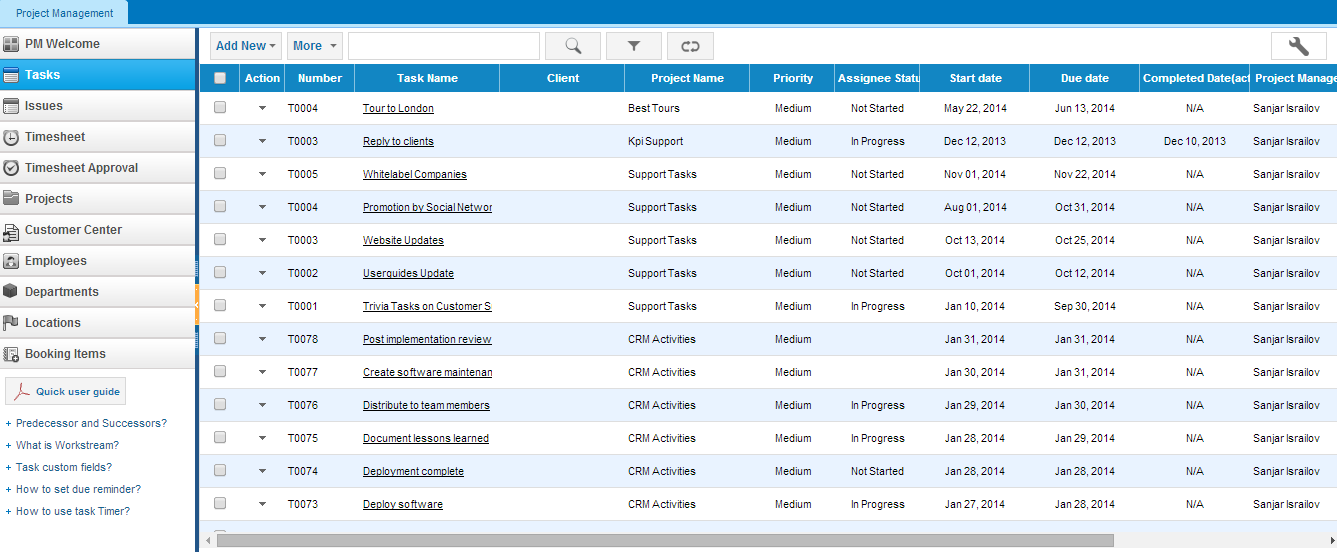
Tasks
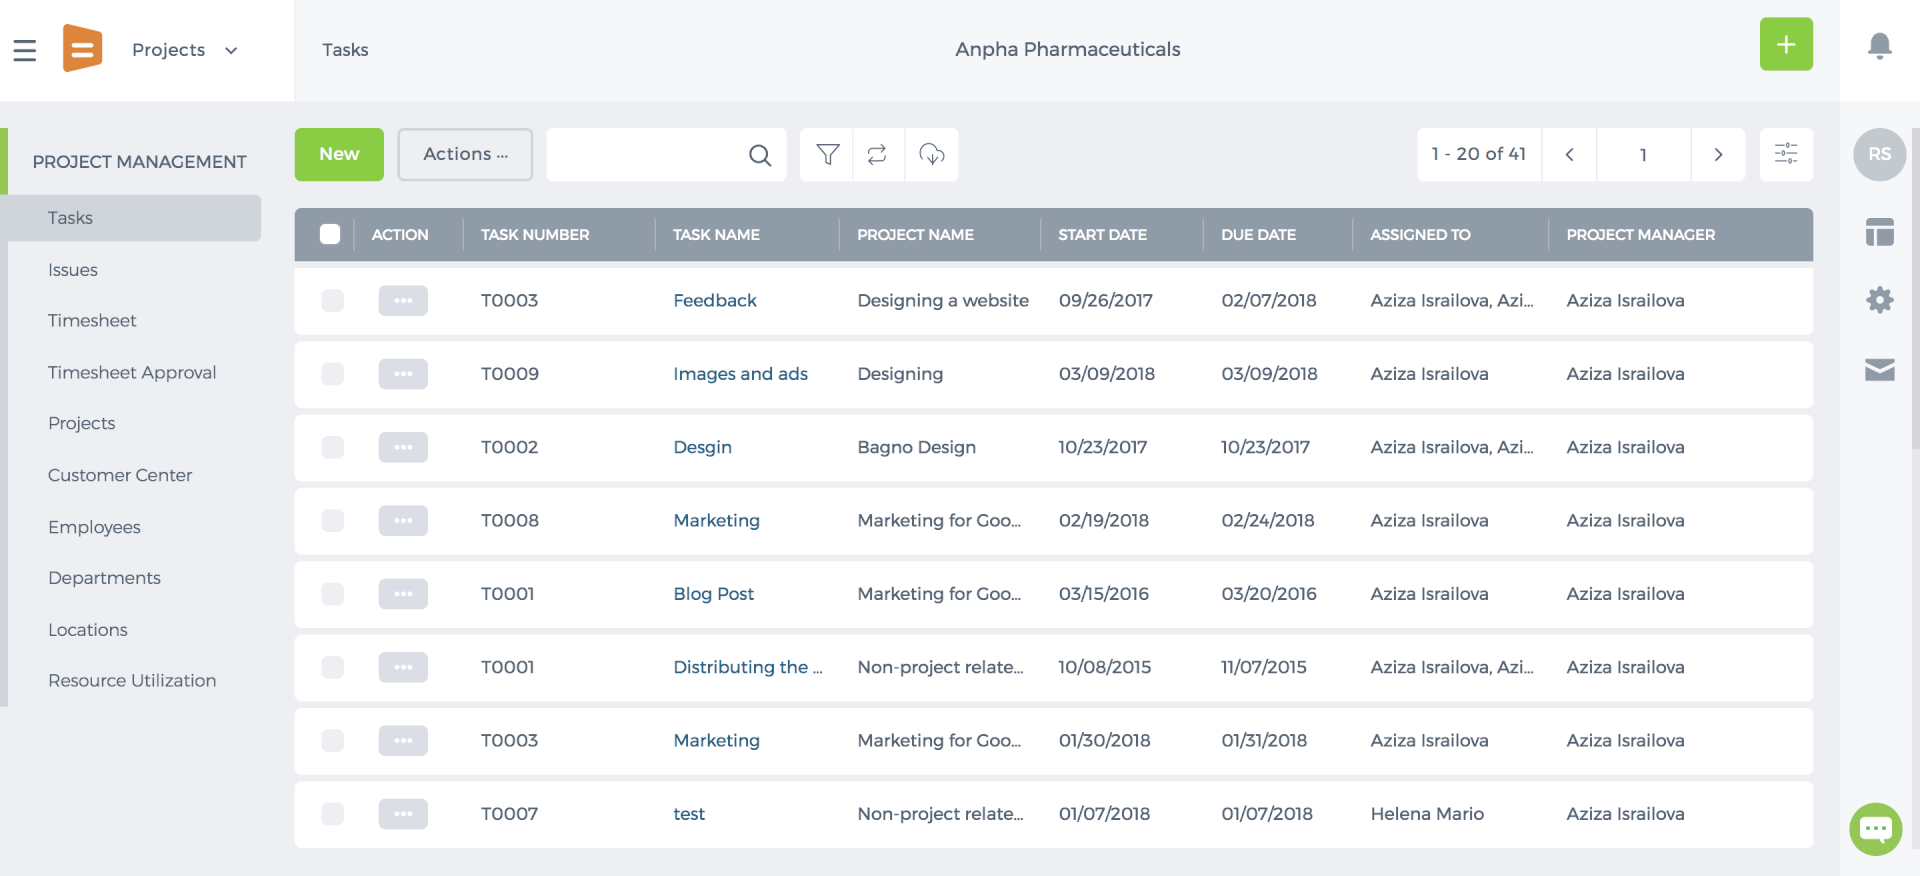
The Tasks section in the CRM is the same as in the Project Management Module. It reflects all tasks that are related to particular projects.
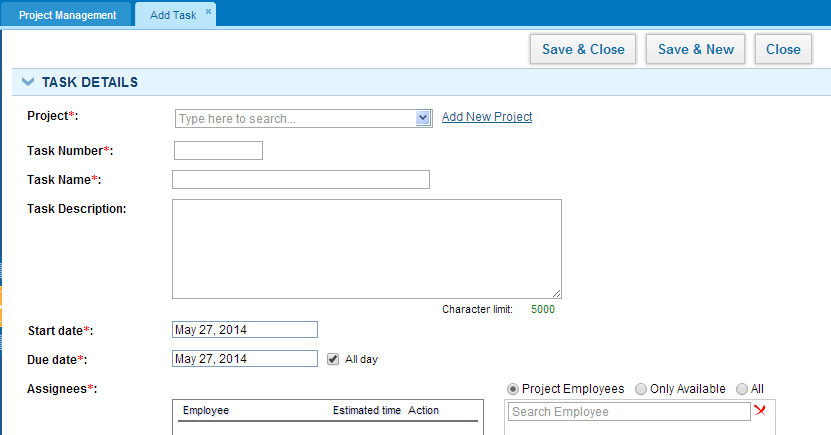
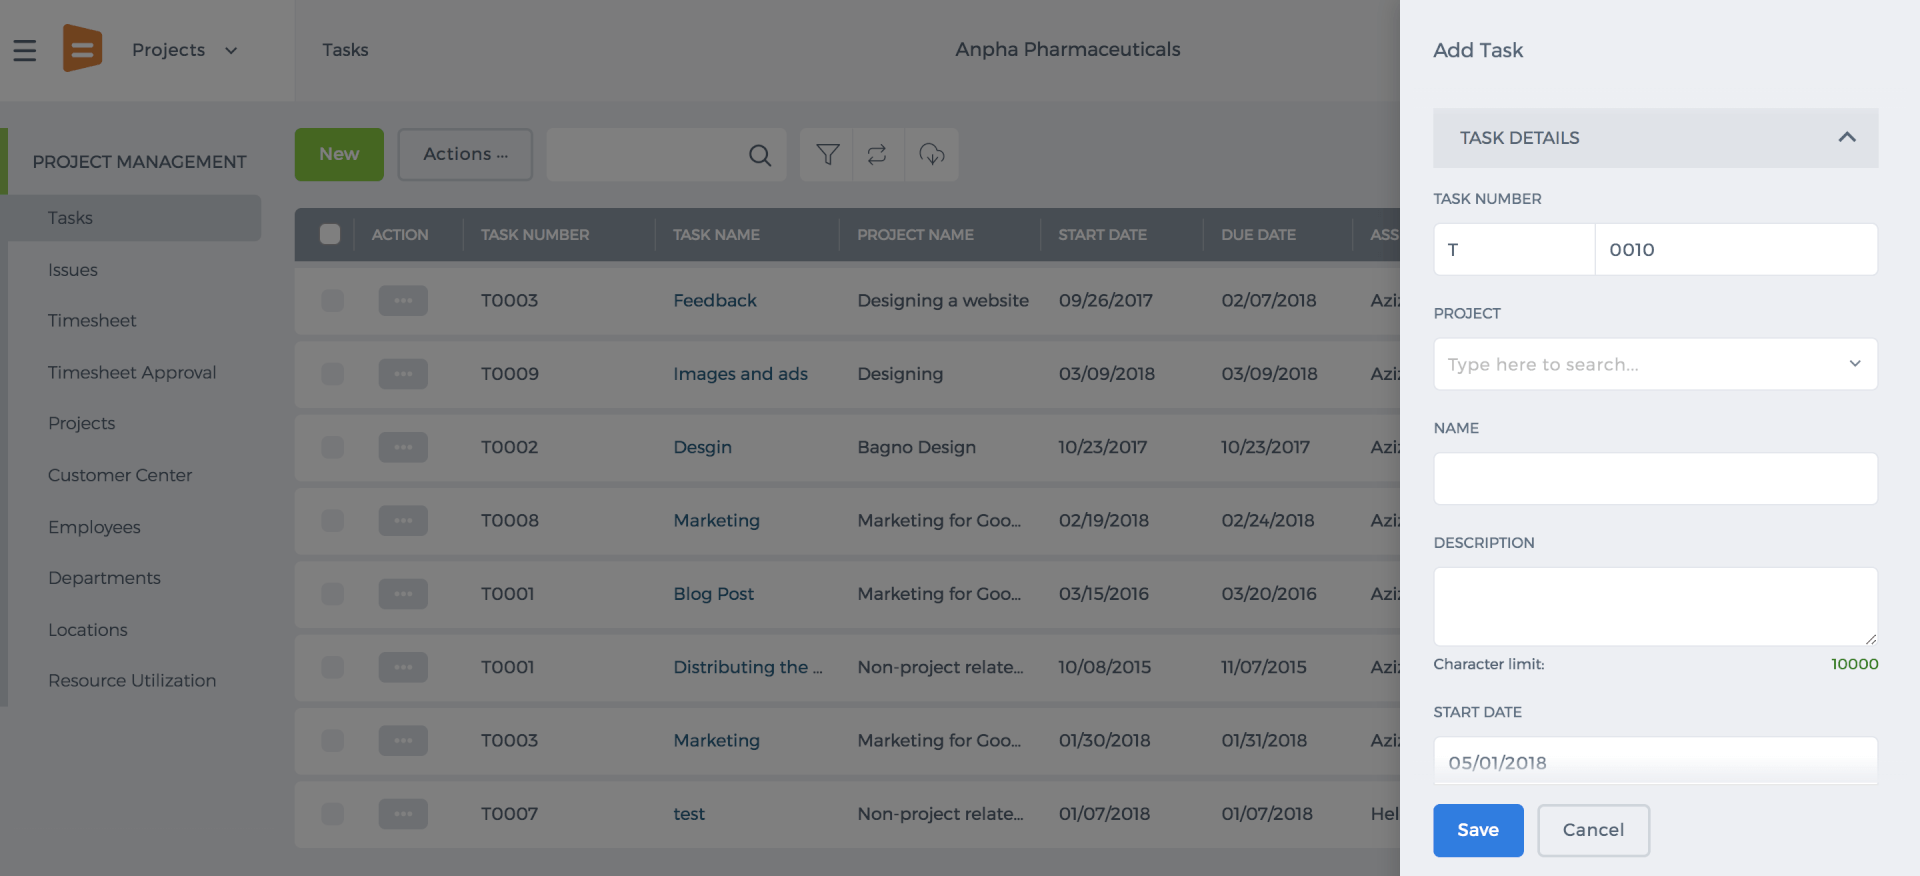
How to add a new task
To add a new task, go to the Tasks subsection and click Tasks in the Add New dropdown from the top menu. You need to fill in the form and click Save & Close.
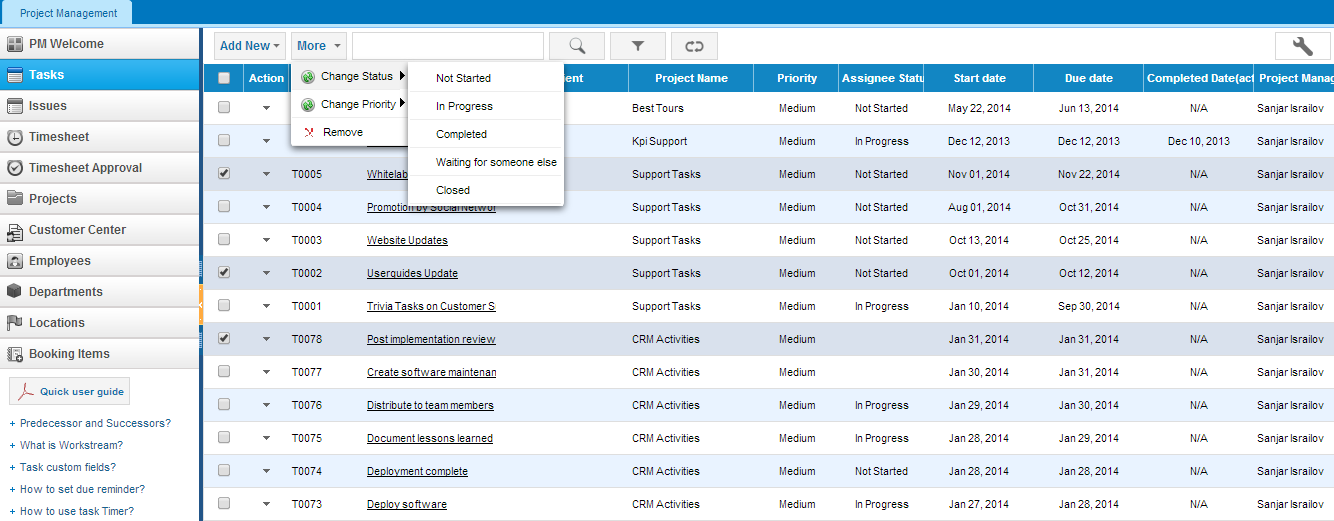
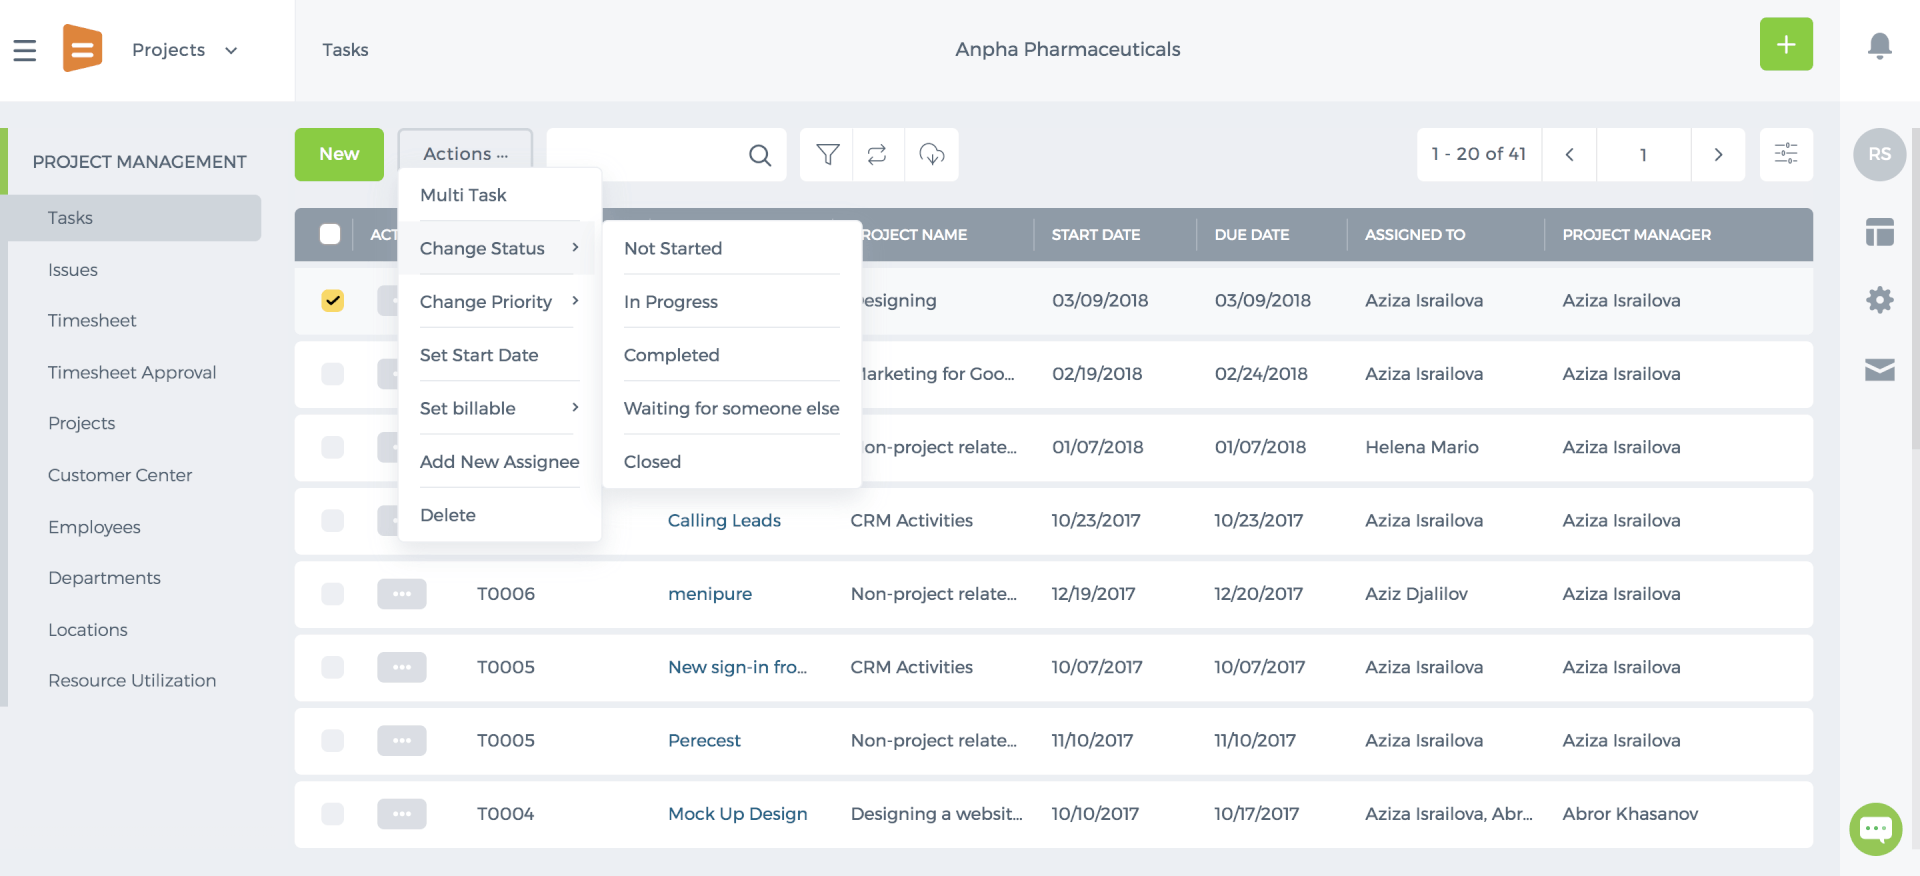
Change Task Status
Select the tasks from the list and open the More/Actions dropdown in the top menu and click Change Status. There are several options for a status change: Not Started, In Progress, Completed, etc.
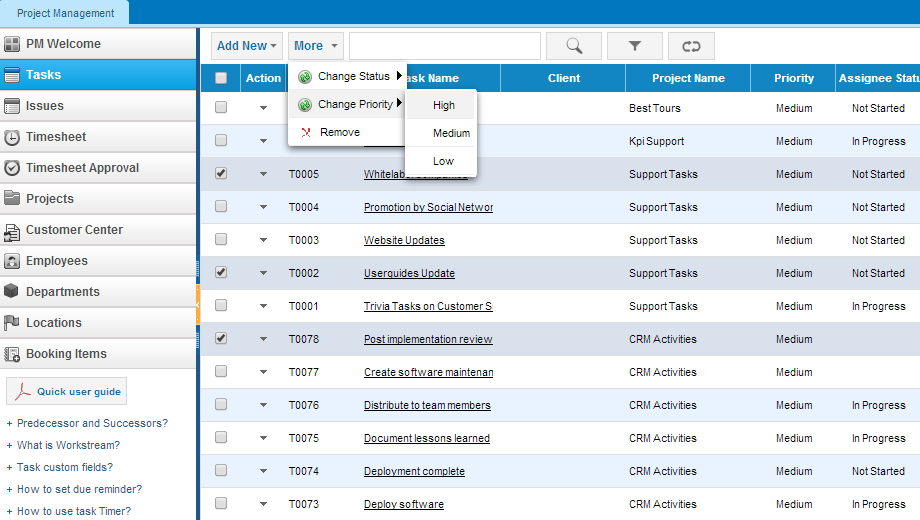
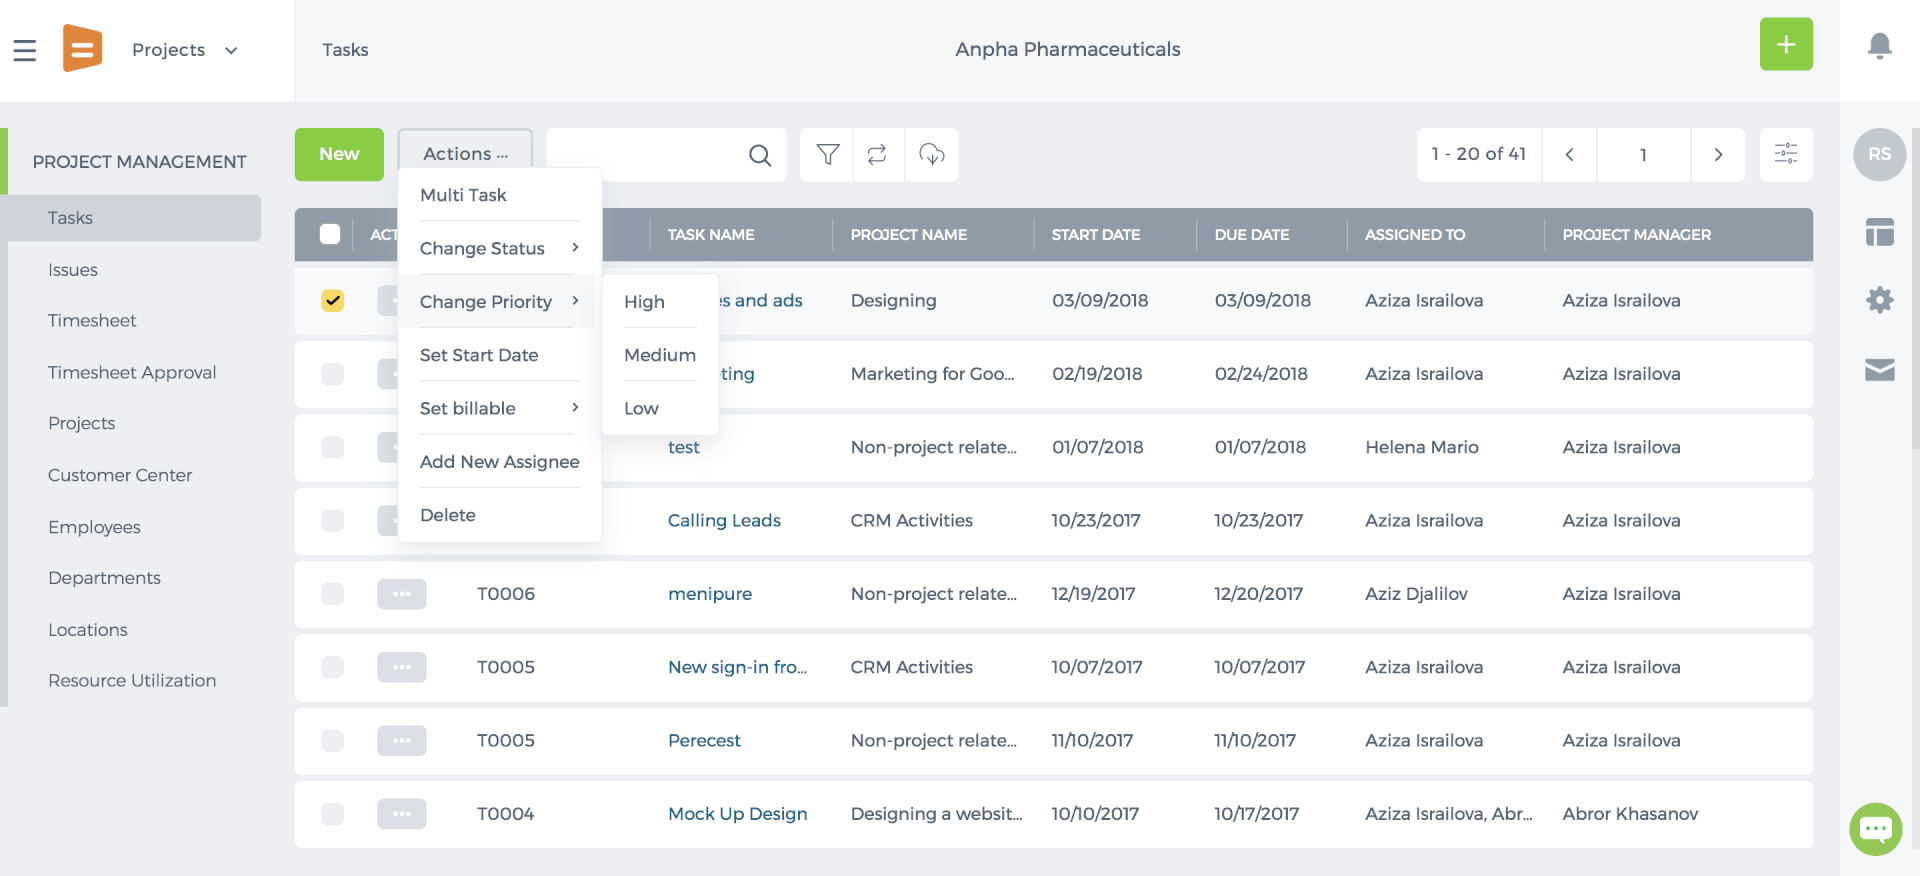
Change Task Priority
The Change Priority function is located in the More dropdown in the top menu which gives three options: High, Medium, and Low.
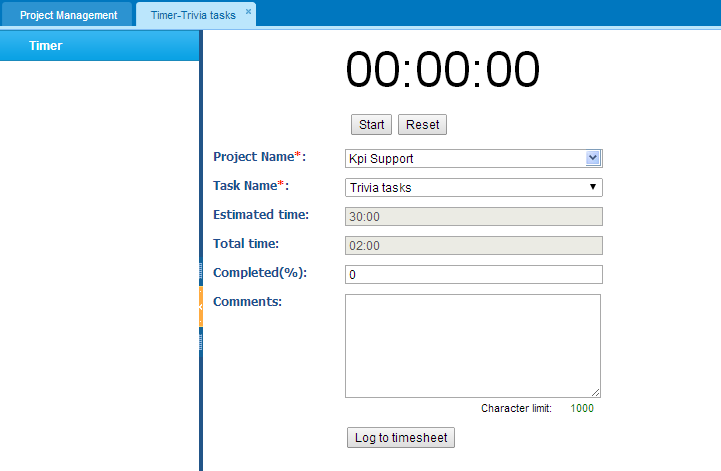
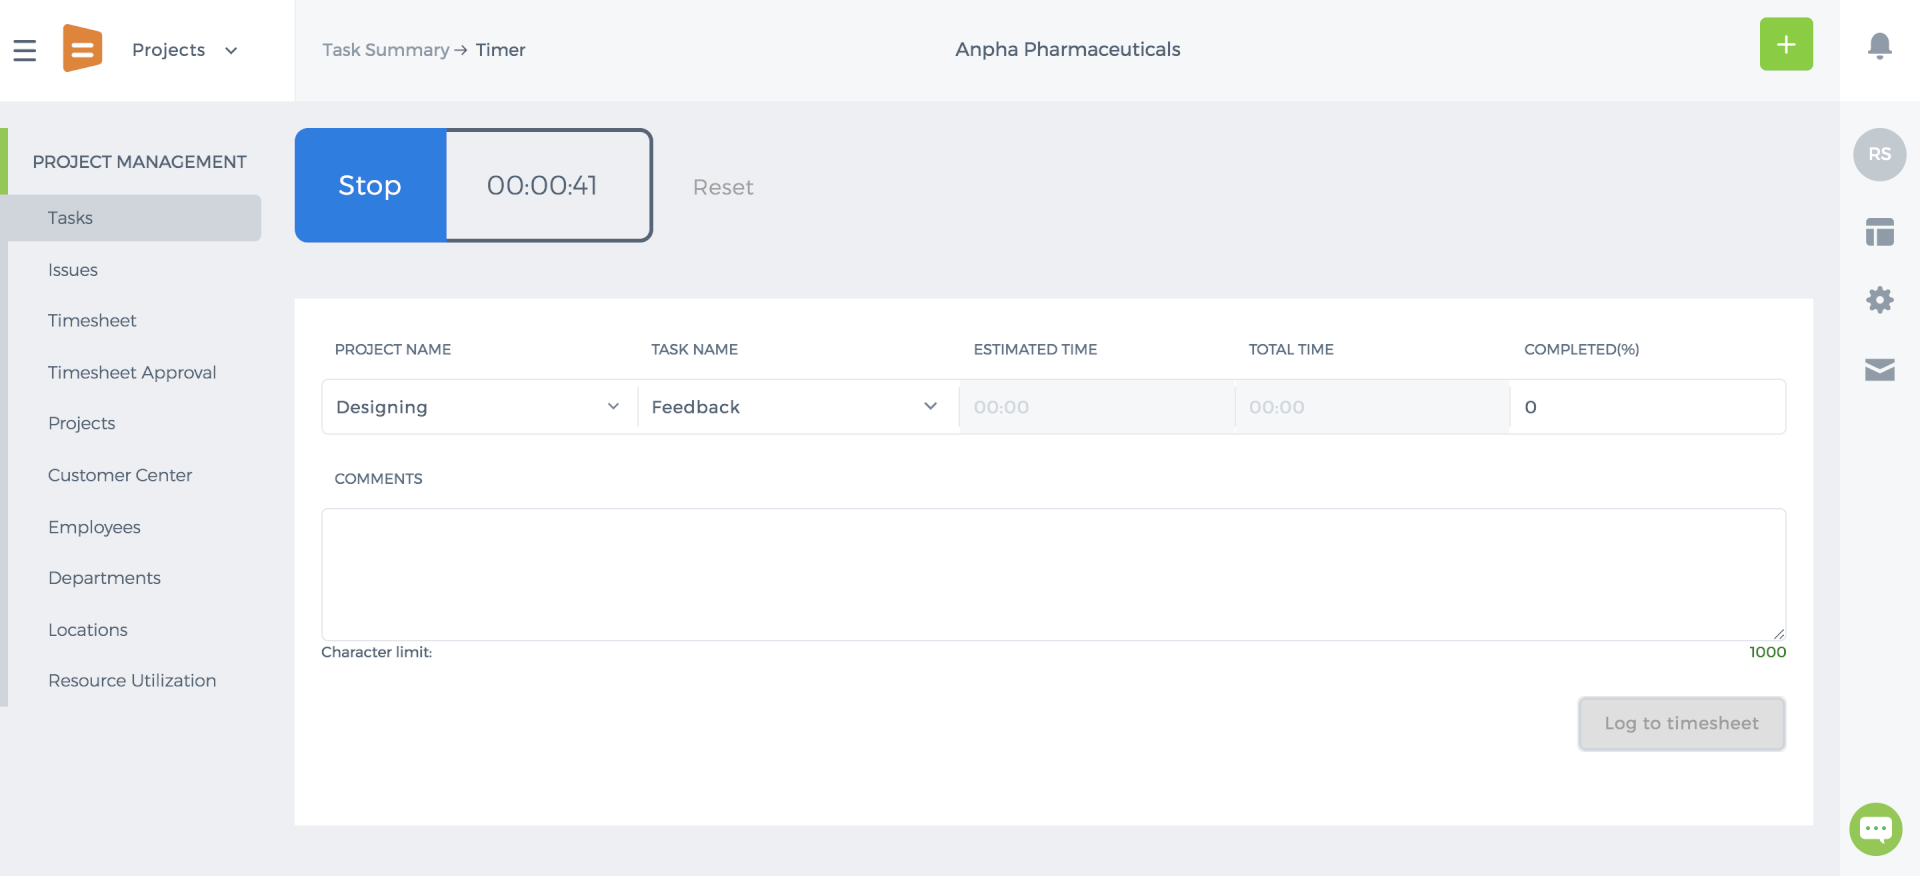
Timer
This function can be found in the Actions list of each task. A timer will help you calculate the time you spend on a task. Click Timer and Start to begin the timer. You can click Stop to discontinue it. Clicking the Log to Timesheet feature, the calculated time spent on the task will be saved in the Timesheet form in the Project Management Module.
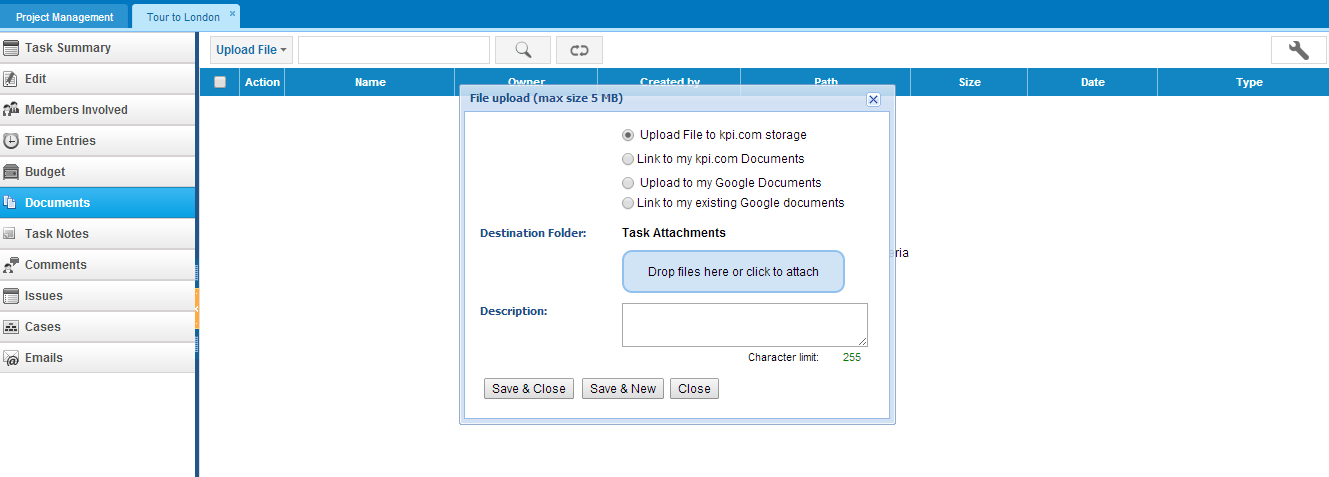
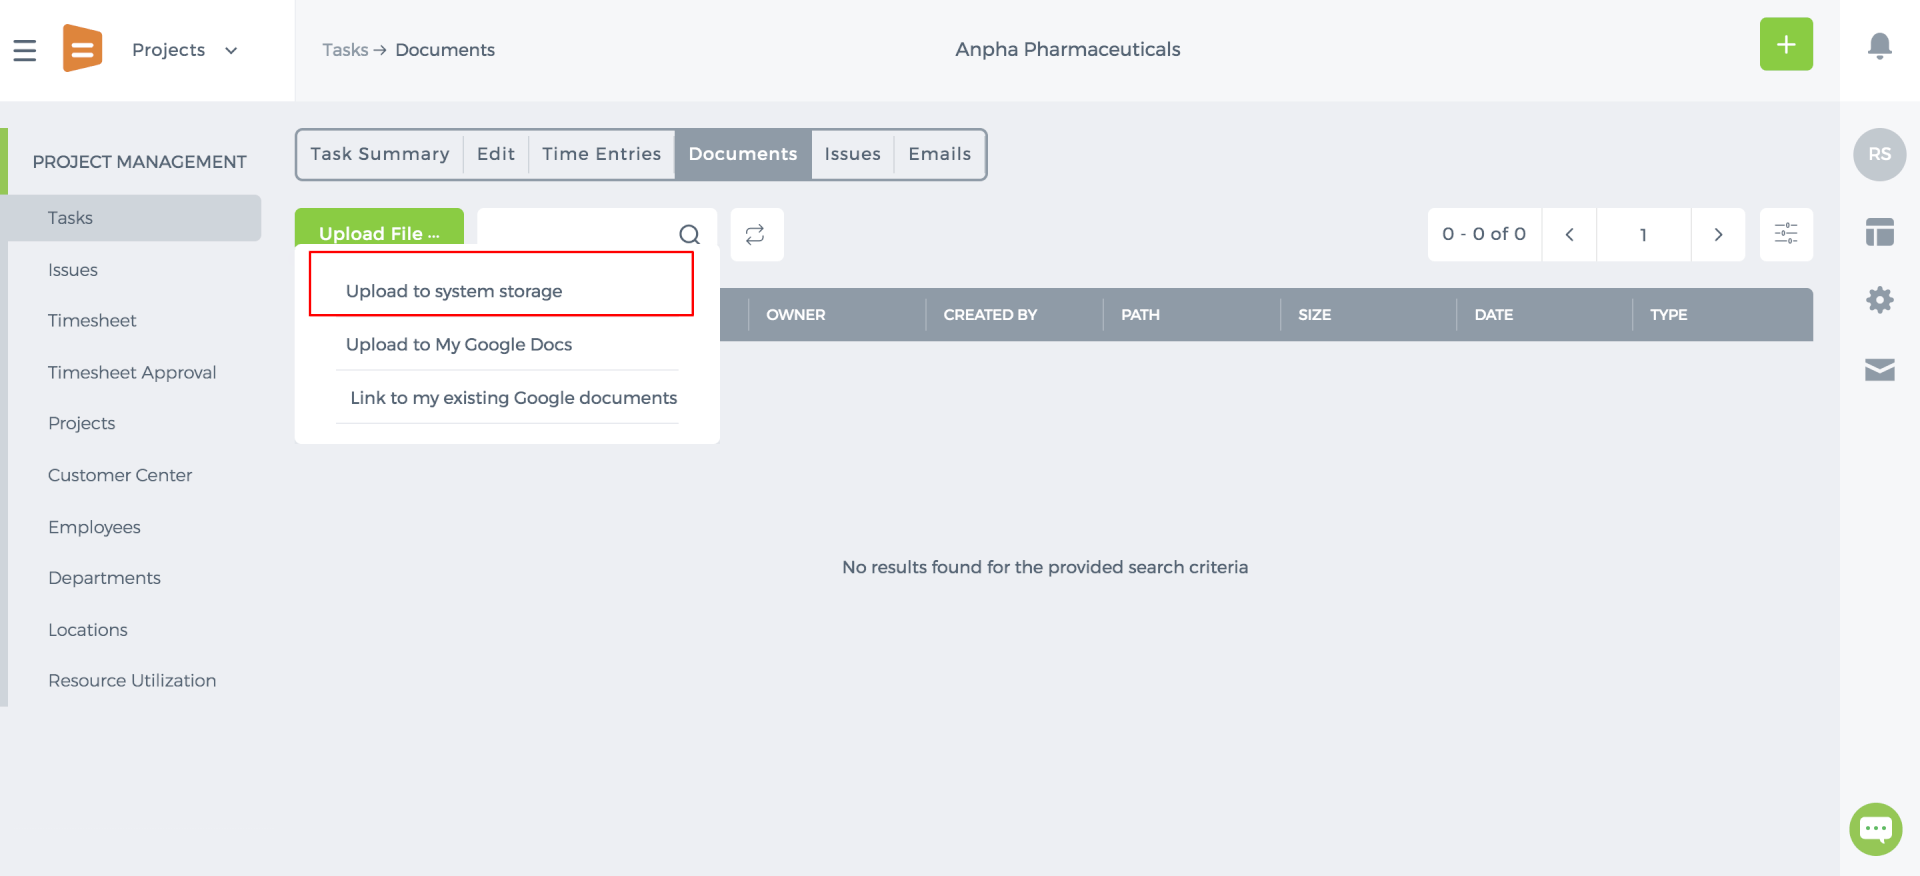
Attach Documents
You can attach files and documents to your task by clicking the Document and then the Upload File. A box will appear where you need to provide the name and description of your file/document you are uploading.
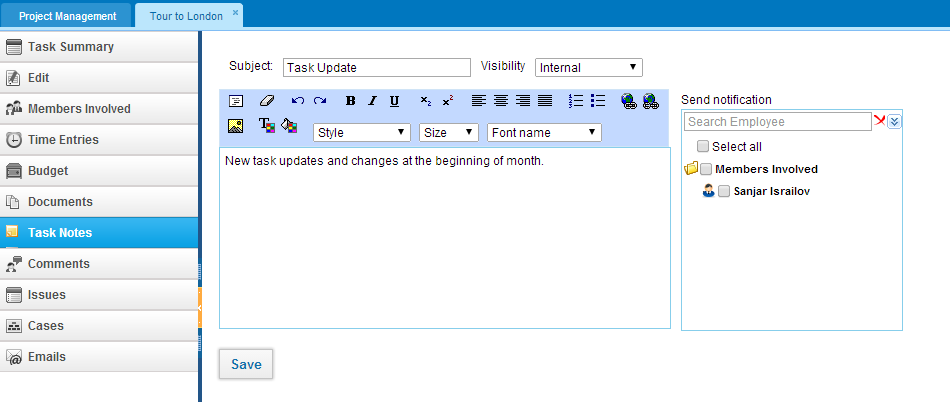
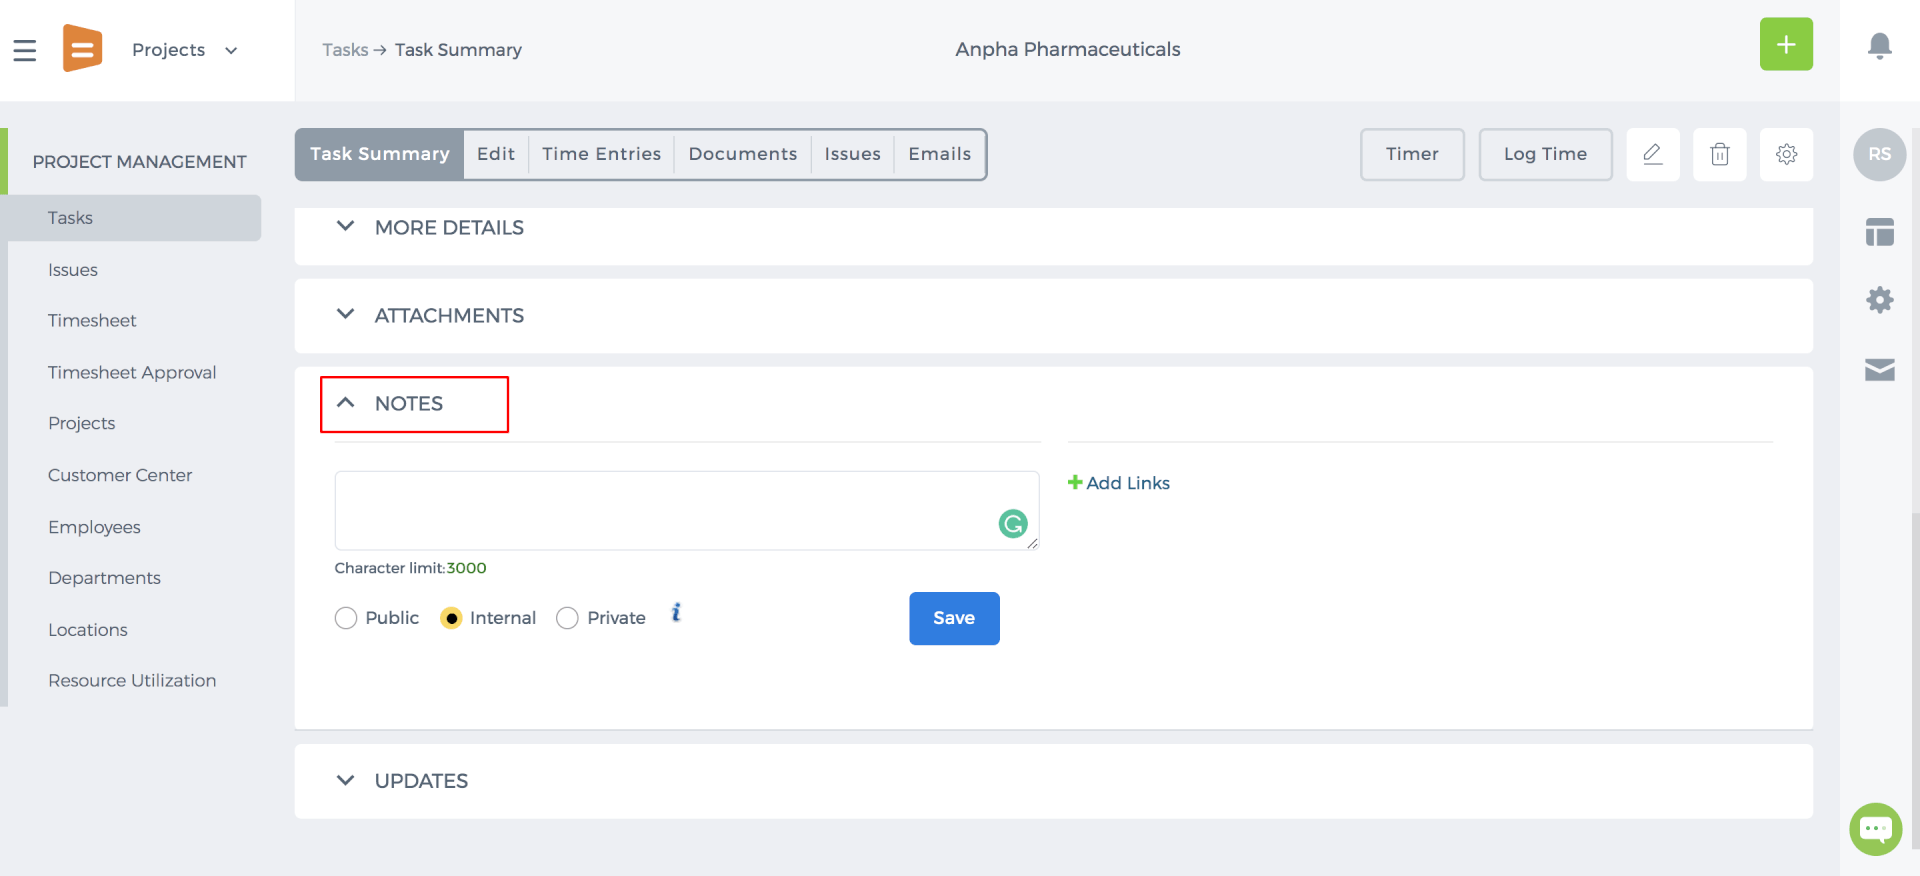
Add Task Notes
You can add or view notes to a task. You can set the visibility of your notes as Private (visible only to you) or Public(visible to all task members). Once you make the visibility Public, select members that you want to send an e-mail notification about the note you have created.
Opportunities
Opportunities
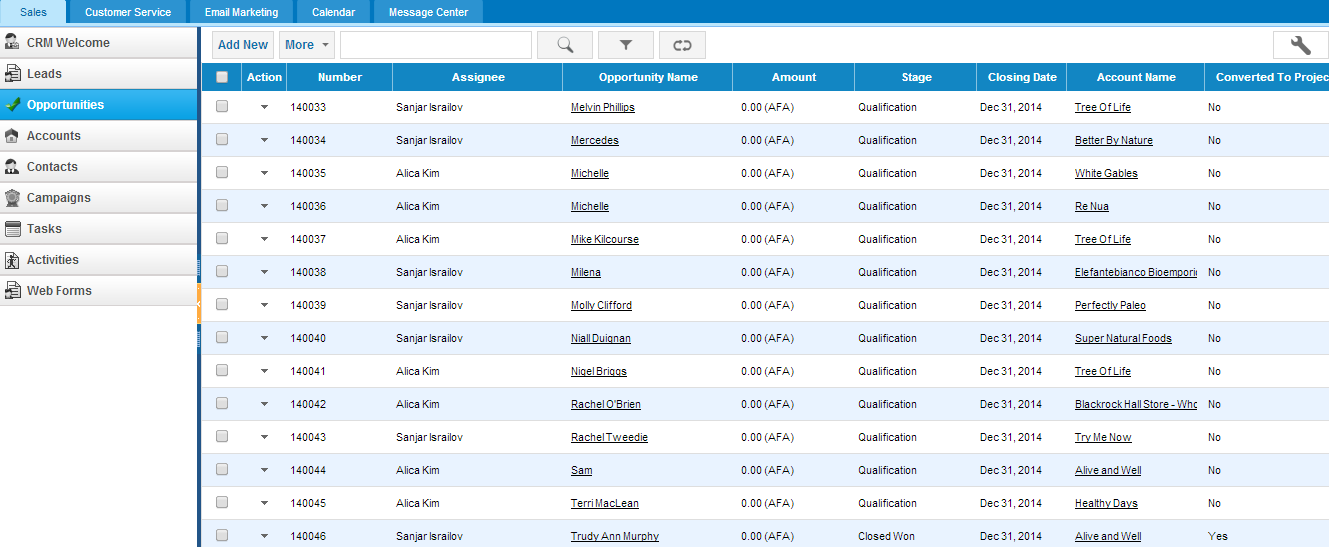
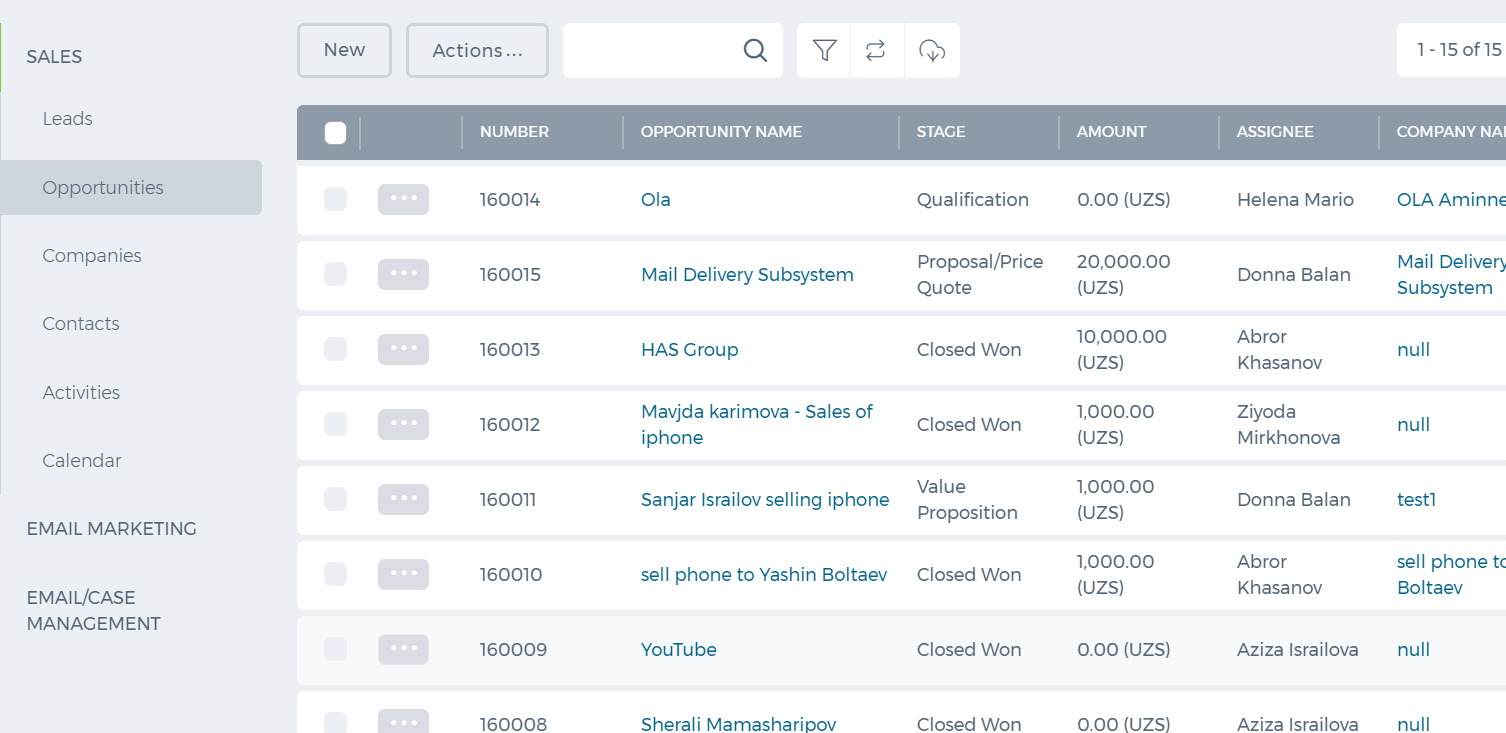
Opportunities in kpi.com are the chances that your client might buy your product/service or get interested in your service. Leads are marked as opportunities to reflect the process of sending quotes, invoices or entering negotiations for a sale with the contact.
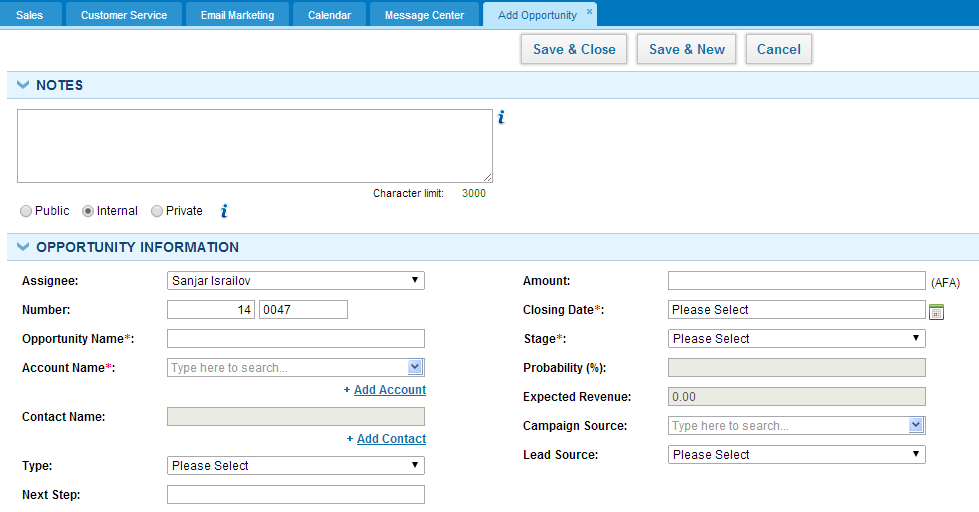
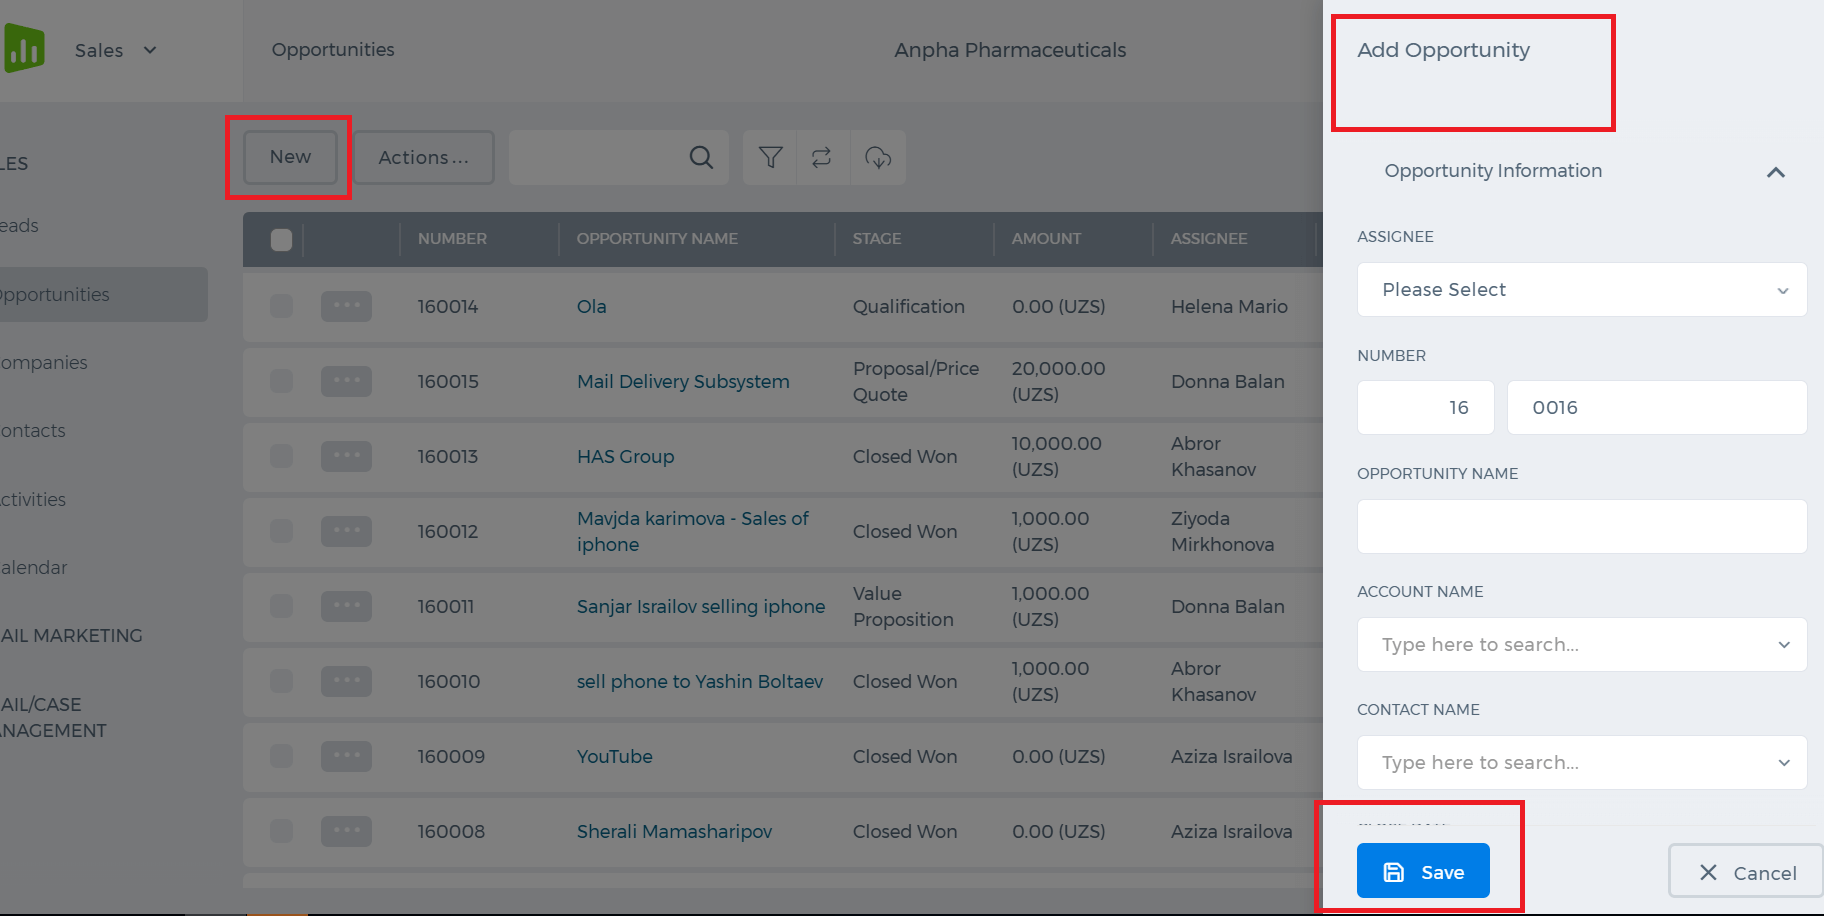
Create Opportunity
This option is located in the Opportunities section in the top menu. Click the Add New feature and provide the required information in the fields of form which appears. Do not forget to click Save.
Delete Several Opportunities at Once
You need to select opportunities from the list and click the Delete option in the More list.
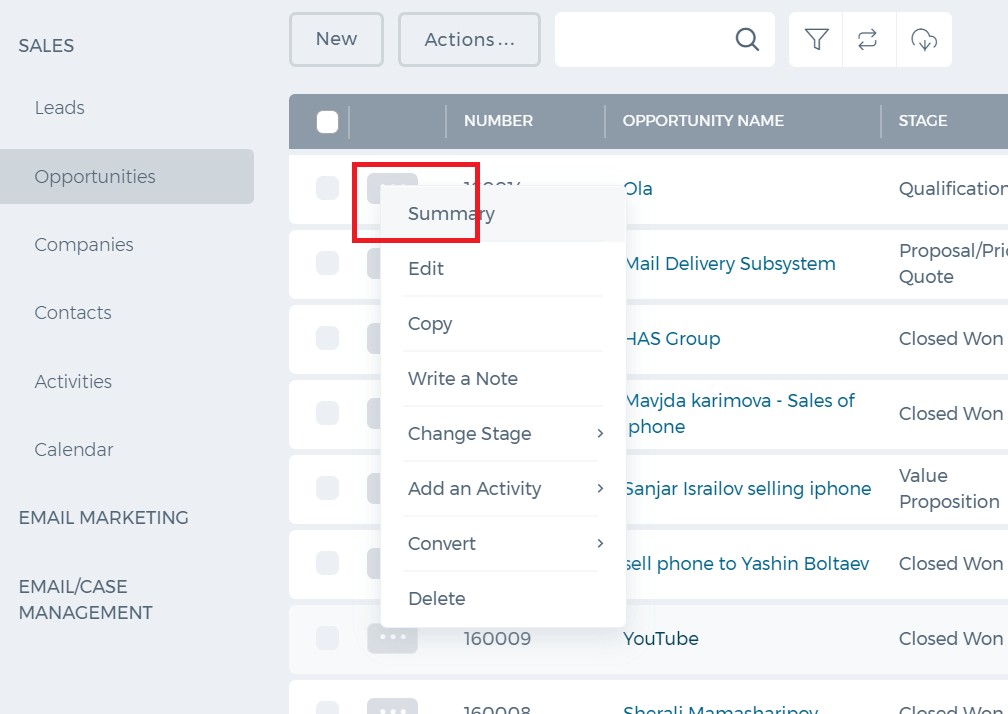
Basic Actions on Opportunities
The basic actions are found in the Actions drop-down, this gives you the following options: Opportunity view, edit opportunity and delete. Furthermore, you can customize the view of this section by clicking the button located on the right top side of the screen.
Leads
Leads
The Leads section keeps the contact information of your potential customers collected from different sources.
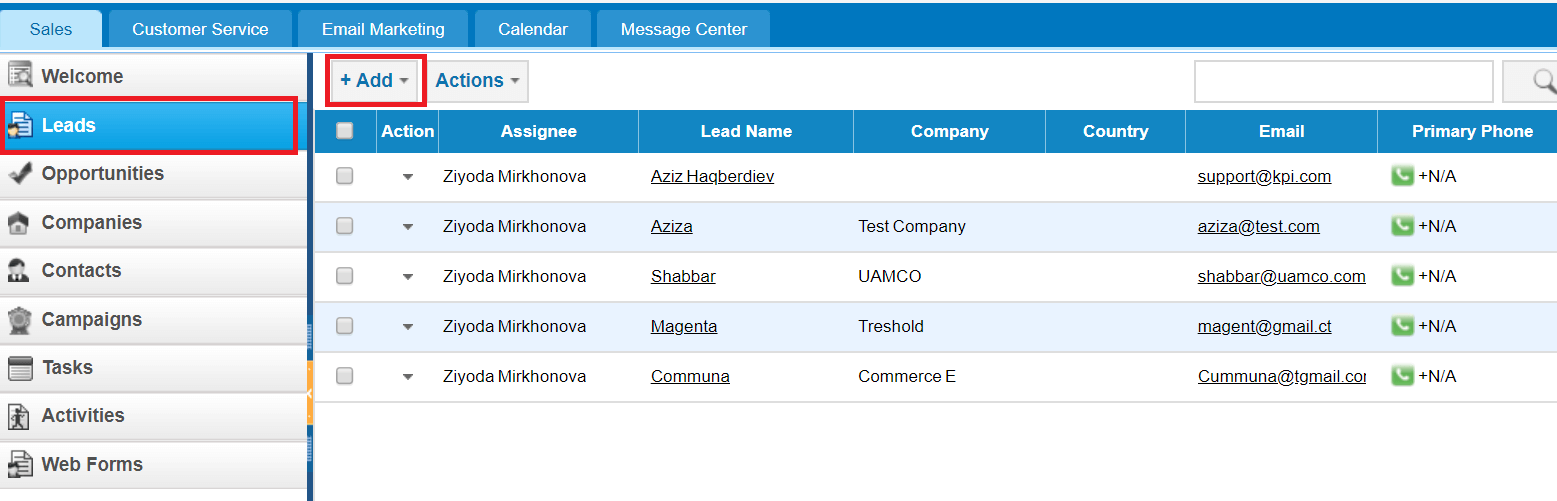
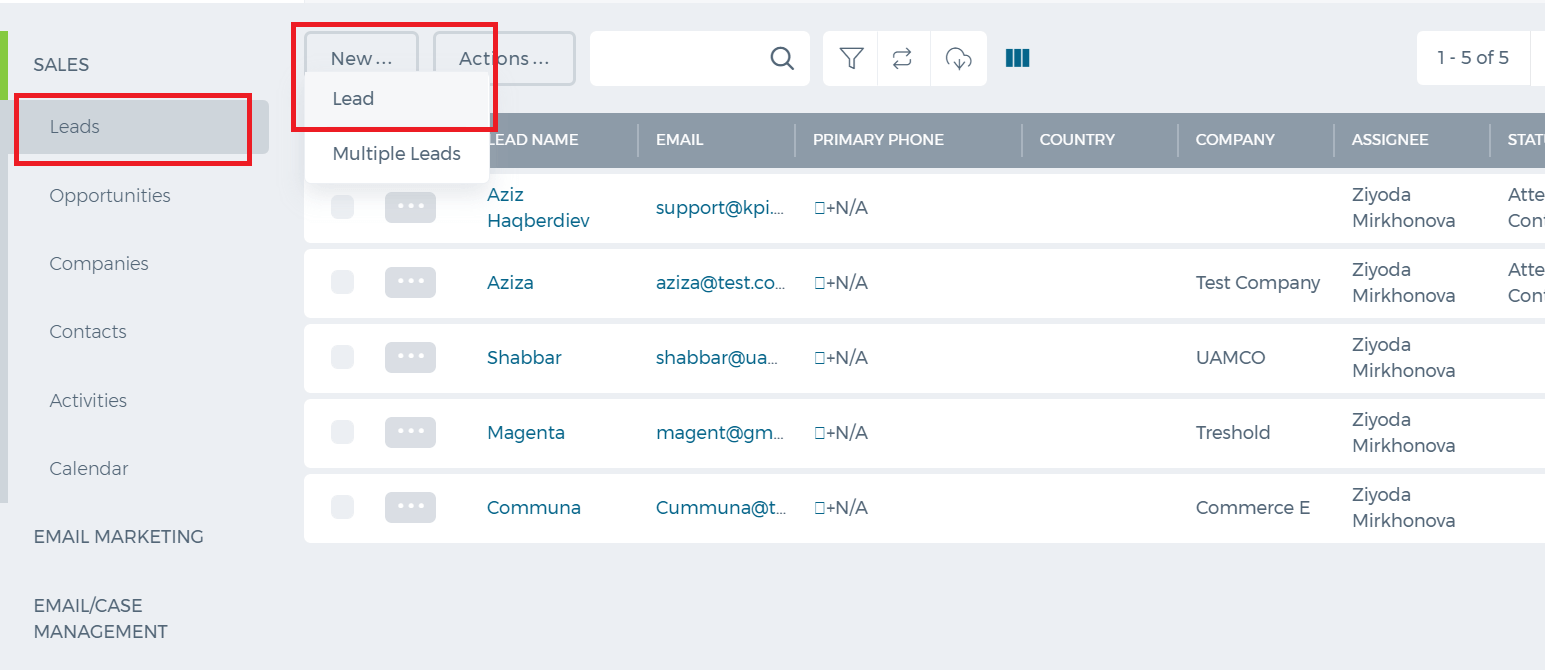
Add New Potential Client
A potential client can be added in the Leads section by clicking the Add New and Lead buttons. The form which appears should be filled in and saved.
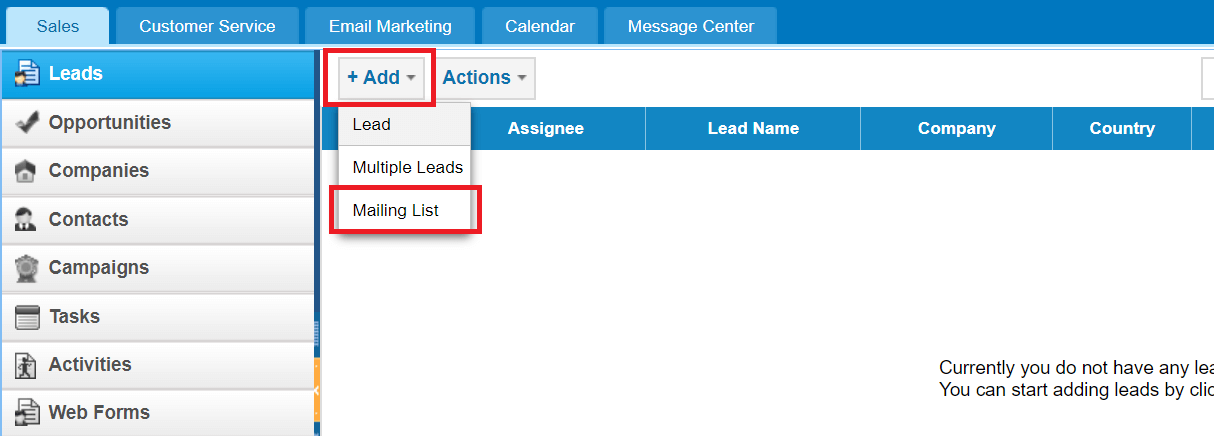
Add Mailing List
There is an option to add a mailing list in the Add New feature that is located on the top menu of the Leads section. Once it is clicked, the box will appear asking three fields to be filled in: Name, Description, and Status of the mailing list. Provide the requested information in the fields and save it.
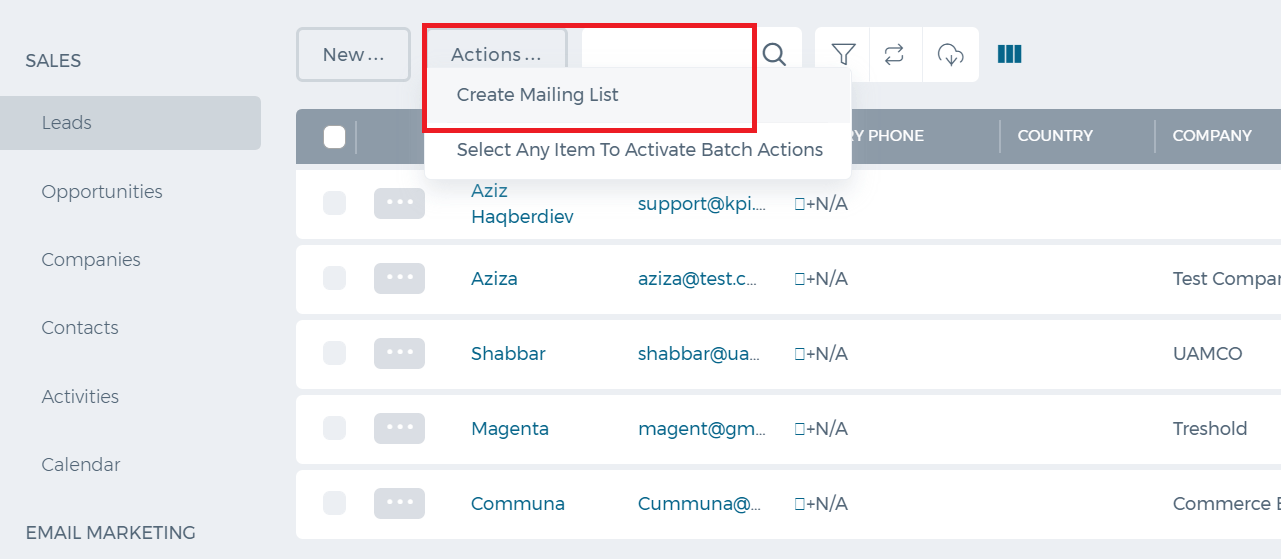
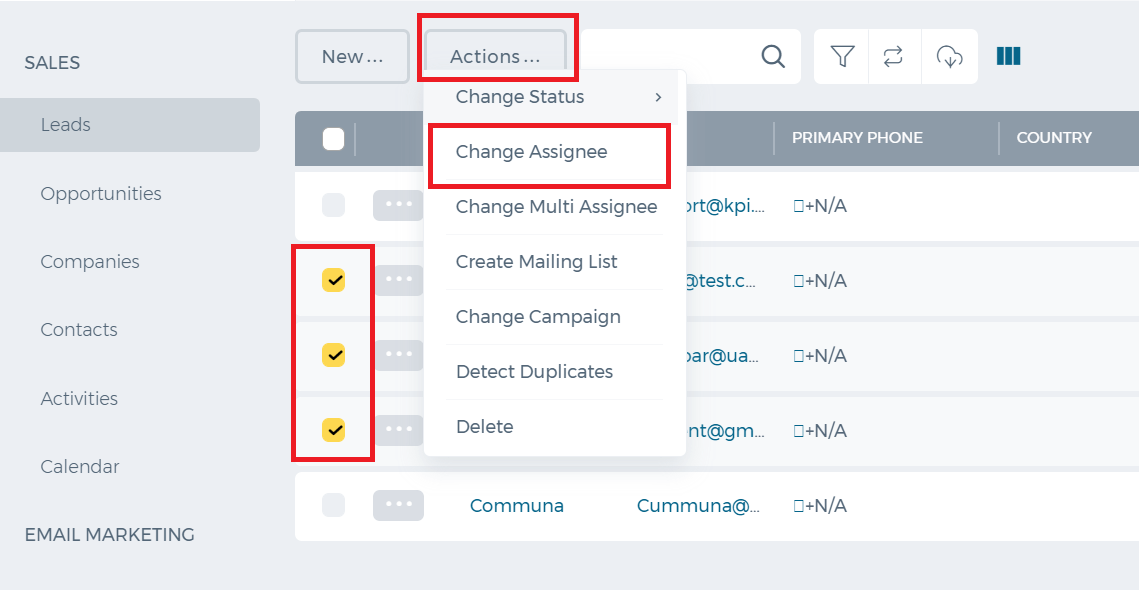
Change Assignees
Assignees can be changed using two ways: the More List or the Actions List. To use the first way, select several leads from the leads list and click theChange Assignee function in the More list. To change one assignee of a lead, open the Actions list and Assignee to choose one.
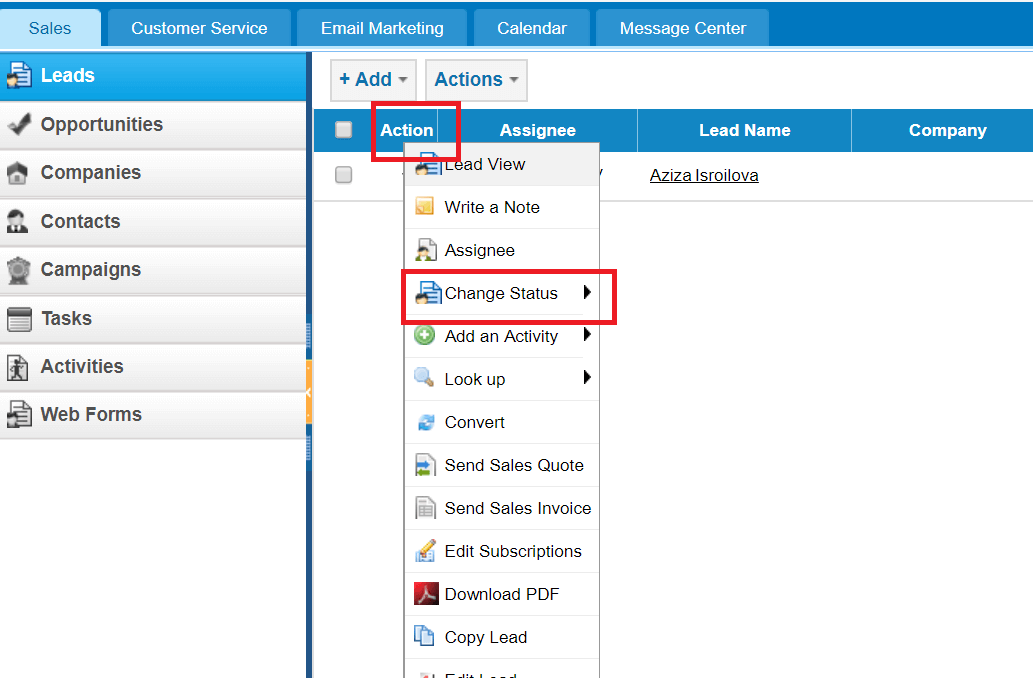
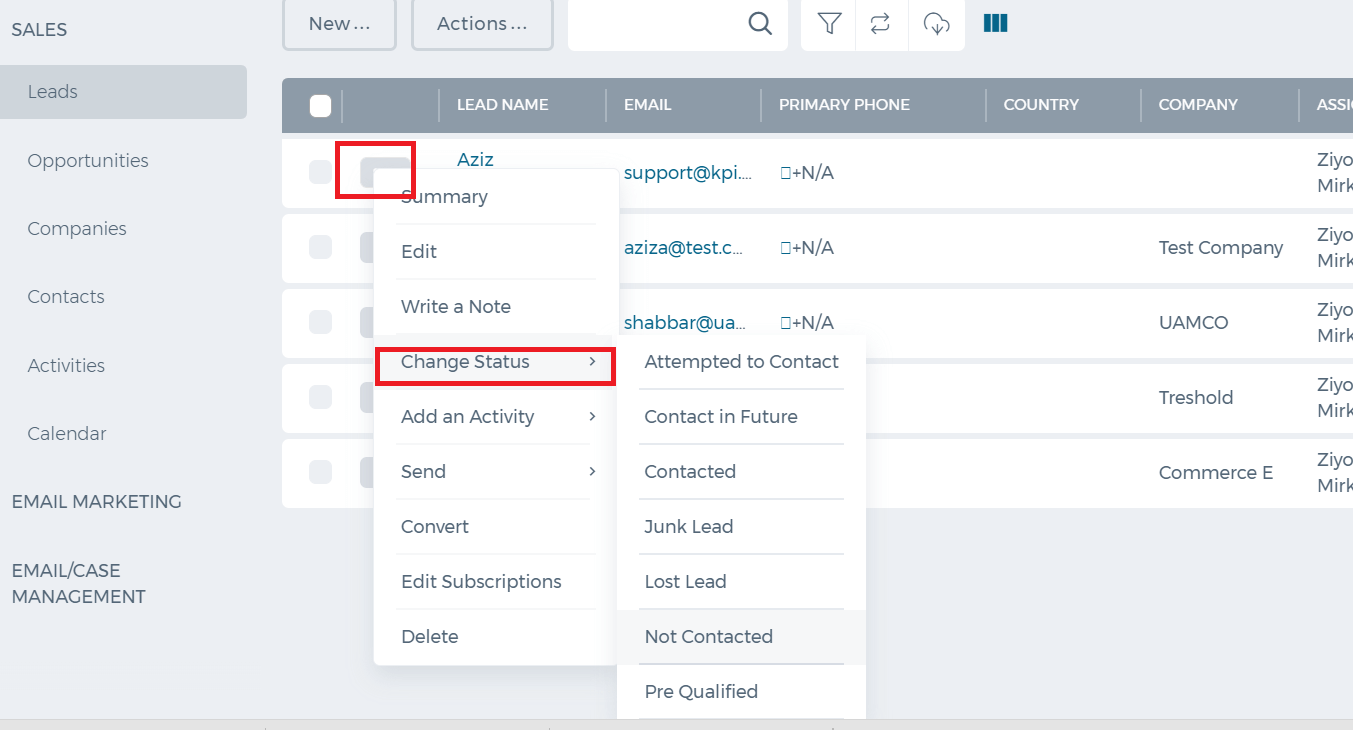
Change Lead Status
You can set different kinds of statuses such as: attempted to contact, contact in future, pre-qualified, etc. To do so, open the Actions list and click Change Status. The list of statuses will appear and choose the most relevant status for your lead.
Convert Leads to Contacts
In kpi.com, leads can be converted to contacts either with opportunity or without opportunity. There are different kinds of opportunities that you should choose and set the due date for that opportunity.
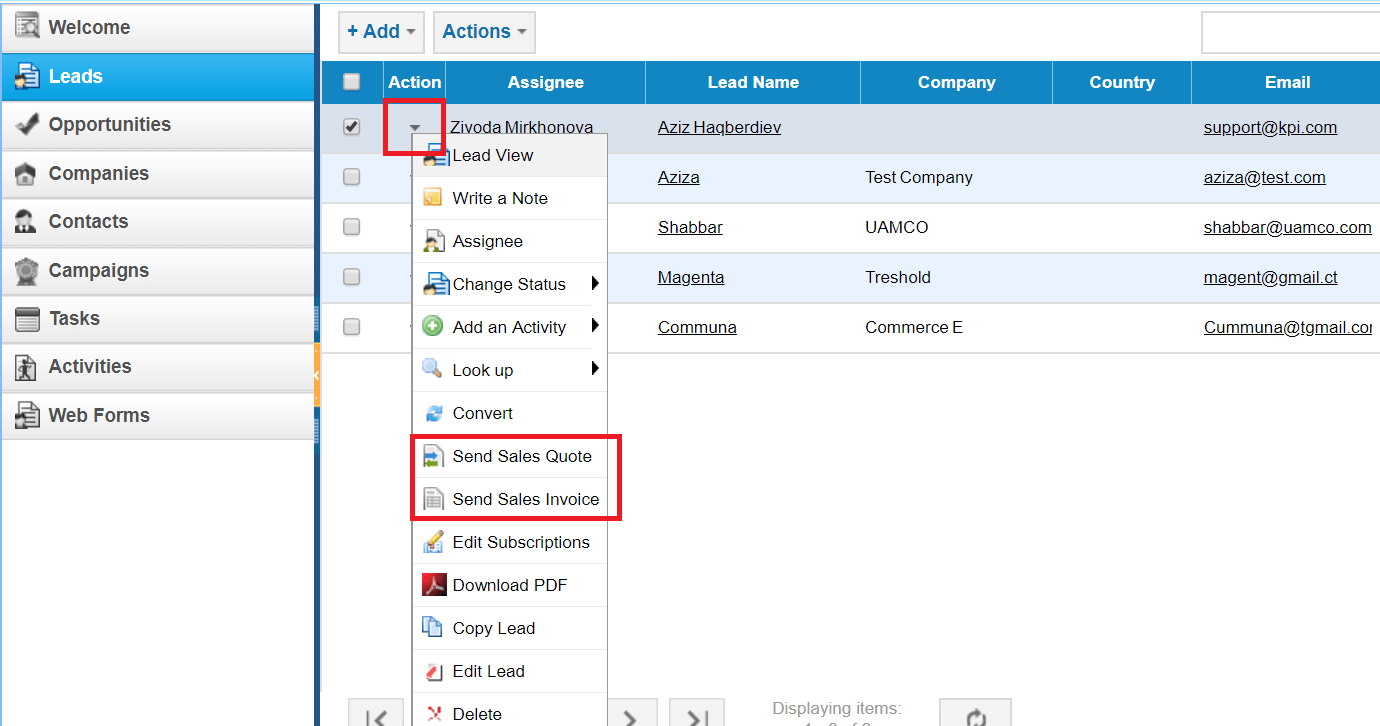
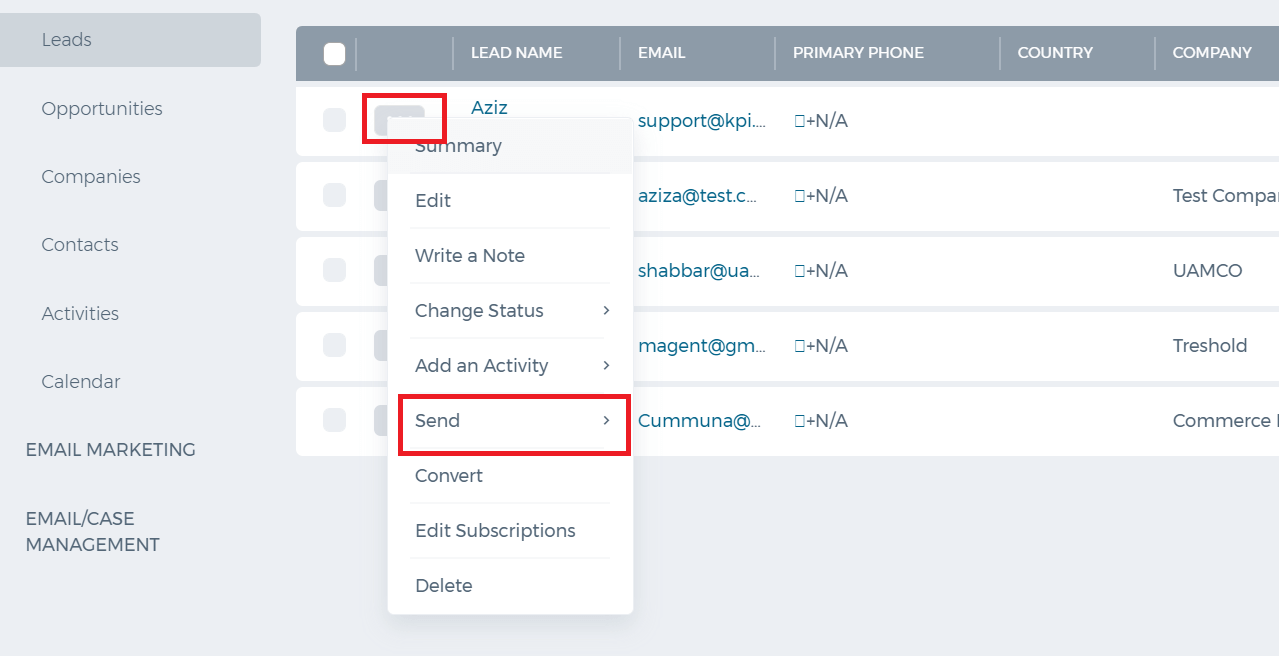
Send Sales Invoice or Quote
You can send sales invoices and sales quotes in the kpi.com Leads section. Choose one of the functions from the Actions drop-down this forwards you to the Accounting & Finance Module where you need to provide the information in the form which has appeared and then send the sales invoice/quote to your lead.
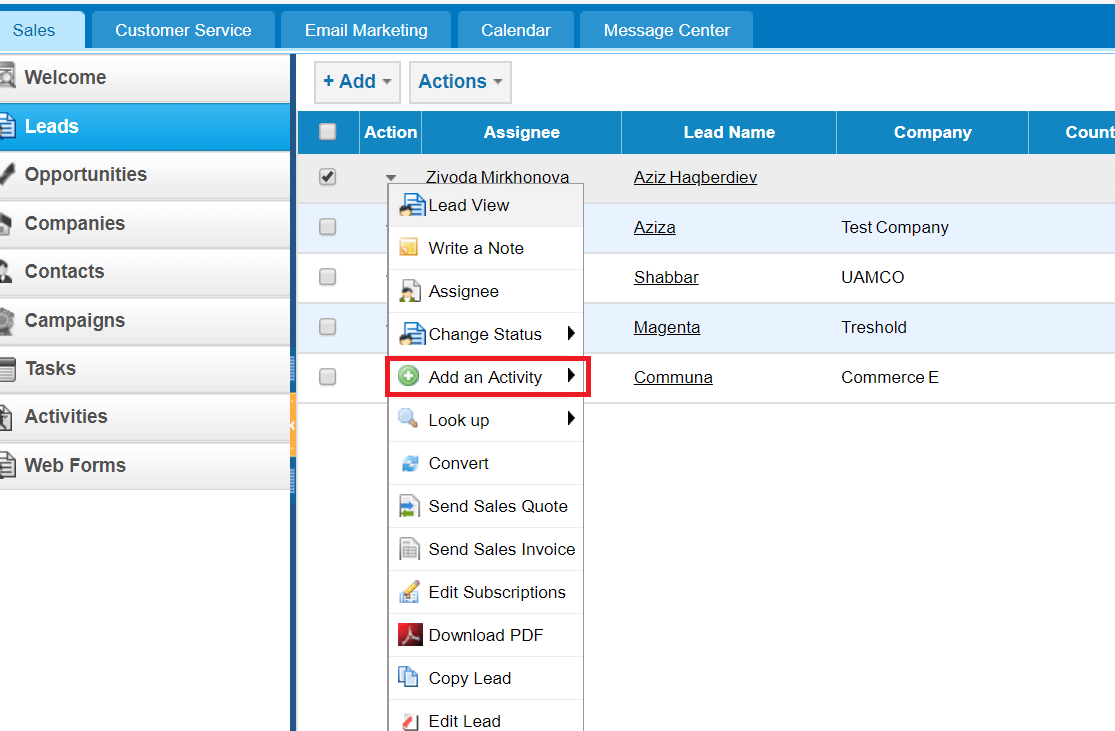
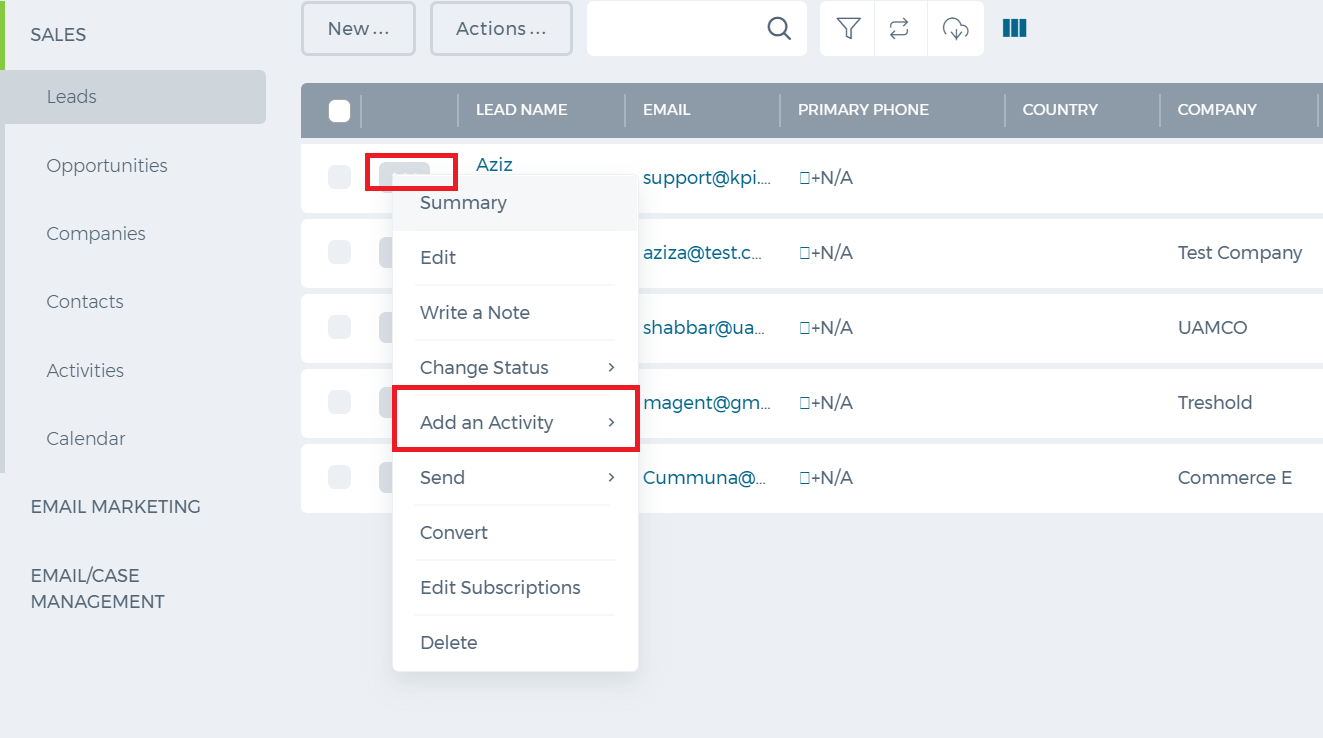
Add Activity for a Lead
You can log a call and create a meeting for a lead from the Actions drop-down. Select "Add Activity" option and either log a call or schedule an event. A pop-up will appear that you will to fill with the details of the activity and save. The activity that you registered will be reflected in the Activities section and in your calendar.
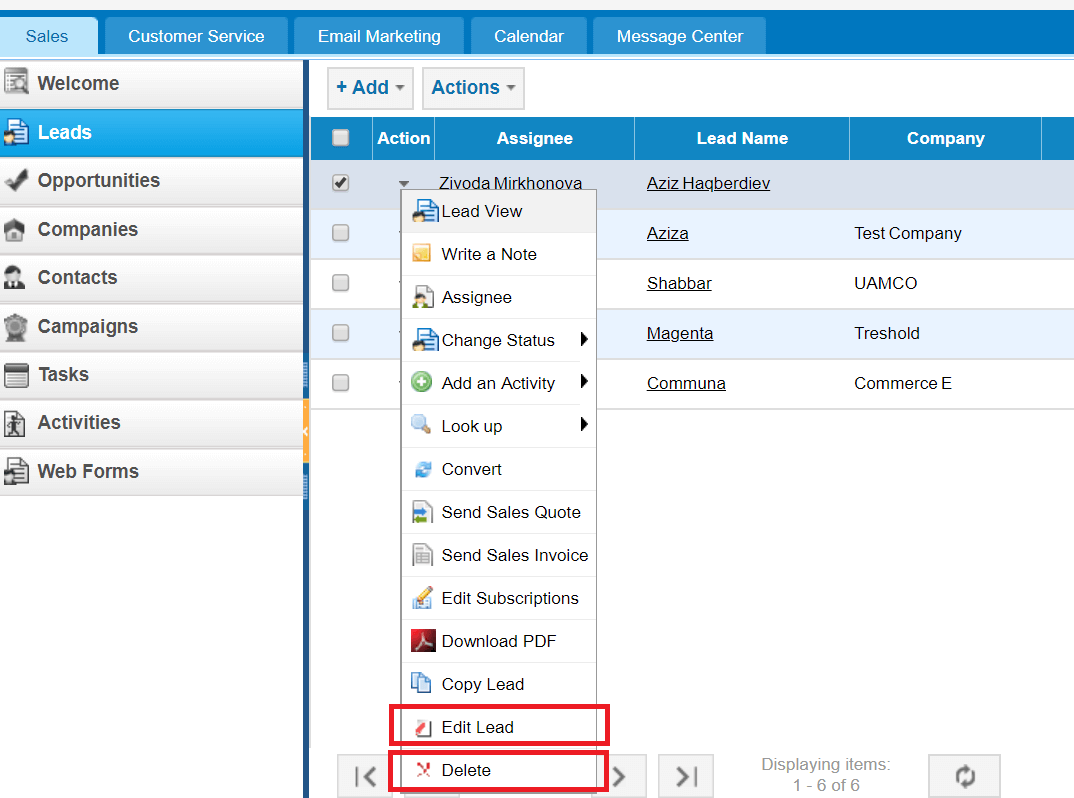
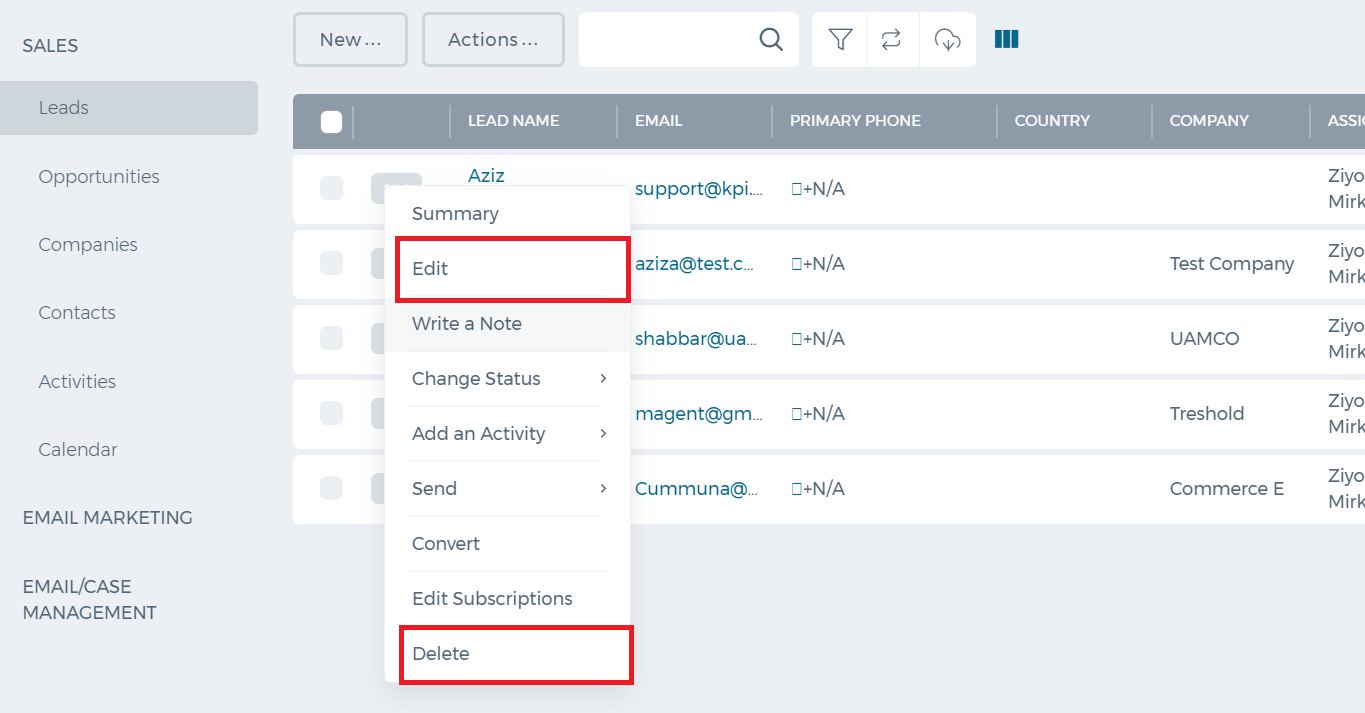
Edit Lead Information
The Edit function is located in the Actions drop-down of the Leads list. Once clicked, it forwards you to lead’s profile page where you can implement any necessary changes and save the page to complete it.
Delete Lead
The Delete function is located in the Actions drop-down of the Leads list. If you need to remove several leads from the list, select the leads you wish to remove and open the More. This function gives you several alternatives where you should choose the Delete option.
Client Access
Client Access
To enable client access to the client's cases, perform the following steps:
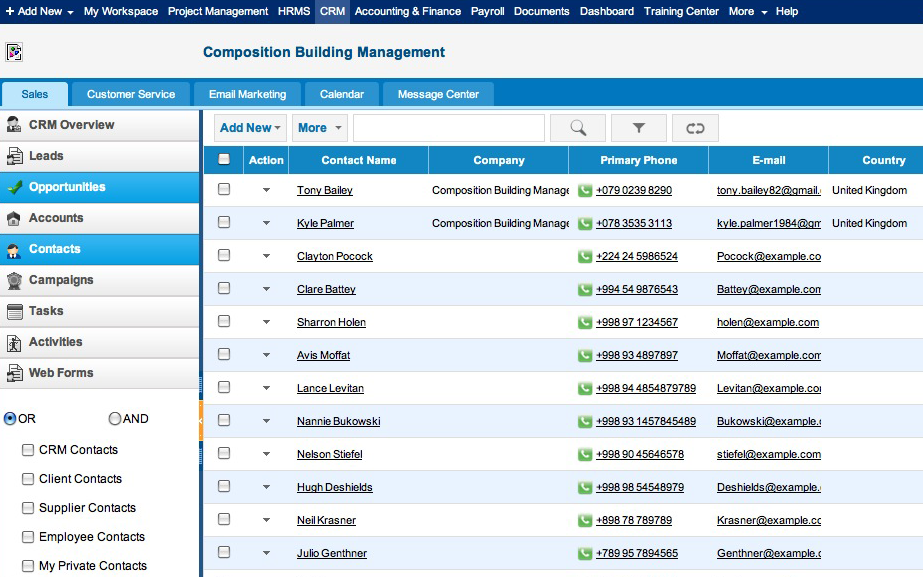
1. Go to the CRM module on the main menu.
2. Click Contacts on the left sidebar.
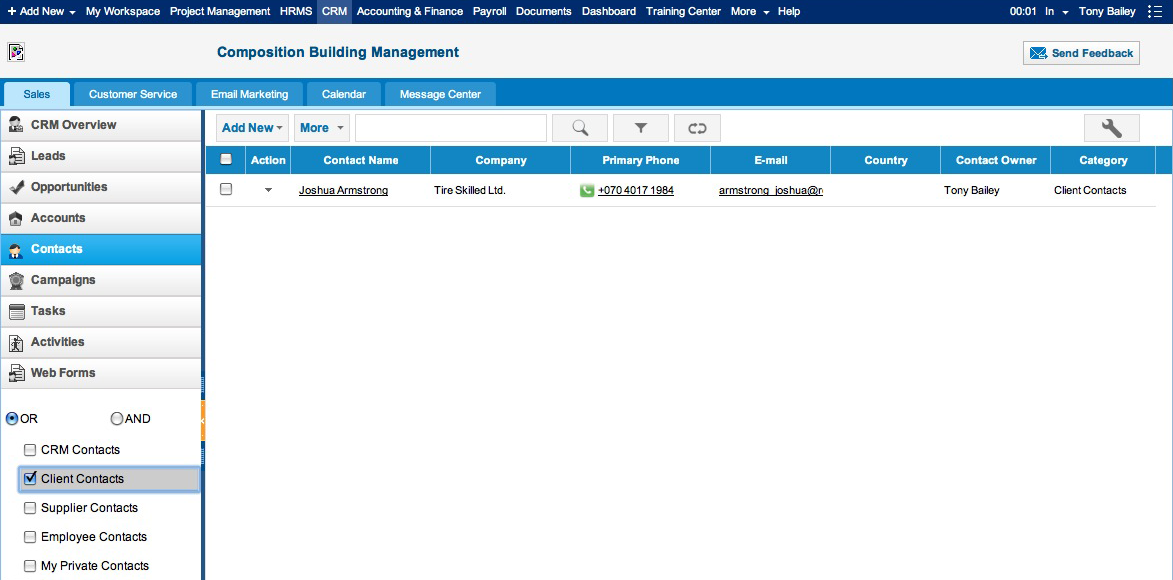
3. Check the Clients Contacts checkbox and select the client from the list.
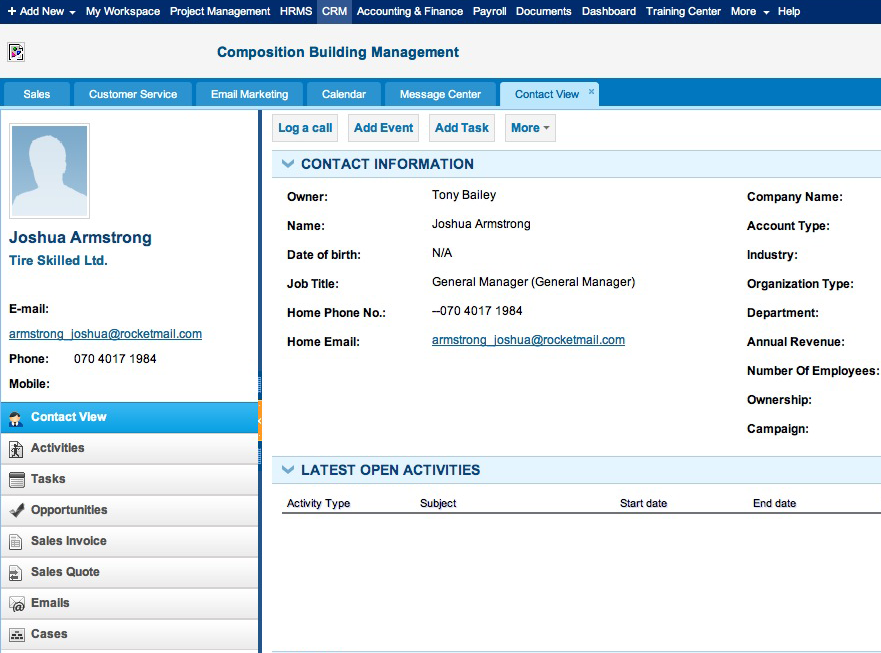
4. You will be redirected to the client's Contact View page.
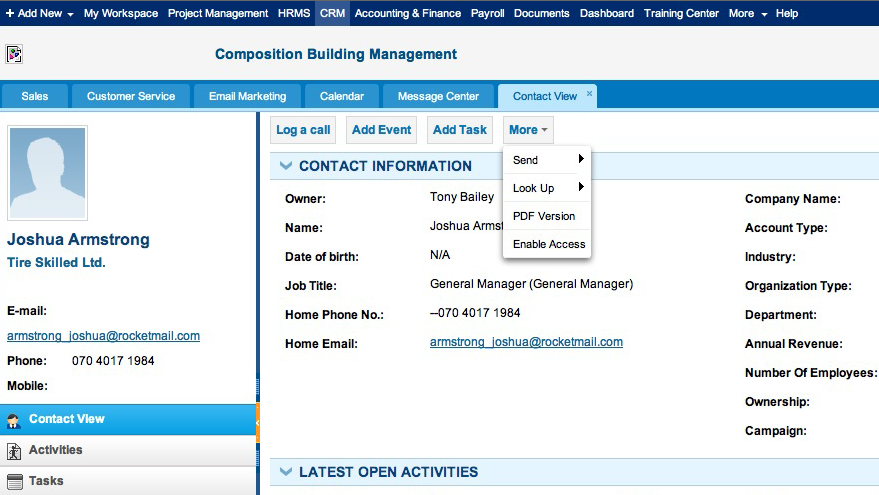
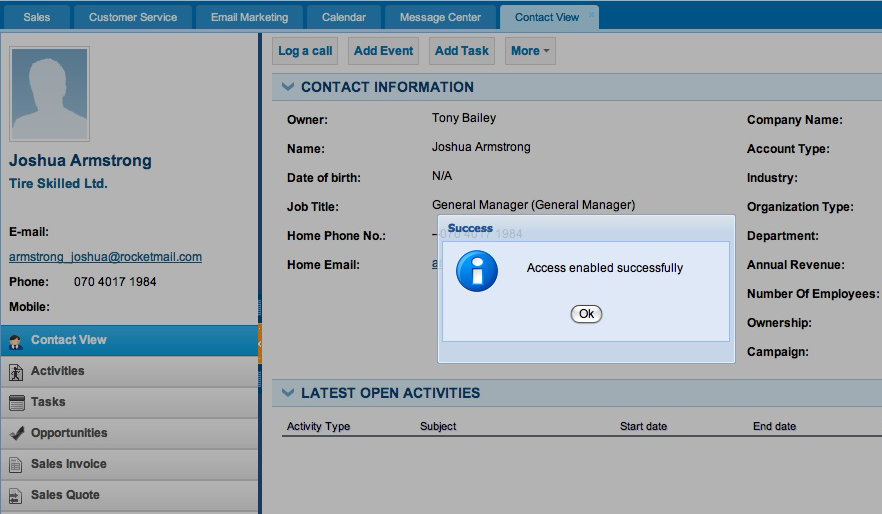
5. Click the More dropdown menu in the Contact View page.
6. Select Enable Access.
7. The Access Enabled Successfully window will be displayed. Click OK to complete the process.
Cases
Cases
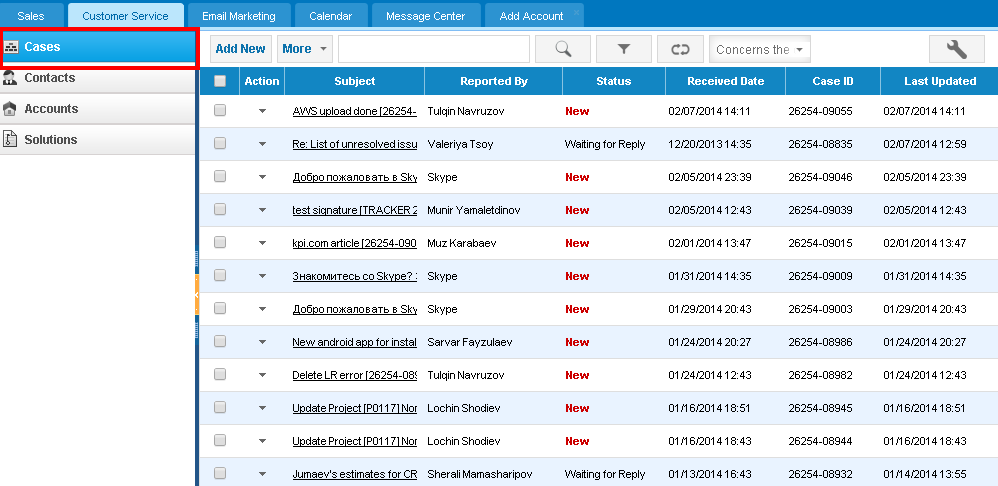
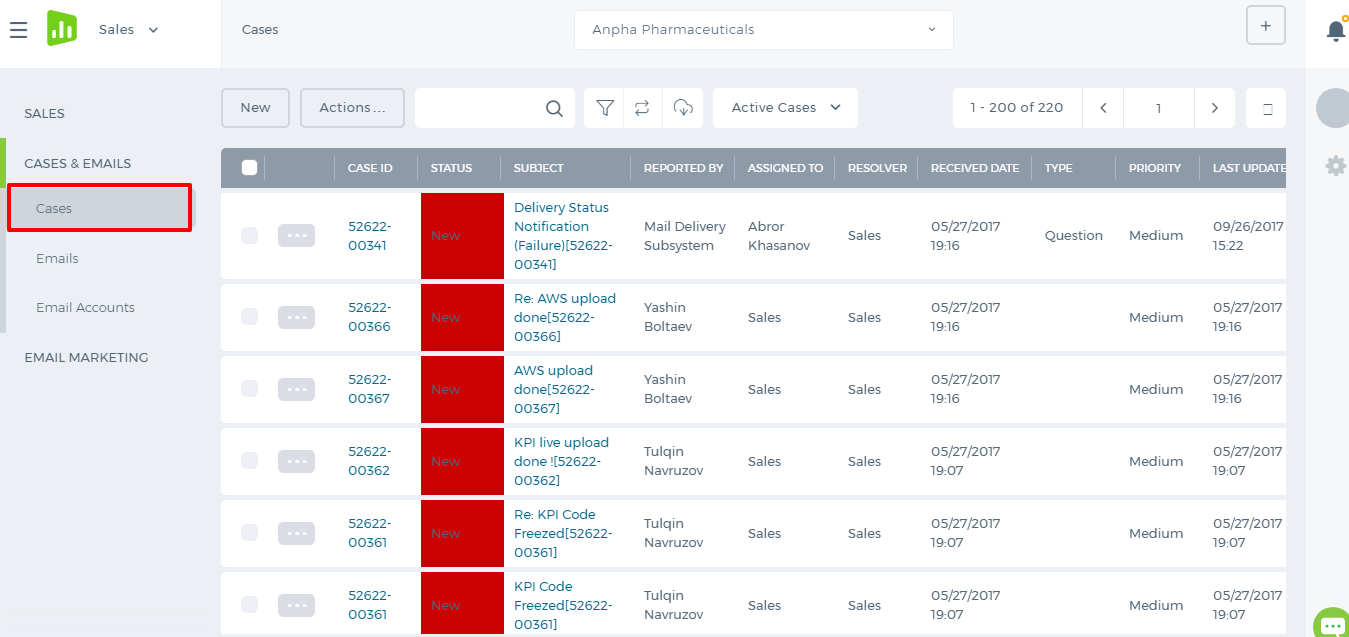
Cases are tickets raised by your Customers.
Add Case
Cases are created in three ways:
Manually - to add a case manually, click on the Add New button.
Web Forms - you can create case forms, and whenever the form is filled in your website, the case will be created.
Emails - you can set up Message Center and create parent/assignee filters. All emails passing through those filters will arrive in cases section. For more information look through the email integration article here.
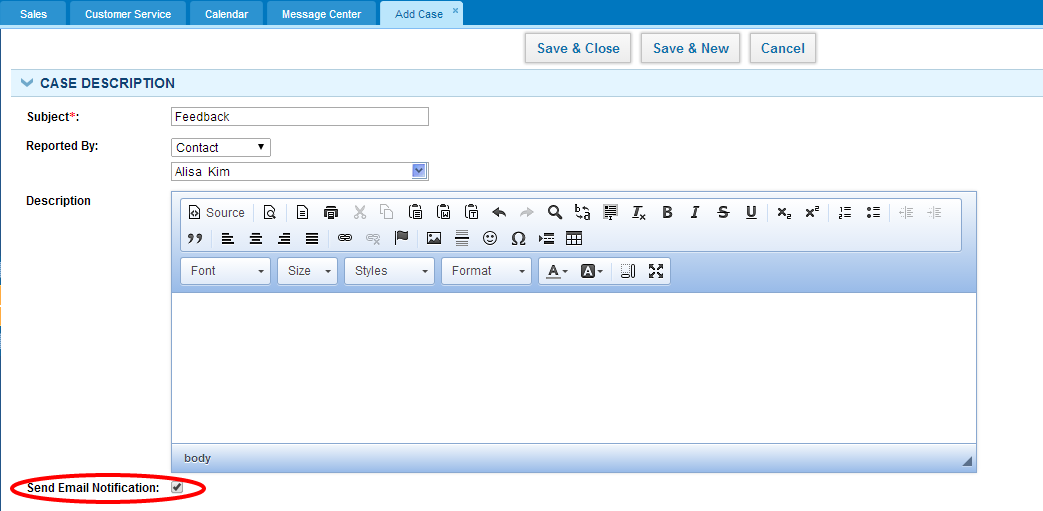
Send Email Notification
Send email notification option is an auto-reply notification sent to the reporter of the case. If you want the auto-reply to be sent to the reporter every time a case is added manually, please contact support to make the option ticked by default.
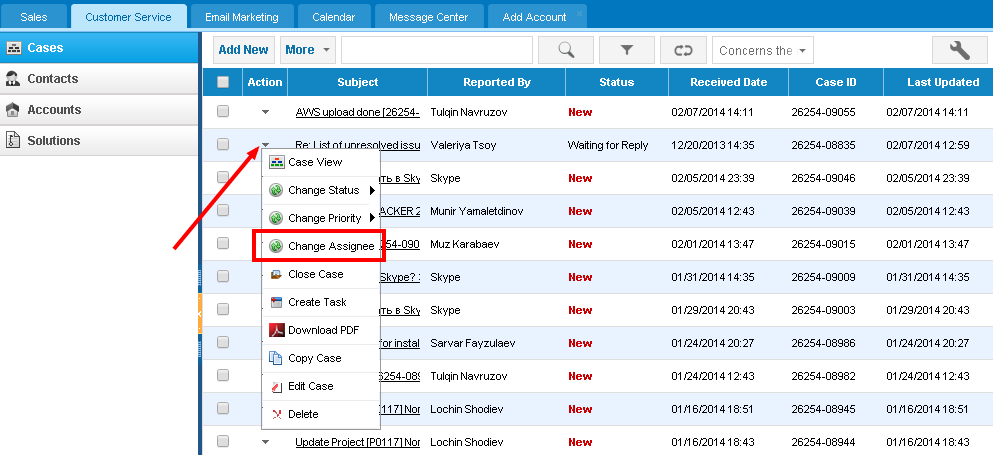
Case Assignees
When a case is created automatically from an email, it is assigned to one of the company employees. If it fits the assignee filter, then it is assigned to the right person, otherwise, it will be assigned to the default assignee set in the Filters.
The assignees are notified about the case creation/update through emails. You can modify case notifications from Settings>>Email Templates section.
You can change assignees using the actions drop-down.
Case Status
When a case arrives, its status is New by default. Whenever you respond to a case, the status changes to Replied. When the customer replies the second time, the status again changes from Replied to Waiting for Reply.
As soon as you change case status to Closed, the reporter (customer) will receive an email notification about the case closure.
In case, the customer responds to the closed case, the status changes to Reopened.
You can also create custom case status, you can find more about custom case status here.
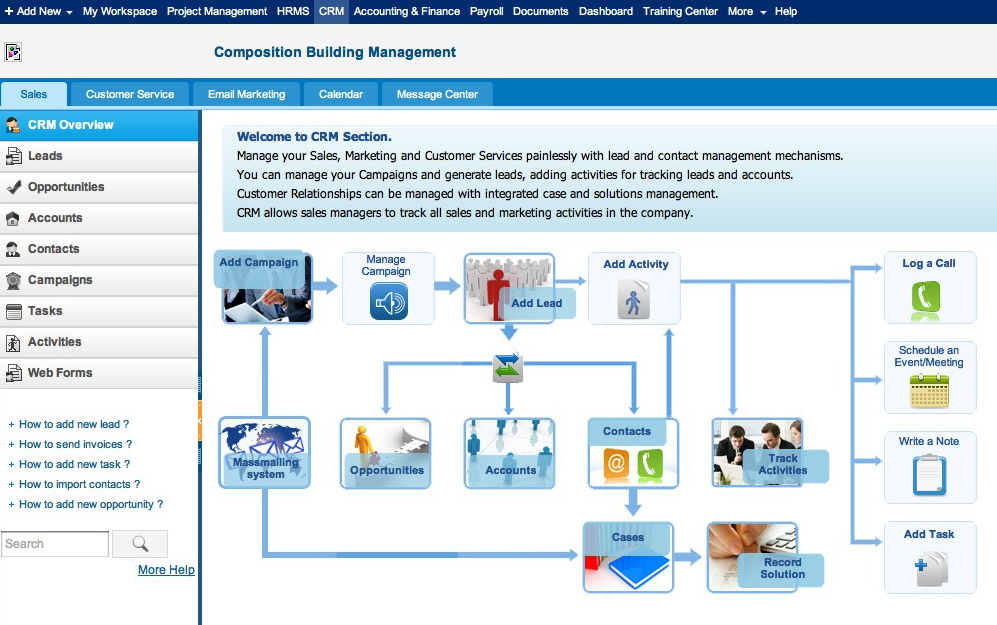
Leads, Opportunities and Cases
Leads, Opportunities and Cases
Leads are contacts of your potential customers. This is normally the first step when a contact is registered in the CRM Tool.
Leads that show interest in your offer are usually converted to Opportunities. When a Lead is converted to an Opportunity, Account and Contact records are created in the CRM.
Opportunities are deals with your customers.Opportunities have different stages of deal process such as: Needs Analysis, Closed Won, Closed lost to competition, Value proposition and so on. An can be converted to a project and or to a sales quote.
Cases are the questions and issues raised by your clients. Therefore, cases are assigned to responsible employees to deal with the client requests.
CRM cases is usually called a ticketing system. Once a case is resolved or closed, the client will get an email notification that their case has been resolved/closed.
When you set up an email in the system, Message Center will receive emails from different senders. If the sender's email and contact name is not recorded in the system, the senders contact details will be automatically recorded as a lead in the CRM Leads Section.
How to add organization chart
How to add organization chart
To add organization chart first of all you should add departments.
Go to HRMS>>Departments.
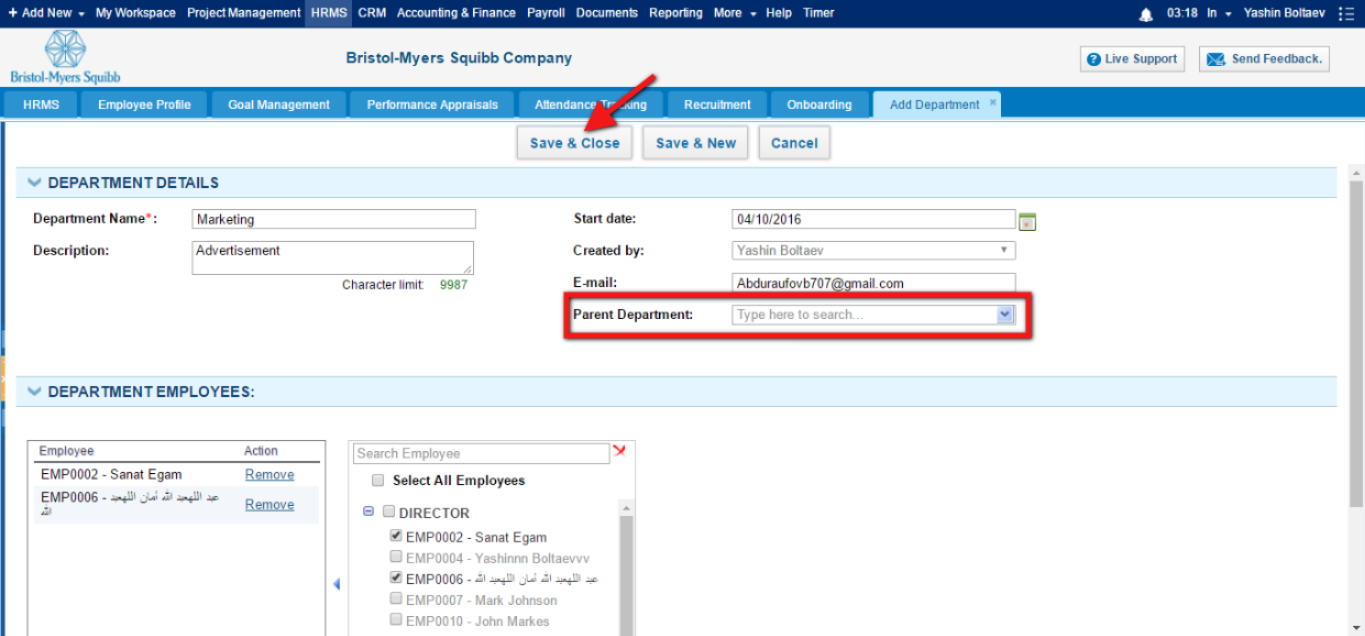
Then click on New Department Button
Once you click New Department, following form appears on the screen and choose the parent department and click on the Save button.
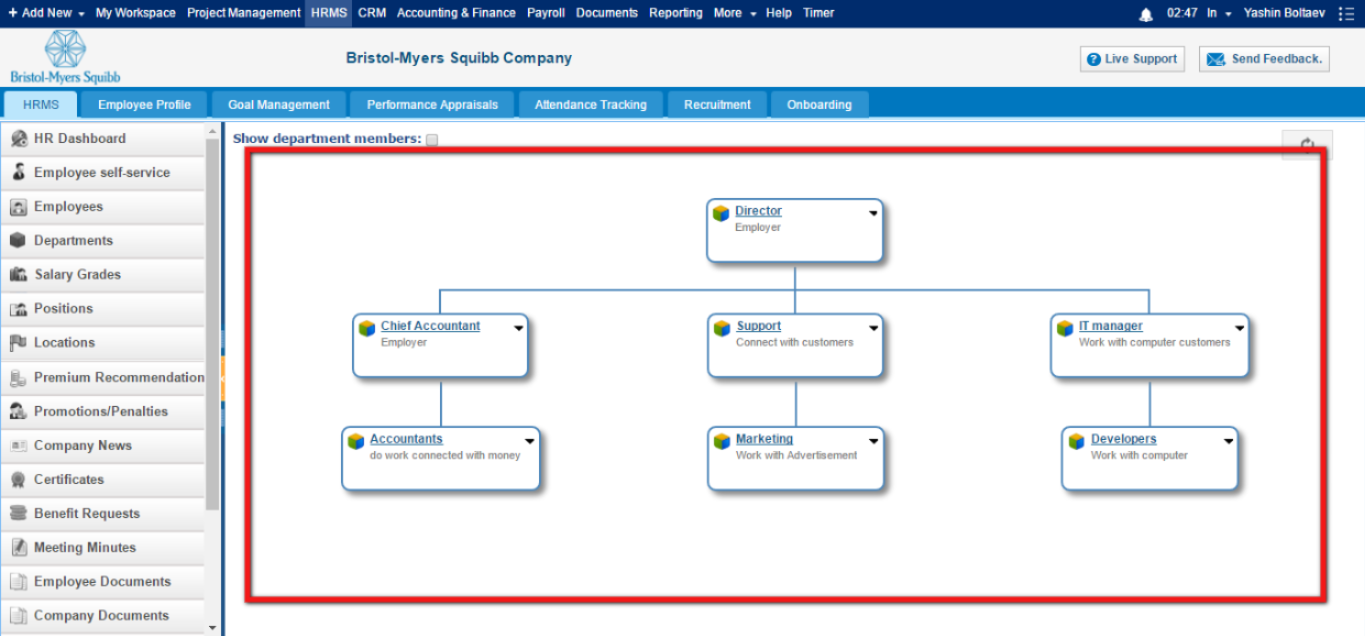
Once you click on Save button, you can check organization tree from Organization chart.
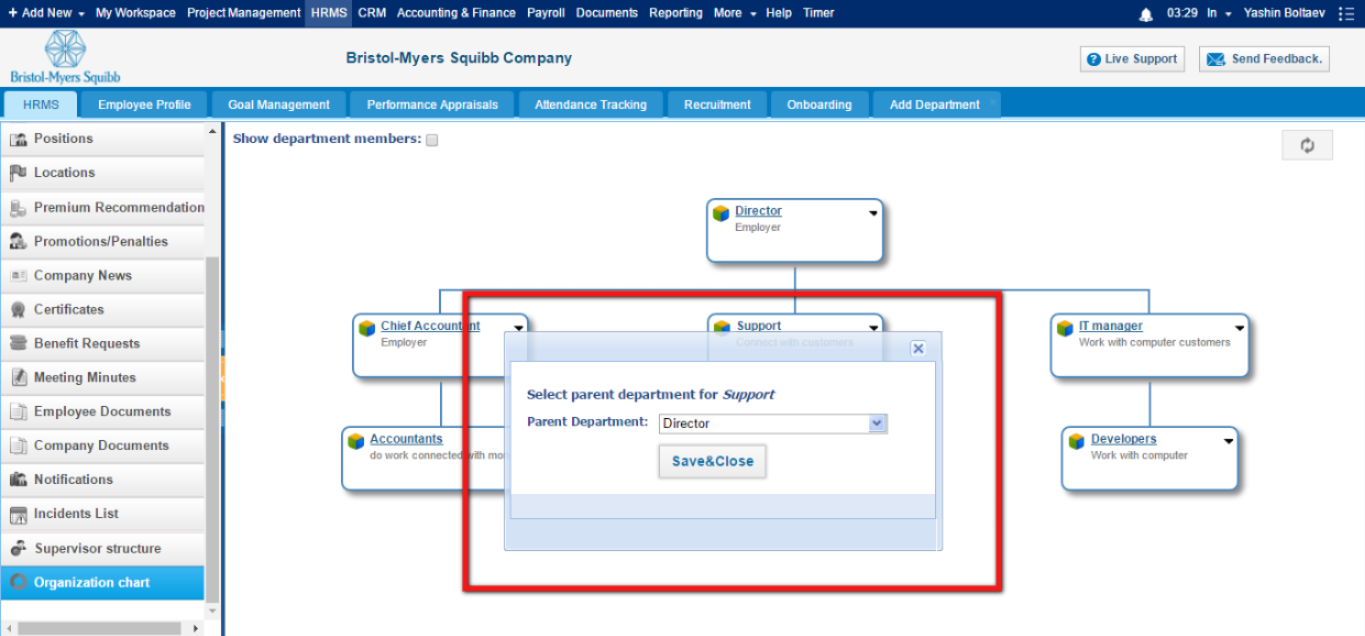
The easiest way to assign parent department is:
Go to organization chart and click on down arrow and set parent department.
Annual Leave Allowance
Annual Leave Allowance
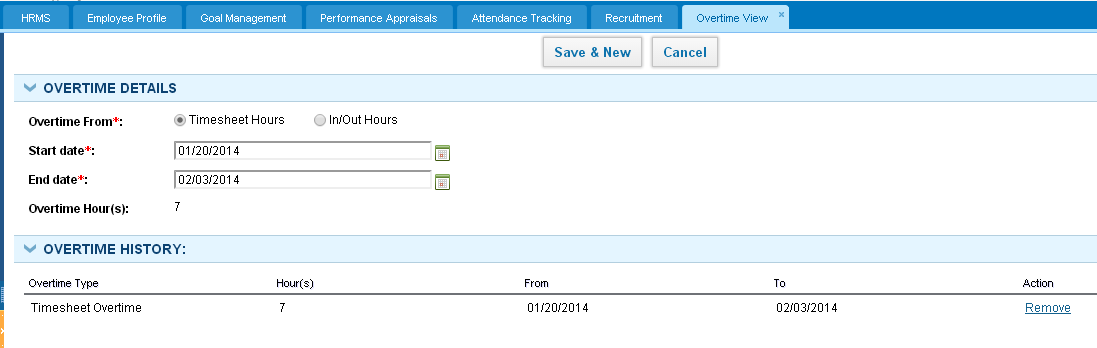
Annually allowed leave hours per year are set in this page.
Type in the allowed hours in the Annual Leave Leave Allowance Hours box and the next column will show it in days.
If you want to add last year's remaining leave hours to this year, tick the Add box and the total hours will increase.
You can also view overtime hours worked by your employees compared to timeslot. Click on Overtime link and check either the timesheet or in/out hours compared to timeslot.
You can record the results in the history using the Save&New button.
Employee Leave Status
Employee Leave Status
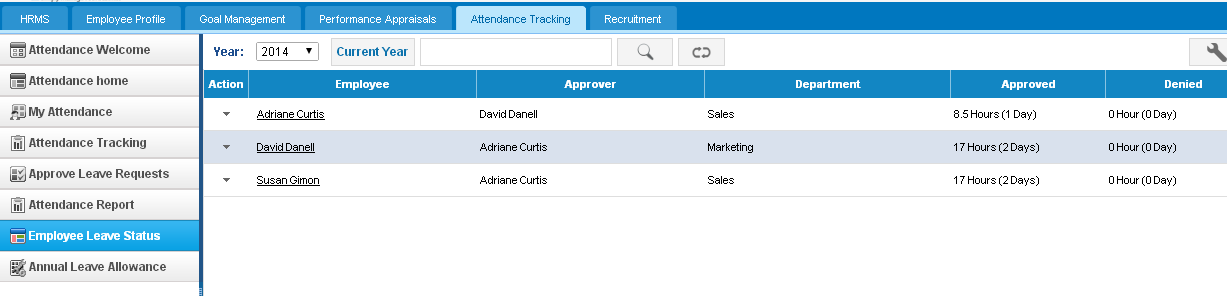
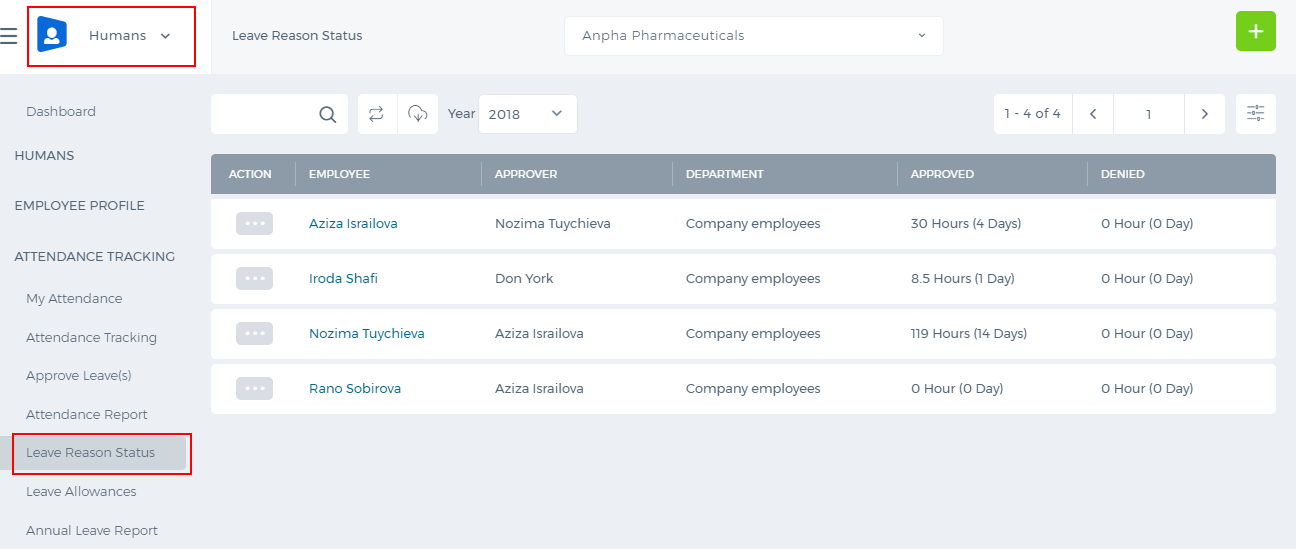
In this section you will be able to see how many leave days have been approved and denied by employees. The page shows leave status per year, so you can choose years from the top dropdown.
A click on the employee name forwards to employee profile page, so see leave requests in detail.
Attendance Report
Attendance Report
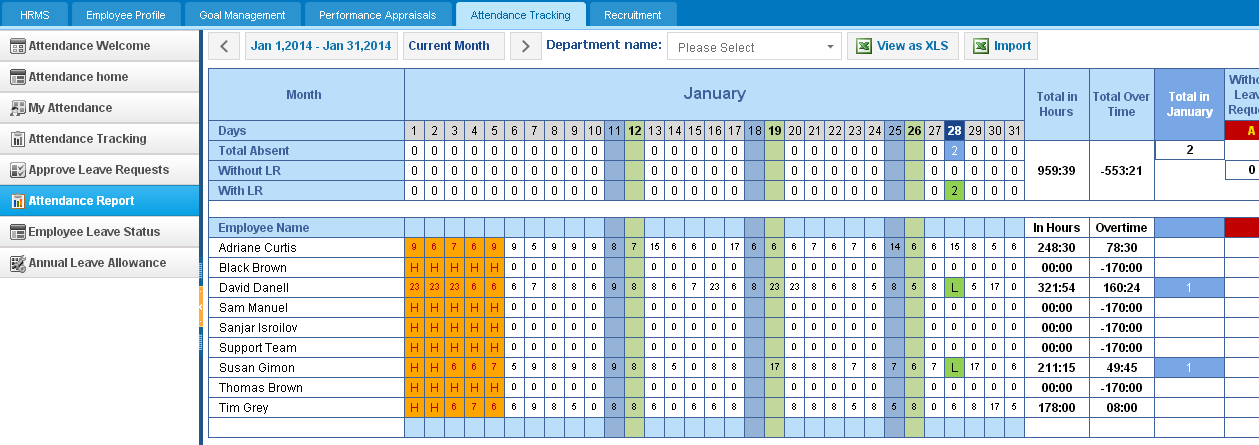
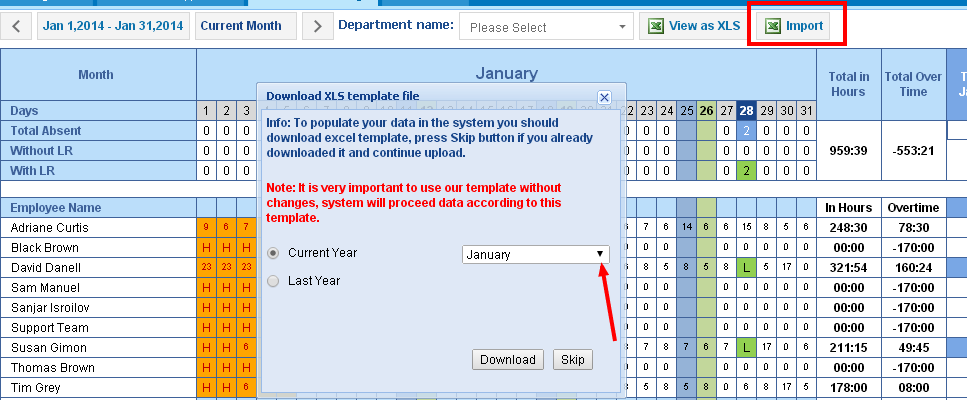
Attendance Report shows the number of hours worked by your employees in a month. The data is based on the in/out hours. It also shows leave requests taken, holidays, not approved leave requests and overtime hours compared to the timeslot.
Taken Leave Requests are labeled in green, holidays in orange and not approve leave requests in red as absent.
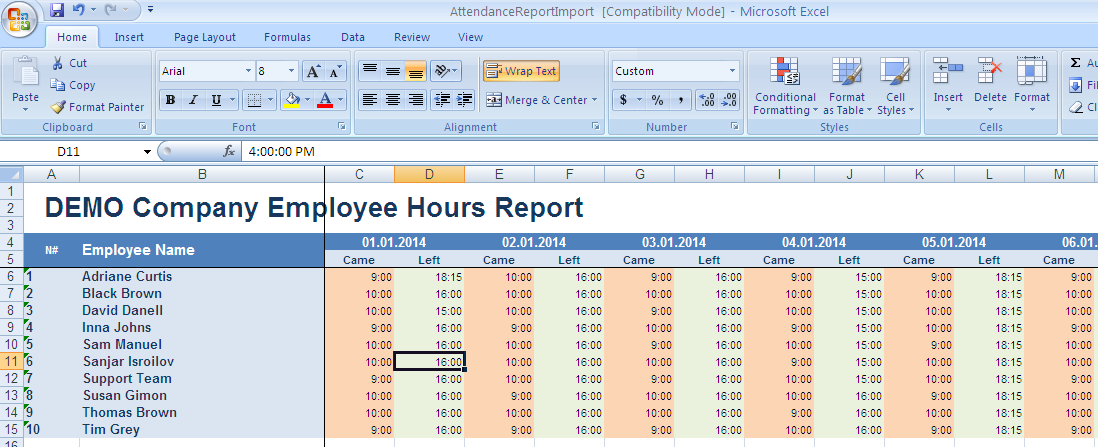
If you want to change the data in the report, you need to import your own file with the changes. So click on theImport button, download the template and make changes. If you already have downloaded the template, you can skip this step and upload the file.
Note that the entered came and left hours should follow the timeslot hours. Otherwise the import process will fail.
You can also filter by department and view the report in Excel format for more convenience.
Approve Leave Requests
Approve Leave Requests
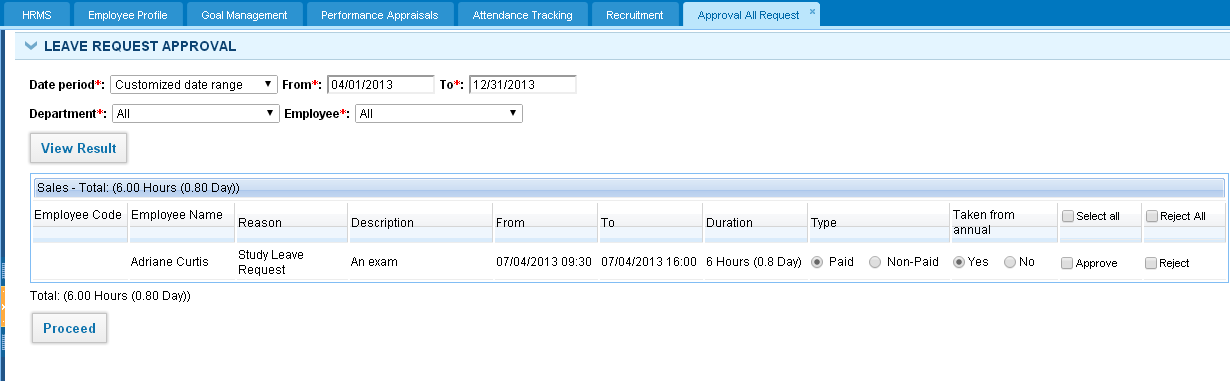
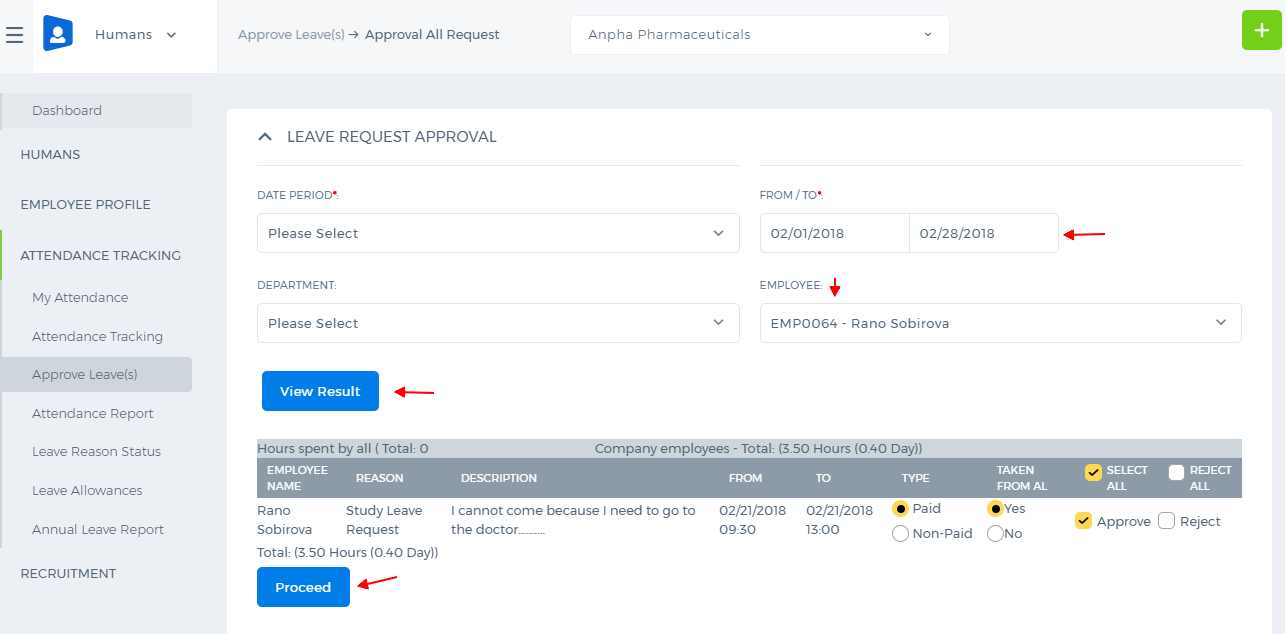
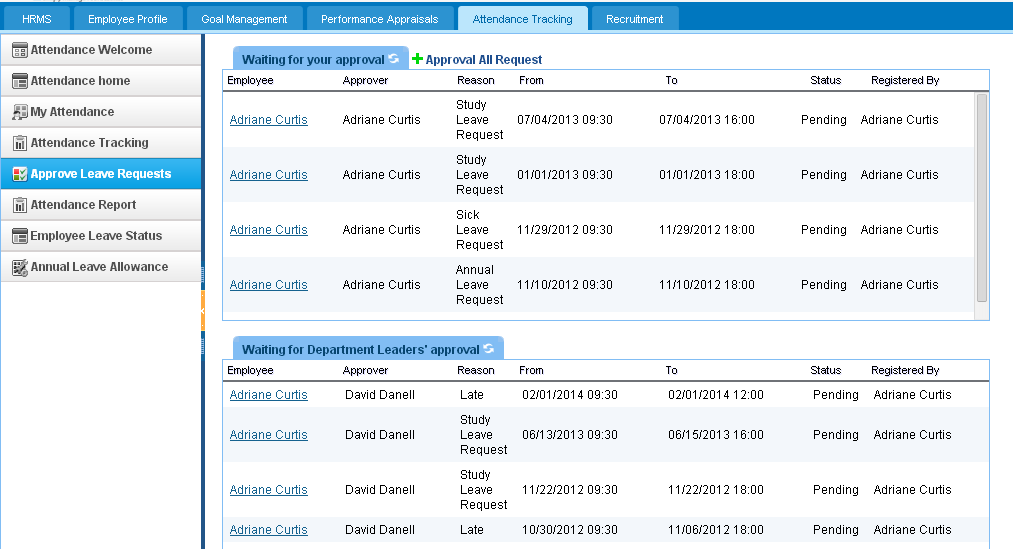
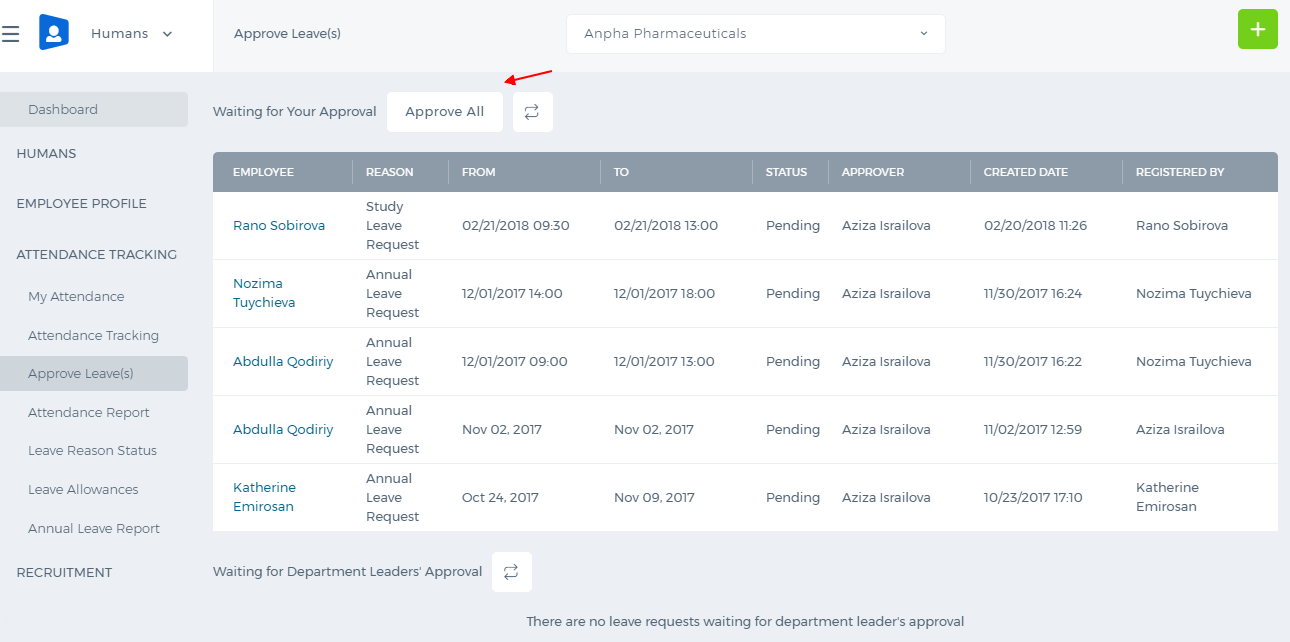
This page shows all pending leave requests either waiting for your approval or for department leader's approval.
You can quickly view the leave requests and approve them all with one click.
So click on the "Approve All Request" and choose period, a department and an employee. The "View Result" button shows you leave requests for the selected filter. You can change leave type, leave allowance and approve.
Attendance Tracking
Attendance Tracking
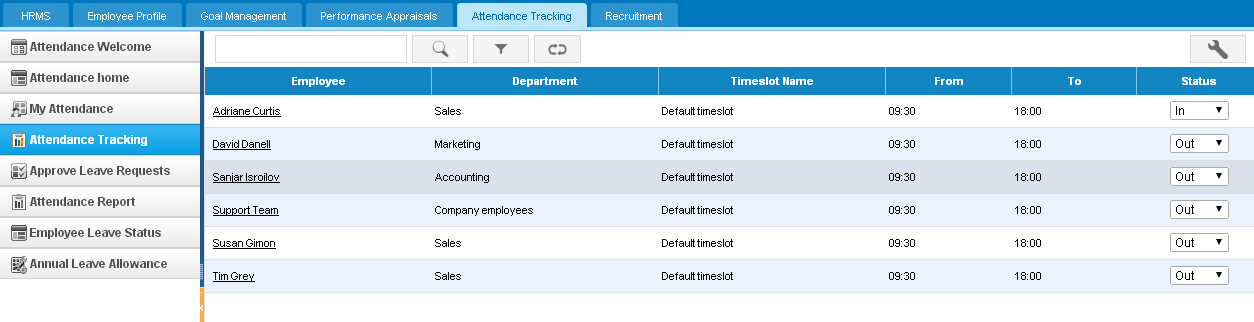
Attendance Tracking page shows all company employees and their timeslots. A click on the employee name forwards you to the Employee's attendance profile page where you can see his/her leave requests, leave status and in/out hours.
This page helps you manage the in/out hours of your employees. For example, if an employee cannot come to office and is working outside office, you can change his/her status to "In" (by clicking on the status dropdown) to register time for the correct attendance report.
My Attendance
My Attendance
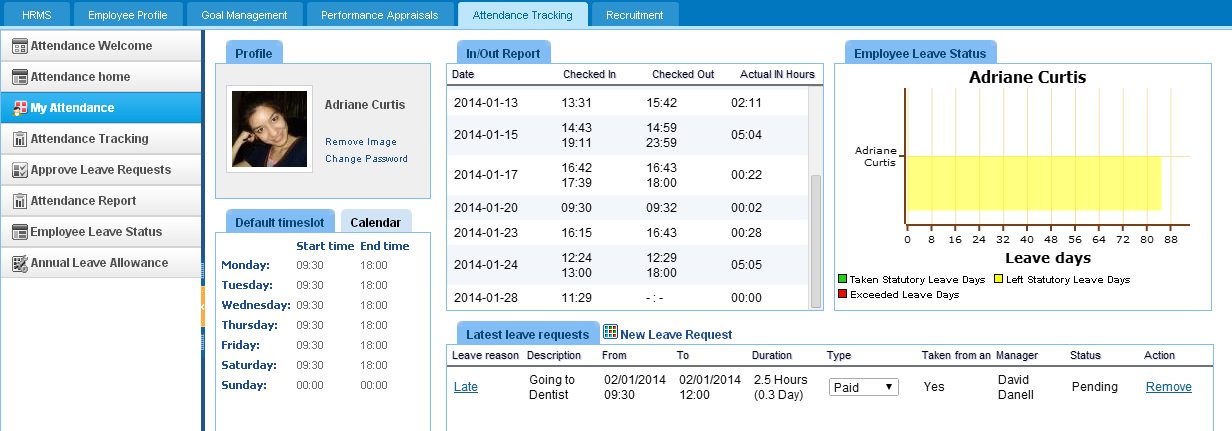
My Attendance page involves reports about your in/out hours, timeslot, leave status and leave requests for the current year.
You can add and remove leave requests or change the leave request type to paid or non-paid.
You can also look at the calendar which highlights company holidays and day-offs in red.
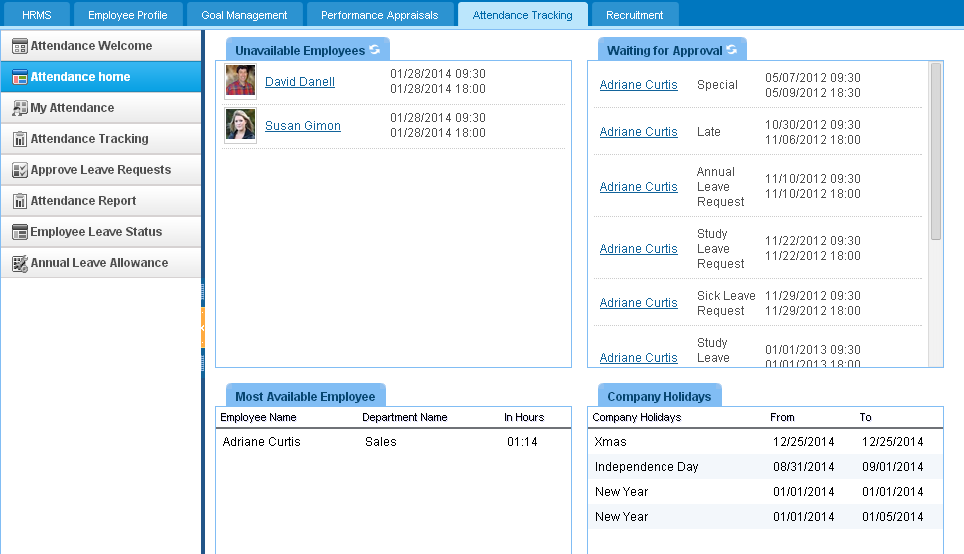
Attendance Home
Attendance Home
Attendance Home page is a dashboard that shows Unavailable Employees for the current date, Most Available Employees, Leave Requests waiting for approval and Company Holidays.
Unavailable Employees dashboard shows those who have approved leave requests for the current date.
Waiting for Approval shows all the leave requests that have not yet been approved.
Most Available Employees shows those who have been in the system most for the current month.
Company Holidays shows all public holidays for the current year.
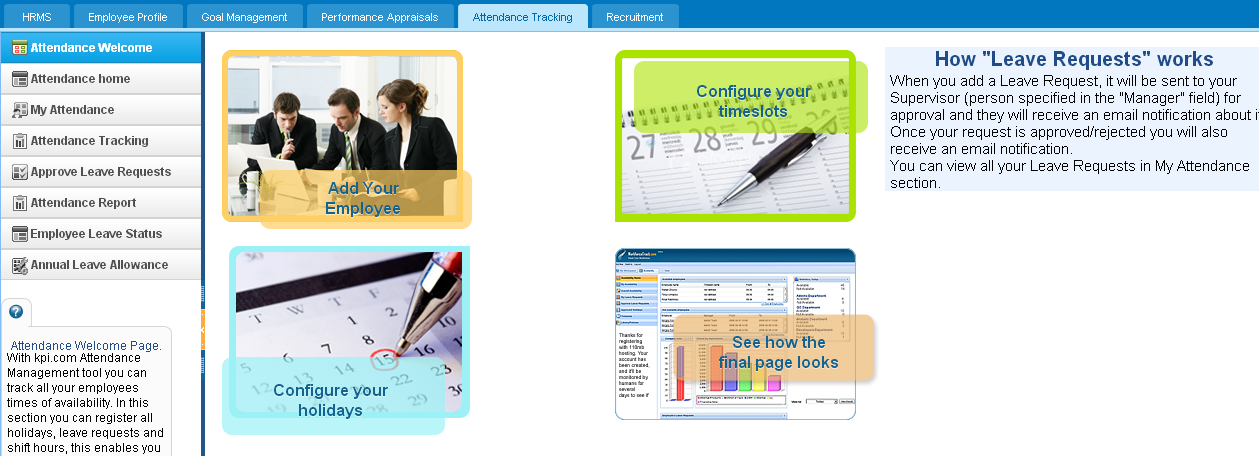
Attendance Welcome
Attendance Welcome
Attendance Tracking welcome page involves quick links to add holidays, timeslots and employees and a view of the final dashboard of your attendance profile.
So you do not need to go to Settings to add holidays and timeslots. However, this page is available for those roles who have full access to the HRMS section such as Admins and HR Managers.
 If you are using one of the Google accounts in your browser, a pop-up window shows your Google accounts. Choose the Google account with which you are going to synchronize and proceed. Alternatively, if you have not signed in any Google accounts you can sign in the following pop-up window.
 After signing in to your account, the following window will appear where you should confirm that you agree that system will be synchronized with your Google account.
 After accepting the term, pop-up window redirects you to the kpi.com system. Before synchronizing system contacts with Google contacts, you should set your kpi.com account settings for synchronization. For that, click on the Google Contacts and choose the Settings
 Following box will appear where you should match system contacts’ group with Google contacts’ group.
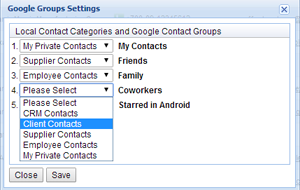 Save the settings and click on the synchronize button and system starts synchronizing with Google Contacts. It may take a few minutes depending on the number of contacts in the system.
 Add New Campaign
To add a new campaign to the list, you need to click Add New on the top menu and fill in the form which appears on your screen. Once you have finished the form, you may click Save & New, Save & Close or Cancel.
Add New Campaign
To add a new campaign to the list, you need to click Add New on the top menu and fill in the form which appears on your screen. Once you have finished the form, you may click Save & New, Save & Close or Cancel.
 Edit Information of Campaign
To edit your campaign, click on the Actions drop-down and choose the Edit Campaign feature. The form for your campaign will appear. Make your changes and save the changed campaign form.
Delete Campaign
The Delete function is located in the Actions drop-down of each campaign.
Edit Information of Campaign
To edit your campaign, click on the Actions drop-down and choose the Edit Campaign feature. The form for your campaign will appear. Make your changes and save the changed campaign form.
Delete Campaign
The Delete function is located in the Actions drop-down of each campaign.

 Add a Company
 Detect Duplicates
This is one of the options in the Actions dropdown list. Select the accounts from the list and click the Detect Duplicates function. The duplicated accounts list will be shown on your screen.
Detect Duplicates
This is one of the options in the Actions dropdown list. Select the accounts from the list and click the Detect Duplicates function. The duplicated accounts list will be shown on your screen.
 Then select the fields that should be merged and click Save&Close.
 View/Edit Activities
These two features are located in the Actions drop-down of the Activities section.
View/Edit Activities
These two features are located in the Actions drop-down of the Activities section.
 Delete Activities
Open the Actions list and click the Delete option.
Edit Activities
You can edit an event by pressing Edit Event option in the Action list or while viewing an event by clicking on the pencil in the right of the screen. Here you can make any changes related to the event.
Delete Activities
Open the Actions list and click the Delete option.
Edit Activities
You can edit an event by pressing Edit Event option in the Action list or while viewing an event by clicking on the pencil in the right of the screen. Here you can make any changes related to the event.
 When you click for editing, a window appears with detailed information about an event: name, time and location and etc.
In reminders, you can choose an email option and set time - which means how much time before it should remind the user about the event.
When you click for editing, a window appears with detailed information about an event: name, time and location and etc.
In reminders, you can choose an email option and set time - which means how much time before it should remind the user about the event.
 Recurring option helps you create the same event repeatedly.
There is an option Advanced with which you can share the event with your employees - it's showing in the top of the window and guests who are not employees by adding their emails. If you tick Send invitation to Guest, your guests will receive an invitation automatically to their emails.
Recurring option helps you create the same event repeatedly.
There is an option Advanced with which you can share the event with your employees - it's showing in the top of the window and guests who are not employees by adding their emails. If you tick Send invitation to Guest, your guests will receive an invitation automatically to their emails.
 How to add a new task
To add a new task, go to the Tasks subsection and click Tasks in the Add New dropdown from the top menu. You need to fill in the form and click Save & Close.
How to add a new task
To add a new task, go to the Tasks subsection and click Tasks in the Add New dropdown from the top menu. You need to fill in the form and click Save & Close.
 Change Task Status
Select the tasks from the list and open the More/Actions dropdown in the top menu and click Change Status. There are several options for a status change: Not Started, In Progress, Completed, etc.
Change Task Status
Select the tasks from the list and open the More/Actions dropdown in the top menu and click Change Status. There are several options for a status change: Not Started, In Progress, Completed, etc.
 Change Task Priority
The Change Priority function is located in the More dropdown in the top menu which gives three options: High, Medium, and Low.
Change Task Priority
The Change Priority function is located in the More dropdown in the top menu which gives three options: High, Medium, and Low.
 Timer
This function can be found in the Actions list of each task. A timer will help you calculate the time you spend on a task. Click Timer and Start to begin the timer. You can click Stop to discontinue it. Clicking the Log to Timesheet feature, the calculated time spent on the task will be saved in the Timesheet form in the Project Management Module.
Timer
This function can be found in the Actions list of each task. A timer will help you calculate the time you spend on a task. Click Timer and Start to begin the timer. You can click Stop to discontinue it. Clicking the Log to Timesheet feature, the calculated time spent on the task will be saved in the Timesheet form in the Project Management Module.
 Attach Documents
You can attach files and documents to your task by clicking the Document and then the Upload File. A box will appear where you need to provide the name and description of your file/document you are uploading.
Attach Documents
You can attach files and documents to your task by clicking the Document and then the Upload File. A box will appear where you need to provide the name and description of your file/document you are uploading.
 Add Task Notes
You can add or view notes to a task. You can set the visibility of your notes as Private (visible only to you) or Public(visible to all task members). Once you make the visibility Public, select members that you want to send an e-mail notification about the note you have created.
Add Task Notes
You can add or view notes to a task. You can set the visibility of your notes as Private (visible only to you) or Public(visible to all task members). Once you make the visibility Public, select members that you want to send an e-mail notification about the note you have created.
 Create Opportunity
This option is located in the Opportunities section in the top menu. Click the Add New feature and provide the required information in the fields of form which appears. Do not forget to click Save.
Create Opportunity
This option is located in the Opportunities section in the top menu. Click the Add New feature and provide the required information in the fields of form which appears. Do not forget to click Save.
 Delete Several Opportunities at Once
You need to select opportunities from the list and click the Delete option in the More list.
Basic Actions on Opportunities
The basic actions are found in the Actions drop-down, this gives you the following options: Opportunity view, edit opportunity and delete. Furthermore, you can customize the view of this section by clicking the button located on the right top side of the screen.
Delete Several Opportunities at Once
You need to select opportunities from the list and click the Delete option in the More list.
Basic Actions on Opportunities
The basic actions are found in the Actions drop-down, this gives you the following options: Opportunity view, edit opportunity and delete. Furthermore, you can customize the view of this section by clicking the button located on the right top side of the screen.

 Add Mailing List
There is an option to add a mailing list in the Add New feature that is located on the top menu of the Leads section. Once it is clicked, the box will appear asking three fields to be filled in: Name, Description, and Status of the mailing list. Provide the requested information in the fields and save it.
Add Mailing List
There is an option to add a mailing list in the Add New feature that is located on the top menu of the Leads section. Once it is clicked, the box will appear asking three fields to be filled in: Name, Description, and Status of the mailing list. Provide the requested information in the fields and save it.
 Change Assignees
Assignees can be changed using two ways: the More List or the Actions List. To use the first way, select several leads from the leads list and click the Change Assignee function in the More list. To change one assignee of a lead, open the Actions list and Assignee to choose one.
Change Assignees
Assignees can be changed using two ways: the More List or the Actions List. To use the first way, select several leads from the leads list and click the Change Assignee function in the More list. To change one assignee of a lead, open the Actions list and Assignee to choose one.

 Change Lead Status
You can set different kinds of statuses such as: attempted to contact, contact in future, pre-qualified, etc. To do so, open the Actions list and click Change Status. The list of statuses will appear and choose the most relevant status for your lead.
Change Lead Status
You can set different kinds of statuses such as: attempted to contact, contact in future, pre-qualified, etc. To do so, open the Actions list and click Change Status. The list of statuses will appear and choose the most relevant status for your lead.
 Convert Leads to Contacts
In kpi.com, leads can be converted to contacts either with opportunity or without opportunity. There are different kinds of opportunities that you should choose and set the due date for that opportunity.
Send Sales Invoice or Quote
You can send sales invoices and sales quotes in the kpi.com Leads section. Choose one of the functions from the Actions drop-down this forwards you to the Accounting & Finance Module where you need to provide the information in the form which has appeared and then send the sales invoice/quote to your lead.
Convert Leads to Contacts
In kpi.com, leads can be converted to contacts either with opportunity or without opportunity. There are different kinds of opportunities that you should choose and set the due date for that opportunity.
Send Sales Invoice or Quote
You can send sales invoices and sales quotes in the kpi.com Leads section. Choose one of the functions from the Actions drop-down this forwards you to the Accounting & Finance Module where you need to provide the information in the form which has appeared and then send the sales invoice/quote to your lead.
 Add Activity for a Lead
You can log a call and create a meeting for a lead from the Actions drop-down. Select "Add Activity" option and either log a call or schedule an event. A pop-up will appear that you will to fill with the details of the activity and save. The activity that you registered will be reflected in the Activities section and in your calendar.
Add Activity for a Lead
You can log a call and create a meeting for a lead from the Actions drop-down. Select "Add Activity" option and either log a call or schedule an event. A pop-up will appear that you will to fill with the details of the activity and save. The activity that you registered will be reflected in the Activities section and in your calendar.
 Add Case
Cases are created in three ways:
Add Case
Cases are created in three ways:


 A click on the employee name forwards to employee profile page, so see leave requests in detail.
 You can quickly view the leave requests and approve them all with one click.
So click on the "Approve All Request" and choose period, a department and an employee. The "View Result" button shows you leave requests for the selected filter. You can change leave type, leave allowance and approve.
You can quickly view the leave requests and approve them all with one click.
So click on the "Approve All Request" and choose period, a department and an employee. The "View Result" button shows you leave requests for the selected filter. You can change leave type, leave allowance and approve.