Add New Product/Service
Add New Product/Service
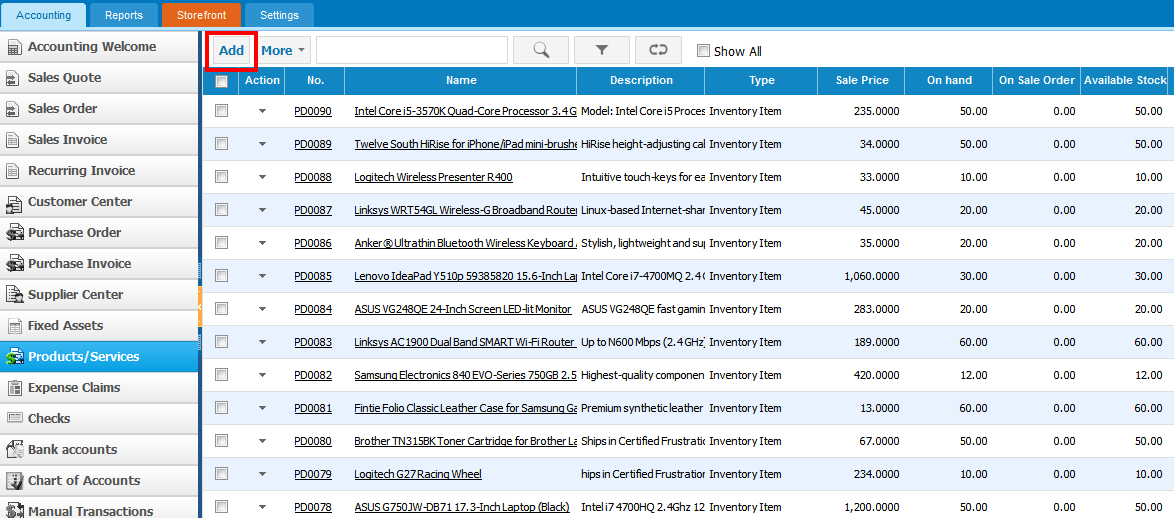
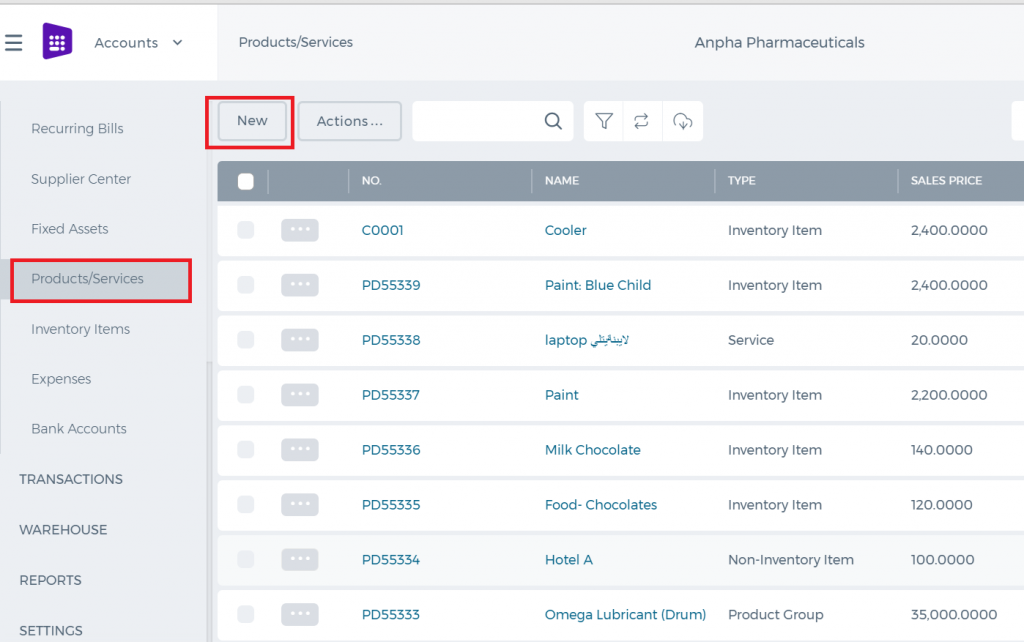
To create
Product/Services, go to Product/Services listing page and click
Add or use hot keys "ALT+t" (for Google Chrome) and "Shift+Alt+t" (for Mozilla Firefox).
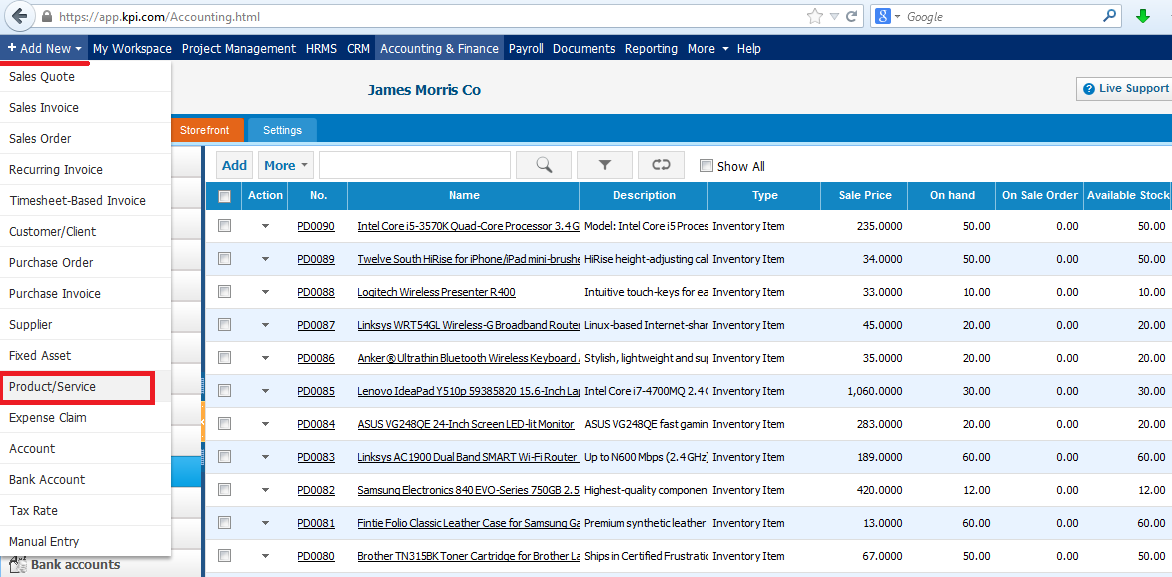
If you are already in
Accounting and Finance section you can go to
+ Add New on top left-corner and dropdown menu will appear, here you can click on the
Product/Service.
The form will appear with the following fields:
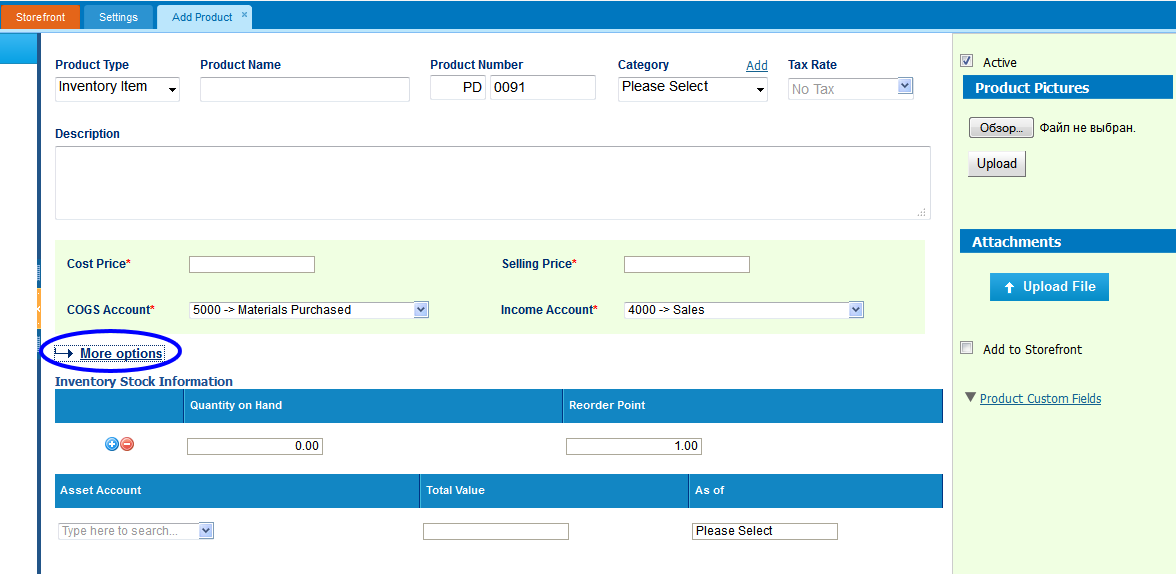
 Product Type –
 Select a type of product you are going to save. It can be
Inventory Item,
Non-Inventory Item,
Service,
Assembly Item,
Other Charge and
Product Group.
If you select
Inventory Item type following fields will be available:
Product Name – Write the name of Product or Service.
Product Number – Product number will be set automatically. You can set your own numbering in Settings, Numbering Settings, Product Numbering.
Category – Choose a category of the product or service. You can add new Category here in dropdown clicking
Add New or in Settings, Product Categories and Add Category.
Tax Rate – Tax rate to the per unit of product or service.
Cost Price – Cost price of the product to the company.
Selling Price – Selling price of the product to customers.
COGS Account – Cost of Goods Sold account. By default
Materials Purchased will be set, you can choose other COGS account in dropdown menu.
Income Account –
Sales account will be set by default, you can choose another income account from dropdown menu.
Quantity on Hand – Number of the products that company has currently in Stock.
Reorder Point – Enter the level of inventory when an order should be made with suppliers to bring the inventory up.
Asset Account – Choose an asset account from dropdown menu to register your inventory item to your Stock.
Total Value – Total cost of the product/services, it will calculated automatically based on the cost price and Quantity on Hand of the Inventory Item.
As of – Select the date that Inventory item came to your Stock.
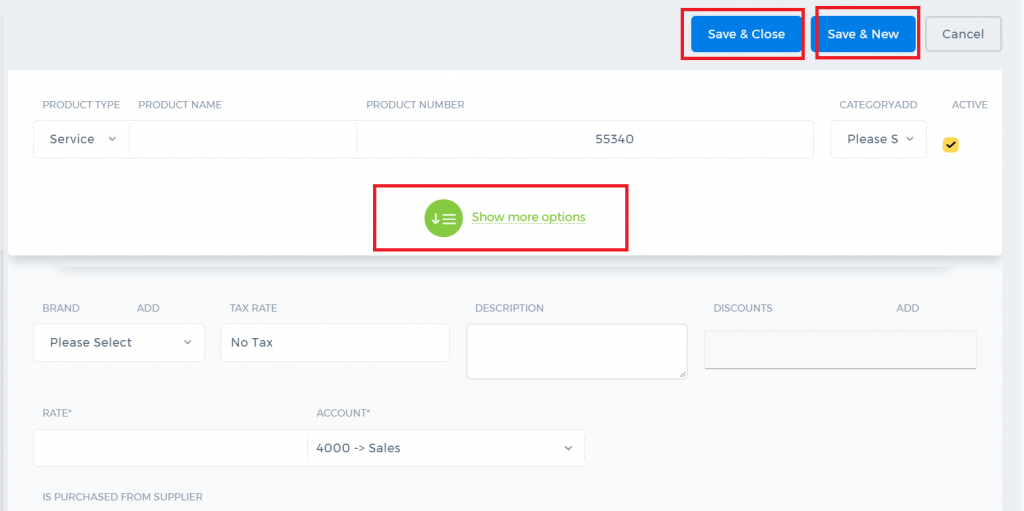
If you are going to input more data about the Product you can push
More options:
SKU number
UPC number
Unit measurement
Vendor
Manufacturer
Part number
Products & Services Overview
Products & Services Overview
Products & Services
Products & Services at
kpi.com can accommodate various industries from services to manufacturing companies.
To add a Product/Service, go to Products/Services listings page and click Add.
From Product Type, select the right item, be it Inventory Item, Service, Product Group, Assembly Item or other types, set its category, add product images that you want to see on your product view.
In addition,
kpi.com has a multiple-warehouse add-on. Once enabled for your company, you can assign warehouses and locations, to your items when adding and monitor stock valuation report by warehouse.
Spending and Receiving Transactions
Spending and Receiving Transactions
If you need to make adjustment to your accounts, change customer, supplier balances, allocate costs across projects, then Manual Transaction at
kpi.com is the right feature you need.
Date - Enter date information
Narration - Narration of the transaction
Entry No - Number of Manual Transaction
Memorized transaction - If Enable transaction information will be remembered
Account - Select account
Debit/Credit - Enter Sum of money into necessery side
Description - Enter Description
Name - Name of the Transaction
Project - Select Project
Department - Choose Department
Note:
When you put money in or spend money on behalf of the company, you should always credit owners equity account (or a separate owners equity account name something like additional paid-in capital, depending on your situation).
The debit would then be to either cash if you were putting money in (receive money), or an asset, or an expense account (spend money) such as office supplies.
Import Manual Transactions
Import Manual Transactions
To import your Manual entry transactions, open Accounting >>Transactions>>Manual transactions tab
In the following form click on CSV file and download a Sample XLS file.
In excel file you should fill out the mandatory fields such as Narration, Date, Reference, Account code, Debit and Credit. Based on your preference you can fill out others.
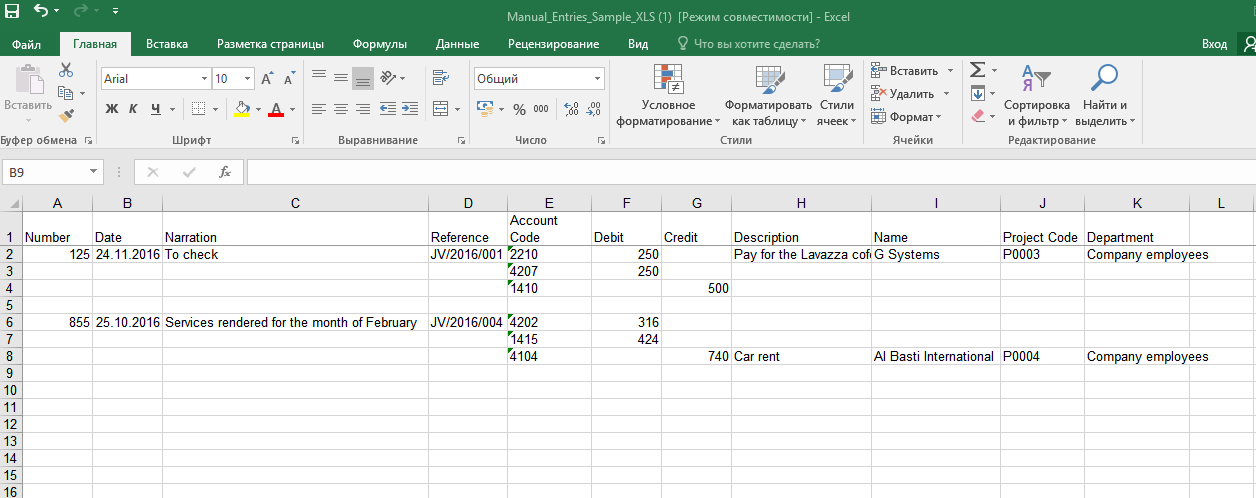
To import manual transactions successfully you should follow these rules:
1. There must be only one value for each transaction Date, Reference and Narration.
2. Sum of Debit and Credit amounts in each transaction must be equal.
3. Chart of account code must be in the system.
4. Date format in Excel must be similar with date format in your kpi.com account.
After finishing filling Excel sheet, you must save it in CSV format to import in kpi.com.
The system will provide you with imported and not imported manual transactions’ statistics through email.
How to make Journal Entries for Retained Earnings
How to make Journal Entries for Retained Earnings
The retained earnings figure lies in the Share Capital section of the balance sheet. The retained earnings figure shows the collected profits of past and current periods that are distributable to the stockholders of a corporation; the amount presented through retained earnings originates from the corporation’s income statements (Profit and Loss report).
Net Income or Loss
The closing entries of a corporation include closing the income summary account to the Retained Earnings account.
If the corporation was profitable in the accounting period, the Retained Earnings account will be credited;
Dr Sales
Cr Retained Earnings
if the corporation suffered a net loss, Retained Earnings will be debited.
Dr Retained earnings
Cr Sales
Dividends
When dividends are declared by a corporation's board of directors, a journal entry is made on the declaration date to debit
Retained Earnings and credit the current liability
Dividends Payable. It is the
declaration of cash dividends that reduces Retained Earnings.
Dr Retained Earnings
Cr Dividends Payable
Manual Transaction Overview
Manual Transaction Overview
Manual Transactions
If you need to make adjustment to your accounts, change customer, supplier balances, allocate costs across projects, then Manual Transaction at
kpi.com is the right feature you need.
Closing the Fiscal Year
Closing the Fiscal Year
In the system, there is no need to add financial year closing entry. System will calculate profit and loss on the run-time base and in Trial Balance report you will see 0 beginning balance for Revenue and Expense accounts. Their balances will be shown in Retained Earnings accounts in Beginning Balance column. If you go to transaction details of Retained Earnings account in Account Transactions report, you will see per financial year net profit (loss).
Consolidated Reports
Consolidated Reports
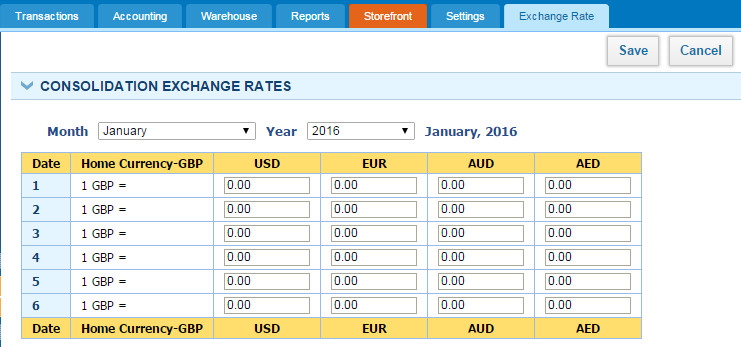
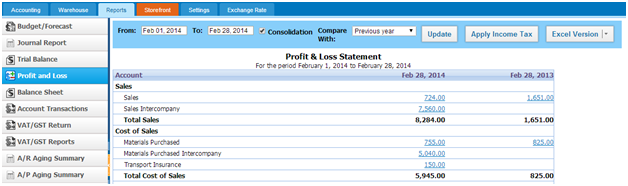
To consolidate Profit & Loss and Balance Sheet reports, parent company admin or accountant need to set proper exchange rates under Exchange Rates tab, which is available only in parent company account and lock the ex-rates by clicking "
Save". After saving, ex-rates cannot be altered.

If no exchange rates are set in the Exchange Rate tab, in consolidation, transactions will be divided by 1 for the missing date.
Once the exchange rates are set and locked, you can see consolidated Profit & Loss and Balance Sheet statementsparent company, all you need to do is to check "
Consolidation" check box and click "
Update" button to see up-to-date report.
Intercompany Purchases
Intercompany Purchases
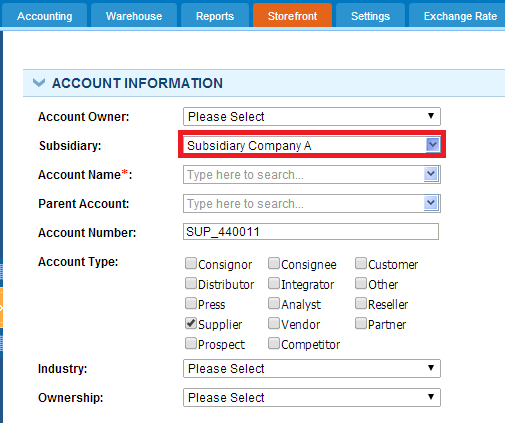
Add parent/subsidiary company as a Supplier
Logic of adding a supplier as a subsidiary is the same as adding customer as the subsidiary.
In adding supplier, you would need to choose subsidiary from the subsidiary field, fill required fields and save it. Once you have subsidiaries as a supplier you can start purchasing services and inventory items.
Creating intercompany Purchase invoice
Select the Supplier related to a subsidiary company and choose the right currency, which is limited to the base currencies of the parent and subsidiary company.
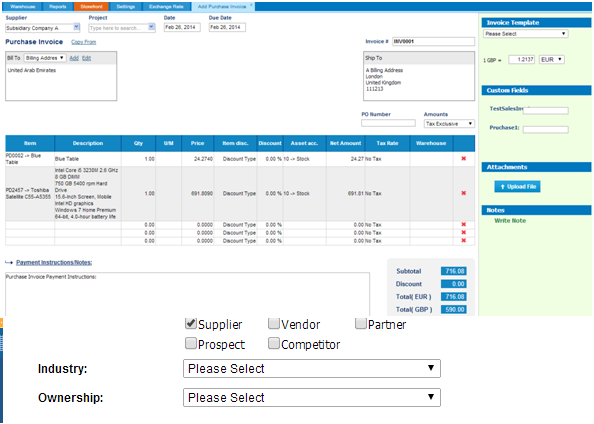
Once a purchase invoice issued by a parent company, it will be listed in Sales Invoice listings page of the child company with "
Pending" status.
Creating Intercompany Sales Invoice
Creating Intercompany Sales Invoice
Select the customer related to a subsidiary company and choose the right currency, which is limited to the base currencies of the parent and subsidiary company.
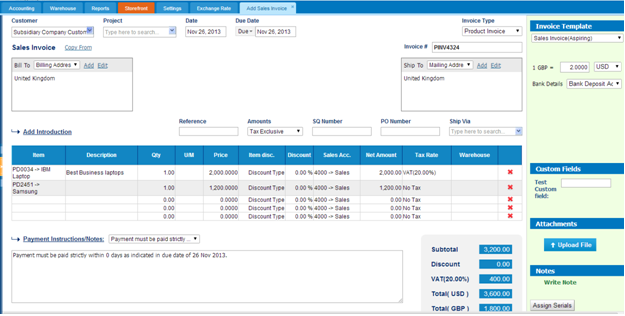
Once a sales invoice issued by a parent company will be listed in Purchase Invoice listings page of the child company with "
Pending" status. Accountant of the subsidiary company would then need to login to their account and click the button under "Action" in Purchase Invoice listings as is shown in the screenshot to the right.
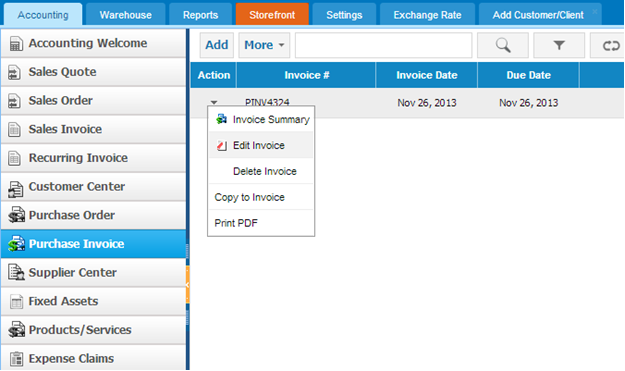
Child company accountant or admin would need to set Purchase Invoice number and double check the exchange rate in the right bar and click "Draft" button, which would set the status of the purchase invoice into Draft. Accountant would need to revisit the purchase Invoice and click "Approve Invoice" button to finalize intercompany sales.
Intercompany Sales
Intercompany Sales
To conduct intercompany sales, which could be between subsidiaries from bottom to up sales, from parent company to subsidiaries or vice versa, you would need to add a customer and relate one of companies in the network.
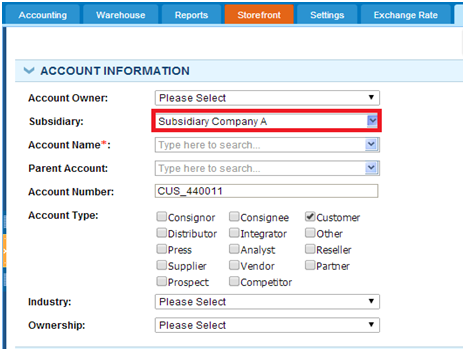
Add subsidiary/parent companies as a Customer
In adding a customer, you would have an additional field
“Subsidiary”, which is visible only if Multi-Company feature is enabled.
In order to relate a customer to subsidiary you would need to select from the list of active subsidiaries in your company. After you have the subsidiary as a customer you can start selling services and inventory items. (Product Group and Assembly items cannot participate in intercompany sales).
If the items you are selling to your subsidiary are not listed in that company's Products/Services listings page, those items will be automatically created in child company's account.
Multi-Company Settings
Multi-Company Settings
With the kpi.com you can manage multi-company accounting and interact with the subsidiary companies.
Multi-company accounting feature is enabled upon the request, you can send request to
support@kpi.com.
After passing Accounting & Finance "Getting Started", locate your name from the top right corner and click"
Settings" link, which will lead to the following screen:
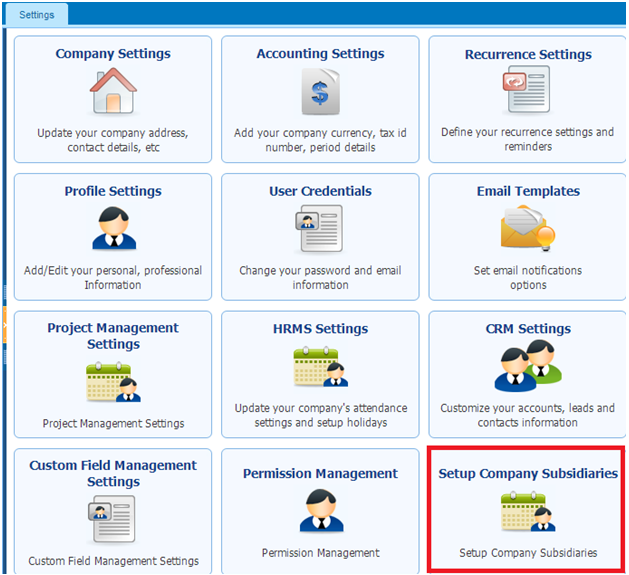
Once “multi company” feature is enabled in your company, you will find additional settings
“Setup Company Subsidiaries".
Proceed with the link to arrive at Subsidiaries listings page. Click
Add New button to invite your subsidiary company or companies.
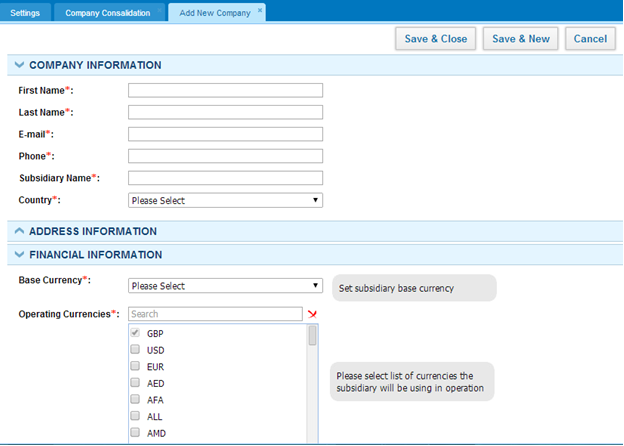
In adding a subsidiary company you would need provide basic information under
Company information,
Address information and
Financial information.
Note: Under
Financial Information you will need to provide subsidiary’s
Base Currency and select other currencies if child company deals with it currencies in their daily activity under
Operating Currencies.

You need to make sure that Parent Company's base currency coincides with child companies Base Currency or is listed under Operating Currencies.
Overview of Role Level Access
Overview of Role Level Access
User Roles in kpi.com
Your level of access to kpi.com depends on your user role. If your user role allows it, you may be able to set up other users or change your own role settings.
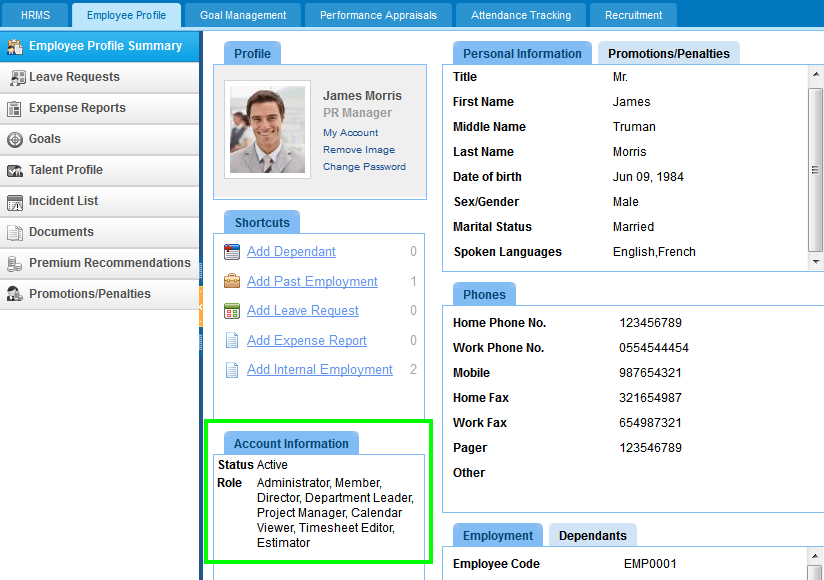
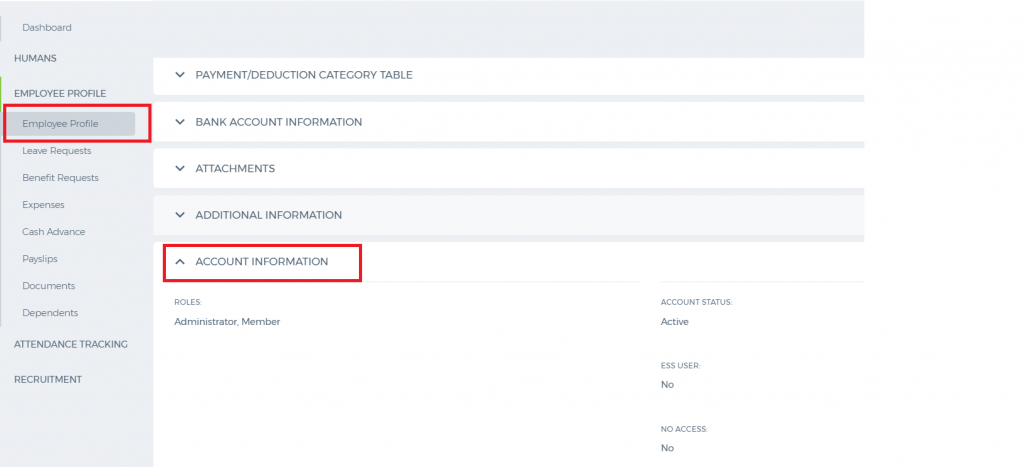
You can see what role you have in
Employee Profile Summary in the
Account Information column in
HRMSsection.
 User Roles and Permissions
kpi.com has following User roles by default and you can add New User roles yourself:
- Administrator
- Director
- HR Manager
- Accountant
- Admin Location
- Sales Manager
- Project Manager
- Department Leader
- Customer Service Representative
- Sales Person
- Member
- Calendar Editor
Administrator - Has highest level of permissions, can see all projects, tasks, employees, and can see any other listings in the company without any restrictions. Only administrator can remove data which was created by others.
Director - Has high level of permissions, can see all projects, tasks, employees, and can see any other listings in the company with some restrictions.
HR Manager - Has full access to HRMS system, can view all leave requests, can approve those leave requests, and has full control over employees, positions, salary grades and departments. HR manager additionally should have member access role for other sections.
Accountant - Has full level access to Accounting System. Accountant can create sales quotes, sales invoices, etc... can make manual transaction entries and view reports. Accountant will view other sections with member access role.
Admin Location - Administrator of office locations, can view all project, task, employee, and all other data in the location, but can't see data of other locations.
Sales Manager - Can assign leads, tasks, and events in CRM to sales people in his/her team.
Project Manager - Has full control over project management section. Project manager can add projects, tasks, assign employees to the project, approve timesheet, and view reports.
Department Leader - Can see all projects, tasks, employees and positions in his/her department. Can add new employees to the department, and also can initiate performance appraisals to employees in their own department.
Customer Service Representative - Can add, remove, and change the status of all cases, add solutions, close cases.
Sales Person - Can see assigned leads, accounts and contacts, work with leads and tasks. Sales person has access to CRM sections, but to see other sections, he or she will be a member by default.
Member - Default role in the system. Members will view their own data only, and can remove their own data only. Members can add tasks to themselves, once assigned to project, they can edit their own information in employee profile, and submit expense claims for approval.
Calendar Editor - Can see other people's calendar, can add events to other people, and also remove events from events lists of others.
Move Inventory to Another Warehouse
Move Inventory to Another Warehouse
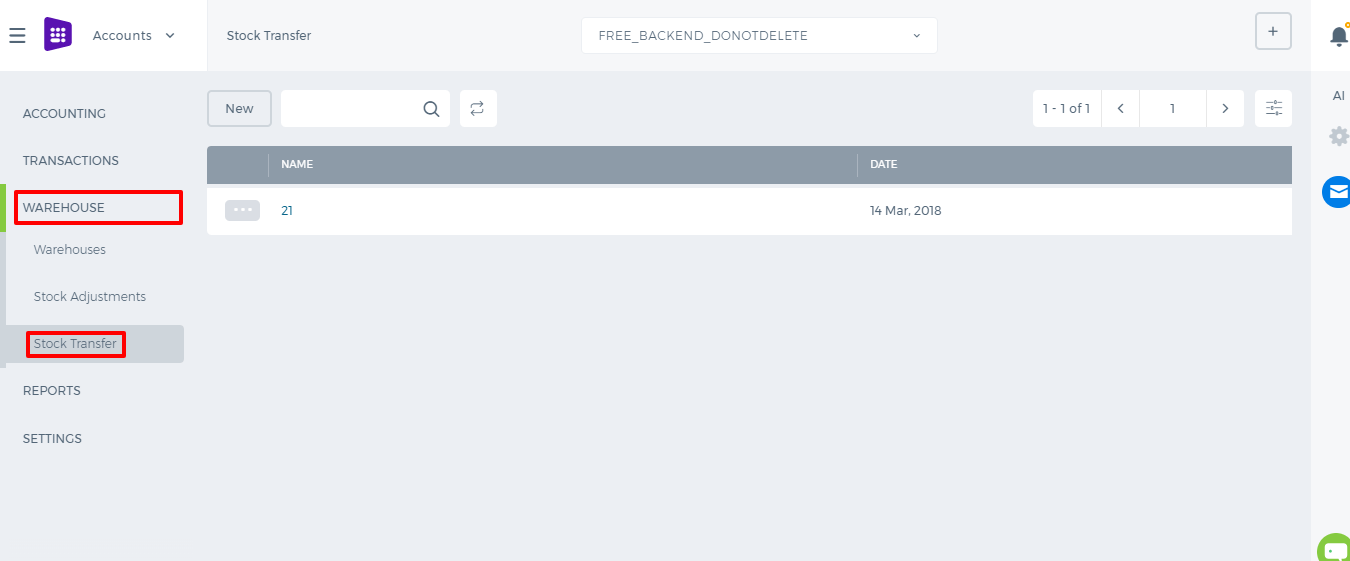
To move the inventory to another warehouse, ensure that the
Multiwarehouse option is enabled on your account. Then select the
Stock Transfer either by clicking
More on the
Product Listing page or the left sidebar on the
Product Summary page.
Once you are there, you need to specify the warehouse along with the asset account for the transfer to be completed.
For more detailed information, visit our blog page here: http://blog.kpi.com/inventory-control-and-multi-warehouse-management/
Stock Transfer
Stock Transfer
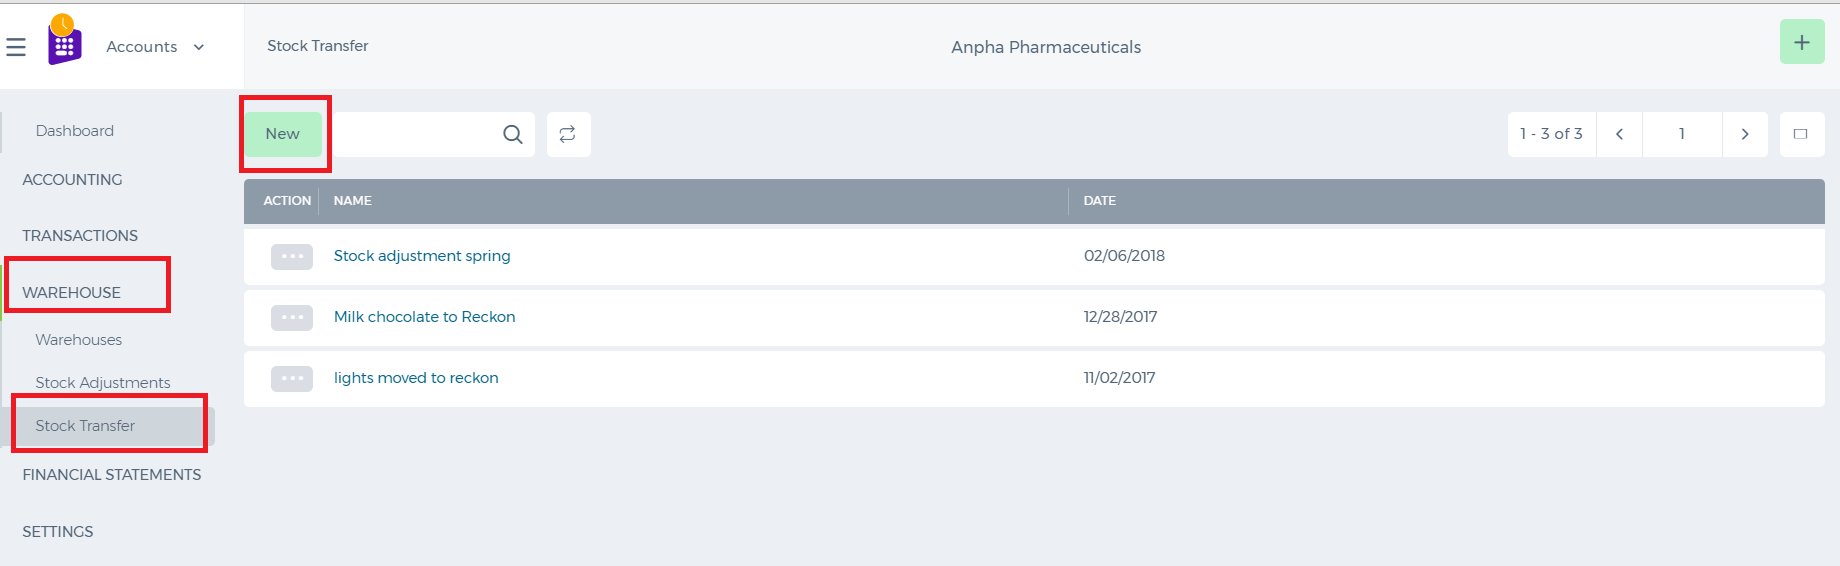
1. In
Stock Transfer you may transfer products or stock from one warehouse to another warehouse. To do Stock Transfer, firstly, go to the
Warehouse page. Choose
Stock Transfer from list of menu.

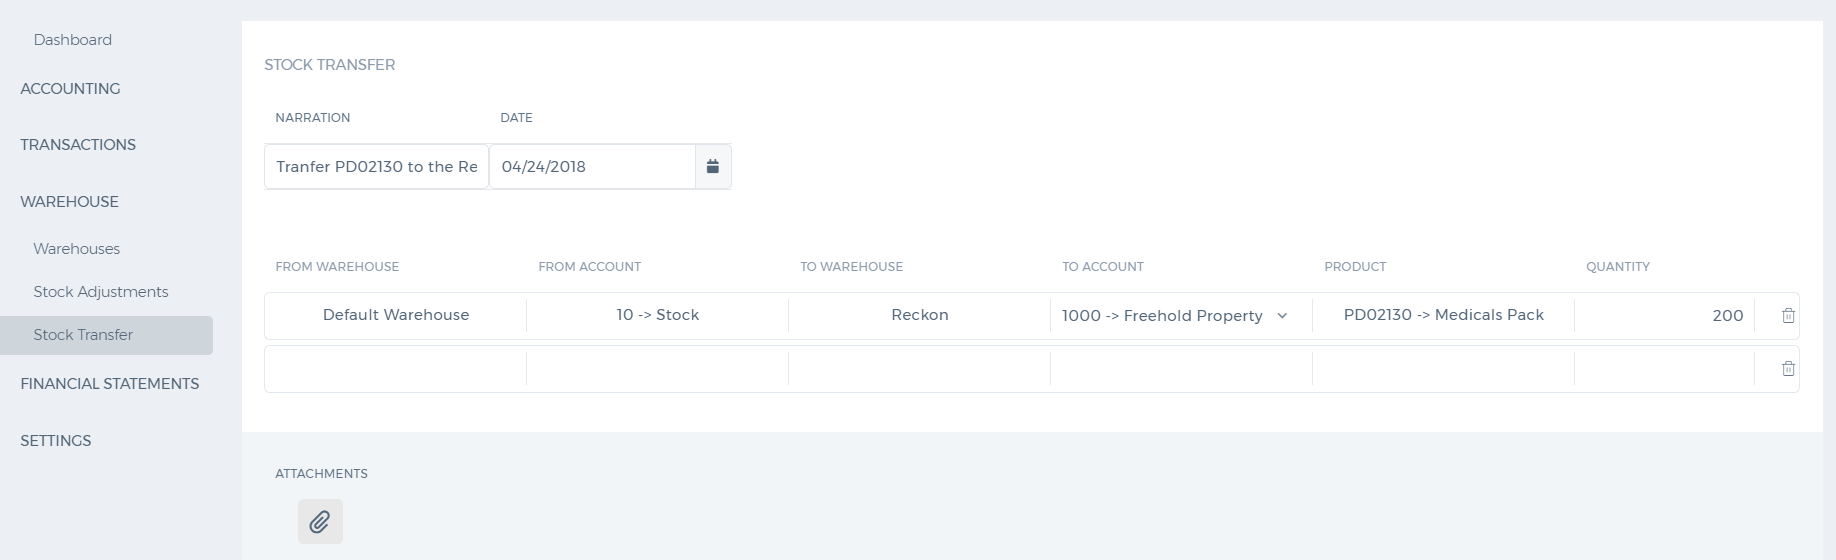
2. Then, choose warehouse which have products in
From Warehouse and identify
Account. Then select
Warehouse which has to be transfered with
Account.
In Product - you should recognize which product you are transfering.
Quantity - select quantity you need
Remove - delete all entry
Save - Save all entry
Stock Adjustments
Stock Adjustments
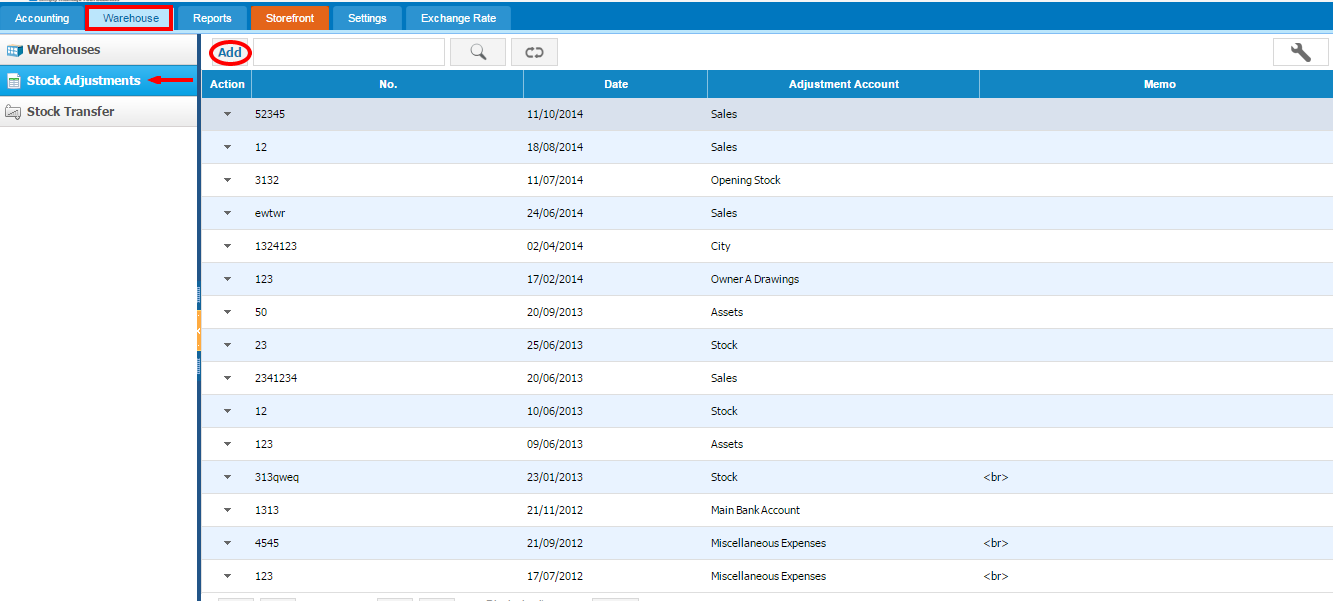
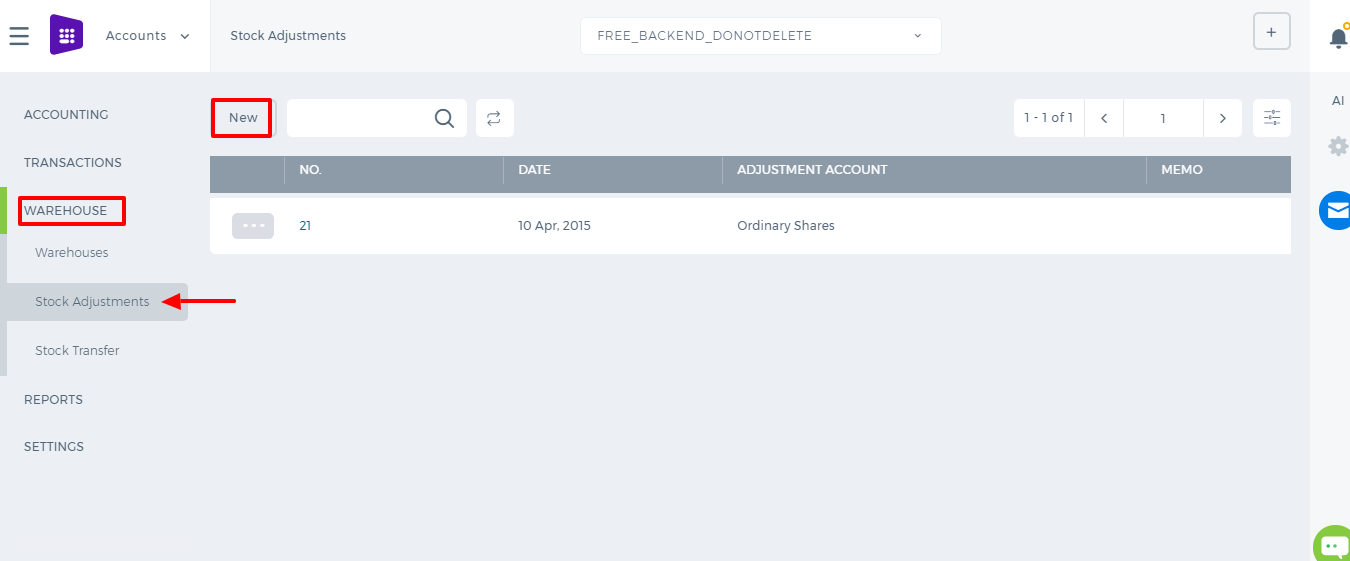
1. In
Stock Adjustment you may add stocks / products to warehouses. For Creating Stock Adjustment, go to
Warehouse page and choose Stock Adjustment from left corner menu. Then Click
Add to create new Stock Adjustment:
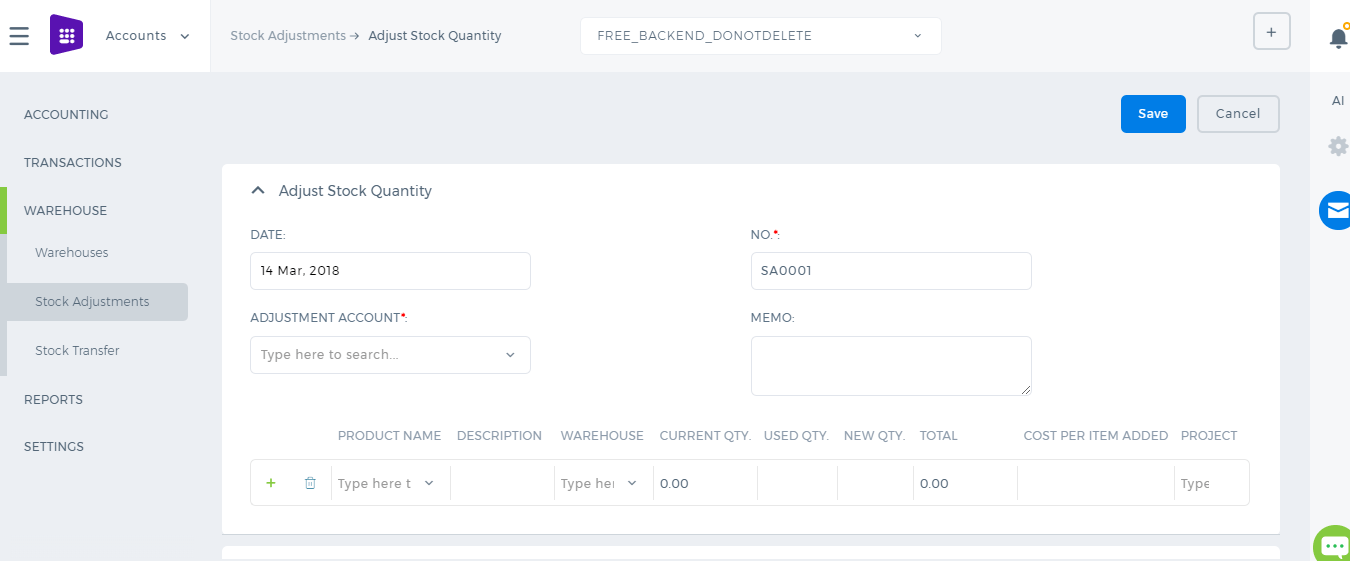
2. When create new Stock Adjustment you may see
Adjust Stock Quantity page. In this page you should fulfill each dates and informations.
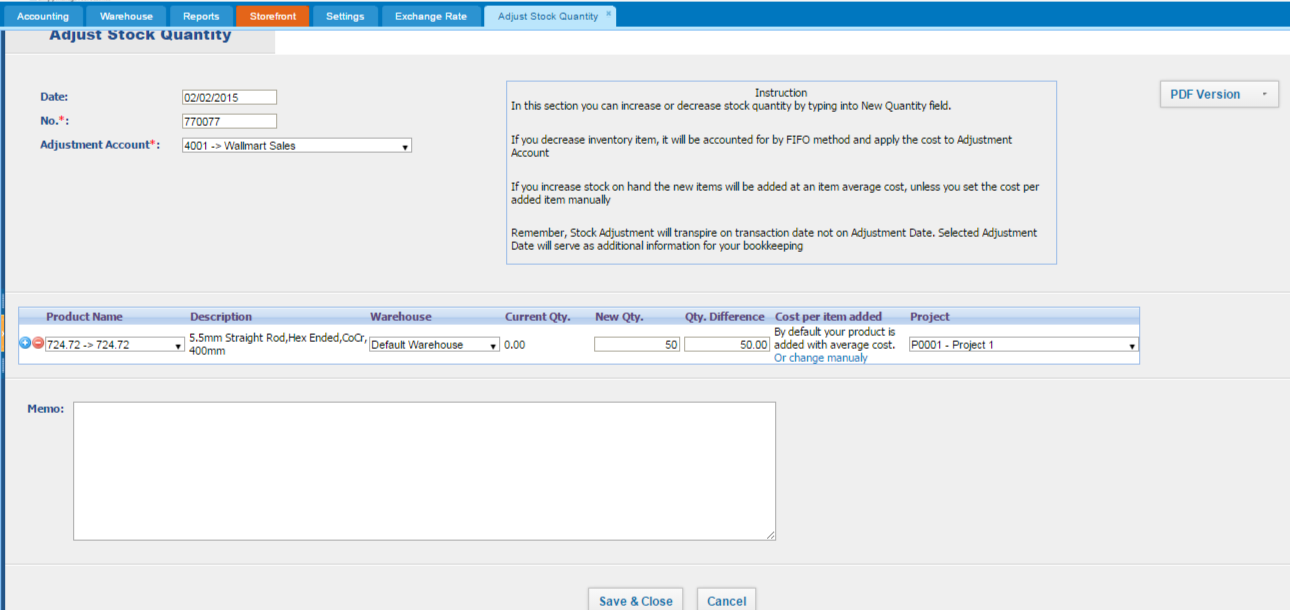
 Date
Date - Enter date
No. - number of adjustment
Adjustment Account - Adjustment account
Prodact Name - The name of product
Description - Description of Product
Warehouse - Name of Warehouse
Current Quantity - current quantity
New Quantity - enter new quantity
Quantity Difference - difference between current and new quantity
Cost per item added - cost of item ( change it manually )
Project - Select the name of Project
PDF Version - get PDF version of Stock Adjustment
Save & Close - Save all entries
Cancel - cancel all entries
Fixed Assets
Fixed Assets
At
kpi.com you can add fixed assets, automatically calculate depreciation on a straight line method and dispose of either by selling on the account, for cash, that will properly be accounted in your financial reports.
 Add Fixed Asset
To add a fixed asset, go to
Fixed Assets listing page, and click
Add. From
Category select the
Fixed Asset Category, such as Furniture & Fixtures, Equipment, etc. If you cannot locate the right fixed asset category, then go to the
Chart of Accounts, and add the right category
Fixed Asset account.
Fixed Asset Code is automatically generated and comprises of suffix + four digit number. You can input any combination of suffix and digits in the pattern provided.
Fixed Asset Cost is a historical price of a fixed asset in company's base currency. Thus, if you set up your company with kpi.com, and your company base currency is USD, any number in
Fixed Asset Cost is also denominated in USD.
Fixed Asset Purchase Date is the date when a Fixed Asset is purchased. If a purchase date of a fixed asset is after your company conversion period, and if
Calculate Depreciation is enabled, the system calculates depreciation expense and accumulated depreciation expenses.
Useful life - is entered in years, which in the depreciation calculation used as the denominator. Useful life usually refers to the duration for which the item will be useful (to the business), and not how long the property will actually last. Many factors affect a property's useful life, including the frequency of use, the age when acquired and the repair policy and environmental conditions of the business. The useful life for identical types of property will differ from user to user depending on the above factors, as well as additional factors such as foreseeable technological improvements, economic changes and changes in laws.
Residual Value - is subtracted from the cost of the fixed asset in calculating depreciation expense throughout the useful life of the asset.
How much a fixed asset is worth at the end of its useful life.
If you are a business owner, let's say your desk has a useful life of ten years. How much the desk is worth at the end of ten years (its fair market value as determined by agreement or appraisal) is its residual value (also known as salvage value).
Purchase Invoice - through this link you can add this fixed asset to purchase invoice form.
Purchase Order - through this link you can add this fixed asset to purchase order form.
Account - field completes the required input fields and it is related to an account from the chart of accounts. This field is the account that the fixed asset financed by. You need to select one account if you do not link this fixed asset to Purchase Order or Purchase Invoice.
After entering all fields and clicking save, the fixed asset is created and it is saved in the system.
Purchase Date After Conversion Date
For instance, if you purchased a fixed asset in the amount of $130,000, with useful life 10 years and a residual value of $10,000 on February 2012, and your company conversion date is January 2012, the following transaction transpires:
Fixed Asset Dr. 130,000
GL Account (or AP) Cr. 130,000
Depreciation Expense Dr. 2,000
Accumulated Depreciation Cr 2,000
Purchase Date Before Conversion Date
If purchase date of the fixed asset is December 2011,
Fixed Asset Dr. 130,000
GL Account (or AP) Cr. 129,000 (130,000 - one month acc. depreciation)
Accumulated Depreciation Cr. 1,000
Workflow of Expense Claims
Workflow of Expense Claims
Expense claims can be seen by each employee once their accounting and finance module is fully setup by administrators. Employees can leave various forms of expense claims and send them for managers’ approval.
Workflow of Expense Claims:
- Employees are able to submit expense claim for approval;
- Department Leaders and project managers review expense claim and choose to approve or reject it;
- Rejected expense claims can be changed and re-submitted again;
- Once Expense Claim is approved, accountants can make payment to expense claim.
October 2017 Update
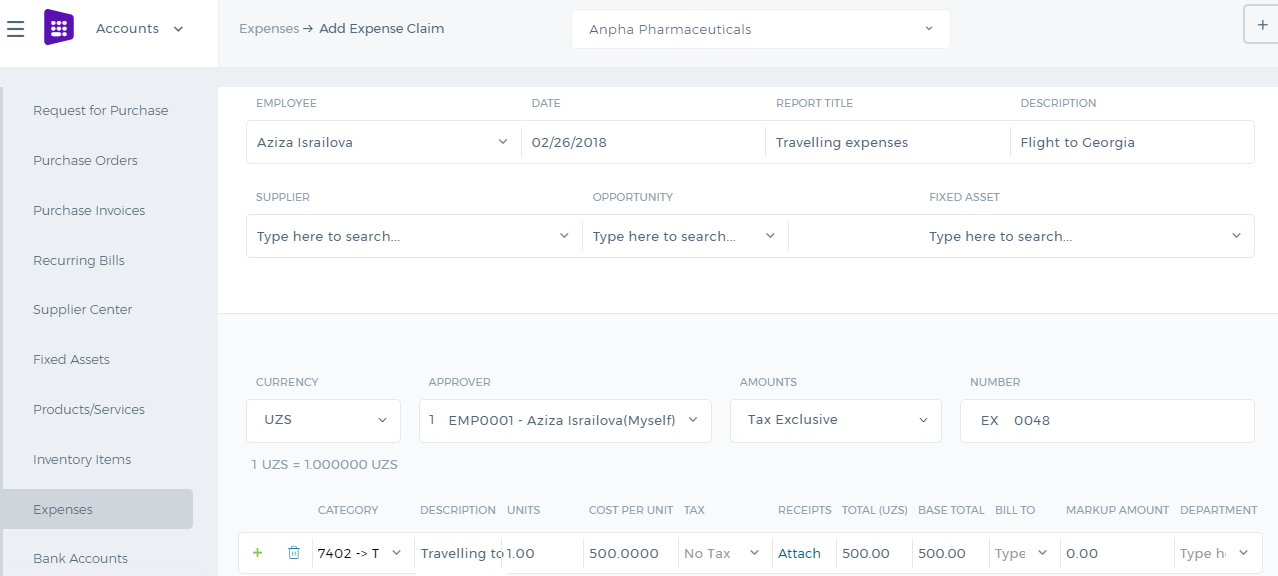
After the October 2017 system upgrade, the expenses are separated into Company and Employee expenses. Company expenses can be created by higher level users like Admin, Director and Accountant while Employee expenses can be created by everybody.
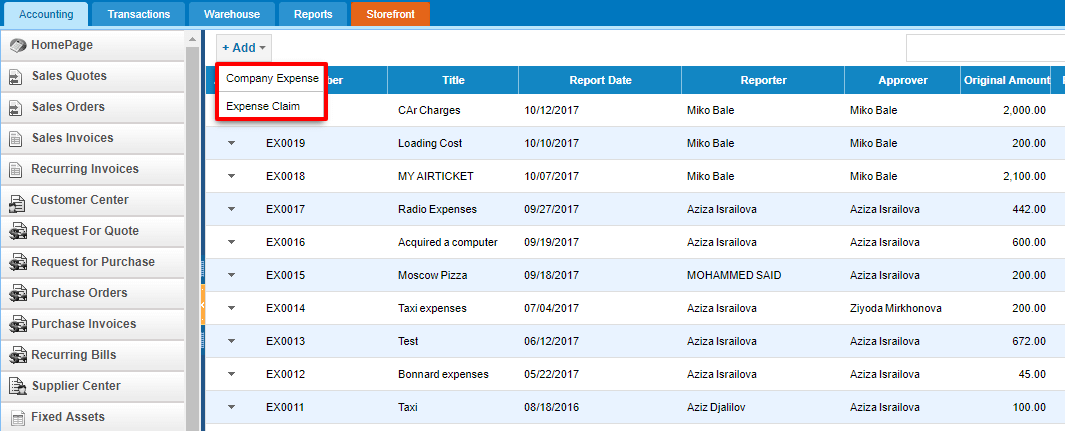
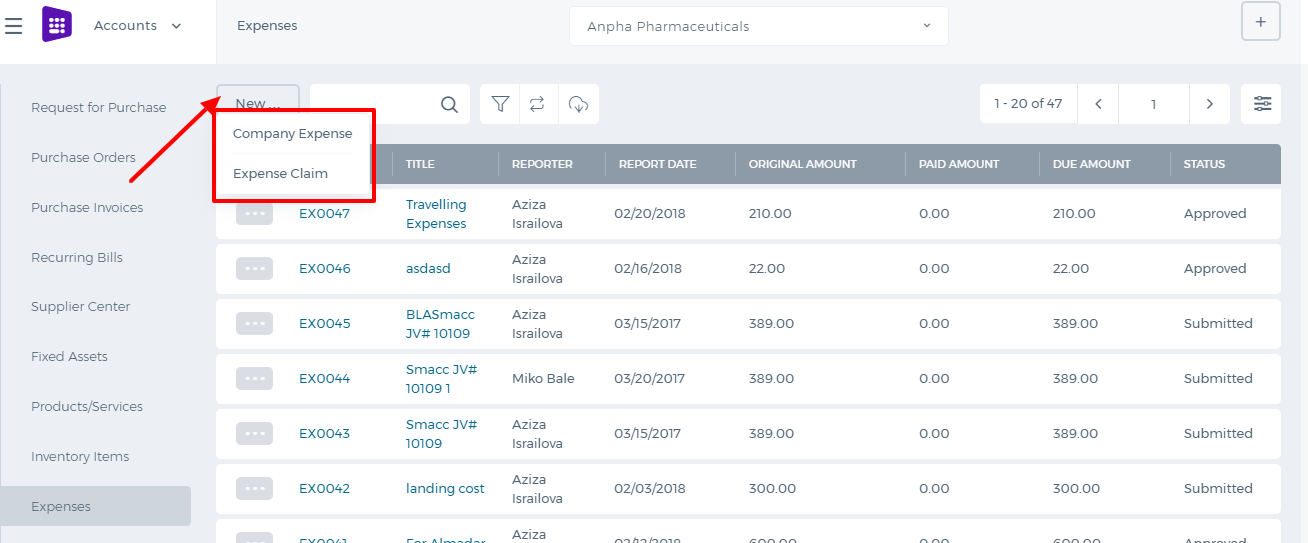
Employee expense form has been changed and simplified. There is no Category and Bill to columns. These fields will be chosen by the manager while approving the employee expenses.
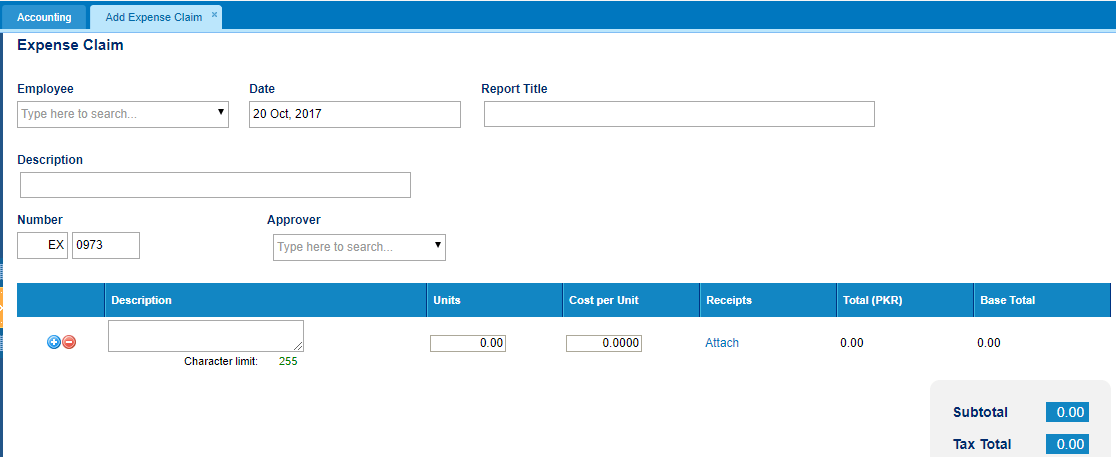
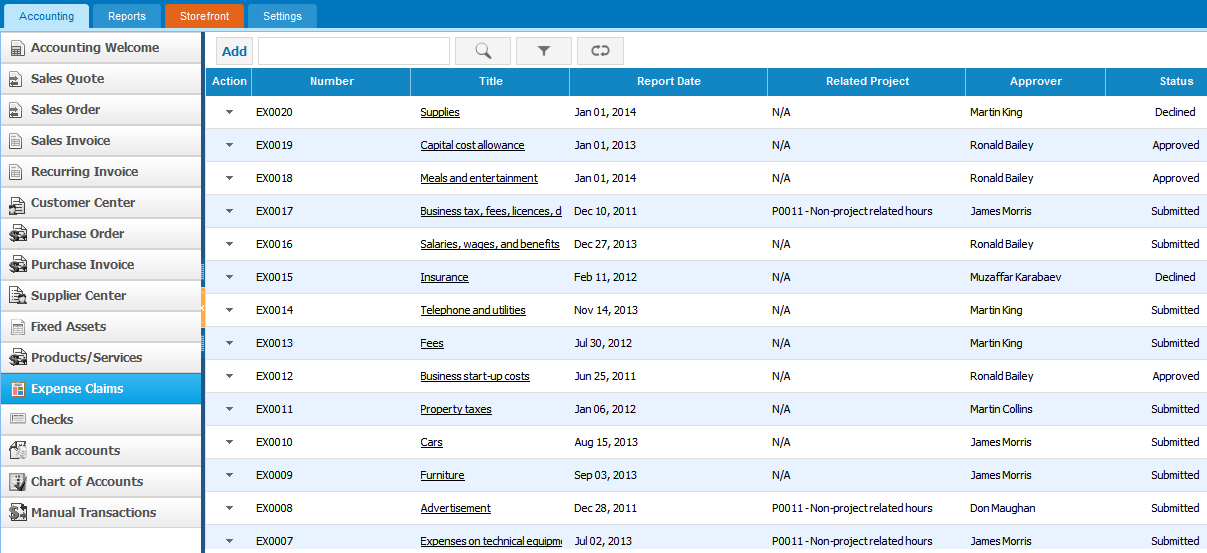
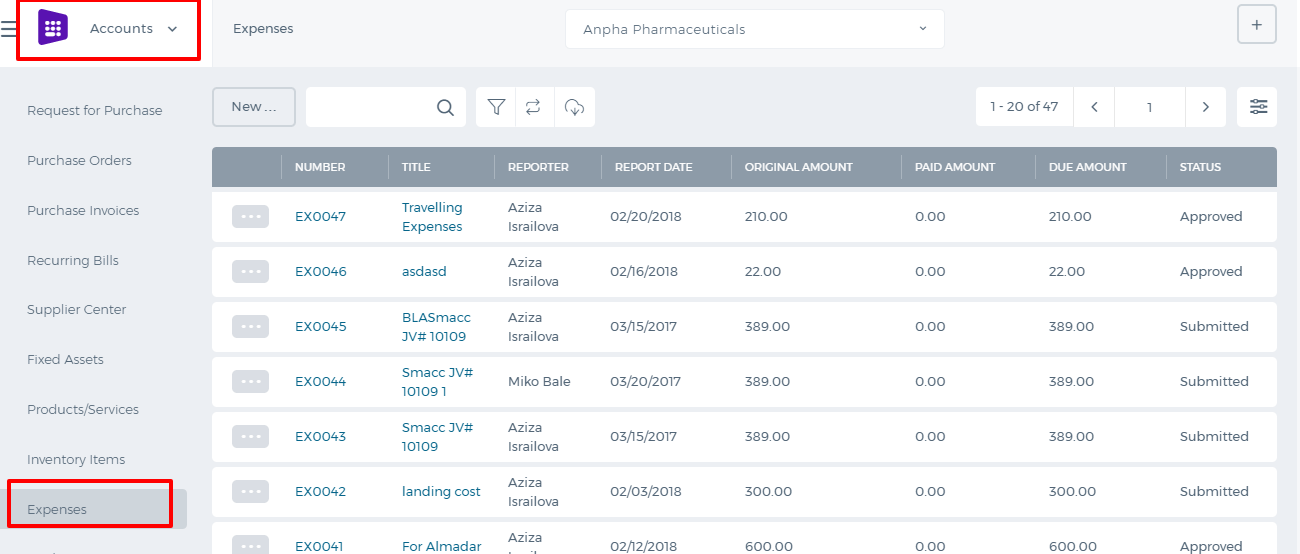
About Expense Claims
About Expense Claims
Enter and manage expense claims for yourself in your organization in
Expense Claims. An expense claim is a list of amounts of money spent for business purposes that you should be paid back by your employer. After submitting an expense claim, you will be reimbursed for your spending.

To get to expense claims, go to
Accounting and Finance >
Expense Claims. You can save as Draft, Submit for Approval and view your own expense claim unless your role allows you to approve your claim and those of others in the organization.
If a transaction has gone through your organization's bank account and you are not to be paid back personally, enter the spending as a
Spend Money transaction in
Bank Accounts. You won't need to submit an expense claim for it.
Purchases / Bills Overview
Purchases / Bills Overview
Purchases / Bills
At
kpi.com, you can register bills, create purchase orders and purchases invoices.
If you are placing an order with your supplier, go to Purchase Order listings page, click Add. In Purchase Order add form, you can find multiple options – Approve & Email to Supplier or just Approve. Yet if you need to email additional data on top a purchase order, you can enclose multiple documents by uploading in the add-form. If you need to place an order in a foreign currency, you can do so, by setting the right currency from the top right corner.
Once your Purchase Order is approved, you can receive Purchase Order items and convert it into a Purchase Invoice, either by navigating into a Purchase Order and clicking “Convert to invoice”, or from Purchase Invoice add form, where you will be notified of available purchase orders with a selected supplier.
From Supplier Center, just like in Customer Center, you can monitor Supplier info and their balances. You can also drill down into supplier balances and print Supplier Reports in Excel and PDF.